1. Introduction
Thank you for purchasing the Godox TT520II Wireless Transmission Flash Speedlite. This manual provides detailed instructions for the proper operation and maintenance of your flash unit. The TT520II is a versatile flash designed for various DSLR cameras with a standard hot shoe, featuring a built-in wireless receiver and an RT transmitter for enhanced functionality.

Figure 1.1: Godox TT520II Flash Speedlite and Accessories
This image displays the Godox TT520II flash unit along with its accompanying accessories. These include a wireless RT transmitter, a set of colorful gel filters for creative lighting effects, a compact mini stand for off-camera placement, and a soft diffuser to soften the flash output.
2. Safety Precautions
- Do not disassemble or modify the flash unit. High voltage circuits inside the flash are dangerous.
- Keep the unit dry. Do not handle with wet hands or immerse in water.
- Do not use the flash unit in the presence of flammable gases, chemicals, or other materials.
- Avoid direct eye exposure to the flash. It can cause temporary visual impairment.
- Keep out of reach of children.
- Remove batteries when the unit is not in use for extended periods.
3. Package Contents
Verify that all items are included in your package:
- 1x Godox TT520II Camera Flash
- 1x RT Remote Transmitter
- 1x Protection Bag
- 1x Mini Stand
- 1x Instruction Manual (this document)
- 1x 12-Color Gel Film Set
- 1x Soft Cover (Diffuser)
4. Product Overview
4.1. Components and Controls

Figure 4.1: Side View of Flash Unit
This image provides a side view of the Godox TT520II flash unit, highlighting its control panel and the location of the battery compartment.

Figure 4.2: Back View of Flash Unit
This image shows the back of the Godox TT520II flash unit, displaying the Godox logo and the red-tinted wireless sensor window.

Figure 4.3: Front View of Flash Unit
This image presents the front view of the Godox TT520II flash unit, highlighting the flash head and the Godox branding.
4.2. Key Features
- Built-in Wireless System: Features a 433MHz wireless transmission system with 16 channels for reliable triggering.
- Versatile Flash Modes: Supports Manual (M), S1, and S2 flash modes for various shooting scenarios.
- Adjustable Power Output: Offers 8 steps of flash output control, from 1/128 to full power.
- Fast Recycle Time: Achieves a recycle time of 0.1-1.55 seconds, allowing for 500-600 continuous shots.
- Flexible Head Rotation: The flash head can rotate vertically from 0 to 90 degrees and horizontally from 0 to 270 degrees for bounce flash and creative lighting.
- Integrated Reflection Card & Wide Panel: Includes a pull-out reflection card for catchlights and a wide panel for broader light distribution.
- Protection Features: Equipped with multiple auto-self protections to prevent overheating and conserve power.
- External Power Port: Features a sync socket and terminals for connecting an external power pack (sold separately).

Figure 4.4: Main Features Overview
This graphic highlights the primary features of the Godox TT520II flash, including its 433MHz wireless transmission, fast flash speed, multiple flash modes (M, S1, S2), adjustable power output, and built-in protection mechanisms. It also points out the sync socket for external power.

Figure 4.5: Reflection Card and Wide Panel
This image focuses on the flash head, illustrating the pull-out reflection card, which helps create a catchlight in the subject's eyes, and the wide panel, used to broaden the light spread for softer illumination.

Figure 4.6: Flash Head Rotation and Modes
This diagram illustrates the extensive rotation capabilities of the flash head, allowing for vertical movement from 0 to 90 degrees and horizontal movement up to 270 degrees. It also references the three available flash modes: M (Manual), S1, and S2.
5. Setup
5.1. Battery Installation
The Godox TT520II flash unit requires four (4) AA batteries.
- Open the battery compartment cover located on the side of the flash unit.
- Insert four AA batteries, ensuring correct polarity (+/-) as indicated inside the compartment.
- Close the battery compartment cover securely.
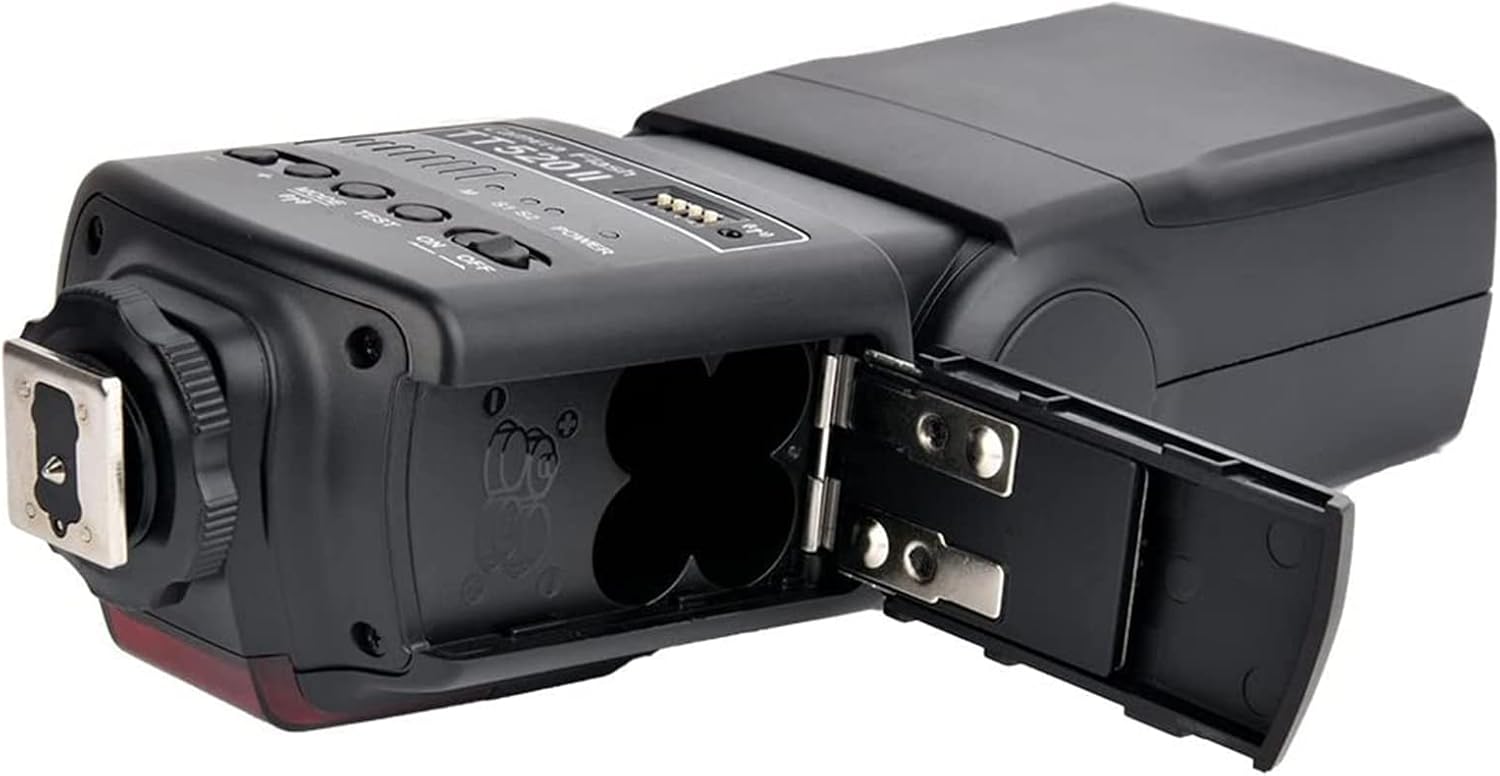
Figure 5.1: Battery Compartment
This image shows the Godox TT520II flash unit with its battery compartment open, clearly revealing the four slots for AA batteries. Proper battery insertion according to polarity markings is essential for operation.
5.2. Attaching to Camera
The TT520II is compatible with most DSLR cameras featuring a standard hot shoe.
- Slide the flash unit's hot shoe mount into your camera's hot shoe slot.
- Tighten the locking ring or lever on the flash unit to secure it firmly to the camera.

Figure 5.2: Compatible Hot Shoe Mounts
This image displays examples of standard hot shoe mounts found on various camera brands, including Canon, Sony, Nikon, Fuji, Pentax, and Olympus, demonstrating the broad compatibility of the Godox TT520II flash.
5.3. Attaching the RT Remote Transmitter
The included RT Remote Transmitter allows for wireless triggering of the flash unit.
- Insert the RT Remote Transmitter into your camera's hot shoe.
- Ensure the flash unit is set to a wireless slave mode (S1 or S2) or is triggered by the transmitter in manual mode.
6. Operating Instructions
6.1. Powering On/Off
- To power on, slide the ON/OFF switch to the "ON" position. The indicator light will illuminate.
- To power off, slide the ON/OFF switch to the "OFF" position.
6.2. Adjusting Power Output
In Manual (M) mode, you can adjust the flash output from 1/128 to full power.
- Press the MODE button until "M" is displayed.
- Use the + and - buttons to increase or decrease the flash power.
6.3. Flash Modes
The TT520II offers three flash modes:
- M (Manual Mode): The flash fires at the power level you set. This mode offers full control over flash output.
- S1 (Slave Mode 1): The flash will fire in sync with the first flash from a master flash. This is suitable for manual, pre-flash-less master flashes.
- S2 (Slave Mode 2): The flash will fire in sync with the second flash from a master flash. This mode ignores the pre-flash from a TTL master flash, making it suitable for use with cameras that use a pre-flash for exposure metering.
To switch between modes, press the MODE button repeatedly until the desired mode (M, S1, or S2) is displayed on the indicator panel.
6.4. Wireless Operation
The TT520II can be triggered wirelessly using the included RT Remote Transmitter or by another flash in S1/S2 mode.
- Using the RT Remote Transmitter:
- Attach the RT Remote Transmitter to your camera's hot shoe.
- Ensure the flash unit is powered on and set to Manual (M) mode.
- The transmitter will trigger the flash when you press your camera's shutter button.
- Using S1/S2 Slave Modes:
- Place the TT520II flash unit off-camera.
- Set the TT520II to S1 or S2 mode (refer to section 6.3 for mode selection).
- When your camera's built-in flash or another master flash fires, the TT520II will automatically trigger in sync.

Figure 6.1: Wireless Triggering Capability
This image highlights the Godox TT520II's built-in wireless signal, emphasizing its ability to be triggered remotely and its compatibility with a wide range of DSLR cameras equipped with a standard hot shoe.

Figure 6.2: Applicable Scenarios
This visual demonstrates the versatility of the Godox TT520II flash, showcasing its application in diverse photographic settings such as portraiture, capturing dynamic action shots, and wedding photography, highlighting its adaptability for different lighting needs.

Figure 6.3: Multi-Flash Wireless Setup
This image illustrates the 433MHz wireless transmission capability, showing how multiple Godox TT520II flash units can be simultaneously triggered by a single RT transmitter mounted on a camera, enabling complex lighting setups.
6.5. Official Product Video
Video 6.1: Godox TT520II Camera Flash Overview
This video provides a visual overview of the Godox TT520II camera flash, demonstrating its design and key features in action. It showcases the flash unit from various angles, highlighting its compact form factor and the articulation of the flash head.
7. Maintenance
- Cleaning: Use a soft, dry cloth to clean the flash unit. For stubborn dirt, use a cloth lightly dampened with water and a mild detergent, then wipe dry immediately. Do not use solvents like benzene or alcohol.
- Storage: Store the unit in a dry, cool place away from direct sunlight and excessive humidity. Remove batteries if storing for an extended period to prevent leakage.
- Handling: Avoid dropping or subjecting the unit to strong impacts.
8. Troubleshooting
| Problem | Possible Cause | Solution |
|---|---|---|
| Flash does not fire. |
|
|
| Flash output is too weak/strong. |
|
|
| Wireless triggering fails. |
|
|
| Flash overheats. |
|
|
9. Specifications
| Feature | Detail |
|---|---|
| Model | TT520II |
| Guide Number | GN33 (ISO 100, 105mm) |
| Flash Mode | M, S1, S2 |
| Vertical Rotation Angle | 0-90 degrees |
| Horizontal Rotation Angle | 0-270 degrees |
| Power Supply | 4 x AA batteries (Alkaline or Ni-MH) |
| Flash Times | 100-1500 times (with alkaline batteries) |
| Recycle Time | Approx. 0.1-1.55 seconds |
| Color Temperature | 5600K ± 200K |
| Flash Duration | 1/300s - 1/20000s |
| Wireless Frequency | 433MHz |
| Wireless Channels | 16 |
| Dimensions (L x W x H) | Approx. 7 x 3 x 2 inches (180 x 75 x 50 mm) |
| Weight (without batteries) | Approx. 1.06 pounds (480g) |
10. Warranty and Support
For warranty information and technical support, please refer to the official Godox website or contact your local distributor. Keep your purchase receipt as proof of purchase for warranty claims.
An official Instructions for Use (IFU) PDF document is available for download: Godox TT520II User Manual PDF.


