AMIR WA33
AMIR Digital Alarm Clock User Manual
Model: WA33
Product Overview
The AMIR Digital Alarm Clock is a versatile LED clock designed for various settings such as bedrooms, offices, and homes. It features a large display, adjustable brightness, and multiple functions including time, date, temperature display, and alarm modes. This manual provides detailed instructions for setup, operation, and maintenance of your new alarm clock.

Figure 1: Front view of the AMIR Digital Alarm Clock.
Video 1: An overview demonstrating the features and functions of the AMIR Digital Alarm Clock, including its large LED display, adjustable brightness, and various modes.
Setup and Power Supply
Your AMIR Digital Alarm Clock offers two primary power supply methods: USB power and 3 AAA batteries. Understanding these options is crucial for optimal performance.
Battery Installation
To install batteries:
- Locate the battery compartment on the back of the clock.
- Open the battery cover.
- Insert 3 AAA batteries, ensuring correct polarity (+/-).
- Close the battery cover securely.
Note: When powered by batteries, the screen will turn off after 16 seconds to enter power-saving mode. Voice control functionality is only available when using battery power.
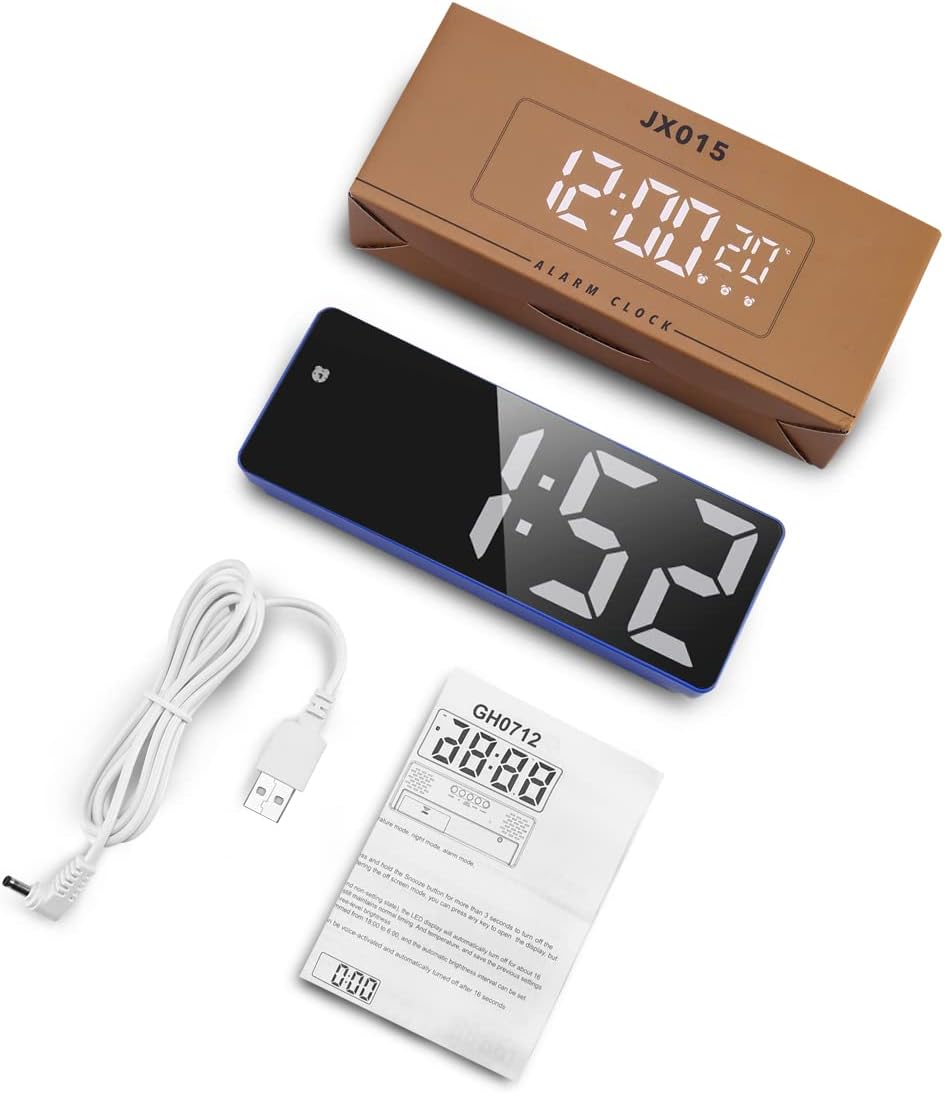
Figure 2: Rear view of the alarm clock, highlighting the battery compartment and control buttons.

Figure 3: Illustration of the two power supply methods: AAA battery (for power saving and voice control) and USB power (for continuous display).
USB Power Connection
To power the clock via USB:
- Connect the provided 1-meter (39.37-inch) USB power cord to the DC 5V port on the back of the clock.
- Plug the other end of the USB cable into a USB power adapter (not included) or a compatible USB port.
Note: When using USB power, the screen will always remain on. If powered by USB alone, there is no time memory function after power off.
Operating Instructions
Setting Time and Display Modes
The clock features clock mode, date mode, temperature mode, night mode, and alarm mode. The "colon" between the hour and minute display flashes continuously.
- Press and hold the "MODE" button to enter time setting.
- Press "UP" or "DOWN" to adjust the 12/24 hour format.
- Press "MODE" again, then use "UP" or "DOWN" to adjust the hour.
- Press "MODE" again, then use "UP" or "DOWN" to adjust the minute.
- Press "MODE" again to return to the time display.

Figure 4: Step-by-step guide for setting the time on your alarm clock.
The clock can display time, date, and temperature. You can cycle through these displays by pressing the "MODE" button briefly.

Figure 5: The clock's multi-function display showing time, date, and temperature.
Adjustable Brightness and Night Mode
The clock offers 3 levels of brightness (Bright/Medium/Low). Simply press "UP" or "DOWN" to adjust the brightness.
To set the night mode:
- Press "MODE" to enter the night mode setting.
- Press "UP" or "DOWN" to turn night mode ON/OFF (default is OFF).
- When night mode is ON, the clock automatically dims during 18:00-6:00. You can set a custom period by long pressing "MODE" in night mode setting.
To turn off the display completely (e.g., while sleeping), press and hold the "SNOOZE" button for more than 3 seconds.

Figure 6: Visual representation of the three adjustable brightness levels.
Alarm Modes and Snooze Function
The alarm clock offers three working day modes:
- Monday to Friday (1-5)
- Monday to Saturday (1-6)
- Monday to Sunday (1-7)
To set the alarm:
- Long press the "ALARM" button.
- Use the "UP" and "DOWN" buttons to adjust the hour, minute, snooze time (1-60 minutes), and working day mode.
- Press "ALARM" again to confirm each setting.
When the alarm goes off, press the "SNOOZE" button to get 1-60 minutes of extra sleep. Press any other key to cancel the alarm.

Figure 7: The three available alarm modes for customized wake-up schedules.
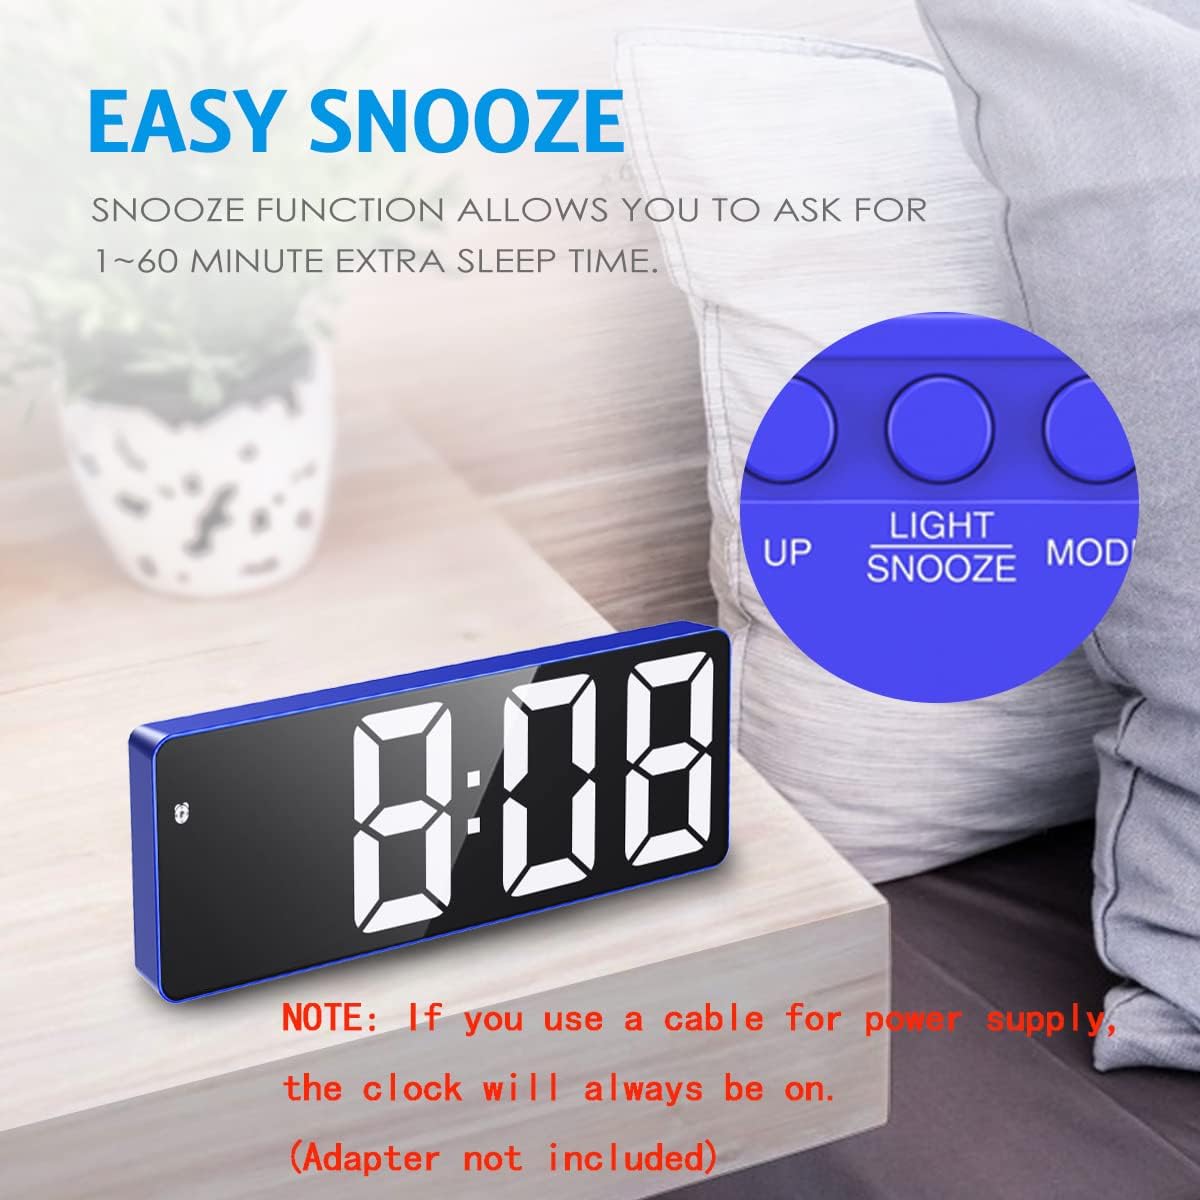
Figure 8: The snooze function allows for adjustable extra sleep time.
Voice Control and Power Saving Mode
This feature is available only when powered by AAA batteries. You can activate the display by making a noise (like clapping your hands) or tapping the clock.
In power saving mode (battery powered), the LED alarm clock automatically turns off after 16 seconds of no operation. The system continues to keep normal timing and temperature, maintaining previous settings.

Figure 9: Intelligent voice control allows the LED display to be activated by sound or touch when using batteries.
Maintenance
To ensure the longevity and proper functioning of your AMIR Digital Alarm Clock, please follow these maintenance guidelines:
- Clean the clock regularly with a soft, dry cloth. Avoid using abrasive cleaners or solvents.
- Keep the clock away from direct sunlight, extreme temperatures, and high humidity.
- If using batteries, replace them when the display becomes dim or unresponsive. Remove batteries if the clock will not be used for an extended period to prevent leakage.
- Ensure the USB cable is not bent or damaged, as this can affect power supply.
Troubleshooting
If you encounter any issues with your AMIR Digital Alarm Clock, please refer to the following common problems and solutions:
| Problem | Possible Cause / Solution |
|---|---|
| Clock does not light up or display is off. |
|
| Time or format resets to 24-hour. |
|
| Screen is too bright at night. |
|
| Voice control does not work. |
|
Specifications
- Brand: AMIR
- Model Number: WA33
- Color: Blue Case+white Digit
- Display Type: Digital
- Style: Modern
- Special Features: Adjustable Brightness, Large Display, Snooze, Temperature Display, Voice Control
- Product Dimensions: 0.7"W x 6.3"H
- Power Source: Battery Powered (3x AAA, not included), Corded Electric (USB)
- Room Type: Bedroom
- Shape: Rectangular
- Indoor/Outdoor Usage: Indoor
- Frame Material: Acrylonitrile Butadiene Styrene
- Item Weight: 5.6 ounces (0.16 Kilograms)
- Alarm Clock: Yes
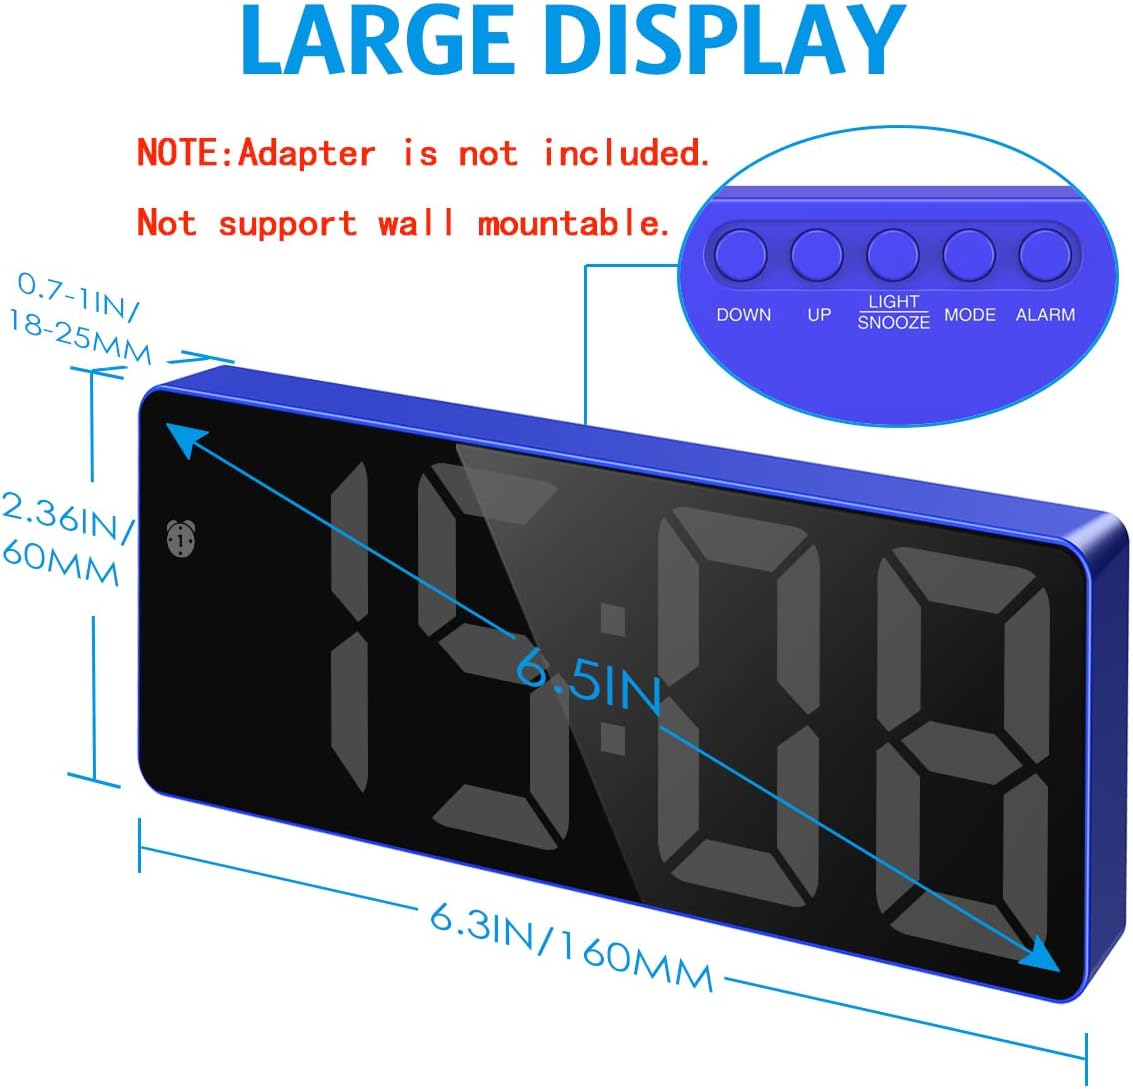
Figure 10: Dimensions of the AMIR Digital Alarm Clock.
Warranty and Support
For detailed warranty information or further assistance, please refer to the official user guide provided by AMIR. A digital version of the user guide is available:
For any product-related inquiries or support, please contact AMIR customer service through the retailer's platform or their official website.
Ask a question about this manual
Ask about setup, troubleshooting, compatibility, parts, safety, or missing instructions. Manuals+ will review the question and use this page’s manual context to help answer it.