1. Product Overview
This BTF-LIGHTING 3 Pin 10mm Transparent Connector Kit provides a solderless solution for connecting and extending 3-pin addressable LED strip lights. It facilitates various LED strip configurations, including straight connections, corner connections, and direct connections to controllers or power supplies. The transparent design ensures minimal obstruction of light, and the connectors offer a firm, seamless connection without the need for soldering.
2. Package Contents
The package includes the following components:
- 8 x Corner Connectors
- 4 x Gapless Solderless Connectors
- 4 x 15cm Long 22AWG Extension Wires

Figure 2.1: Contents of the connector kit.
3. Compatibility
This connector kit is compatible with:
- 3-pin WS2812B, WS2811, SK6812, SK6812RGBW, WS2814 CCT RGBIC Addressable Chasing Color SMD LED Strip Lights.
- LED strips with a width of 10mm (0.39 inches).
- The included 3-pin wires (ASIN: B0C81L9GT7) are designed for use with these 3-pin connectors.
Important Note: These connectors are NOT compatible with 12mm width LED strips or other strip widths. Verify your LED strip's width is 10mm for proper functionality.
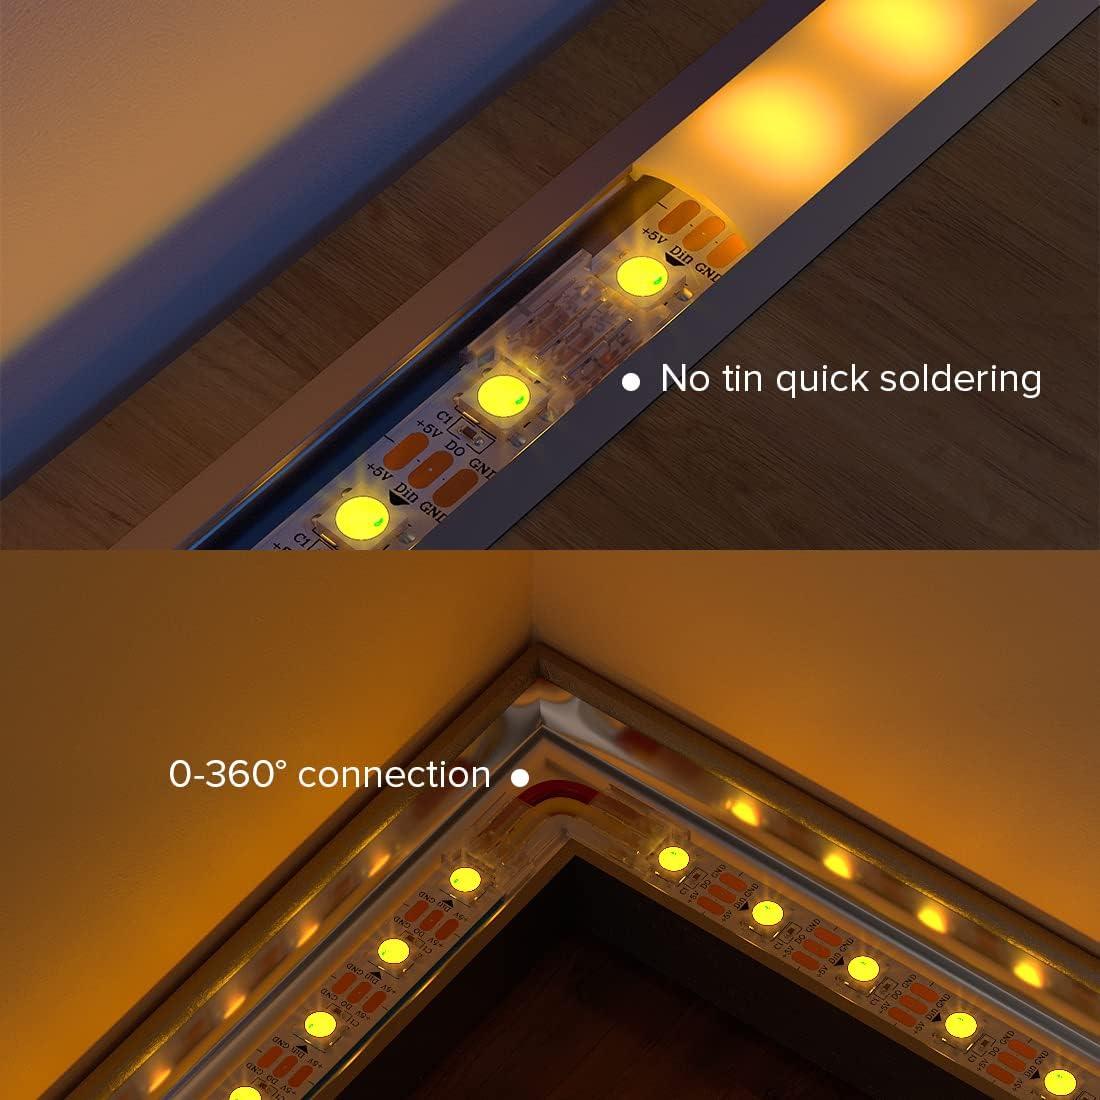
Figure 3.1: LED strip width compatibility.
4. Installation Instructions
Follow these steps for a secure and functional solderless connection.
4.1 Connector Details
The connectors feature a transparent design and specific dimensions for 10mm LED strips and 3-pin wires.

Figure 4.1.1: Connector dimensions and connection points.
4.2 Step-by-Step Connection Guide
- Cut the LED Strip: Locate the designated cut line on your LED strip, often marked with a 'scissor' icon. Make a clean, straight cut through this line.
- Match Polarity: Carefully align the copper pads on the LED strip (typically labeled +5V, Din, GND) with the corresponding metal contacts inside the connector. Ensure that each label on the strip matches the corresponding label on the connector. Incorrect alignment can cause a short circuit or prevent the strip from lighting.
- Insert Strip and Wires: Open the transparent connector's clasp. Gently slide the prepared LED strip into one side of the connector, ensuring the copper pads are fully seated under the metal pins. For wire connections, insert the unstripped 22AWG extension wires into the other side of the connector. The internal metal pins are designed to pierce the wire insulation to make electrical contact.
- Secure the Connection: Close the connector's clasp. Use a pair of pliers to firmly press down on the transparent cover until it is fully clamped. This action ensures the internal metal pins make secure contact with both the LED strip and the wires. A strong, even press is necessary for a reliable connection.
- Final Check: Once clamped, the installation is complete. Test the LED strip to confirm proper functionality and illumination.

Figure 4.2.1: Cutting the LED strip.

Figure 4.2.2: Matching LED strip polarity.

Figure 4.2.3: Inserting LED strip and wires into the connector.

Figure 4.2.4: Securing the connection with pliers.

Figure 4.2.5: Completed installation.
4.3 Video Installation Guide
For a visual demonstration of the connection process, please watch the following video:
Video 4.3.1: Demonstration of connecting LED strips using BTF-LIGHTING DIY connectors.
5. Troubleshooting
- No Light or Partial Lighting:
- Incorrect Polarity: Ensure that the +5V, Din, and GND labels on the LED strip are perfectly aligned with the corresponding contacts in the connector. Misalignment can cause a short circuit or prevent the strip from functioning. Refer to Figure 4.2.2 and Figure 5.1.
- Insufficient Clamping: The connector must be firmly clamped with pliers to ensure the internal metal pins properly pierce the LED strip's copper pads and the wire insulation. A weak connection will result in no power or intermittent lighting.
- Improper Cut: Verify that the LED strip was cut cleanly along the designated cut line. Uneven cuts can prevent proper contact.
- Incorrect Strip Width: Confirm that your LED strip is exactly 10mm wide. These connectors are not compatible with other widths, which will prevent a secure electrical connection.
- Connector is Single-Use: These connectors are designed for a single, permanent connection. Attempting to open or remove the LED strip or wires after clamping may damage the internal contacts, rendering the connector unusable. If a connection needs to be redone, use a new connector.
- Wire Not Secure: Ensure the wire is inserted completely into the connector before clamping. The connector's design relies on piercing the wire insulation; stripping the wires beforehand may lead to a loose or unreliable connection.

Figure 5.1: Correct vs. Incorrect Wiring.
6. Specifications
| Brand | BTF-LIGHTING |
| Model | 3PIN-10MM-SMD-BB-BX-XC |
| Material | Plastic |
| Connector Type | 3-pin LED Strip Connector |
| Compatible LED Strip Width | 10mm (0.39 inches) |
| Recommended Uses | Extending LED strip lights, splicing LED strip lights, corner connection, connecting to LED strip controllers or power supplies. |
| Item Weight | 0.02 Kilograms |
| Manufacturer | BTF-LIGHTING Technology Co., Limited |
7. Warranty and Support
Specific warranty information for this product is not detailed in this manual. For warranty details, technical support, or any further assistance, please refer to the product packaging, the official BTF-LIGHTING website, or contact the retailer from whom the product was purchased.