1. Introduction
This manual provides detailed instructions for the installation, operation, and maintenance of your ENSTER Solar Security Camera. This wireless outdoor camera features a 360° view, 2K PTZ capabilities, color night vision, human detection, two-way talk, and supports both cloud and SD card storage. It is designed to be waterproof for reliable outdoor use.
For optimal performance and safety, please read this manual thoroughly before using the product and retain it for future reference.
2. What's in the Box
Verify that all components are present in the package:
- 1 x ENSTER WiFi Security Camera
- 1 x Solar panel
- 1 x Bracket
- 1 x Charging Cable
- 1 x Screw set
- 1 x User Guide
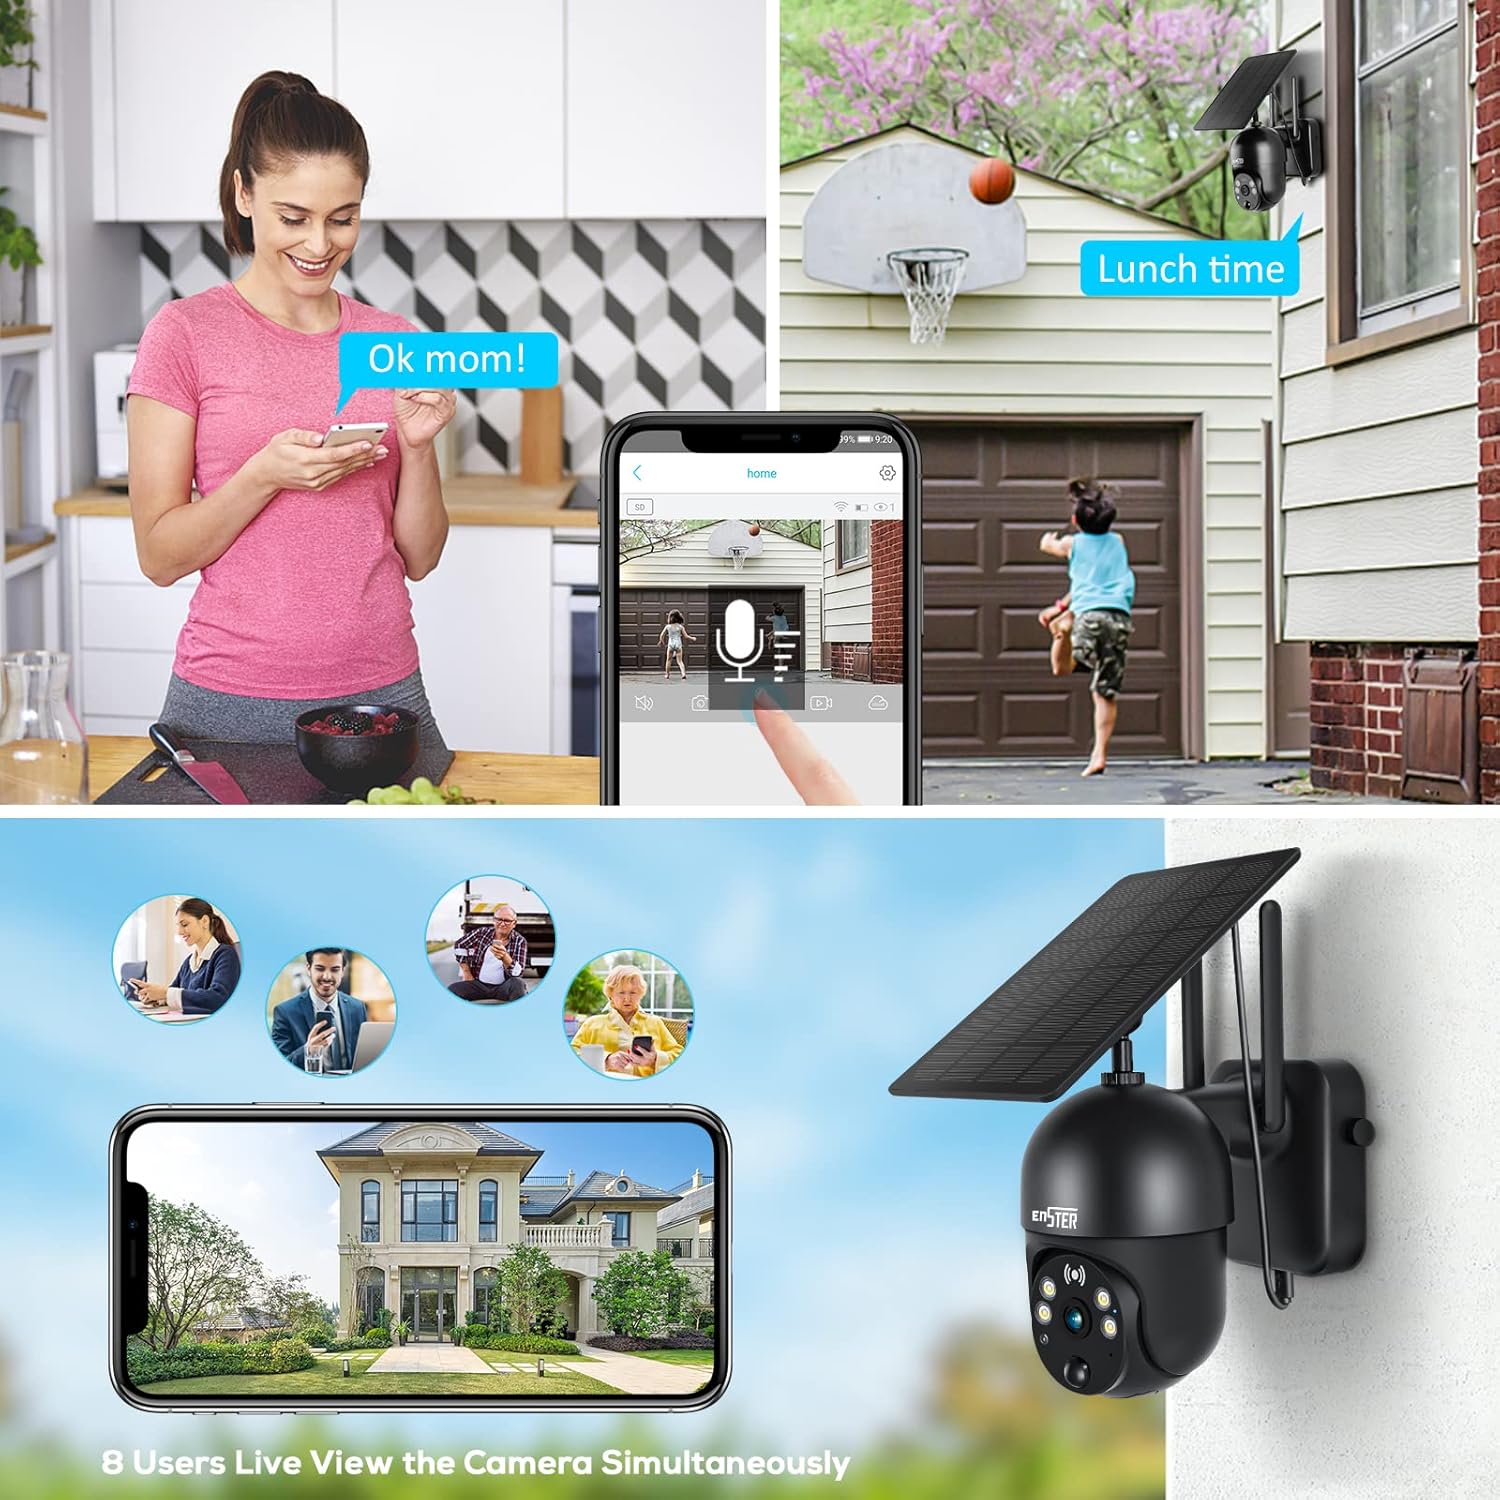
Image: The ENSTER Solar Security Camera and its accessories laid out, including the camera, solar panel, mounting hardware, and user manual.
Unboxing and Initial Overview Video
Video: This video demonstrates the unboxing process and provides an initial overview of the ENSTER Solar Security Camera components.
3. Setup Guide
3.1 Initial Power-On and App Connection
- Charge the Camera: Before first use, fully charge the camera using the provided charging cable.
- Download the App: Search for the 'Ubox' app in your smartphone's app store (iOS or Android) and install it.
- Create Account: Open the Ubox app and register for a new account or log in if you already have one.
- Power On Camera: Open the waterproof plastic cover on the camera and turn on the power switch. The camera will emit a connection prompt sound, and a blue light will start flashing.
- Add Device: In the Ubox app, tap 'Add a device' or the '+' icon. Follow the on-screen prompts.
- Connect to Wi-Fi: Enter your 2.4GHz Wi-Fi network name and password. Note: The camera does not support 5GHz Wi-Fi. Ensure your phone is connected to a 2.4GHz Wi-Fi band.
- Scan QR Code: The app will display a QR code. Point your phone's screen at the camera lens (approximately 4 inches away) until you hear a confirmation sound from the camera.
- Connection Confirmation: Once connected, the camera will confirm the successful pairing.
App Connection and Pairing Video
Video: This video guides you through the process of connecting the camera to the mobile application and pairing it with your Wi-Fi network.
4. Installation
4.1 Mounting the Camera
The camera offers flexible installation options. Choose a location that provides the desired viewing angle and good Wi-Fi signal strength.
- Install Camera Bracket: Secure the camera installation bracket to a wall or suitable surface using the provided screws. Ensure the large clip on the bracket is on the upper side.
- Attach Camera: Slide the camera onto the installed bracket. Press down firmly until you hear a "Ka" sound, indicating it is securely locked.
- Secure Camera: Install the camera fixing screws on the side of the bracket to prevent accidental removal.

Image: The ENSTER Solar Security Camera securely mounted on a wall, highlighting its compact design and dual antennas for enhanced signal.
4.2 Solar Panel Installation
The solar panel provides continuous power to your camera, ensuring uninterrupted operation.
- Attach Solar Bracket: Screw the solar panel bracket into the solar panel.
- Mount Solar Panel: Install the solar panel bracket support on the wall in a location that receives maximum direct sunlight.
- Attach Solar Panel: Connect the solar panel to its mounted support and twist in the close direction to tighten. Adjust the direction of the bracket to optimize sun exposure and fix it before letting go.
- Connect to Camera: Insert the USB cable from the solar panel into the extension cable, then install the waterproof cover. Plug the extension cord into the camera's charging port.

Image: Two installation methods for the ENSTER Solar Security Camera and its solar panel are shown, demonstrating flexibility in placement.
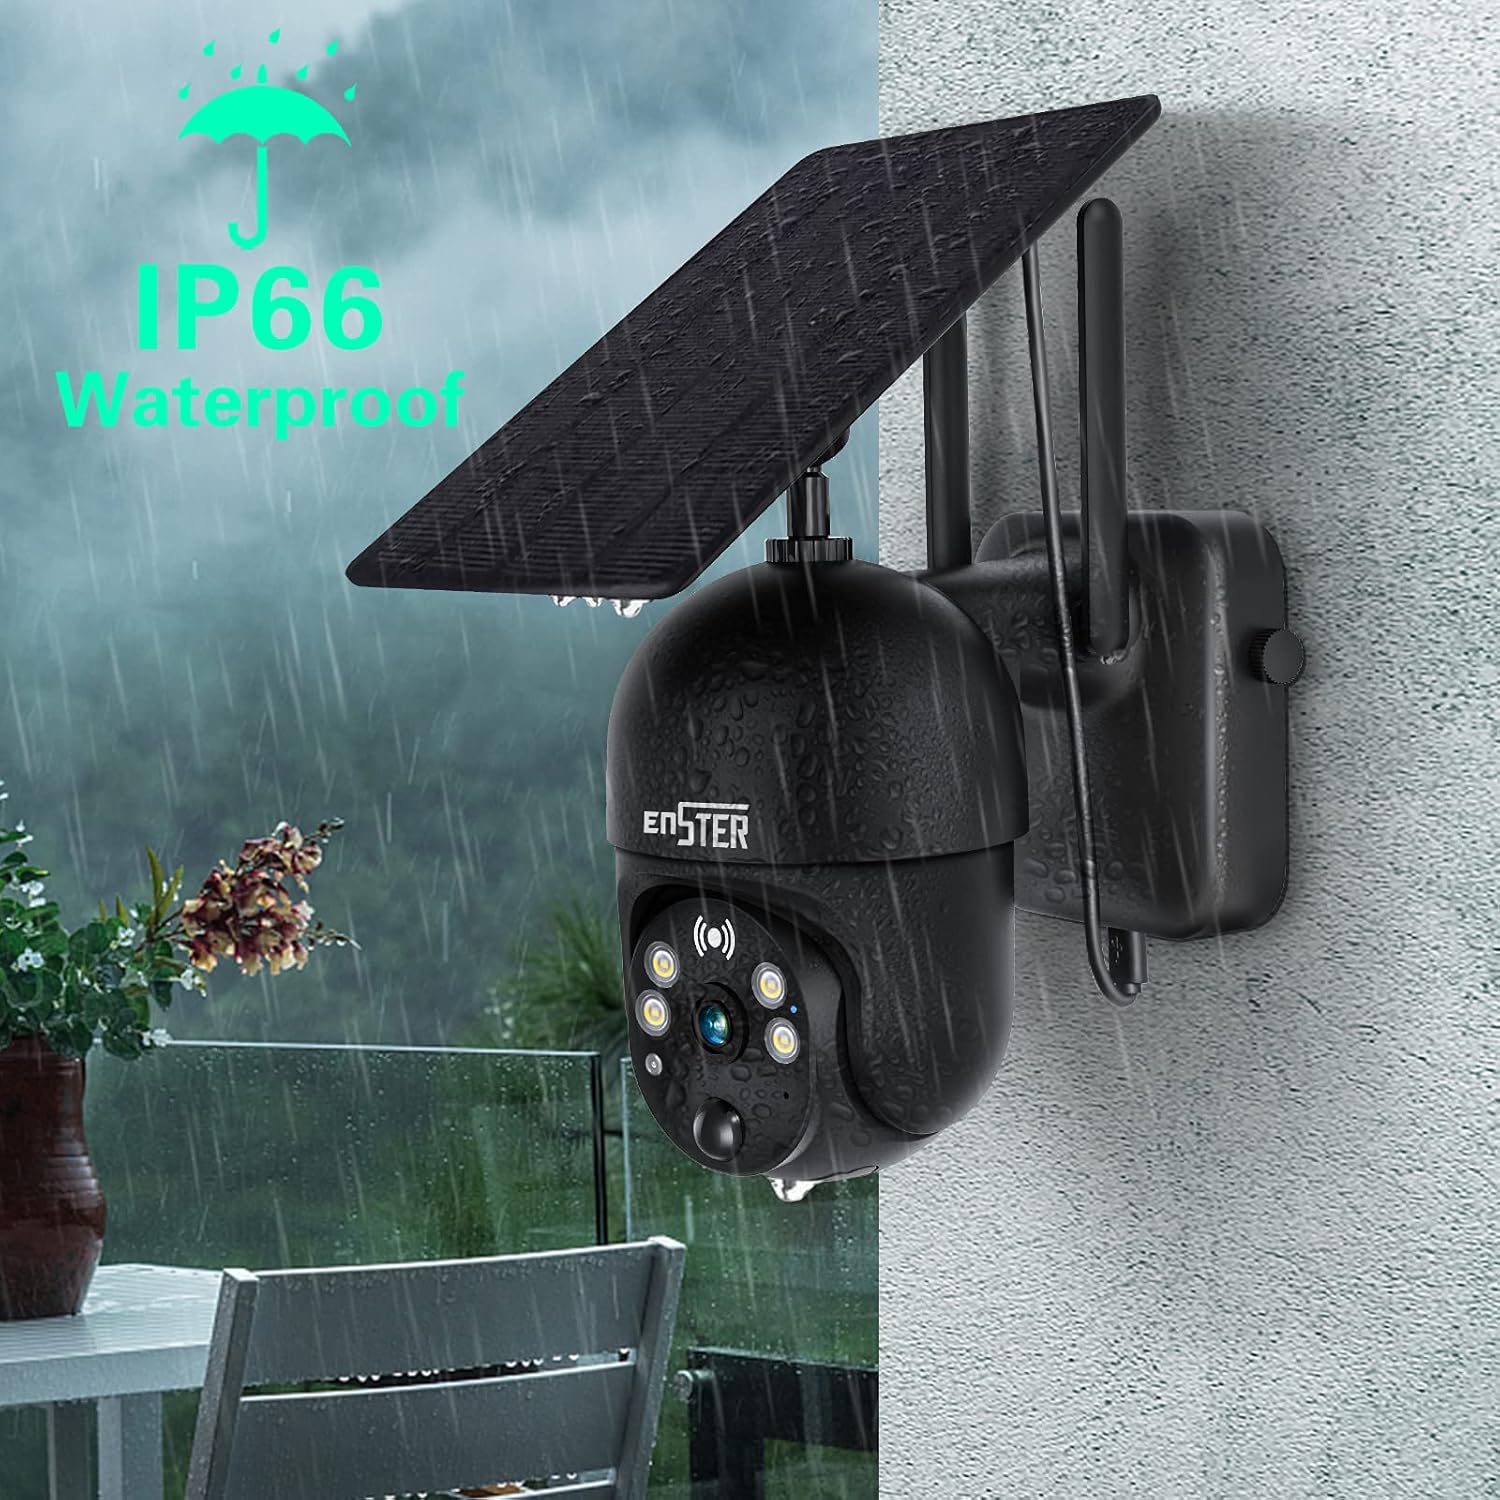
Image: The ENSTER Solar Security Camera is shown connected to its solar panel, with a mobile phone displaying the camera's live feed and battery charging status.
Installation Process Video
Video: This video demonstrates the physical installation of the ENSTER Solar Security Camera and its solar panel, including mounting and connection steps.
5. Operating Instructions
5.1 Live View and Pan/Tilt Control
Access the live feed and control the camera's movement through the Ubox app.
- Access Live View: Open the Ubox app and select your camera from the device list to view the live feed.
- Pan/Tilt Control: Use the directional controls within the app to rotate the camera 360° horizontally (pan) and 120° vertically (tilt).
- Digital Zoom: Pinch the screen with your fingers to digitally magnify the live view.
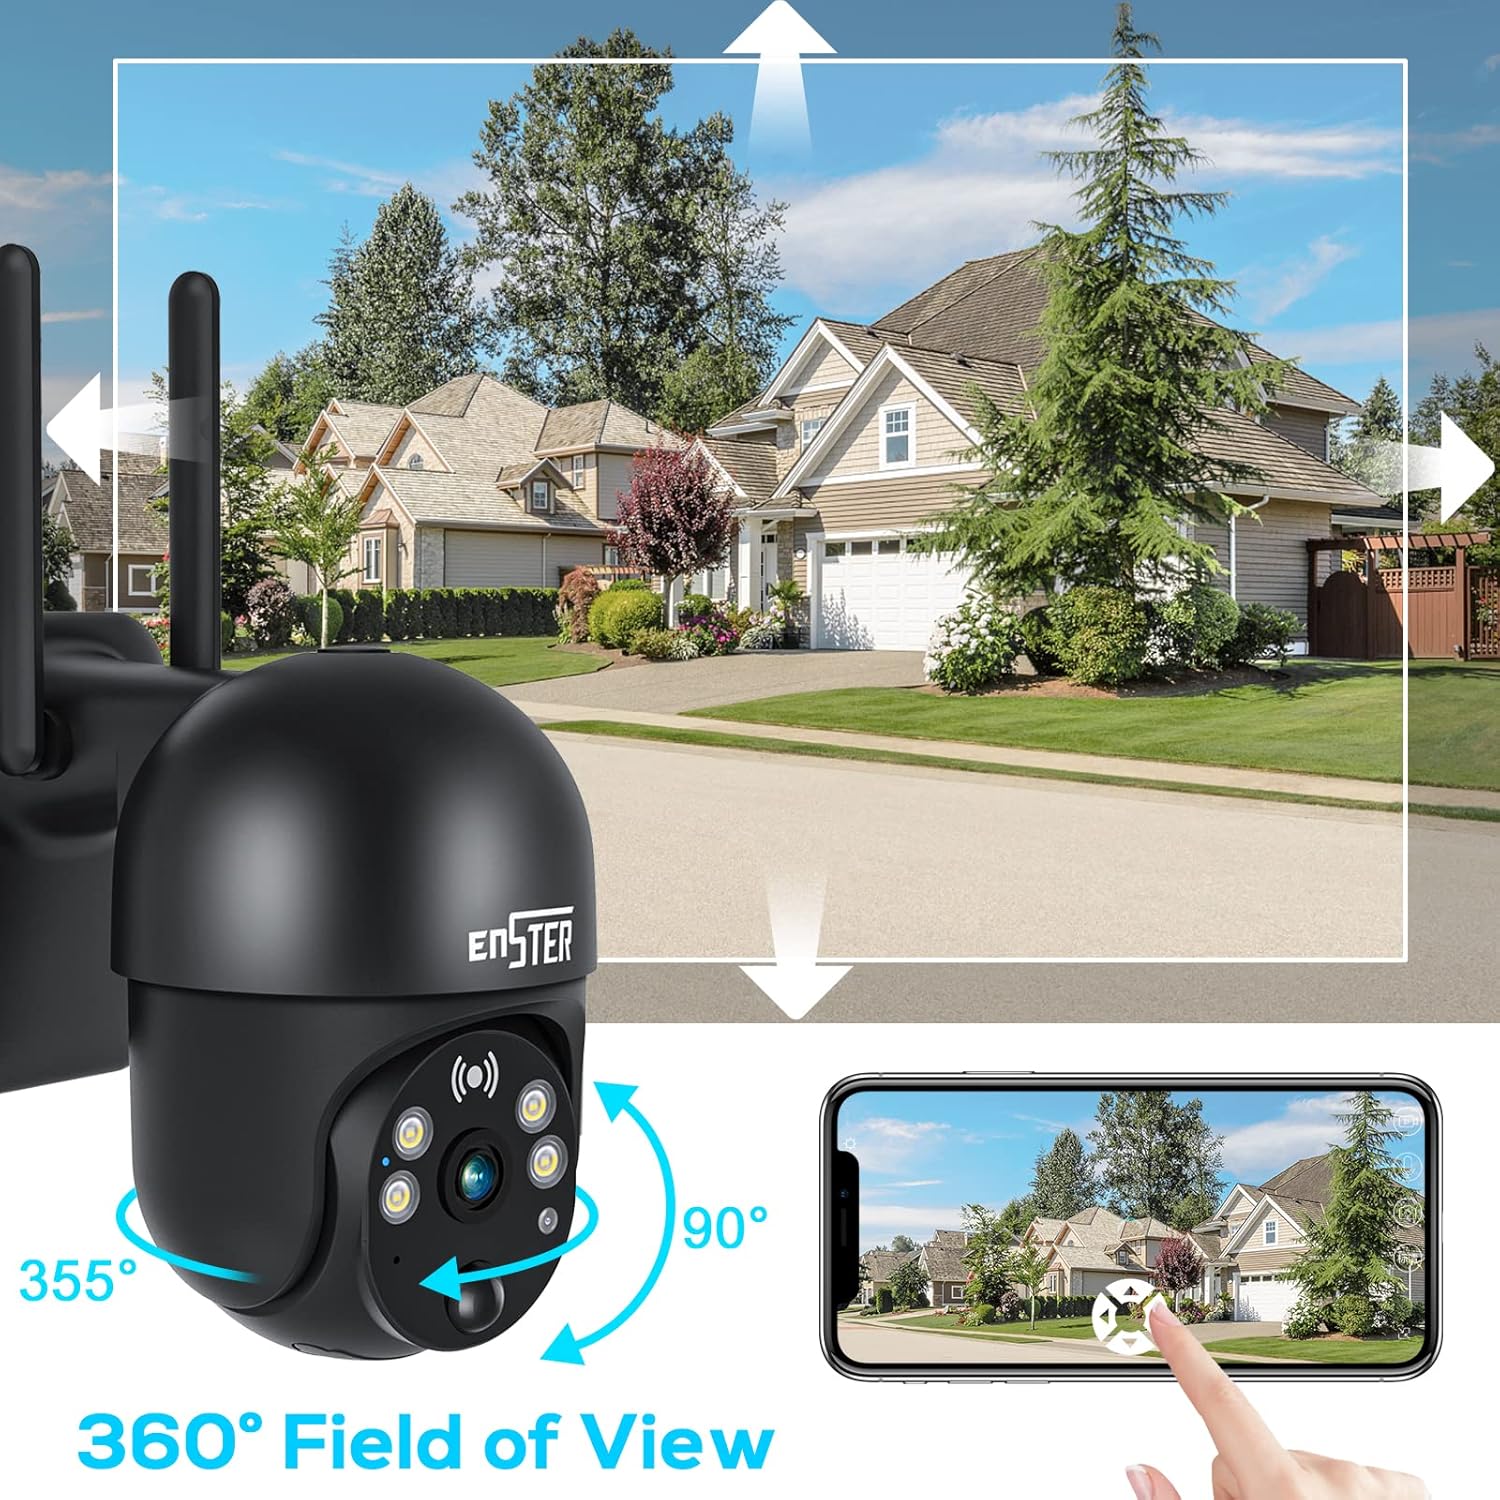
Image: The ENSTER Solar Security Camera demonstrates its 360-degree field of view, with arrows indicating its pan (355°) and tilt (90°) movement, controllable via a smartphone app.
5.2 Night Vision
The camera is equipped with 4 LED lights and infrared night vision, providing clear visibility in low-light conditions.
- Color Night Vision: The camera can capture color video at night within 100 feet.
- Automatic Activation: Night vision automatically activates in low-light environments.

Image: The ENSTER Solar Security Camera with its integrated spotlight activated, providing clear illumination for color night vision in a dark outdoor setting.
5.3 Two-Way Audio
Communicate with visitors or deter intruders using the camera's built-in microphone and speaker.
- Activate Two-Way Talk: Tap the microphone icon in the Ubox app to speak through the camera.
- Listen: The camera's microphone will pick up audio from the monitored area.
Image: A collage showing the ENSTER Solar Security Camera's two-way audio feature in use, with a person speaking through the camera, and multiple users viewing the live feed simultaneously.
5.4 Motion Detection and Alerts
Receive instant notifications when motion is detected in the camera's field of view.
- PIR Motion Sensor: The digital PIR motion sensor detects human movement.
- Adjust Sensitivity: Set detection sensitivity (medium, high, low) in the app to reduce false alarms.
- Real-time Alerts: When an intruder is detected, the camera immediately pushes an alarm message to your mobile phone.
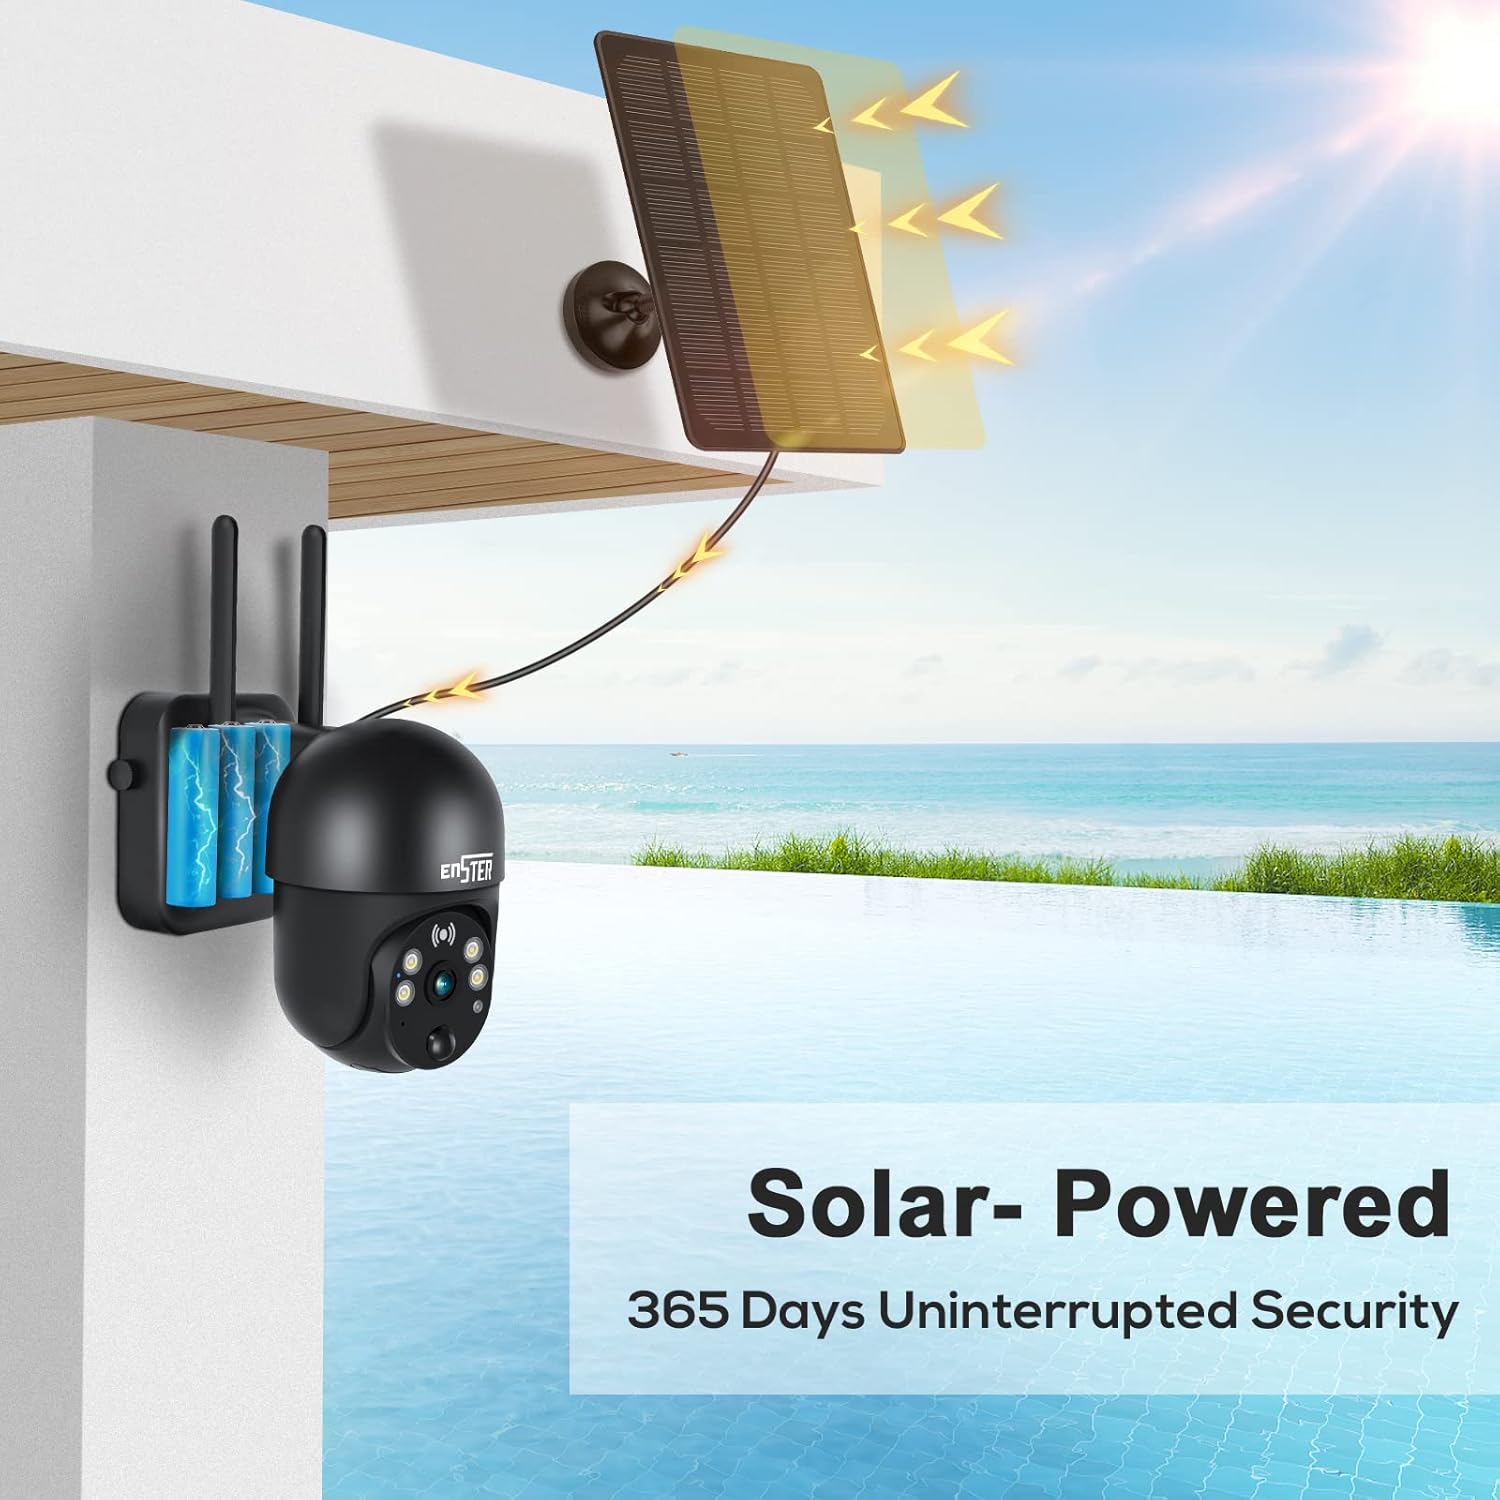
Image: The ENSTER Solar Security Camera's smart PIR sensor detects activity, triggering real-time alerts on a smartphone, shown with a person receiving a 'Device Activity detected' notification.
5.5 Storage Options
Record and store video footage using either a local SD card or cloud storage.
- SD Card: Insert a microSD card (not included) into the designated slot for local storage.
- Cloud Storage: Optional cloud recording encryption is available for secure data storage.
Product Features Overview Video
Video: This video provides a quick overview of the key features of the ENSTER Solar Wireless Camera, including its waterproof design, 360-degree view, color night vision, two-way audio, and solar power capabilities.
6. Maintenance
- Cleaning: Regularly wipe the camera lens and solar panel with a soft, damp cloth to ensure clear vision and efficient charging. Avoid abrasive cleaners.
- Battery Care: The solar panel is designed to keep the camera charged. Ensure the solar panel is positioned to receive adequate sunlight. Even in winter conditions with snow cover, the camera is designed to maintain charge.
- Weather Resistance: The camera has IP66 weatherproof certification, ensuring it operates reliably in heavy rain or extreme sun.
Image: The ENSTER Solar Security Camera is shown operating in snowy conditions, highlighting its ability to remain charged and functional year-round, even when the solar panel is partially covered.
7. Troubleshooting
If you encounter issues with your ENSTER Solar Security Camera, refer to the following common solutions:
- Camera Not Powering On: Ensure the camera is fully charged. Check the power switch is in the 'ON' position.
- Wi-Fi Connection Issues: Verify your Wi-Fi network is 2.4GHz. Ensure the camera is within range of your Wi-Fi router. Re-attempt the pairing process.
- No Alerts: Check app notification settings on your phone and within the Ubox app. Adjust motion detection sensitivity.
- Poor Video Quality: Ensure the camera lens is clean. Check your Wi-Fi signal strength. Switch between SD and HD viewing options in the app.
- Solar Panel Not Charging: Ensure the solar panel is positioned to receive direct sunlight for several hours daily. Clean the solar panel surface.
- Offline Status: Check Wi-Fi connection and camera power. Restart the camera and router if necessary.
For more detailed troubleshooting or persistent issues, please consult the full user guide or contact ENSTER customer support.
8. Technical Specifications
| Feature | Specification |
|---|---|
| Model Number | ENSTER-001 |
| Video Capture Resolution | 2K |
| Connectivity Technology | Wireless (Wi-Fi 2.4GHz only) |
| Power Source | Solar Powered |
| Indoor/Outdoor Usage | Outdoor |
| Special Feature | Motion Sensor, 2-Way Talk, Color Night Vision |
| Night Vision Range | 100 Feet |
| International Protection Rating | IP66 |
| Control Method | App (Ubox) |
| Pan/Tilt | 360° Pan & 120° Tilt |
| Digital Zoom | 4x |
| Storage | Cloud / SD Card |
9. Warranty and Support
ENSTER is committed to providing quality products and customer satisfaction. This product comes with a standard manufacturer's warranty. Please refer to the warranty card included in your package for specific terms and conditions.
For technical support, warranty claims, or any inquiries, please contact ENSTER customer service through the contact information provided in your user guide or on the official ENSTER website.


