CARBBIA 530071811
CARBBIA 530071811 Carburetor Instruction Manual
Model: 530071811 (Manufacturer Part Number: 8157-2)
1. Safety Information
Always prioritize safety when working with power tools and fuel systems. Failure to follow safety instructions can result in serious injury or property damage.
- Disconnect Spark Plug: Before performing any maintenance or installation, always disconnect the spark plug wire to prevent accidental engine startup.
- Fuel Handling: Work in a well-ventilated area. Avoid smoking or open flames near fuel. Use appropriate containers for fuel storage.
- Eye Protection: Wear safety glasses to protect your eyes from debris or fuel splashes.
- Gloves: Wear protective gloves to prevent skin contact with fuel and other chemicals.
- Tool Safety: Use the correct tools for each task. Ensure tools are in good condition.
- Engine Cooling: Allow the engine to cool completely before working on the carburetor or fuel system.
2. Package Contents
Verify that all components listed below are present in your package before beginning installation.

Figure 2.1: Complete Carburetor Replacement Kit Components.
- 1x Carburetor
- 2x Gasket
- 1x Air Filter
- 1x Fuel Filter
- 1x Fuel Line (2.55630mm)
- 2x Fuel Line Connector
- 1x Fuel Line Installation Hook
- 1x Spark Plug
- 2x Primer Bulb
- 1x Adjustment Tool
3. Compatibility
This CARBBIA 530071811 Carburetor is designed as a replacement for Zama C1U-W19 and is compatible with the following trimmer models:
- For Poulan Trimmers: P4500, P4500F, PP025, PP125, PP125E, PP25E, PP325, SM705, PP258TP, PP258TPC, PP25CFA
- For Craftsman Trimmers: 358791010, 358791030, 358791031, 358791032, 358791050, 358791051, 358791530, 358791540, 358791560, 358791590, 358796600, 944514460, 944515560, 944516360, 944516550, 944516560, 944516561
- For McCulloch Trimmers: MC025, MC125
Refer to your equipment's owner's manual for specific part numbers and replacement procedures.
4. Installation Instructions
This section outlines the general steps for replacing a carburetor. Specific procedures may vary slightly depending on your trimmer model. Always consult your trimmer's service manual for detailed instructions.
4.1 Preparation
- Ensure the engine is cool and the spark plug wire is disconnected.
- Drain any remaining fuel from the fuel tank into an approved container.
- Gather necessary tools, including screwdrivers, wrenches, and pliers.
4.2 Carburetor Removal
- Locate the carburetor on your trimmer. It is typically connected to the air filter housing and the engine intake.
- Carefully disconnect the fuel lines from the old carburetor. Note their positions for reinstallation.
- Disconnect the throttle linkage and choke linkage from the carburetor.
- Remove any mounting bolts or nuts securing the carburetor to the engine.
- Gently remove the old carburetor and any old gaskets.
4.3 New Carburetor Installation
- Install new gaskets on both sides of the new carburetor. Ensure they are correctly oriented.
- Position the new carburetor and secure it with the mounting bolts or nuts. Do not overtighten.
- Reconnect the throttle linkage and choke linkage. Verify smooth operation.
- Reconnect the fuel lines to the appropriate ports on the new carburetor. Use the provided fuel line and connectors if needed. The fuel line installation hook can assist with routing.
- Replace the air filter with the new one provided.
- Replace the fuel filter in the fuel tank.
- Replace the spark plug with the new one provided.
- Replace the primer bulbs if necessary.
4.4 Visual Reference for Carburetor Components

Figure 4.1: Carburetor Front View with Dimensions.
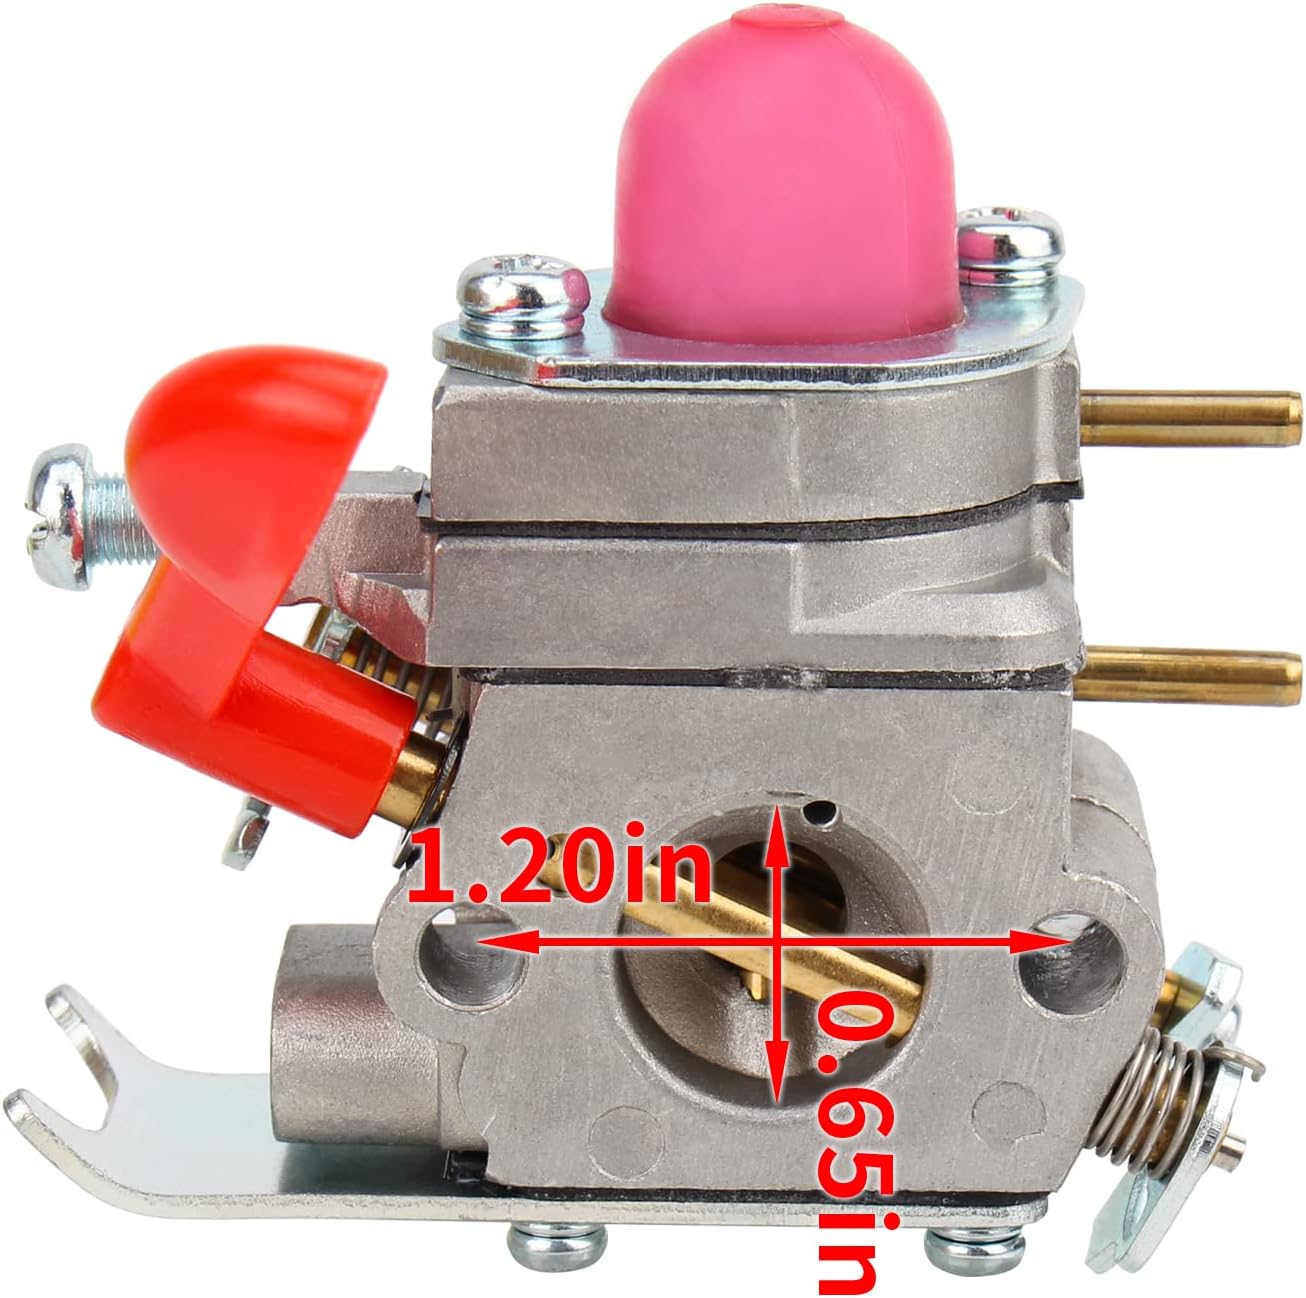
Figure 4.2: Carburetor Side View with Dimensions.

Figure 4.3: Carburetor with Choke Lever.
4.5 Installation Videos
The following videos provide visual guidance for carburetor installation and related procedures. Please note that specific trimmer models may differ.
Video 4.1: Overview of the Carbhub 530071811 Carburetor for Poulan Pro. This video demonstrates the physical characteristics and components of the carburetor.
Video 4.2: Carburetor for Poulan Featherlite PP025 Trimmer. This video provides a detailed look at the carburetor, which is compatible with the PP025 model.
Video 4.3: Carbhub C1U-W19 PP258TP Carburetor for Poulan Pro 530071811. This video showcases the C1U-W19 carburetor, suitable for Poulan Pro 530071811 and PP258TP models.
5. Operating Instructions: Carburetor Adjustment
After installing a new carburetor, minor adjustments may be necessary to ensure optimal engine performance. New carburetors are often pre-set from the factory, but environmental factors or specific engine requirements might necessitate fine-tuning.
5.1 Initial Startup
- Refill the fuel tank with the appropriate fuel mixture for your trimmer.
- Reconnect the spark plug wire.
- Prime the carburetor by pressing the primer bulb until fuel is visible and flows freely.
- Set the choke to the appropriate starting position (usually full choke for a cold engine).
- Start the engine according to your trimmer's manufacturer instructions.
- Once the engine starts, gradually move the choke to the run position. Allow the engine to warm up for a few minutes.
5.2 Carburetor Adjustment (High/Low Speed)
Your carburetor may have two adjustment screws: a High (H) speed screw and a Low (L) speed screw. An adjustment tool is included in your kit to facilitate this process.
- Low Speed (L) Adjustment: This screw controls the fuel mixture at idle and low engine speeds. Adjust it to achieve a smooth, consistent idle without stalling or excessive smoke. Turn clockwise to lean the mixture (less fuel), counter-clockwise to richen (more fuel).
- High Speed (H) Adjustment: This screw controls the fuel mixture at full throttle. Adjust it to achieve maximum engine power without sputtering or overheating. Turn clockwise to lean, counter-clockwise to richen.
- Idle Speed Adjustment: Some carburetors also have an idle speed screw (T) to set the engine's idle RPM.
Important: Make small adjustments (1/8 to 1/4 turn at a time) and test the engine's response. Over-leaning the mixture can cause engine damage. If you are unsure, consult a qualified service technician.
6. Maintenance
Regular maintenance ensures the longevity and optimal performance of your carburetor and trimmer.
- Fuel Quality: Always use fresh, clean fuel mixed to the manufacturer's specifications. Stale fuel or incorrect oil-to-gas ratio can clog the carburetor.
- Fuel Filter: Replace the fuel filter periodically (e.g., annually or every 50 hours of operation) to prevent contaminants from reaching the carburetor. A new fuel filter is included in your kit.
- Air Filter: Clean or replace the air filter regularly to ensure proper airflow and prevent dirt from entering the engine. A new air filter is included in your kit.
- Spark Plug: Inspect and replace the spark plug as recommended by your trimmer's manufacturer. A new spark plug is included in your kit.
- Storage: Before long-term storage, drain the fuel tank and run the engine until it stops to clear the carburetor of fuel, or use a fuel stabilizer.
7. Troubleshooting
If your trimmer experiences issues after carburetor replacement, consider the following common problems and solutions:
| Problem | Possible Cause | Solution |
|---|---|---|
| Engine won't start | No fuel, clogged fuel filter, faulty spark plug, incorrect choke setting, fuel lines reversed. | Check fuel level, replace fuel filter, replace spark plug, adjust choke, verify fuel line connections. |
| Engine starts but stalls | Incorrect idle speed adjustment, clogged fuel filter, air leak, old fuel. | Adjust low-speed screw, replace fuel filter, check for loose connections, use fresh fuel. |
| Engine runs poorly at high speed / lacks power | Incorrect high-speed adjustment, clogged air filter, restricted exhaust. | Adjust high-speed screw, clean/replace air filter, check exhaust for blockages. |
| Excessive smoke | Too much oil in fuel mixture, carburetor running too rich (too much fuel). | Verify fuel mixture ratio, adjust carburetor (lean mixture). |
| Fuel leaks | Loose fuel line connections, damaged primer bulb, faulty gaskets. | Tighten connections, replace primer bulb, ensure gaskets are properly seated. |
If problems persist after attempting these solutions, it is recommended to consult a professional service technician.
8. Specifications
- Brand:
- CARBBIA
- Part Number / Model:
- 530071811
- Manufacturer Part Number:
- 8157-2
- Compatible Zama Carburetor:
- C1U-W19
- Item Weight:
- 9.1 ounces
- Package Dimensions:
- 6.34 x 2.87 x 2.01 inches
- UPC:
- 710412775822
- Date First Available:
- June 8, 2022
9. Warranty and Support
For specific warranty information regarding your CARBBIA 530071811 Carburetor, please refer to the documentation included with your purchase or contact the manufacturer directly. Support resources may also be available through the official CARBBIA store.
Visit the official CARBBIA Store for more products and support: CARBBIA Store on Amazon