GLOBACT RCP311
Flysky FS-A3 3CH Receiver User Manual
Model: FS-A3 (RCP311) | Brand: GLOBACT
Introduction
The GLOBACT Flysky FS-A3 3CH Receiver is a compact and reliable 2.4G AFHDS 2A receiver designed for use with compatible Flysky transmitters. It offers stable performance and excellent anti-jamming capabilities, making it suitable for various RC applications including cars, trucks, crawlers, and boats.

Image: The compact Flysky FS-A3 3CH Receiver, showing its ports and labeling.
Compatibility
This receiver is compatible with Flysky brand Wireless protocol: AFHDS 2A transmitters, including models such as Flysky FS-GT5, FS-GT2E, FS-GT2F, FS-GT2G, FS-iT3B, and FS-iT3C. It is designed to work seamlessly with a wide range of RC vehicles.

Image: The FS-A3 receiver shown alongside compatible Flysky FS-GT5 and FS-GT2E transmitters, illustrating its protocol compatibility.

Image: The FS-A3 receiver displayed with various RC vehicles including a boat, crawler, and truck, demonstrating its broad application.
Setup and Installation
Follow these steps to properly set up and install your FS-A3 receiver:
- Physical Installation: Place the receiver inside your RC model. Its small size and light weight allow for flexible placement without occupying excessive space. Ensure the antenna is positioned for optimal signal reception.
- Connecting Components: Connect your Electronic Speed Controller (ESC) and servos to the appropriate channels on the receiver. The FS-A3 is a 3-channel receiver.
- Power Connection: Ensure the receiver receives an input voltage of 4-6.5V. Connect the power source (typically from the ESC's BEC) to the B/VCC port.
- Binding Process:
- Connect the binding plug (included) to the B/VCC port on the receiver.
- Power on the receiver. The LED on the receiver should flash rapidly, indicating it's in binding mode.
- Put your compatible Flysky transmitter into binding mode (refer to your transmitter's manual for specific instructions).
- Once the receiver's LED turns solid, the binding process is complete.
- Turn off the receiver and then the transmitter. Remove the binding plug from the receiver.
- Power on the transmitter first, then the receiver. The receiver's LED should remain solid, indicating a successful connection.

Image: Close-up view of the FS-A3 receiver installed in an RC vehicle, showing the input voltage connection point (4-6.5V) and connected wires.
Video: This video demonstrates the installation and binding process for the Flysky FS-A3 receiver, showing how to connect it to an RC vehicle and pair it with a compatible transmitter.

Image: The FS-A3 receiver shown with its included binding plug and antenna tube, essential for setup and optimal signal.
Operating Information
The FS-A3 receiver operates on a 2.4GHz frequency, providing a reliable connection for your RC models. Its AFHDS 2A protocol ensures efficient communication and robust performance.
Receiving Range
The receiver offers a remote control range of 100-200 meters, providing ample operational distance for most RC applications.
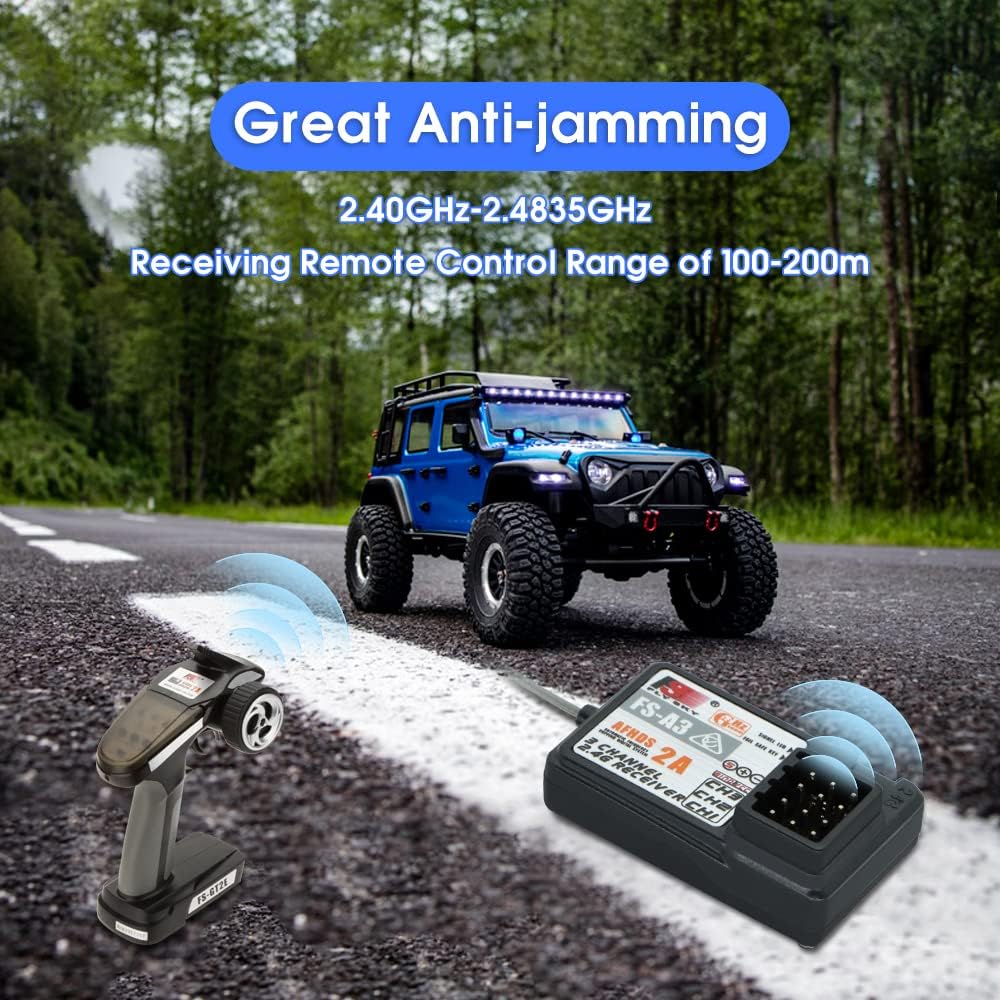
Image: An RC car on a road with the FS-A3 receiver and a transmitter, illustrating the 100-200m receiving range and anti-jamming capabilities.
Anti-jamming Technology
The working frequency between 2.40GHz-2.4835GHz is divided into 160 frequency points. Each system utilizes 16 points and 160 hopping frequencies to effectively avoid frequency jamming, ensuring a stable and interference-free connection.
Maintenance
- Cleaning: Regularly clean the receiver and its connections with a soft, dry cloth. Avoid using liquids or solvents.
- Storage: Store the receiver in a dry, cool place away from direct sunlight and extreme temperatures when not in use.
- Connection Check: Periodically inspect all wire connections to ensure they are secure and free from damage.
Troubleshooting
| Problem | Possible Cause | Solution |
|---|---|---|
| Receiver not binding/LED flashing rapidly after power on. | Binding plug not inserted correctly or transmitter not in binding mode. | Ensure binding plug is firmly inserted into the B/VCC port. Verify your transmitter is in binding mode. Try the binding process again, ensuring the transmitter is powered off before the receiver is powered on for the final connection check. |
| No response from RC model after binding. | Incorrect channel connections, low battery, or receiver not fully bound. | Check all servo and ESC connections to ensure they are plugged into the correct channels. Verify the battery is fully charged. Re-attempt the binding process. |
| Limited range or intermittent signal. | Antenna obstruction, interference, or damaged antenna. | Ensure the receiver antenna is not obstructed by carbon fiber or metal parts. Avoid operating in areas with high 2.4GHz interference. Inspect the antenna for any damage. |
Specifications
- Model: FS-A3 (RCP311)
- Channels: 3
- Wireless Protocol: AFHDS 2A
- Frequency: 2.40GHz-2.4835GHz
- Receiving Range: 100-200 meters
- Input Voltage: 4-6.5V
- Item Weight: 0.317 ounces
- Package Dimensions: 4.65 x 2.6 x 0.47 inches
- Manufacturer: GLOBACT
- Recommended Age: 14 years and up
Warranty and Support
For specific warranty information and technical support, please refer to the official GLOBACT website or contact their customer service directly. Keep your proof of purchase for any warranty claims.
GLOBACT Official Store: Visit GLOBACT Store on Amazon
Ask a question about this manual
Ask about setup, troubleshooting, compatibility, parts, safety, or missing instructions. Manuals+ will review the question and use this page’s manual context to help answer it.