Wisfor RGB Backlit Front Lighted Mirror
Instruction Manual
1. Introduction
Thank you for choosing the Wisfor RGB Backlit Front Lighted Mirror. This manual provides essential information for the safe installation, operation, and maintenance of your new mirror. Please read it thoroughly before use and retain it for future reference.
2. Safety Precautions
- Always disconnect power before installation, maintenance, or cleaning.
- Installation should be performed by a qualified electrician in accordance with local electrical codes.
- Do not expose the mirror to direct water spray or excessive humidity.
- Handle the mirror with care to prevent damage to the glass or electrical components.
- Ensure the mounting surface is structurally sound and can support the weight of the mirror.
- Keep packaging materials away from children to prevent choking hazards.
3. Package Contents
Verify that all components are present and undamaged before proceeding with installation:
- Wisfor RGB Backlit Front Lighted Mirror
- Mounting hardware (screws, drywall anchors)
- Instruction Manual
Tools required for installation (not included): Cordless drill, hammer, screwdriver, pencil, tape measure, level measuring device.
4. Setup & Installation
4.1 Wall Mounting
- Choose a suitable location on the wall. Compare the mirror size and the gap between the mounting holes to the wall space.
- Center your level on the wall and mark the positions for the mounting holes using a pencil.
- Drill 2 or 4 holes (depending on mirror size) with a diameter of 0.23-0.31 inches and a depth of 1.98 inches.
- Insert the drywall anchors into the drilled holes. Use a hammer to gently tap them in until flush with the wall.
- Screw the metal screws into the drywall anchors, leaving a small portion exposed for the mirror hooks.
- Carefully hang the mirror onto the exposed screws, ensuring the holes on the mirror's back align with the hooks.

Image: Wall-mounted mirror installation showing screws and wiring.
4.2 Wiring Options
The mirror offers two wiring methods:
- Plug-in: Pull the plug out from the reserved groove on the mirror and plug it into a standard electrical socket.
- Hardwire: Cut off the plug and connect the mirror's wires to your wall switch wiring. Ensure power is off at the circuit breaker before attempting hardwiring. Consult a qualified electrician if unsure.

Image: Detailed installation diagram for both plug-in and hardwire methods.
4.3 Protective Film Removal
After installation, gently peel off the protective film from the mirror surface.
Video: This video demonstrates the installation process, including marking holes, drilling, inserting anchors, and hanging the mirror, followed by plugging it in and removing the protective film.
5. Operating Instructions
5.1 Touch Controls
The mirror features smart touch sensors for various functions. The buttons are typically located on the front surface of the mirror.

Image: Smart touch sensor buttons for mirror functions.
- Master Switch: A short press turns the mirror on/off. When the button is yellow, the mirror is off and all functions are unavailable.
- Front Light Control: Short press to switch between three color temperatures (e.g., warm, neutral, cool white). Long press to adjust brightness (20%, 60%, 100%).
- RGB Backlight Control: Short press to switch between 7 monochrome RGB lights and running horse lights (dynamic color changes). Long press to adjust brightness (20%, 60%, 100%).

Image: Detailed controls for front light and RGB backlight.
5.2 Anti-Fog Function
Activate the anti-fog function by pressing the dedicated touch button. This will clear condensation from the mirror surface, providing a clear reflection even in steamy environments.
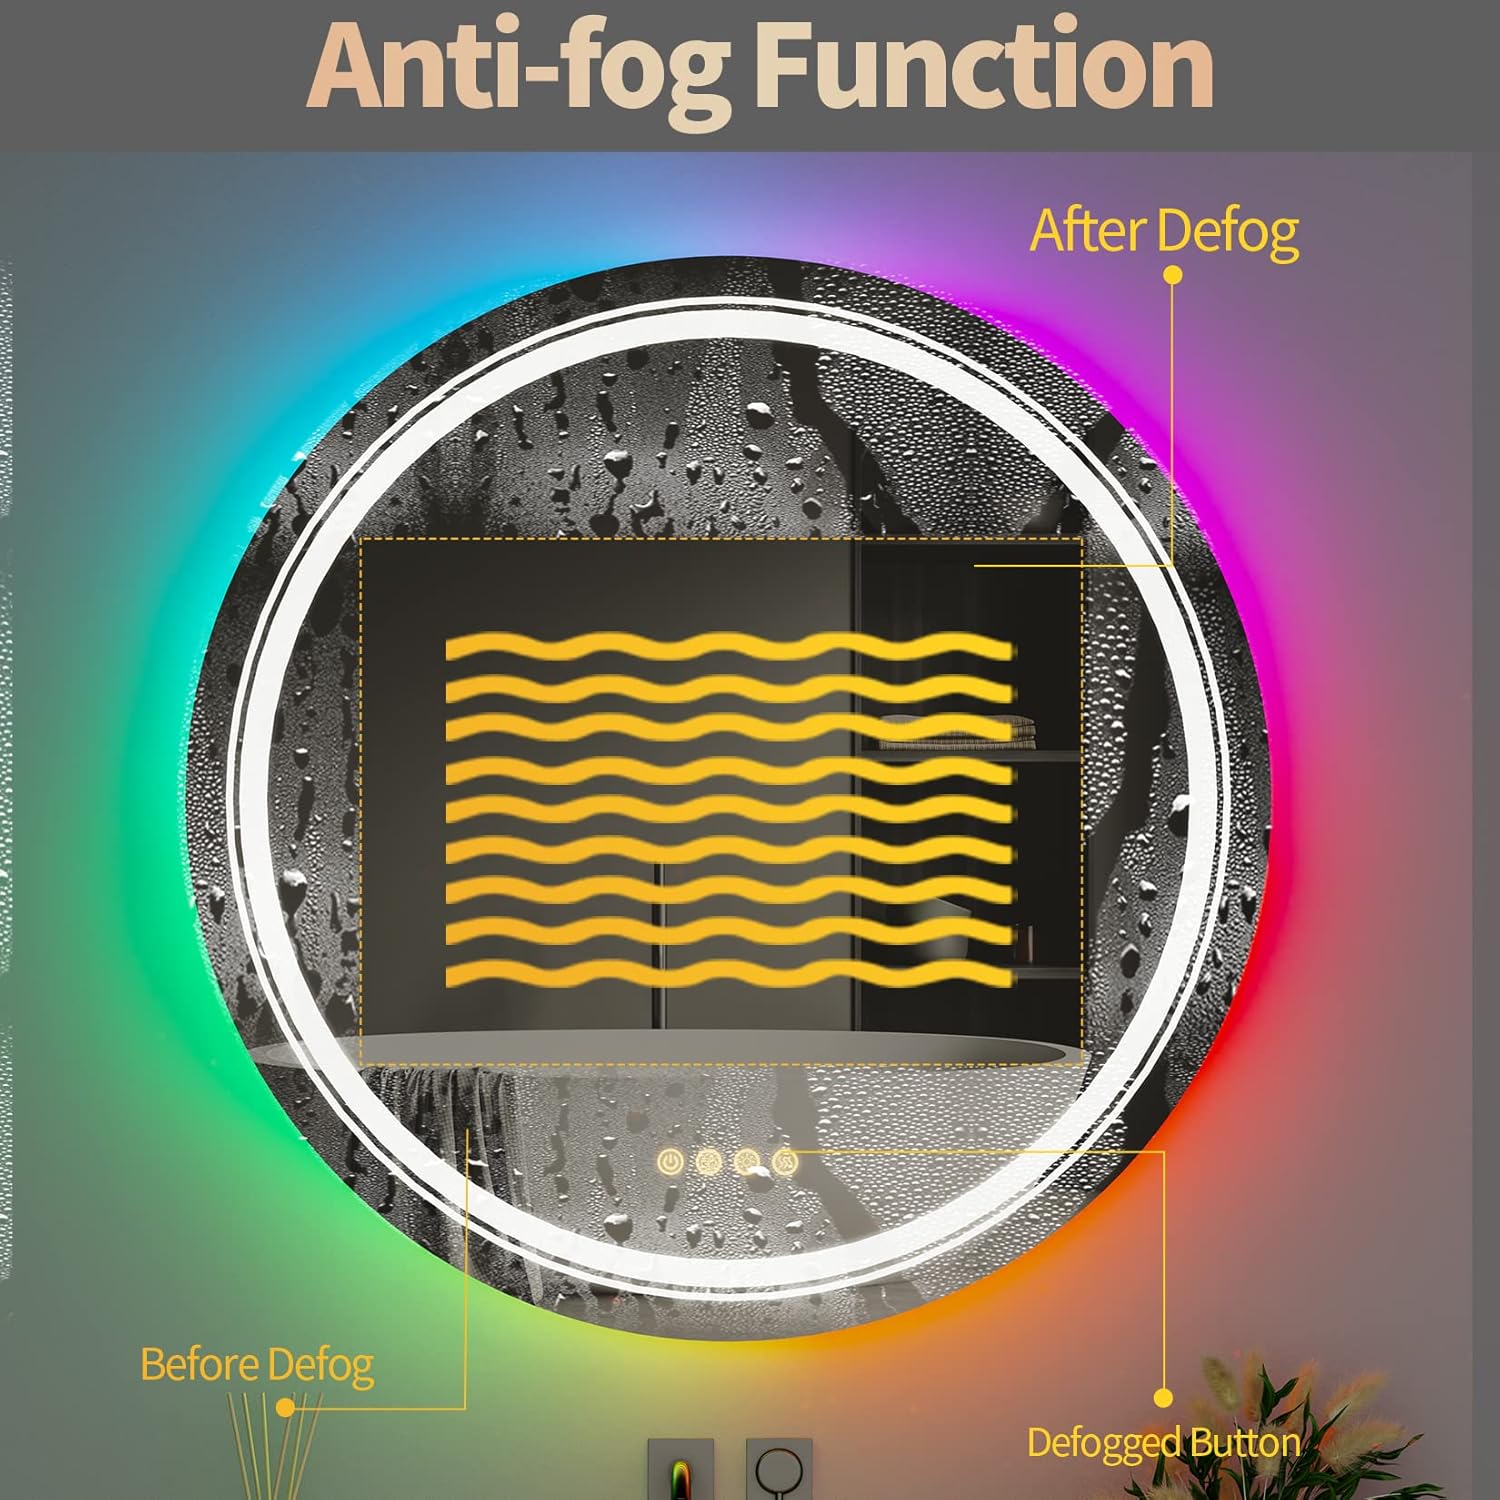
Image: Anti-fog function in action.
5.3 Memory Function
The mirror is equipped with a memory function. When turned off and then back on (either via the touch switch or a wall switch), the LED bathroom mirror will restore the status (light settings, color, brightness) it was in when last used.

Image: Illustration of the memory function with a wall switch.
Video: This video demonstrates the touch controls for adjusting front light color and brightness, RGB backlight colors, and activating the anti-fog function.
6. Maintenance
To ensure the longevity and optimal performance of your Wisfor mirror, follow these maintenance guidelines:
- Cleaning: Use a soft, damp cloth and a mild, non-abrasive glass cleaner. Do not spray cleaner directly onto the mirror; apply it to the cloth first. Avoid harsh chemicals or abrasive pads.
- Inspection: Periodically check the wiring and mounting hardware for any signs of wear or loosening.
- Water Exposure: While the LED strips are IP65 waterproof, avoid prolonged direct exposure to water. Wipe away any splashes promptly.

Image: General view of the Wisfor RGB Backlit Front Lighted Mirror.
7. Troubleshooting Guide
| Problem | Possible Cause | Solution |
|---|---|---|
| Mirror does not turn on | No power supply; loose connection; master switch off | Check power outlet/circuit breaker; ensure all wires are securely connected; press the master switch to turn on. |
| Anti-fog function not working | Anti-fog function not activated | Press the anti-fog touch button to activate. Allow a few minutes for it to take effect. |
| Lights are dim or flickering | Brightness setting too low; loose wiring; faulty LED strip | Long press the light control button to adjust brightness; check wiring connections; contact customer support if issue persists. |
| Touch controls unresponsive | Mirror surface is wet or dirty; temporary electronic glitch | Clean and dry the touch sensor area; disconnect power for 30 seconds and reconnect to reset. |
8. Product Specifications
| Feature | Detail |
|---|---|
| Model Number | B0B2W64W39 |
| Dimensions | 24 Inch Round (Specific dimensions: 28.5 x 27.6 x 4 inches package) |
| Item Weight | 14.57 pounds |
| Mounting Type | Wall Mount (Vertical or Horizontal) |
| Lighting | RGB Backlit (11 color changing), Front Lighted (3 color temperatures: 3000K-6500K) |
| CRI | CRI95 |
| Features | Dimmable, Anti-Fog, Light Memory, Smart Touch Sensor |
| Material | HD copper-free silver mirror, aluminum frame, dual LED lamp strip + silicone lamp strip |
| Waterproof Rating | IP65 (LED strips) |

Image: Construction layers of the mirror.
9. Warranty and Customer Support
Wisfor products are manufactured to high-quality standards. For warranty information, technical support, or any questions regarding your product, please refer to the contact information provided with your purchase or visit the official Wisfor website. Please have your model number (B0B2W64W39) ready when contacting support.