1. Introduction
This manual provides essential information for the proper installation, operation, and maintenance of your Prechen 24-inch 240Hz Gaming Monitor. Please read this manual thoroughly before using the product to ensure optimal performance and safety. This monitor features a 240Hz refresh rate, 2ms GTG response time, Full HD 1920 x 1080P IPS display, AMD FreeSync Premium technology, and a 3-sided frameless design.

Image: Front view of the Prechen 24-inch 240Hz Gaming Monitor with its stand.
2. Safety Information
- Ensure the monitor is placed on a stable, flat surface to prevent accidental falls.
- Use only the power adapter supplied with the monitor.
- Do not expose the monitor to rain, moisture, or extreme temperatures.
- Avoid blocking ventilation openings to prevent overheating.
- Do not attempt to disassemble or repair the monitor yourself. Refer all servicing to qualified personnel.
- Unplug the monitor from the power outlet before cleaning.
3. Setup
3.1 Package Contents
Verify that all components are present in the package:
- Prechen 24-inch Gaming Monitor
- Monitor Stand (Base and Neck)
- Power Adapter and Cable
- DisplayPort Cable
- User Manual
3.2 Assembling the Stand
- Carefully remove the monitor from its packaging, keeping the screen protected.
- Attach the stand neck to the monitor panel.
- Secure the stand base to the stand neck using the provided screws.
- Place the assembled monitor on a stable desk.
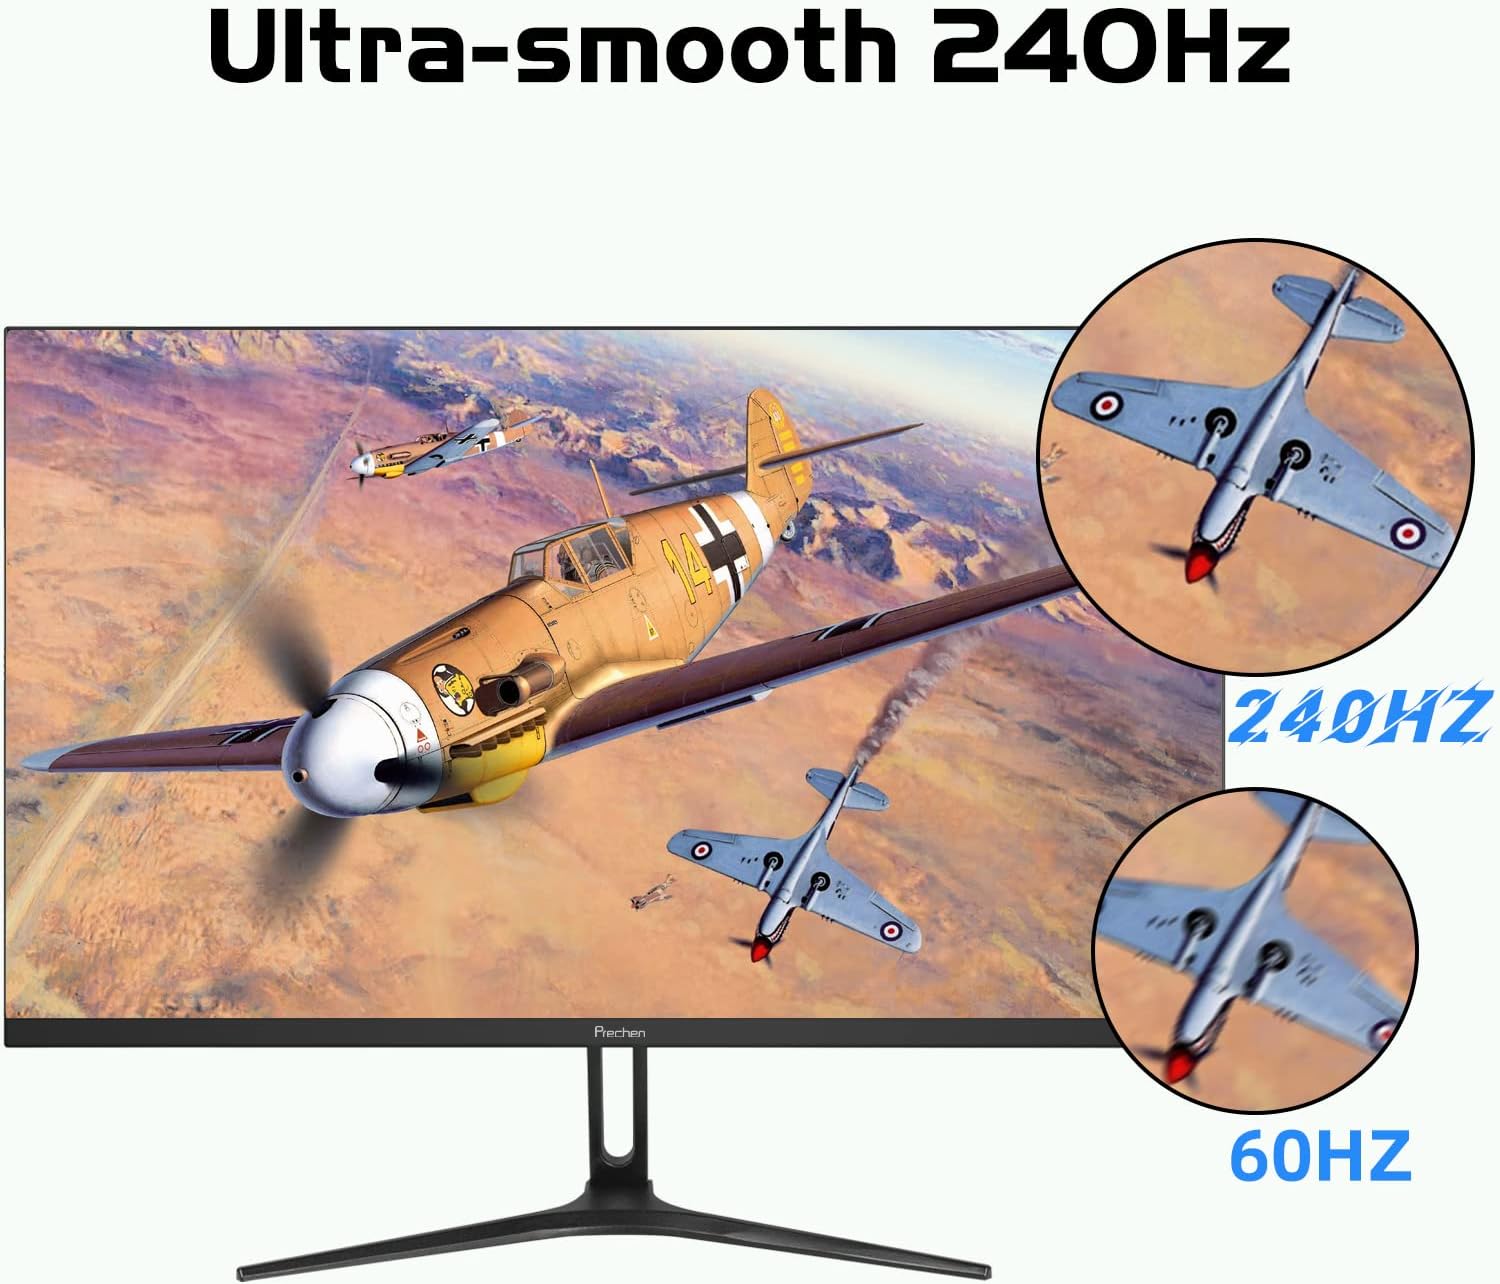
Image: Illustration of the monitor with its stand assembled.
3.3 VESA Wall Mount Installation (Optional)
The monitor supports a 75 x 75mm VESA mount. To install:
- Remove the stand from the monitor if already attached.
- Attach your VESA-compatible wall mount or arm to the four screw holes on the back of the monitor.
- Follow the instructions provided with your VESA mount for secure installation.
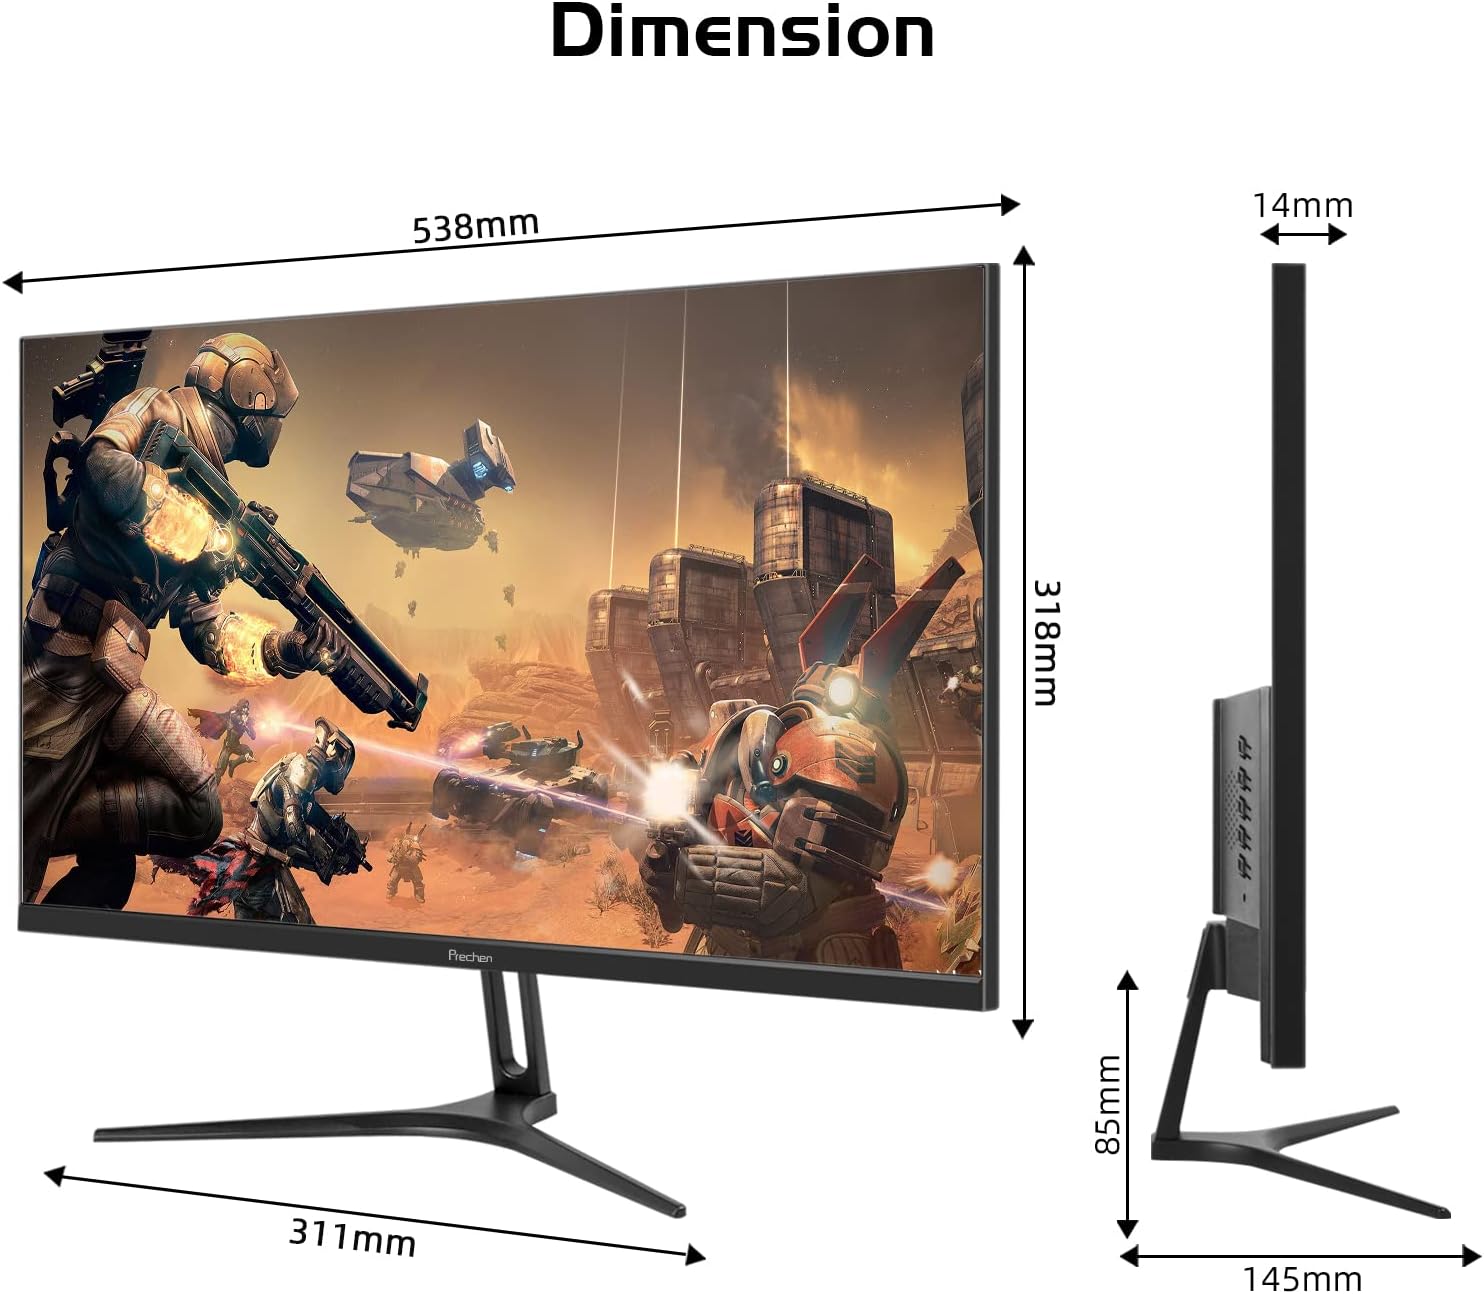
Image: Monitor shown mounted on a VESA-compatible arm.
3.4 Connecting Cables
Connect the necessary cables to the monitor's rear ports:
- Power: Connect the power adapter to the DC Power input on the monitor and then to a power outlet.
- DisplayPort (DP 1.2): For 240Hz refresh rate, connect a DisplayPort cable from your computer's graphics card to the monitor's DP 1.2 port.
- HDMI (HDMI 2.0): For 240Hz refresh rate, connect an HDMI 2.0 cable from your computer to the monitor's HDMI 2.0 port.
- HDMI (HDMI 1.4): For up to 144Hz refresh rate, connect an HDMI 1.4 cable from your computer to the monitor's HDMI 1.4 port.
- Audio In: Connect an audio cable from your audio source to the Audio In port if using external speakers connected to the monitor.
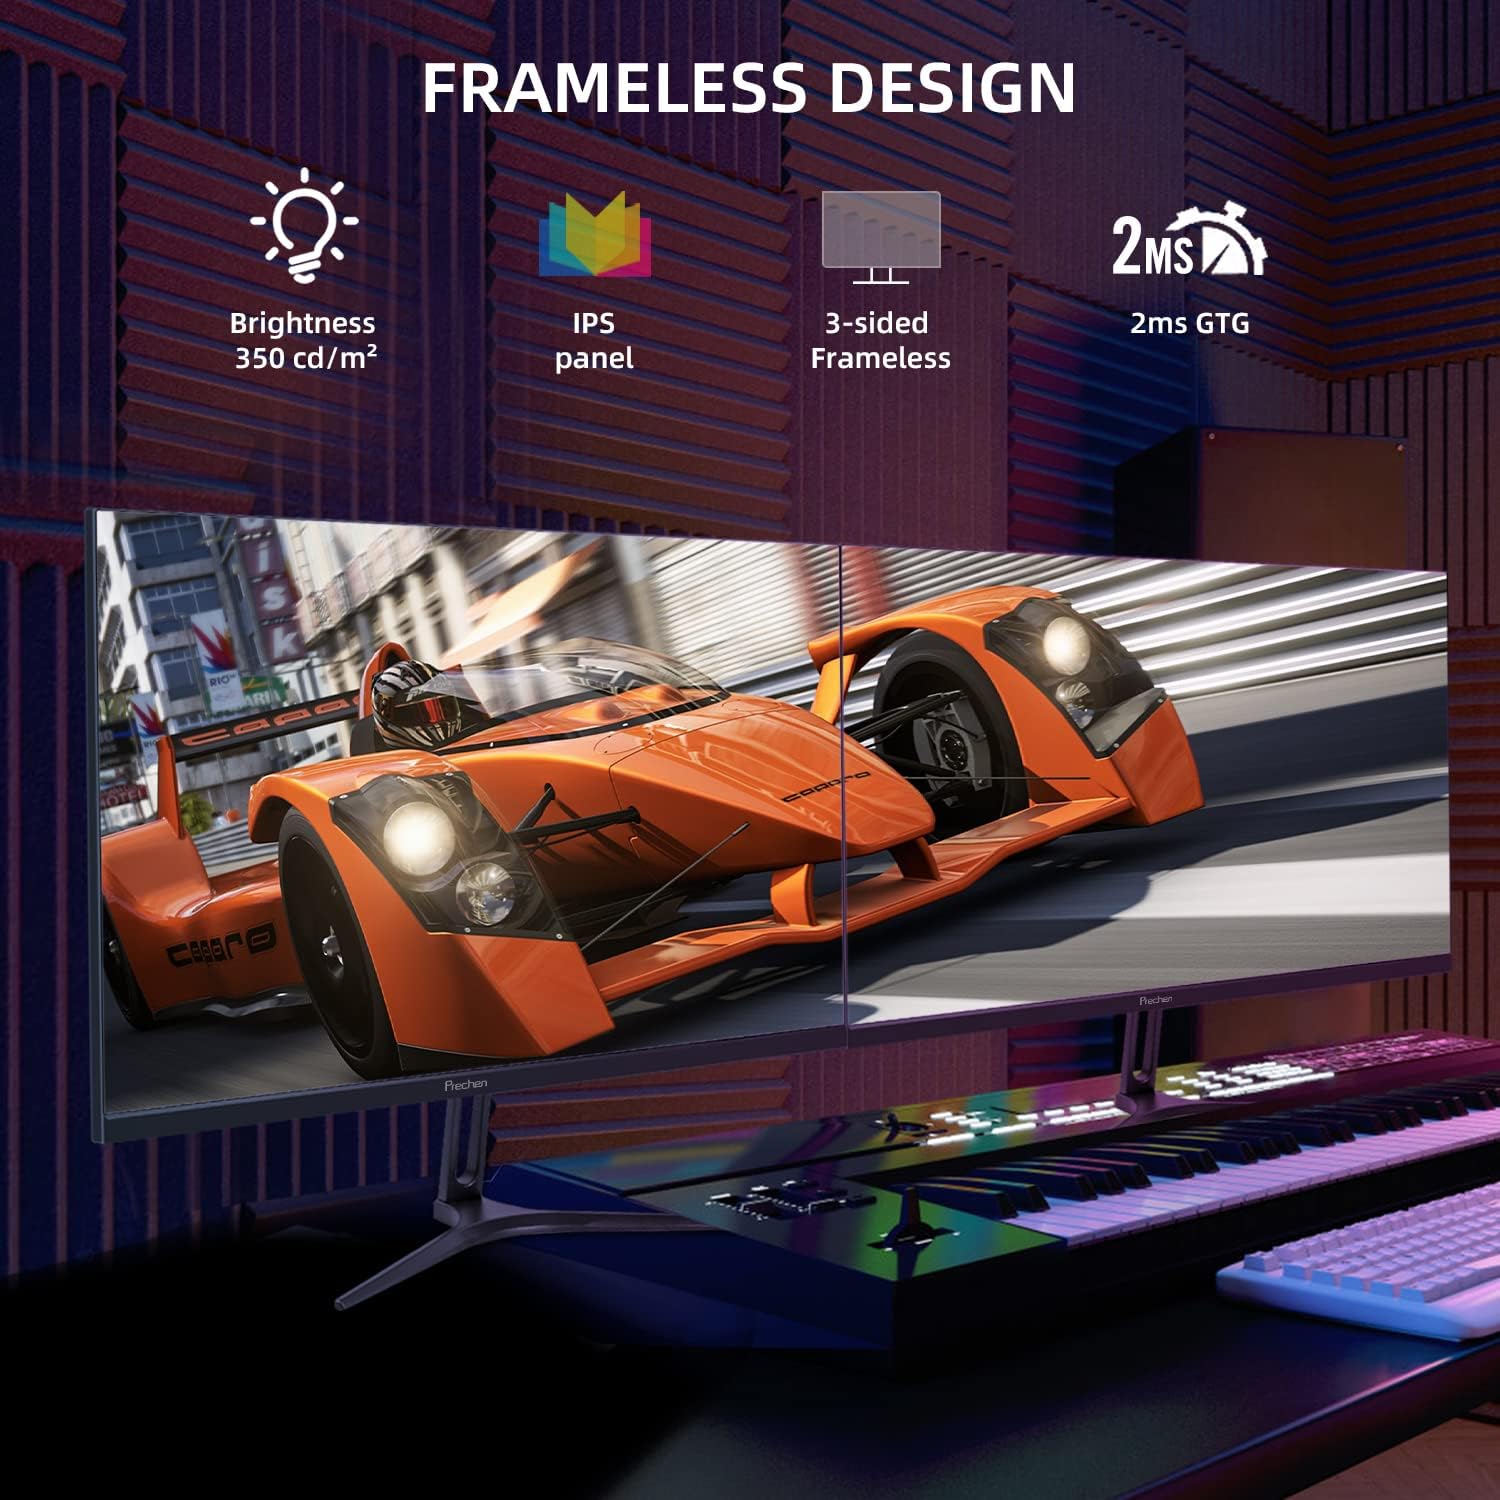
Image: Rear view of the monitor showing DC Power, HDMI 1.4, HDMI 2.0, DP 1.2, and Audio In ports.
4. Operating Instructions
4.1 Power On/Off
Press the power button located on the monitor to turn it on or off. The power indicator light will illuminate when the monitor is on.
4.2 On-Screen Display (OSD) Menu
The OSD menu allows you to adjust various monitor settings. Use the control buttons (usually located on the back or bottom right of the monitor) to navigate the menu.
- Menu Button: Opens the OSD menu.
- Up/Down Buttons: Navigate through menu options.
- Enter/Select Button: Confirms a selection.
- Exit Button: Closes the OSD menu or goes back to the previous level.
4.3 Picture Settings
Adjust settings such as Brightness, Contrast, Color Temperature, and Gamma within the OSD menu to optimize your viewing experience.
4.4 Input Selection
Use the OSD menu to manually select the input source (DisplayPort, HDMI 1.4, HDMI 2.0) if the monitor does not automatically detect it.
4.5 Refresh Rate and AMD FreeSync Premium
This monitor supports up to 240Hz refresh rate via DisplayPort 1.2 and HDMI 2.0, and up to 144Hz via HDMI 1.4. Ensure your graphics card and cable support the desired refresh rate. AMD FreeSync Premium technology can be enabled through your graphics card settings to synchronize the monitor's refresh rate with your GPU's frame rate, reducing screen tearing and stuttering.
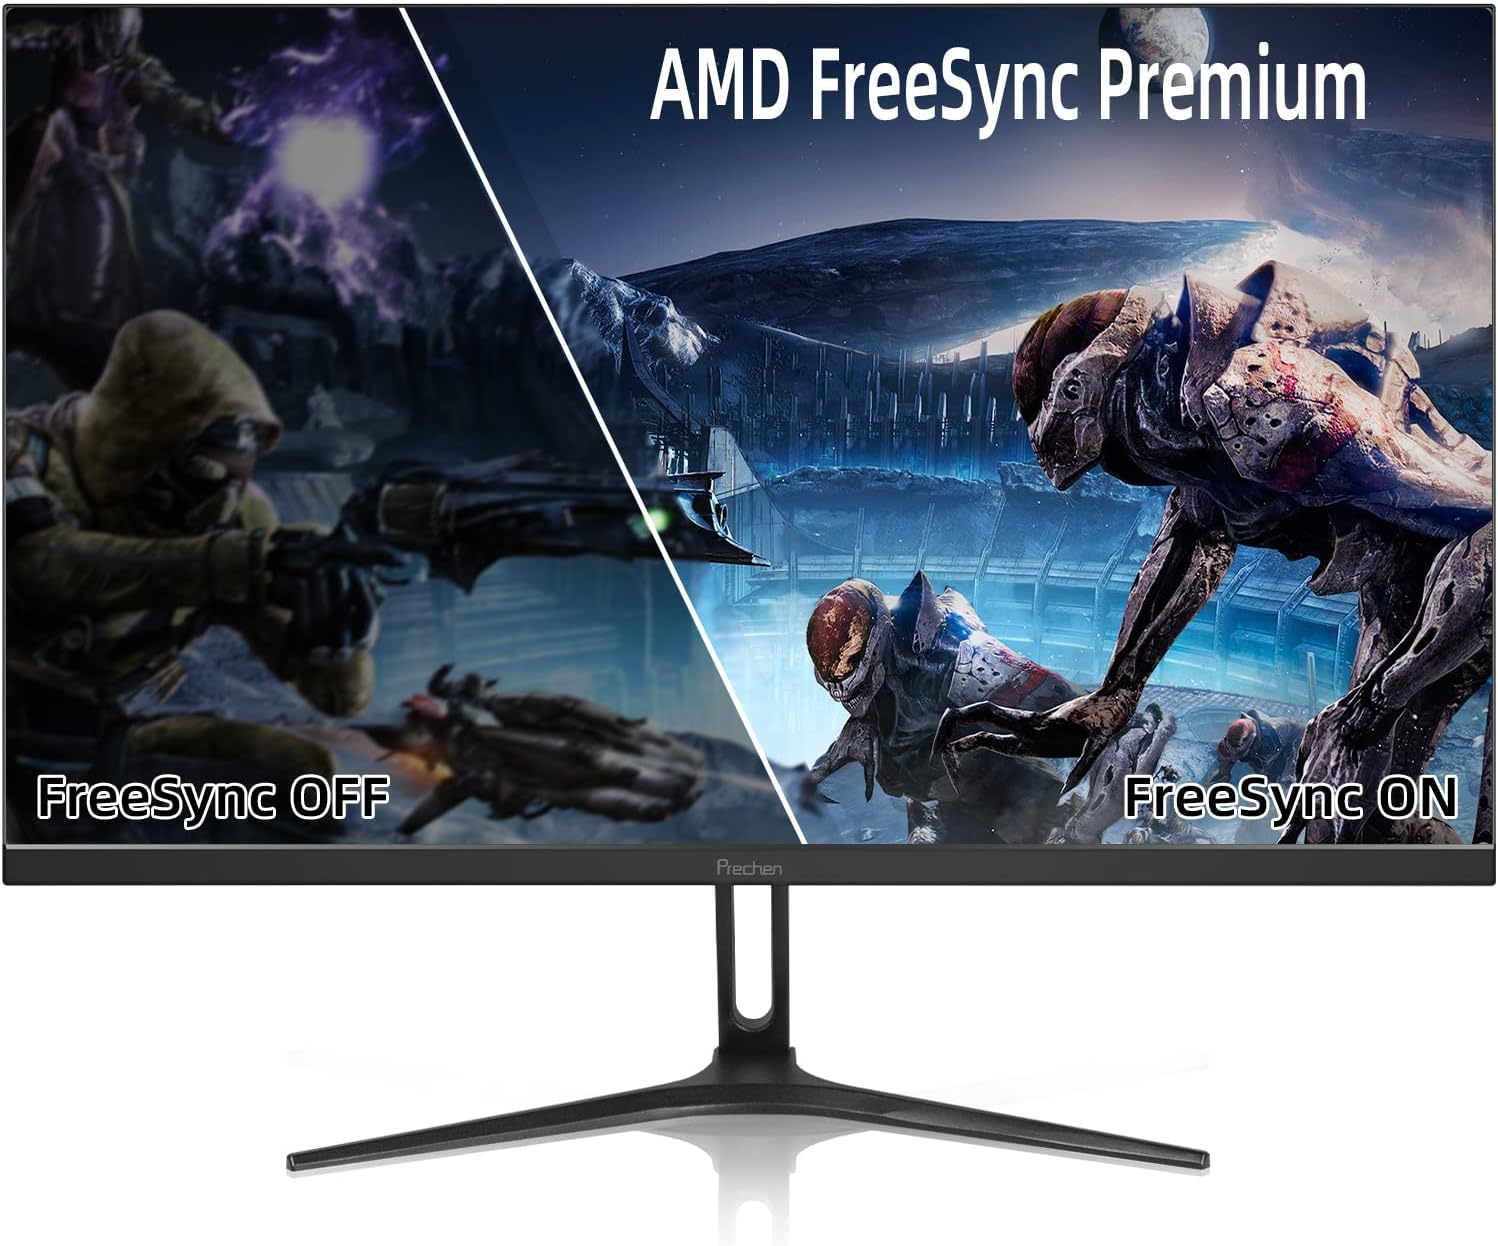
Image: Visual comparison of screen tearing with FreeSync OFF versus smooth display with FreeSync ON.
4.6 Low-Blue Light Mode
Activate the Low-Blue Light mode in the OSD menu to reduce blue light emissions, which can help alleviate eye strain during extended use.
5. Maintenance
5.1 Cleaning the Monitor
- Always unplug the monitor before cleaning.
- Use a soft, lint-free cloth lightly dampened with water or a non-abrasive screen cleaner to wipe the screen.
- For the monitor casing, use a soft, dry cloth.
- Avoid using alcohol, ammonia-based cleaners, or abrasive materials, as they can damage the screen or casing.
5.2 Storage
If storing the monitor for an extended period, unplug it, clean it, and store it in a cool, dry place, preferably in its original packaging to protect it from dust and physical damage.
6. Troubleshooting
| Problem | Possible Cause | Solution |
|---|---|---|
| No power | Power cable not connected; Power outlet faulty | Ensure power cable is securely connected; Try a different power outlet. |
| No signal | Video cable not connected; Incorrect input source selected | Check video cable connections; Select the correct input source via OSD menu. |
| Flickering screen | Incorrect refresh rate; Faulty cable; FreeSync issue | Ensure refresh rate is set correctly in OS; Try a different video cable; Disable/enable FreeSync. |
| Image distorted or blurry | Resolution mismatch; Cable issue | Set display resolution to 1920x1080P; Check video cable for damage. |
| Buttons not responding | OSD lock enabled; Temporary software glitch | Refer to OSD manual for unlocking buttons; Power cycle the monitor. |
7. Specifications
| Feature | Detail |
|---|---|
| Product Dimensions | 5.71 x 21.18 x 15.87 inches |
| Item Weight | 10.18 pounds |
| Standing Screen Display Size | 24 Inches |
| Aspect Ratio | 16:9 |
| Resolution | 1920 x 1080 Pixels (FHD 1080p) |
| Refresh Rate | 240Hz (via DP 1.2, HDMI 2.0), 144Hz (via HDMI 1.4) |
| Response Time | 2ms GTG |
| Panel Type | IPS |
| Color Gamut | 100% sRGB |
| Viewing Angles | 178 degrees (Wide) |
| Connectivity | 1x DisplayPort (v1.2), 1x HDMI (v2.0), 1x HDMI (v1.4), 1x Audio In, 1x DC Power |
| VESA Compatibility | 75 x 75mm |
| Screen Surface Description | Glossy |
8. Warranty and Support
Prechen offers a 2-Year Unlimited Warranty for this monitor, covering manufacturing defects and malfunctions under normal use. Additionally, customers benefit from Lifetime Customer Support.
For technical assistance, warranty claims, or general inquiries, please refer to the contact information provided with your product packaging or visit the official Prechen support website. Please have your model number (35b67e5b-330c-41ac-aed3-24e9854605d3) ready when contacting support.


