1. Introduction
This user manual provides comprehensive instructions for the ASHATA 5012H Portable Digital Oscilloscope. It covers product features, technical specifications, setup procedures, operating modes, maintenance, and troubleshooting. Please read this manual thoroughly before using the device to ensure proper operation and to maximize its performance and longevity.
2. Product Overview
The ASHATA 5012H is a portable digital oscilloscope designed for a wide range of electrical measurement and engineering debugging applications. It features a 100MHz bandwidth and a 500MS/s sample rate, making it suitable for analyzing various electrical signals.

Figure 2.1: Front view of the ASHATA 5012H Portable Digital Oscilloscope, showing the IPS LCD screen and control buttons.
Key Features:
- 100 MHz Bandwidth: Capable of measuring a wide range of electrical signals for amplifiers, oscillators, control systems, DC/DC conversion, inverter systems, and switching power supplies.
- 500 MS/s Sample Rate: Provides high-resolution signal capture.
- Three Operating Modes: Automatic, Single, and Normal modes for diverse testing scenarios.
- IPS LCD Screen: Clear display for waveform analysis.
- Portable Design: Compact and lightweight for field use.
- Engineering Debugging Tool: Ideal for DIY production, inverter circuits, switching power supplies, oscillation circuits, PWM drives, communication circuits, power amplifier circuits, network measurement, and bus circuits.
3. Specifications
| Specification | Value |
|---|---|
| Item Type | Digital Oscilloscope |
| Product Material | ABS |
| Product Color | Yellow |
| Charging Input | 5V 1A/2A/3A/4A |
| Max Test Voltage | 1X: 80V, 10X: 800V |
| LCD Screen Size | Approx. 6.1 cm (2.4 inches) |
| LCD Resolution | 320 x 240 |
| Display Technology | TFT |
| Built-in Battery | 5000mAh Lithium Battery |
| Bandwidth | 100 MHz |
| Sample Rate | 500 MS/s |
| Standby Time | 8 hours |
| External Voltage | 0-80V |

Figure 3.1: The oscilloscope's screen, indicating its approximate 6.1 cm (2.4 inch) size.
4. Package Contents
Verify that all items listed below are included in your package. If any items are missing or damaged, please contact customer support.
- 1 x Oscilloscope Host
- 1 x 100MHz Matching Probe (1X and 10X)
- 1 x USB Data Cable
- 1 x User Manual
- 1 x Storage Case
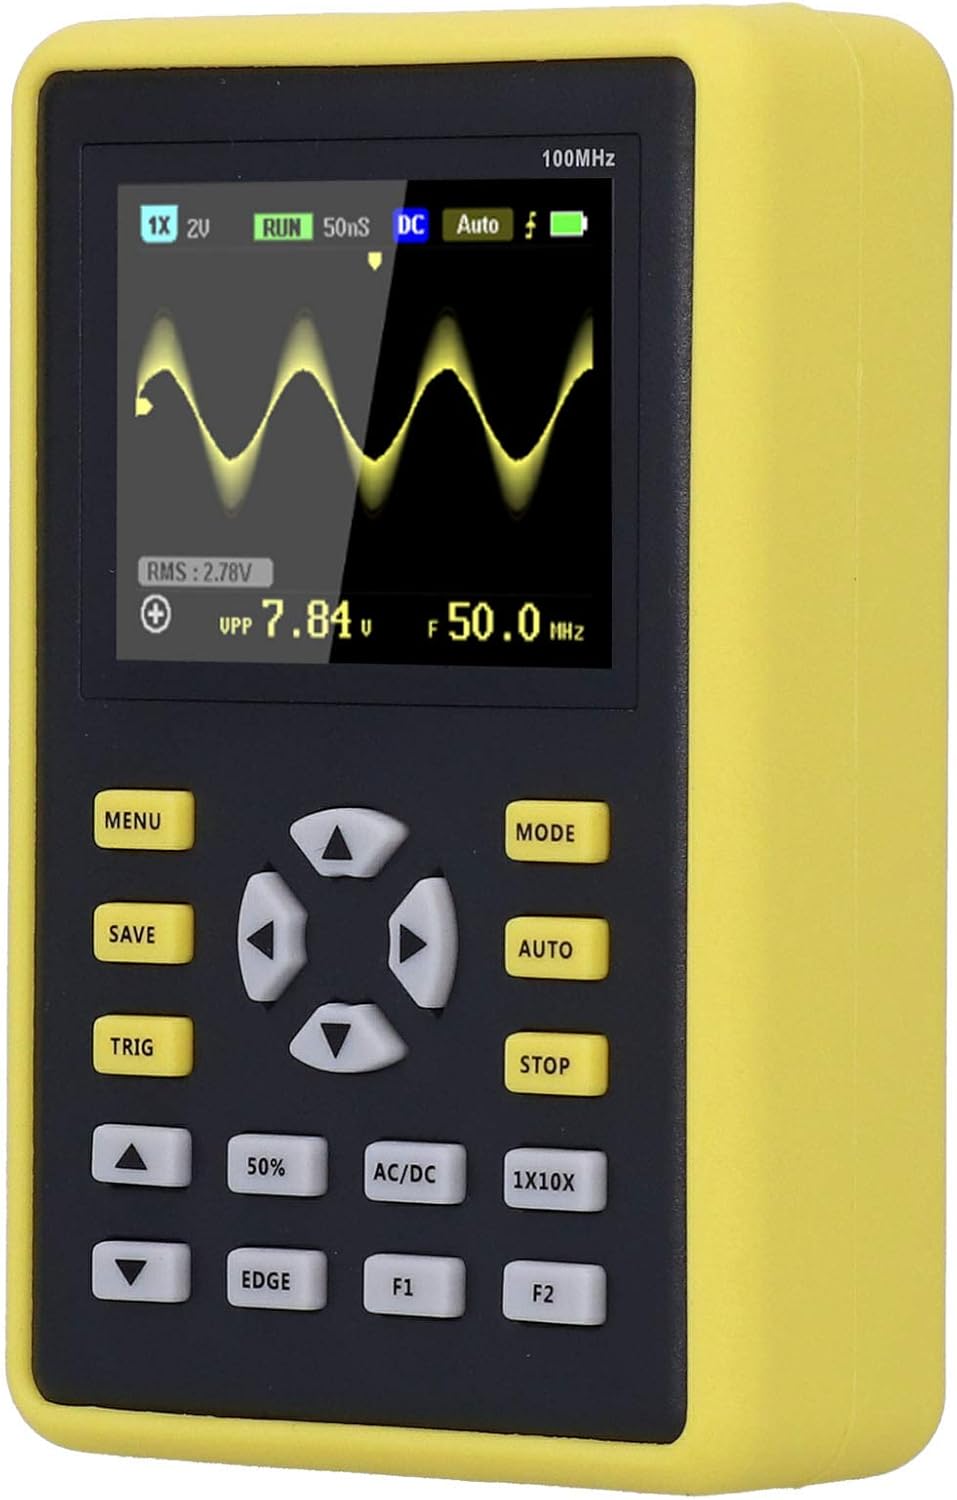
Figure 4.1: The ASHATA 5012H Oscilloscope, probe, USB cable, and user manual neatly packed in its protective storage case.
5. Setup
5.1 Charging the Device
Before initial use, fully charge the oscilloscope. Connect the provided USB data cable to the device's charging port and a 5V power adapter (1A to 4A recommended). The charging indicator will show the charging status.
5.2 Connecting the Probe
- Locate the BNC connector on the oscilloscope.
- Align the probe's BNC connector with the oscilloscope's input and twist clockwise to secure it.
- Attach the ground clip of the probe to the circuit's ground point.
- Select the appropriate attenuation setting (1X or 10X) on the probe based on your measurement requirements. Ensure the oscilloscope's setting matches the probe's attenuation.

Figure 5.1: The oscilloscope connected to its probe and USB charging cable, illustrating the setup for operation and power.
6. Operating Modes
The ASHATA 5012H oscilloscope offers three primary operating modes to suit different measurement needs:
- Automatic Mode: This mode is ideal for testing periodic analog signals, such as sinusoidal waveforms. The oscilloscope automatically adjusts settings to display a stable waveform.
- Single Mode: Use this mode for capturing unexpected, non-periodic events, such as car ignition signals. The oscilloscope triggers once and then stops, allowing for detailed analysis of a single event.
- Normal Mode: This mode is suitable for testing digital logic signals, like those from an infrared remote control. It requires a stable trigger condition to display the waveform.
To switch between modes, press the 'MODE' button on the device. The current mode will be indicated on the screen.

Figure 6.1: A close-up of the oscilloscope's screen, showing a captured waveform and various measurement parameters.
7. Maintenance
- Cleaning: Use a soft, dry cloth to clean the device. Do not use abrasive cleaners or solvents.
- Storage: Store the oscilloscope in its protective case in a cool, dry place when not in use. Avoid extreme temperatures and humidity.
- Battery Care: To prolong battery life, avoid fully discharging the battery frequently. Charge the device regularly, even if not in active use.
- Probe Care: Handle the probe carefully. Do not bend or twist the cable excessively. Keep the probe tip clean.
8. Troubleshooting
If you encounter issues with your ASHATA 5012H oscilloscope, consider the following basic troubleshooting steps:
- Device not powering on: Ensure the battery is charged. Connect the device to a power source using the USB cable and try again.
- No waveform displayed: Check if the probe is correctly connected to both the oscilloscope and the circuit. Verify the probe's attenuation setting matches the oscilloscope's setting. Adjust the trigger level and time base settings.
- Unstable waveform: Try adjusting the trigger settings (level, mode). Ensure the signal source is stable.
- Incorrect readings: Calibrate the probe if necessary. Ensure the input voltage does not exceed the maximum test voltage for the selected probe attenuation.
For persistent issues, please refer to the detailed troubleshooting section in the full user manual or contact customer support.
9. Warranty and Support
This product comes with a standard manufacturer's warranty. For warranty details, technical support, or service inquiries, please refer to the contact information provided in the original product packaging or on the ASHATA official website. Keep your purchase receipt as proof of purchase.