Piececool Eiffel Tower 3D Metal Model
Piececool Eiffel Tower 3D Metal Model Assembly Manual
Model: Eiffel Tower 3D Metal Model | Brand: Piececool
Introduction
This manual provides detailed instructions for assembling your Piececool Eiffel Tower 3D Metal Model. This kit allows you to construct a detailed replica of the iconic Eiffel Tower using precision-cut metal sheets. The assembly process involves carefully detaching, bending, and connecting metal parts without the need for glue or solder. Patience and attention to detail are key to a successful build.

Image: The fully assembled Piececool Eiffel Tower 3D Metal Model, showcasing its intricate design.
Safety Information
- Age Recommendation: This model kit is recommended for individuals aged 16 and above due to the small and delicate parts.
- Sharp Edges: Metal parts may have sharp edges. Handle with care to avoid cuts.
- Small Parts: Keep small parts away from young children to prevent choking hazards.
- Ventilation: Ensure adequate ventilation if using any adhesives (though not typically required for this model).
Package Contents
Your Piececool Eiffel Tower 3D Metal Model kit includes:
- Multiple sheets of precision-cut metal parts.
- Detailed English instruction manual.
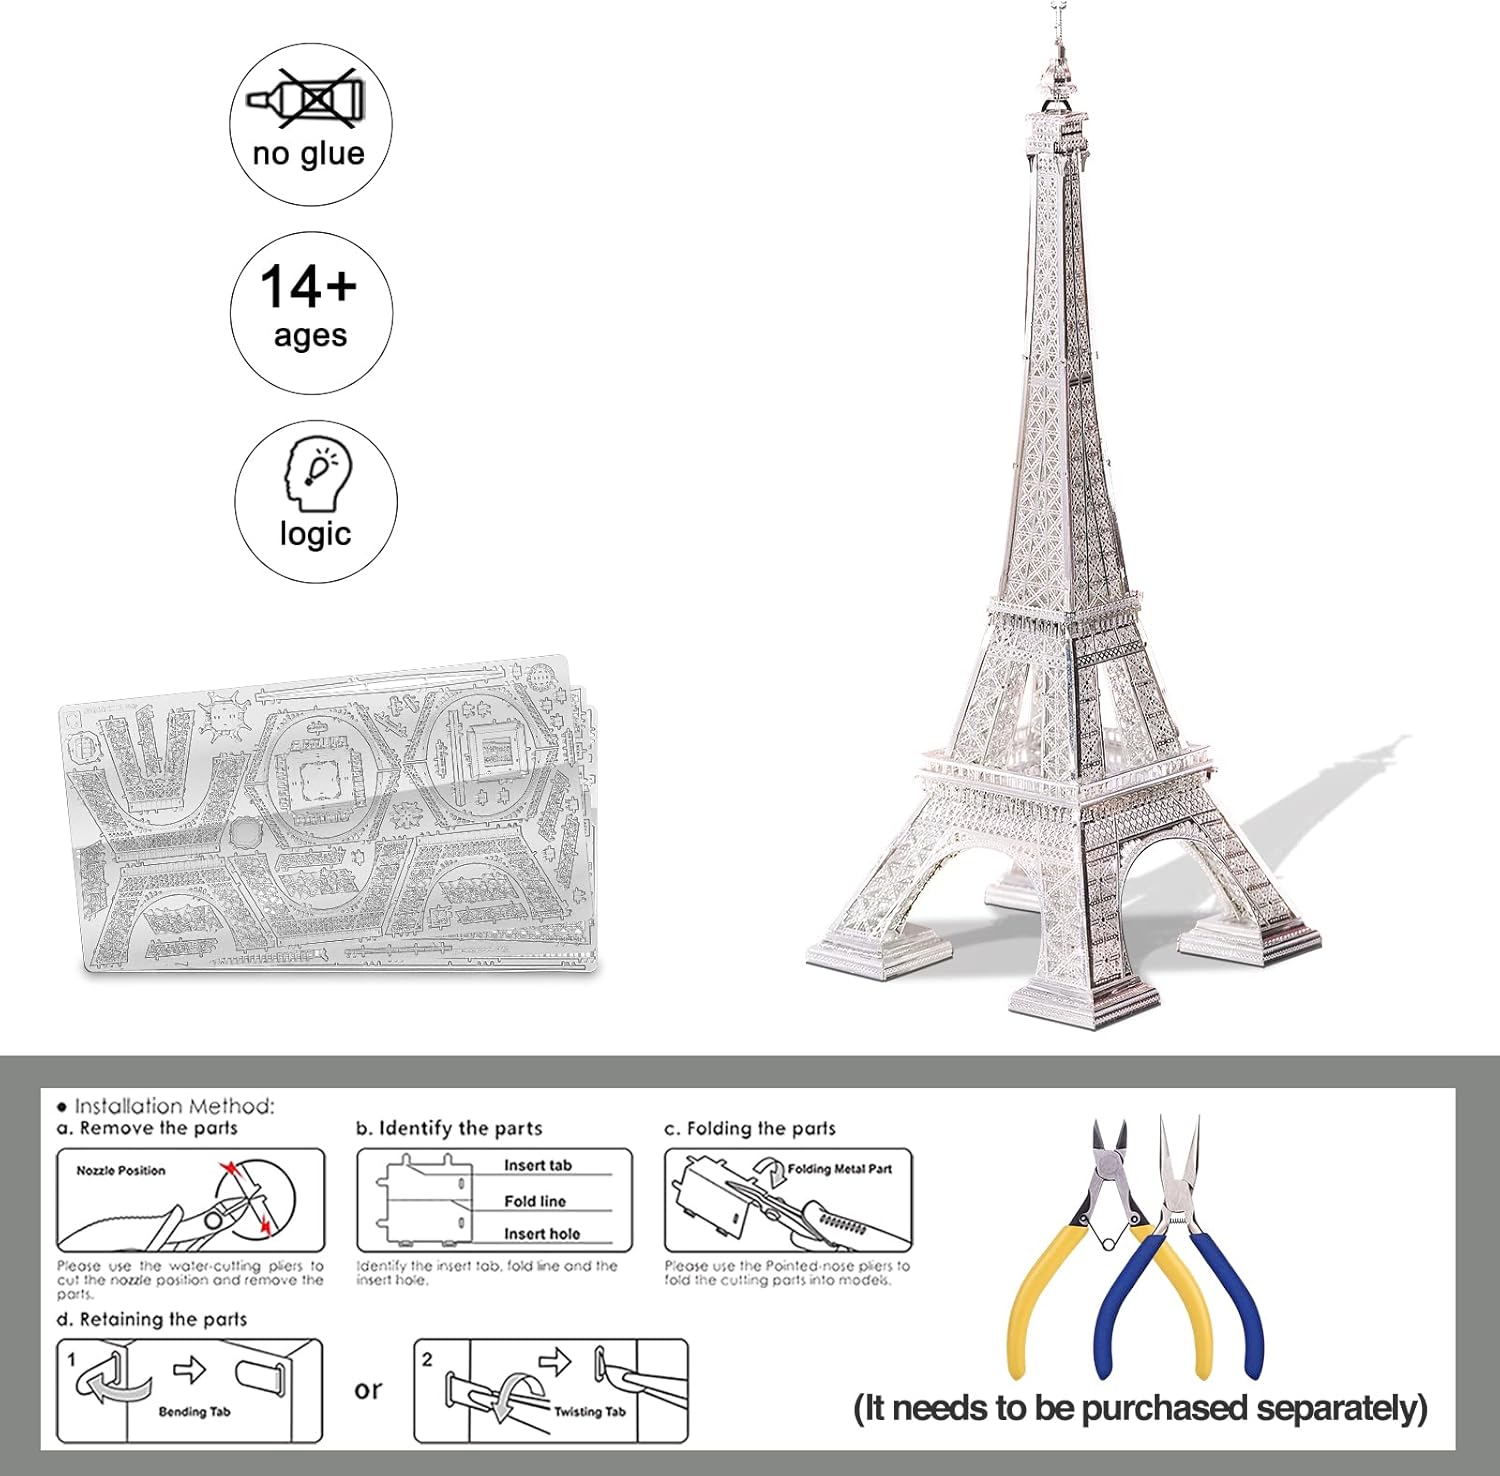
Image: Overview of the metal sheets, recommended age (14+), and basic installation methods.
Setup: Tools Required
While the kit does not require glue or solder, specific tools are highly recommended for optimal assembly and to prevent damage to the delicate parts. These tools are not included in the kit and must be purchased separately.
- Clipper: For cleanly detaching parts from the metal sheets.
- Needle Nose Pliers: Essential for bending and twisting connecting tabs accurately.
- Tweezers: Useful for handling very small parts and precise adjustments.
- Magnifying Glass (Optional but Recommended): For better visibility of intricate details and small tabs.

Image: Metal sheets containing the model parts, alongside recommended assembly tools like clippers and needle-nose pliers.
Assembly Instructions
Follow these steps carefully to assemble your Eiffel Tower model. Refer to the included instruction manual for specific part numbers and detailed diagrams.
- Step 1: Prepare Your Workspace
Ensure you have a clean, well-lit, and organized workspace. Lay out your metal sheets and tools.
- Step 2: Remove Parts
Carefully use a clipper to detach each part from its metal sheet. Avoid twisting or bending the parts while detaching. Only remove parts as needed for the current step to prevent confusion.
Image: Illustration of using a water-cutting pen (clipper) to remove parts from the metal sheet.
- Step 3: Identify Parts
Each part is numbered on the metal sheet and in the instruction manual. Match the part numbers to the diagrams before proceeding.
Image: Diagram illustrating how to identify parts, including tabs, fold lines, and insert holes.
- Step 4: Fold and Bend Parts
Many parts require folding or bending along designated lines. Use needle-nose pliers or other appropriate tools to create clean, precise bends. Refer to the instruction manual for the correct angle and direction of each fold.
Image: Illustration demonstrating the use of pointed nose pliers to fold metal parts.
- Step 5: Connect Parts Using Tabs
Align the tabs on one part with the corresponding slots on another. Gently insert the tabs. Once inserted, bend or twist the tabs to secure the connection. The instruction manual will specify whether to bend (90 degrees) or twist (90 degrees) the tabs.
Image: Diagrams showing two methods for retaining parts: bending tabs or twisting tabs.
- Step 6: Follow Sequential Steps
Proceed through the instruction manual step-by-step. Each step builds upon the previous one. Do not skip steps or force parts together.
- Step 7: Final Assembly
Once all sub-assemblies are complete, connect them according to the final steps in the manual to form the complete Eiffel Tower model.
Operating: Display and Care
Once assembled, your Piececool Eiffel Tower model is a decorative item. To maintain its appearance:
- Placement: Display the model on a stable, flat surface away from direct sunlight, excessive heat, or humidity.
- Handling: Handle the model gently, preferably by its base, to avoid bending or damaging delicate parts.

Image: The assembled Eiffel Tower model displayed as a decorative item on a desk.
Maintenance
To keep your metal model looking its best:
- Cleaning: Dust the model regularly with a soft, dry brush or a microfiber cloth. Avoid using abrasive cleaners or liquids, which can damage the metal finish.
- Repairs: If a part becomes loose or bent, carefully re-bend or re-secure it using appropriate tools. Avoid excessive force.
Troubleshooting
| Problem | Possible Cause | Solution |
|---|---|---|
| Parts break easily during removal or bending. | Excessive force; incorrect tool usage; metal fatigue. | Use a sharp clipper for removal. Apply gentle, even pressure when bending with pliers. Avoid repeated bending of the same part. |
| Tabs do not fit into slots. | Misalignment; bent tabs; burrs on slots. | Ensure precise alignment. Gently straighten bent tabs with pliers. Check for any obstructions in the slots. |
| Model is unstable or crooked. | Inaccurate bends; loose connections; incorrect part placement. | Review previous steps for accuracy. Ensure all tabs are securely bent or twisted. Re-check part orientation against the manual. |
Specifications
- Product Dimensions (Assembled): 3.35 x 3.35 x 8.66 inches (8.5 x 8.5 x 22 cm)
- Item Weight: 7.8 ounces
- Material: Stainless Steel
- Recommended Age: 16 years and up
- Assembly Method: Tab and slot, no glue required
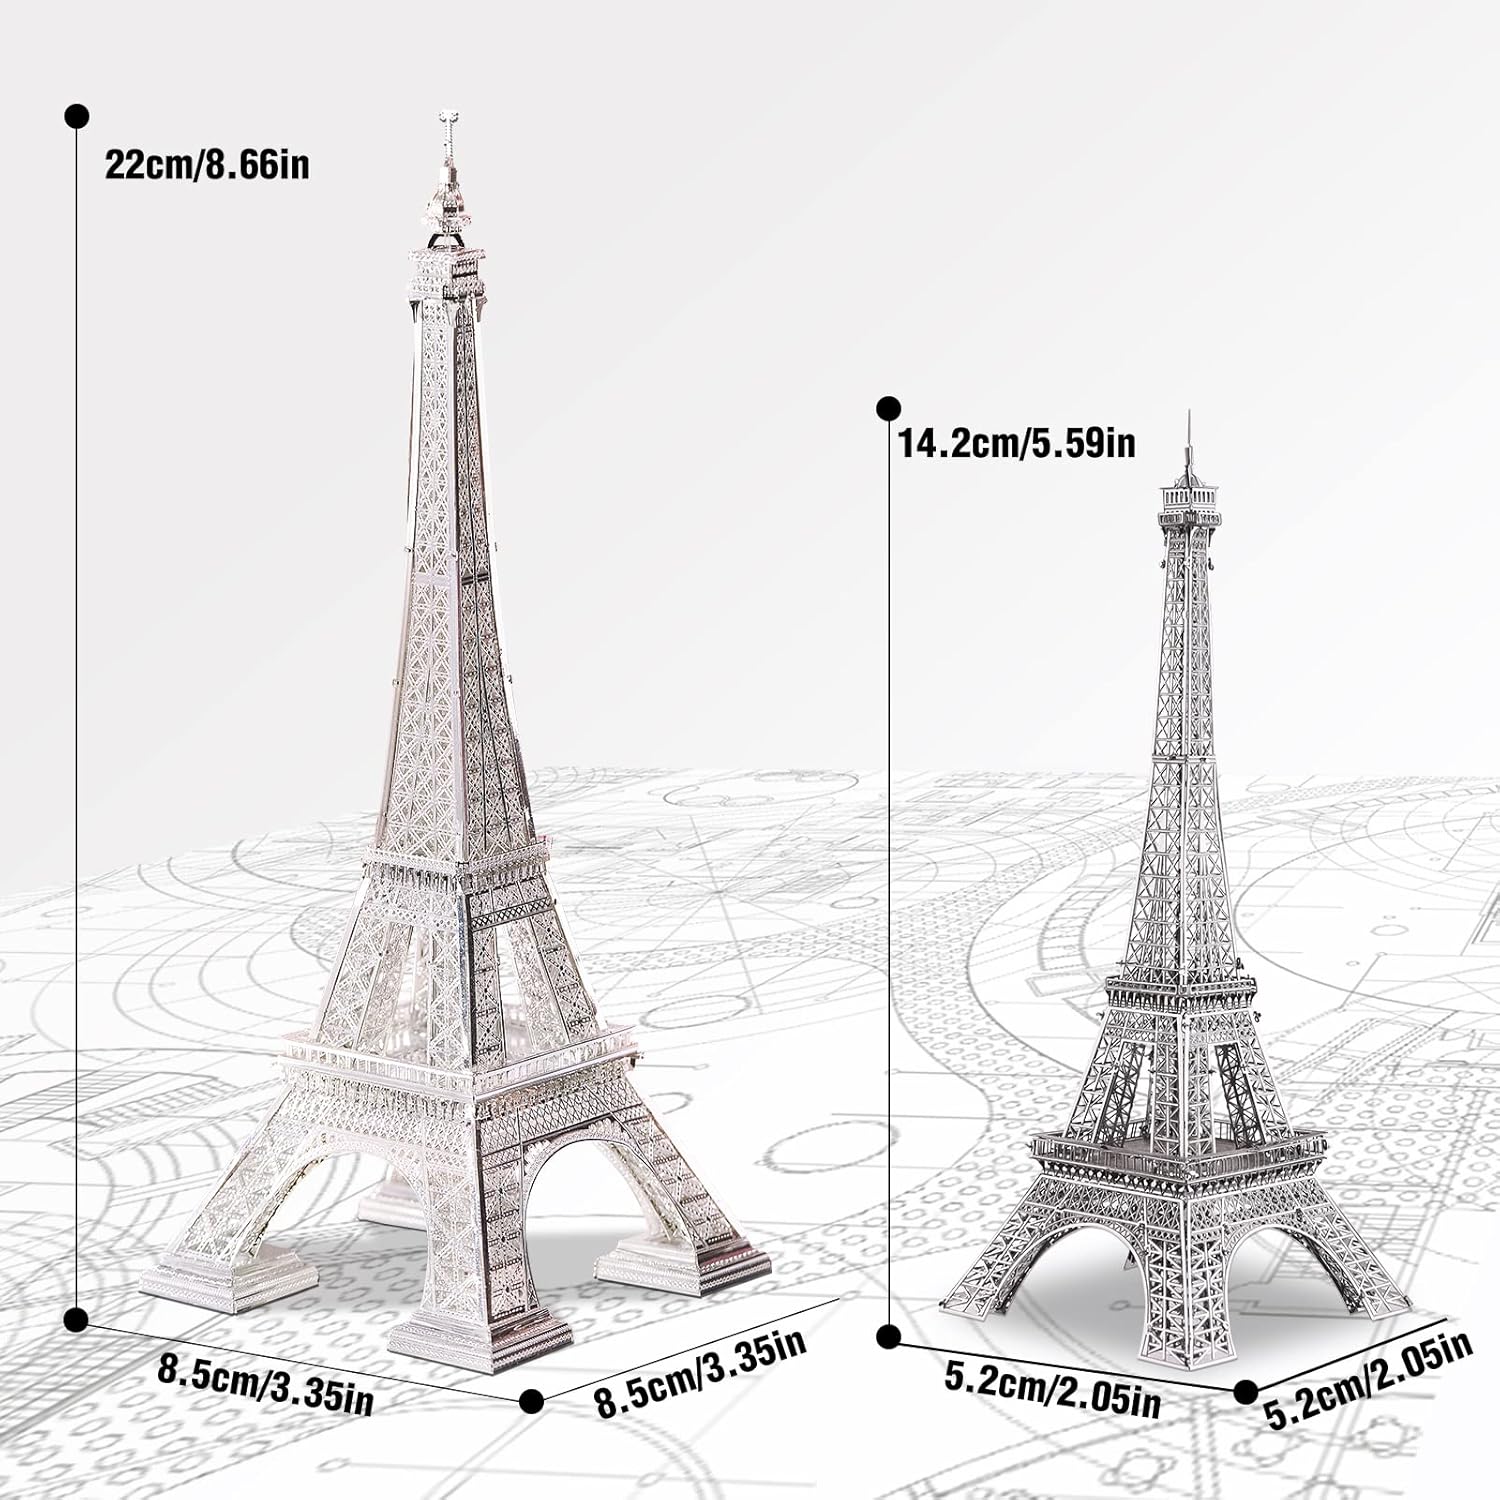
Image: Diagram illustrating the dimensions of the assembled Eiffel Tower model.
Warranty and Support
For specific warranty information, please refer to the documentation included with your product or contact Piececool customer support directly. General support inquiries can often be resolved by reviewing the detailed instruction manual provided in the kit.
If you require further assistance, please visit the official Piececool website or contact their customer service department through the contact information provided on the product packaging.