1. Introduction
Welcome to the HyperX Armada 25 Gaming Monitor user manual. This document provides essential information for setting up, operating, maintaining, and troubleshooting your new monitor. The HyperX Armada 25 is designed for competitive gaming, featuring a 24.5-inch Full HD (1920x1080) IPS panel, a 240Hz refresh rate, and a 1ms response time, ensuring smooth and responsive visuals. It also includes NVIDIA G-SYNC compatibility to eliminate screen tearing and minimize input latency. A desk mount is included for convenient setup and to maximize desk space.
Key Features:
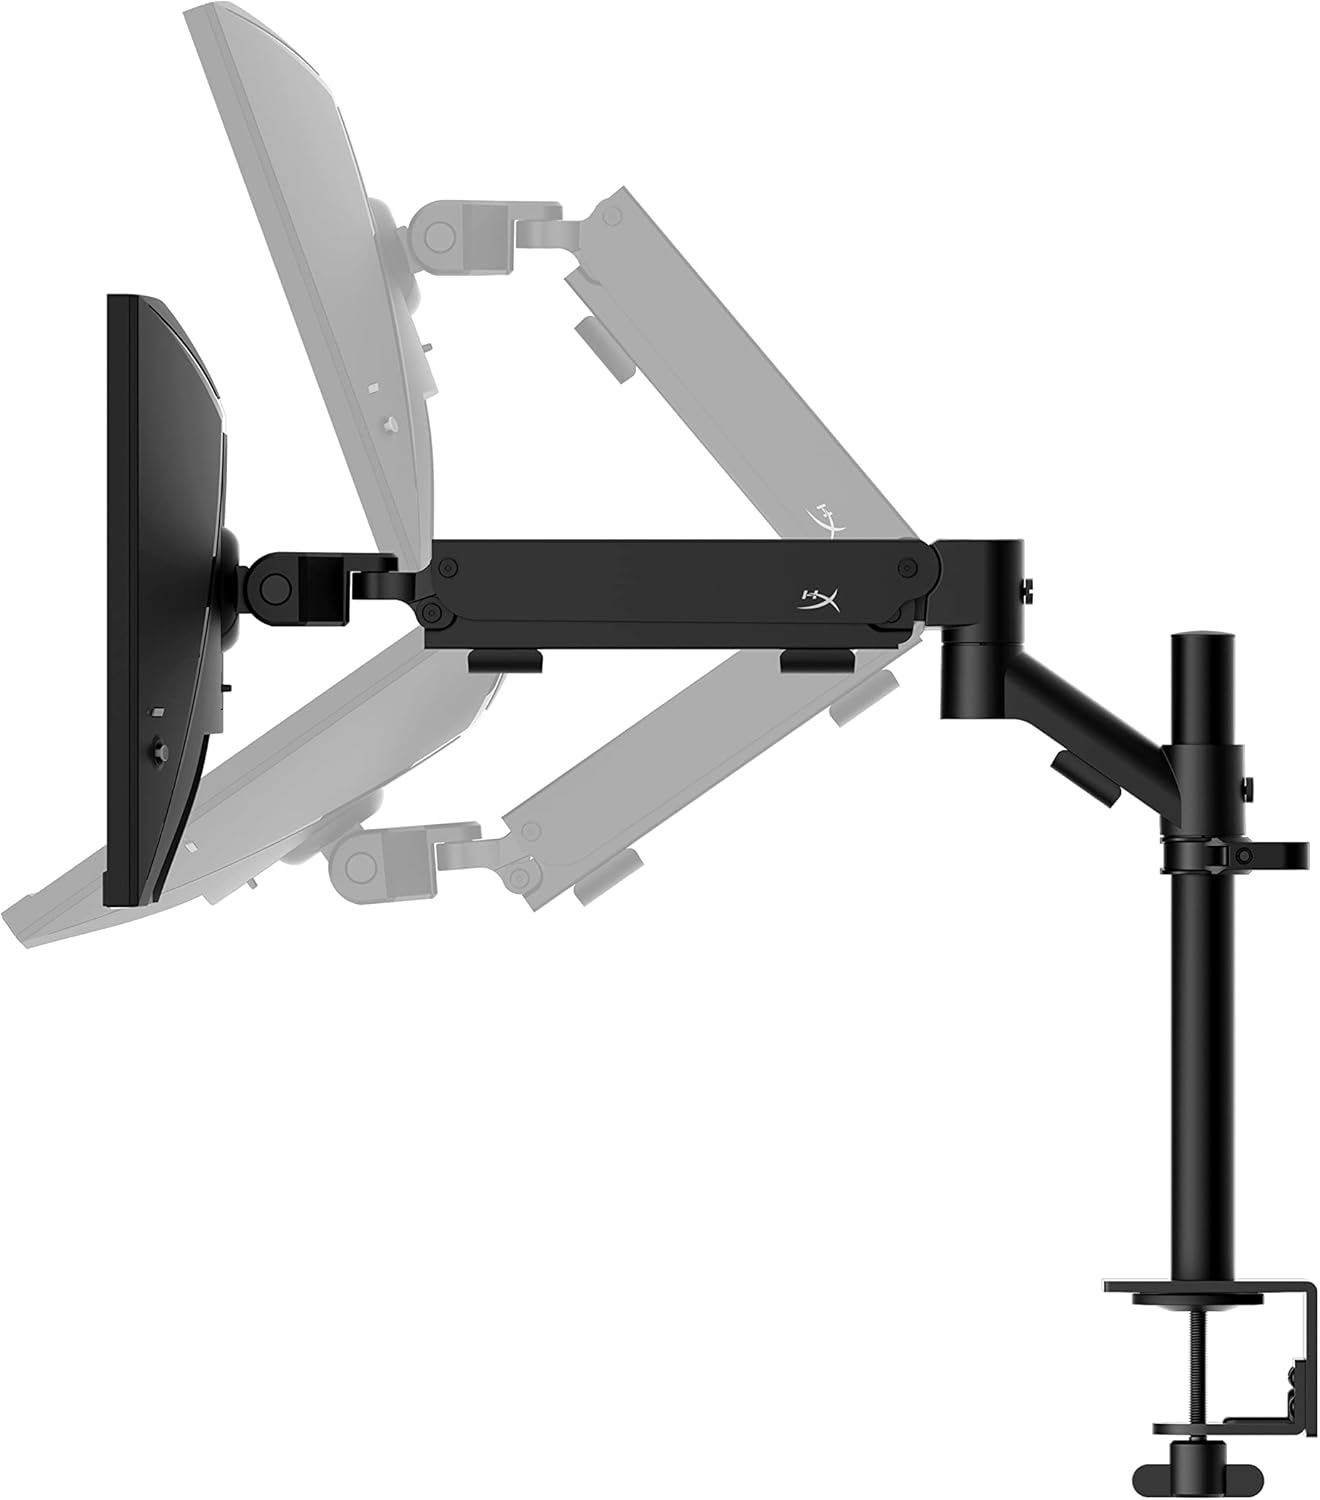
- All-in-One Package: Includes an ergonomic arm and desk mount for easy setup and space-saving.
- High Refresh Rate & Response Time: 240Hz refresh rate and 1ms response time for ultra-smooth gaming.
- Vibrant IPS Panel: 24.5-inch Full HD (1920x1080) IPS panel delivers stunning visuals with accurate colors and wide viewing angles.
- NVIDIA G-SYNC Compatible: Eliminates screen tearing and reduces stuttering for a fluid gaming experience.

Official Product Video:
2. Setup
This section guides you through the initial setup of your HyperX Armada 25 Gaming Monitor, including assembly and connection to your computer.
2.1. Assembling the Desk Mount
The HyperX Armada 25 comes with an integrated ergonomic desk mount. Follow the instructions provided in the separate quick start guide for detailed assembly steps. The monitor head easily snaps into the arm, allowing for quick and secure installation.

2.2. Connecting the Monitor
Connect the monitor to your computer using the appropriate cables. The HyperX Armada 25 supports both HDMI and DisplayPort connections.
- Connect one end of the HDMI or DisplayPort cable to the corresponding port on your computer's graphics card.
- Connect the other end of the cable to an available HDMI 2.0 or DisplayPort 1.4 port on the back of your monitor.
- Connect the power cord to the monitor and then to a power outlet.
- Press the power button on the monitor to turn it on.

3. Operating the Monitor
This section covers basic operation and navigation of the monitor's On-Screen Display (OSD) menu.
3.1. On-Screen Display (OSD) Navigation
The OSD menu is controlled using a joystick located on the back of the monitor. This joystick allows you to power on/off the monitor and navigate through various settings.
- Press the joystick: To open the OSD menu or confirm a selection.
- Move the joystick Up/Down/Left/Right: To navigate through menu options and adjust settings.
- Hold the joystick: To power off the monitor.

3.2. Adjusting Monitor Position
The ergonomic desk mount allows for flexible positioning of your monitor. You can adjust the height, tilt, swivel, and pivot to find your optimal viewing angle.

4. Maintenance
Proper maintenance ensures the longevity and optimal performance of your HyperX Armada 25 Gaming Monitor.
- Cleaning the Screen: Use a soft, lint-free cloth lightly dampened with water or a specialized screen cleaner. Avoid using harsh chemicals, abrasive materials, or direct spraying onto the screen.
- Cleaning the Casing: Wipe the monitor casing with a soft, dry cloth.
- Ventilation: Ensure the monitor's ventilation openings are not blocked to prevent overheating.
- Power Off When Not in Use: Turn off the monitor when not in use for extended periods to save energy and prolong its lifespan.
5. Troubleshooting
If you encounter issues with your monitor, refer to the following common troubleshooting steps.
- No Power:
- Check if the power cable is securely connected to both the monitor and the power outlet.
- Ensure the power outlet is functioning correctly.
- Press the power button on the monitor.
- No Signal:
- Verify that the HDMI or DisplayPort cable is securely connected to both the monitor and your computer.
- Ensure your computer is powered on and not in sleep mode.
- Select the correct input source using the OSD menu.
- Flickering Screen or Image Issues:
- Check the display cable for damage or loose connections.
- Ensure your graphics card drivers are up to date.
- Adjust the refresh rate in your computer's display settings.
- If G-SYNC is enabled, try disabling it temporarily to see if the issue persists.
- Buttons Not Responding (OSD Joystick):
- Ensure the monitor is powered on.
- Try restarting the monitor by unplugging and replugging the power cable.
- Clean around the joystick to ensure no debris is obstructing its movement.
6. Specifications
Detailed technical specifications for the HyperX Armada 25 Gaming Monitor.
| Feature | Detail |
|---|---|
| Product Dimensions | 21.94 x 25.79 x 31.12 inches; 16.98 Pounds |
| Item Model Number | HyperX Armada 25 |
| Date First Available | August 24, 2022 |
| Manufacturer | HP Inc. |
| ASIN | B0B2C1G356 |
| Display Size | 24.5-inch Diagonal |
| Resolution | FHD (1920x1080) |
| Refresh Rate | 240Hz |
| Panel Type | IPS Panel |
| Response Time | 1ms |
| Sync Technology | NVIDIA® G-SYNC® Compatible |
| Included Mount | Desk Mount Included |
| Connectivity | HDMI and Display Port |
7. Warranty and Support
For warranty information, technical support, or to access additional resources, please visit the official HyperX website or contact their customer service.
- Official HyperX Website: www.hyperx.com
- Product Support Page: Refer to the support section on the HyperX website for your specific model.