1. Important Safety Information
Please read and understand all instructions before assembly and use. Failure to follow these instructions may result in serious injury or property damage.
- Snow and Wind Ratings: Check snow capability and wind rating specifications. This gazebo has a Snow Load capacity of 3300 LBS and a Wind Rate of 40 MPH.
- Installation Team: Assembly requires a minimum of 2-4 people. It is recommended that 2-4 people work together to assemble the gazebo, which typically takes 3-5 hours.
- Tools and Protection: Prepare necessary tools such as ladders and gloves for installation.
- Waterproofing: The waterproof performance of the roof system is directly related to the tightness of the installation. Ensure all connections are tight and secure.
- Heat Warning: Due to the dark color of the item and the high heat conductivity of aluminum, the gazebo may heat quickly under direct sunlight and reach high temperatures. This temperature depends directly on sunlight intensity.
- Dimensions: The given dimension of the gazebo describes the measurements from eave edge to eave edge, not from pole to pole. Refer to the specification sheet for detailed dimensions.
- Anchoring: Ensure the four anchoring stands are sturdily anchored into the ground. It is not recommended to permanently anchor this gazebo to a hard surface such as a wood deck or concrete floor without proper anchoring hardware.
- Local Regulations: Consult your local city, municipality, and applicable HOA guidelines before purchasing for guidance on building codes and/or zoning requirements in your area. This structure may require a license.
- Flame Resistance: Keep all flame and heat sources away from the tent fabric. This tent is made with fabric that meets CPAI-84 specification for flame resistance. It is not fireproof. The fabric will burn if left in continuous contact with any flame source. The application of any foreign substance to the tent fabric may render the flame-resistance properties ineffective.
2. Parts List
Before beginning assembly, take all parts out of the boxes and arrange them by serial number. Verify all components are present according to the included packing list.

Image: Overview of various gazebo parts and hardware components.
This image displays the numerous components required for assembly, including various frame pieces, roof panels, and different types of screws and fasteners, each labeled with a letter and quantity for identification.
General Components:
- Frame Components: Posts, beams, and support braces.
- Roof Panels: Galvanized steel panels for the double roof structure.
- Curtains and Netting: Fabric curtains and mosquito netting with zippers.
- Hardware: Various screws (M6x15, ST4.8x12, M5X12, M6X23, M6X50), washers, nuts, and plastic clips (Y, Y1, Z, Z1).
- Accessories: "U" and "J" hooks for hanging lights or fans.
3. Assembly Instructions
Follow these steps carefully for proper assembly. It is highly recommended to have 2-4 people for this process.
3.1. Assemble the Frame
Begin by securing the main posts and connecting the horizontal beams to form the base structure. Ensure all connections are tight and stable.

Image: The main frame of the gazebo, consisting of vertical posts and horizontal beams, partially assembled.
This image illustrates the initial stage of assembly, where the primary support posts and connecting beams are joined to establish the gazebo's foundational structure.
3.2. Assemble the Roof Frame
Construct the roof frame by attaching the upper beams and supports. Pay close attention to the orientation of each piece to ensure correct drainage and stability.

Image: The intricate roof frame of the gazebo, showing the various support beams and connections before the panels are installed.
This image details the skeletal structure of the gazebo's roof, highlighting the robust aluminum framework designed to support the galvanized steel panels.
3.3. Install the Galvanized Panels
Install the galvanized steel roof panels in sequence, ensuring they slide correctly into the grooves and overlap properly to prevent leaks. Secure them with the provided clips and screws.

Image: A close-up view of the galvanized steel double roof, illustrating its layered design for weather protection and ventilation.
This image displays the durable galvanized steel double roof, emphasizing its anti-UV, fire-resistant, anti-corrosion, and weather-proof features, along with smooth drainage capabilities.
3.4. Attach Curtains and Netting
Hang the curtains and netting on the double track system. The curtains provide privacy and UV protection, while the netting offers mosquito protection. Ensure they can slide freely.

Image: The gazebo fully assembled with curtains and netting drawn, providing a private and protected outdoor space.
This image displays the completed gazebo, highlighting the functionality of the fully enclosed zippered double-layer PBV-coated curtains and netting, which offer UV protection and privacy.
Installation Video Guide:
For a detailed visual guide on the assembly process, please refer to the official MELLCOM installation video below.
Video: MELLCOM 12' x 20' Hardtop Gazebo Installation Video.
This video provides a comprehensive step-by-step guide for assembling the MELLCOM Hardtop Gazebo, covering all major components and procedures.
4. Operating Instructions
4.1. Using Curtains and Netting
The gazebo features a double-track system for its curtains and netting. This allows for flexible use:
- Privacy and Sun Protection: Use the solid curtains for privacy or to block direct sunlight. They can be zipped together for full enclosure.
- Insect Protection: Deploy the mosquito netting to keep insects out while maintaining airflow and visibility.
- Combined Use: Both the curtains and netting can be used simultaneously or independently.
- Securing Curtains: When not in use, tie back the curtains and netting to the posts using the provided straps to prevent them from flapping in the wind.
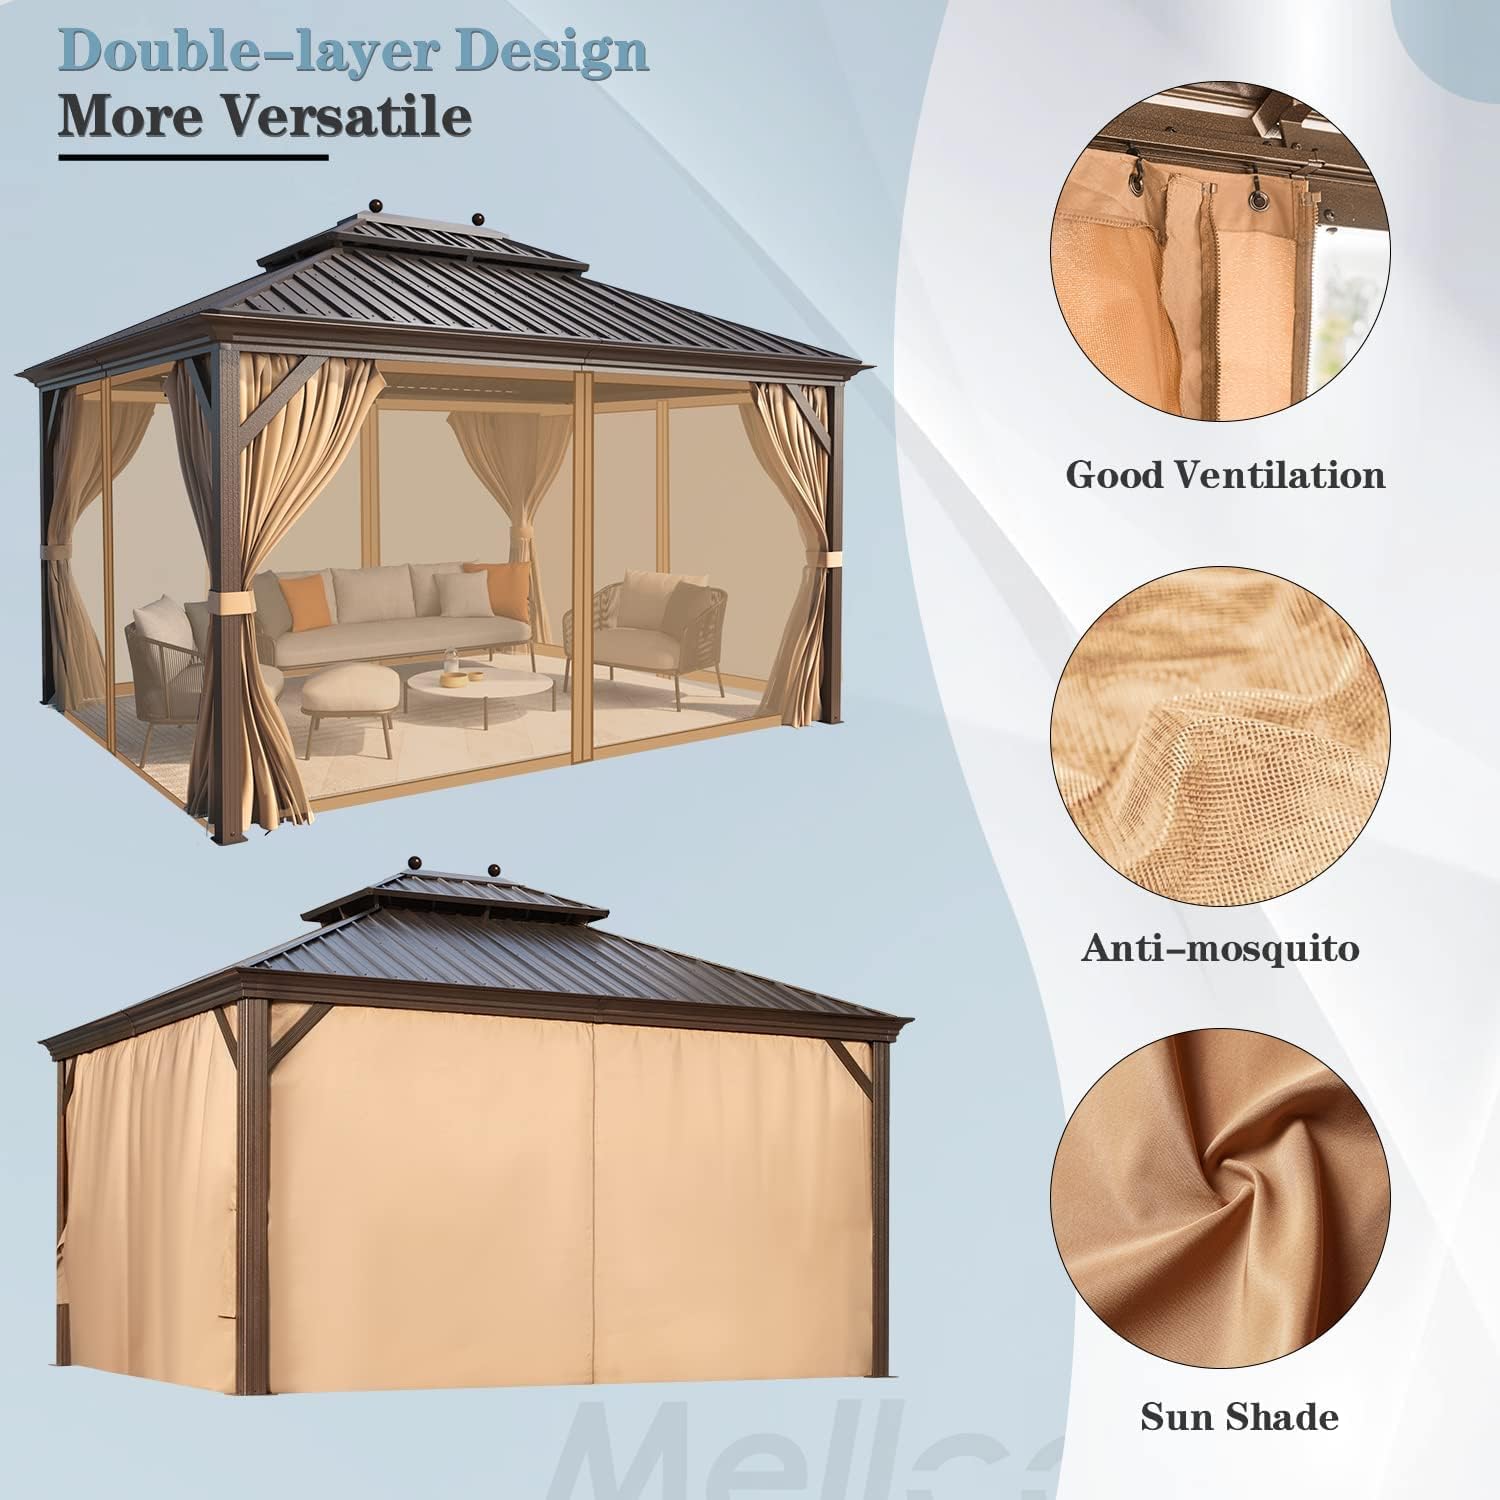
Image: Illustration of the double-layer design for curtains and netting, showing options for ventilation, mosquito protection, and sun shade.
This image highlights the versatility of the gazebo's double-layer design, allowing users to choose between full enclosure for privacy and sun protection, or using only the netting for insect-free ventilation.
4.2. Utilizing Top Hooks
The gazebo is equipped with "U" and "J" hooks on the top roof frame. These hooks can be used to hang various items:
- Lighting: Hang outdoor string lights or lanterns to illuminate your space.
- Fans: Install a lightweight outdoor fan for improved air circulation.
- Decorations: Personalize your gazebo with decorative elements.

Image: Detailed view of the top hooks ("U" and "J" hooks) and the fine mesh of the top nets, indicating user-friendly features.
This image provides a close-up of the integrated "U" and "J" hooks, designed for hanging lights, fans, or other decorations, enhancing the functionality and ambiance of the gazebo.
5. Maintenance
Regular maintenance will extend the life and appearance of your MELLCOM Hardtop Gazebo.
- Cleaning the Roof: Periodically clean the galvanized steel roof panels to remove leaves, debris, and dirt. Use a soft brush or cloth with mild soap and water. Rinse thoroughly.
- Frame Care: Inspect the aluminum frame for any signs of wear or damage. Clean with a damp cloth and mild detergent. Avoid abrasive cleaners.
- Curtains and Netting: The fabric curtains and netting can be spot cleaned with mild soap and water. For deeper cleaning, follow the care instructions on the fabric tags. Ensure they are completely dry before storing or zipping up for extended periods to prevent mildew.
- Hardware Check: Regularly check all bolts, screws, and connections to ensure they remain tight. Tighten any loose hardware to maintain structural integrity.
- Winter Preparation: While the galvanized steel roof is designed to withstand snow, it is advisable to clear heavy snow accumulation to prevent excessive stress on the structure. Store curtains and netting indoors during harsh winter conditions to prolong their lifespan.
6. Troubleshooting
Here are solutions to common issues you might encounter during assembly or use.
| Problem | Possible Cause | Solution |
|---|---|---|
| Roof panels are difficult to install or do not fit. | Incorrect sequence of installation; clips popping off; insufficient bolt length. |
|
| Water seepage from the roof. | Panels not properly overlapped or sealed; loose connections. |
|
| Curtains/netting fly in the wind. | Not properly secured; insufficient weight at bottom. |
|
| Gazebo feels unstable after assembly. | Improper anchoring; loose frame connections. |
|
7. Specifications
| Feature | Detail |
|---|---|
| Brand | MELLCOM |
| Model | 12'x14' Hardtop Gazebo |
| Product Dimensions | 168"L x 144"W x 117.6"H (eave edge to eave edge) |
| Item Weight | 375 Pounds |
| Frame Material | Alloy Steel, Aluminum, Metal (Powder-coated aluminum frames, 4.8"x4.8" triangular) |
| Roof Material | Galvanized Steel Double Roof |
| Water Resistance Level | Waterproof |
| UV Protection | True (Fade-resistant roof, PBV-coated curtains) |
| Snow Load Capacity | 3300 LBS |
| Wind Rate | 40 MPH |
| Curtains & Netting | Fully enclosed zippered removable double-layer PBV-coated curtains and netting |
| Assembly Required | Yes (Recommended 2-4 people, 3-5 hours) |
Product Features Overview:
This video provides a visual overview of the MELLCOM Hardtop Gazebo's key features and benefits.
Video: MELLCOM 12'x20' Hardtop Gazebo, Galvanized Steel Double Roof.
This video highlights the galvanized steel double roof, rustproof aluminum frame, quality curtains and netting, and spacious design of the MELLCOM gazebo.
8. Warranty and Support
MELLCOM is committed to providing high-quality products and customer satisfaction.
- After-Sales Service: We offer excellent after-sales service. If you have any questions or require assistance, please feel free to contact us.
- Protection Plans: Additional protection plans may be available for purchase. Please refer to your retailer for details on available 3-Year Protection Plans or Complete Protect monthly plans.
- Returns: This product typically has a 30-day return policy for refund or replacement. Please check with your retailer for specific return conditions.
For further assistance, please visit the official MELLCOM store or contact customer support through your purchase platform.