RaeSung TM-190
TM-190 Multi-Field EMF Meter User Manual
Model: TM-190 | Brand: RaeSung
1. Introduction
The RaeSung TM-190 is a versatile digital electromagnetic radiation detector designed to measure electromagnetic fields (EMF), electric fields, and radio frequency (RF) strength. This device features a 2.4-inch color TFT LCD display for clear readings and supports multiple languages. It is an essential tool for assessing environmental electromagnetic radiation levels.

Figure 1: The TM-190 Multi-Field EMF Meter in operation, displaying readings for magnetic field, electric field, and RF strength.
2. Key Features
- Multi-Field Measurement: Measures Electromagnetic Field (3-axis), Electric Field, and RF Strength Field.
- High-Resolution Display: Equipped with a 4-digit, 2.4-inch color TFT LCD for clear data visualization.
- Data Hold Function: Allows users to freeze the current reading on the display.
- Multi-Language Support: Supports English, Traditional Chinese, Simplified Chinese, Japanese, and Spanish.
- Audible Alarm: Features a buzzer for key tone alarms.
- Portable Power: Operates on 3x 1.5V AAA alkaline batteries (not included) with approximately 8 hours of battery life.
- External Power Option: Can be powered via USB mini-B (5 pin) connection (DC 4.8 ~ 5.2V; current ≥ 500mA).
3. Package Contents
Upon opening the package, verify that all items are present and in good condition:
- 1 x TM-190 Multi-Field EMF Meter
- User Manual (this document)
- (Optional: Carrying case, as shown in some product images, may be included depending on the specific package.)

Figure 2: Contents of the TM-190 package, including the meter, box, and user manual.
4. Product Overview
4.1 Front Panel
- LCD Display: Shows measurement readings, units, battery status, and menu options.
- Power Button: Turns the device on/off.
- Hold/Menu Button: Toggles data hold function and accesses menu settings.
- Navigation Buttons: Used for menu navigation and selection.
4.2 Rear Panel
- Battery Compartment: Houses 3x AAA batteries.
- Specifications Label: Provides key measurement ranges and power requirements.

Figure 3: Rear view of the TM-190, highlighting the specifications label and battery compartment area.
4.3 Side Panel
- USB Mini-B Port: For external power supply.
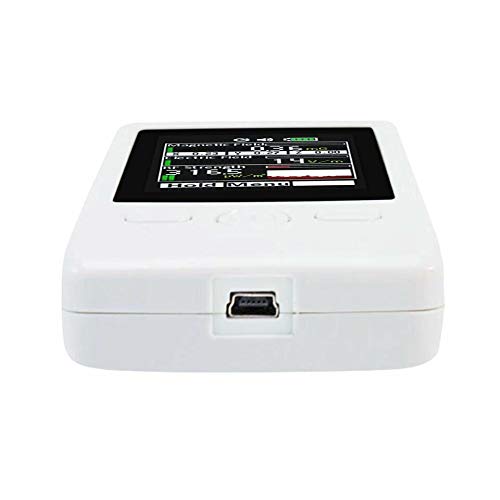
Figure 4: Side view of the TM-190, showing the USB mini-B port for external power.
5. Setup
5.1 Battery Installation
- Locate the battery compartment cover on the rear of the device.
- Slide or lift the cover to open the compartment.
- Insert three (3) 1.5V AAA alkaline batteries, ensuring correct polarity (+/-) as indicated inside the compartment.
- Replace the battery compartment cover securely.

Figure 5: The open battery compartment of the TM-190, showing the slots for three AAA batteries.
5.2 Powering On/Off
- To Power On: Press and hold the Power button until the display illuminates.
- To Power Off: Press and hold the Power button until the display turns off.
5.3 External Power Supply
The TM-190 can also be powered by an external USB mini-B (5 pin) power supply. Connect a compatible USB cable to the device's USB port and to a power source (voltage DC 4.8 ~ 5.2V; current ≥ 500mA). This is useful for extended operation without relying on batteries.
5.4 Language Selection
Upon first use or after a reset, you may be prompted to select a language. Navigate through the options (English, Traditional Chinese, Simplified Chinese, Japanese, Spanish) using the navigation buttons and confirm your selection. This setting can typically be changed later via the menu.
6. Operating Instructions
6.1 Understanding the Display
The 2.4-inch color TFT LCD displays real-time readings for all three measurement types simultaneously:
- Magnetic Field: Displays readings in mG (milligauss) or µT (microtesla) with X, Y, Z axis components.
- Electric Field: Displays readings in V/m (Volts per meter).
- RF Strength: Displays readings in µW/m², µA/m, mV/m, or µW/cm².
- Battery Indicator: Shows current battery level.
- Hold Indicator: Appears when Data Hold function is active.
6.2 Taking Measurements
Once powered on, the TM-190 automatically begins measuring and displaying the current levels of electromagnetic, electric, and RF fields. Position the meter in the area you wish to measure. For accurate readings, avoid direct contact with the meter and any potential sources of interference.
6.3 Data Hold Function
To freeze the current readings on the display:
- While the meter is active, press the Hold/Menu button.
- The "HOLD" indicator will appear on the screen, and the readings will stop updating.
- To resume real-time measurements, press the Hold/Menu button again.
6.4 Menu Navigation
Access the menu by pressing and holding the Hold/Menu button (or a dedicated Menu button if present). Use the navigation buttons to scroll through options such as language settings, unit selection, alarm thresholds, and calibration (if applicable). Refer to the on-screen prompts for specific menu functions.
7. Specifications
| Category | Parameter | Value |
|---|---|---|
| Display | Type | 4 digits, 2.4 inches color TFT LCD |
| Sample Rate | 6 seconds per time | |
| Language Options | English, Traditional Chinese, Simplified Chinese, Japanese, Spanish | |
| Electromagnetic Field | Sensor Type | Low Frequency, Magnetic Fields, Triple axis (X, Y, Z) |
| Range | 0.02~2000mG, 0.02 to 200µT | |
| Resolution | 0.01/0.1/1 mG or 0.01/0.1/1 µT | |
| Frequency & Accuracy | 50/60 Hz, ±(15%+100dgt) | |
| Electric Field | Sensor Type | LF Electric Fields |
| Range | 50V/m to 2000V/m | |
| Resolution | 1 V/m | |
| Frequency & Accuracy | 50/60Hz, ±(7%+50dgt) | |
| RF Strength Field | Sensor Type | RF Strength |
| Range | 0.02µW/m² ~ 554mW/m² | |
| Resolution | 0.01µW/m², 0.1µA/m, 0.1mV/m, 0.001µW/cm², 1dB | |
| Frequency & Accuracy | 50MHz to 3.5GHz, ± 2dB at 2.45GHz | |
| General | Power Supply | 3x 1.5V AAA alkaline battery (NOT Included) |
| Battery Life | Approximate 8 hours | |
| External Power | USB mini-B (5 pin), DC 4.8 ~ 5.2V; current ≥ 500mA | |
| Operating Conditions | 5°C to 40°C, below 80% RH | |
| Storage Conditions | -10°C to 60°C, below 70% RH | |
| Dimensions | Size (L x W x H) | 115(L) x 60(W) x 21(H) mm |
8. Maintenance
8.1 Battery Replacement
When the battery indicator shows low power, replace the batteries promptly to ensure accurate readings and continuous operation. Follow the battery installation steps in Section 5.1.
8.2 Cleaning
To clean the device, use a soft, dry cloth. Do not use abrasive cleaners, solvents, or immerse the device in water. Ensure the device is powered off before cleaning.
8.3 Storage
When not in use for extended periods, remove the batteries to prevent leakage. Store the TM-190 in a cool, dry place, away from direct sunlight and extreme temperatures, within the specified storage conditions (-10°C to 60°C, below 70% RH).
9. Troubleshooting
- Device does not power on:
- Check if batteries are installed correctly with proper polarity.
- Replace with fresh AAA alkaline batteries.
- Ensure the power button is pressed and held sufficiently.
- Try powering via the USB mini-B port with a compatible power supply.
- Readings are erratic or unstable:
- Ensure the device is not near strong magnetic fields or large metal objects that could interfere with readings.
- Check battery level; low batteries can affect performance.
- Ensure the environment is within specified operating temperature and humidity ranges.
- Display is blank or frozen:
- If "HOLD" is displayed, press the Hold/Menu button to release data hold.
- Power off the device and restart it.
- Replace batteries.
10. Safety Information
- Do not attempt to open or modify the device. Unauthorized modifications can void the warranty and pose safety risks.
- Keep the device away from water and excessive moisture.
- Avoid dropping the device or subjecting it to severe impacts.
- Dispose of batteries according to local regulations. Do not dispose of batteries in fire.
- This device is for measurement purposes only and should not be used as a substitute for professional safety assessments or medical advice.
11. Warranty and Support
RaeSung products are manufactured to high-quality standards. For information regarding warranty coverage, technical support, or service, please refer to the contact information provided with your purchase or visit the official RaeSung website. Please retain your purchase receipt as proof of purchase for warranty claims.
Manufacturer: RaeSung
First Available Date: December 20, 2021