1. Introduction
This manual provides essential information for the safe and efficient operation of your AUTOOMMO 12 Volt Portable Refrigerator. Please read these instructions thoroughly before use and retain them for future reference.

Figure 1: AUTOOMMO 12 Volt Portable Refrigerator (44 Quarts)
The image displays the AUTOOMMO 12 Volt Portable Refrigerator with its lid open, revealing various beverages and fruits stored inside. The refrigerator is grey and black, with the AUTOOMMO logo visible on the front. Fresh fruits are also arranged around the base of the unit.
2. Safety Instructions
To ensure safe operation and prevent damage, observe the following precautions:
- Do not operate the appliance if it is visibly damaged.
- Ensure the power supply voltage matches the specifications of the refrigerator.
- Do not immerse the refrigerator in water or expose it to heavy rain.
- Keep ventilation openings clear of obstructions.
- Do not use electrical devices inside the refrigerator unless they are recommended by the manufacturer.
- Avoid touching exposed cables or plugs with wet hands.
- Unplug the refrigerator before cleaning or maintenance.
- Allow the refrigerator to stand upright for at least 24 hours after transport before plugging it in, especially if it was not transported upright. This allows the compressor oil to settle.
3. Package Contents
Verify that all items are present in the package:
- AUTOOMMO 12 Volt Portable Refrigerator
- 12/24V DC Power Cable (for car/RV use)
- 100/240V AC Adapter (for home use)
- User Manual (this document)
4. Setup
Follow these steps for initial setup:
- Unpacking: Carefully remove the refrigerator from its packaging.
- Positioning: Place the refrigerator on a stable, level surface. Ensure adequate ventilation around the unit.
- Initial Standby: If the refrigerator was not transported upright, allow it to stand in an upright position for at least 24 hours before connecting to power. This allows the compressor fluids to settle.
- Power Connection:
- For vehicle use (12V/24V DC): Connect the DC power cable to the refrigerator's DC input port and then to your vehicle's cigarette lighter socket.
- For home use (100V/240V AC): Connect the AC adapter to the refrigerator's AC input port, then plug the adapter into a standard wall outlet.

Figure 2: Power Supply Options
This image illustrates the three primary methods for powering the AUTOOMMO portable refrigerator: via a 12/24V DC cable for car or RV use, a 110-240V AC adapter for home outlets, and compatibility with a solar power station for off-grid use. A car battery protection icon is also shown, indicating three battery protection modes.
5. Operating Instructions
5.1 Control Panel Overview
The control panel features a digital display and buttons for temperature adjustment and mode selection.
5.2 Temperature Control
The refrigerator features a dual-zone design, allowing for both freezing and refrigeration. The LED screen controls the temperature of the freezer zone.
- Freezer Zone: Temperature range from -4°F (-20°C) to 50°F (10°C).
- Refrigeration Zone: Temperature range from 46°F (8°C) to 50°F (10°C). This zone's temperature is dependent on the freezer zone setting.
Use the UP and DOWN buttons on the control panel to set the desired temperature for the freezer zone.
5.3 Operating Modes
The unit offers two operating modes:
- HH Mode (Rapid Freezing): This mode provides maximum cooling power for quick temperature reduction. Ideal for rapidly chilling items or freezing. The unit can reach 32°F (0°C) from 58°F (14°C) in approximately 15 minutes.
- ECO Mode (Energy Saving): This mode optimizes power consumption for extended operation, consuming less than 1 KWH per day. Suitable for maintaining temperatures once desired cooling is achieved.
Press the SET button to toggle between HH and ECO modes.

Figure 3: Dual Zone and Operating Modes
This diagram illustrates the dual-zone design of the refrigerator, showing a larger freezer compartment with meat and a smaller refrigeration zone with fruits. Recommended temperatures for various items (fruit/vegetable, drink, ice cream, meat) are listed. It also compares power consumption: ECO Mode (Energy Saving) at 45W, consuming less than 1 KWH per day, and MAX Mode (Fast Cooling) at 62W.
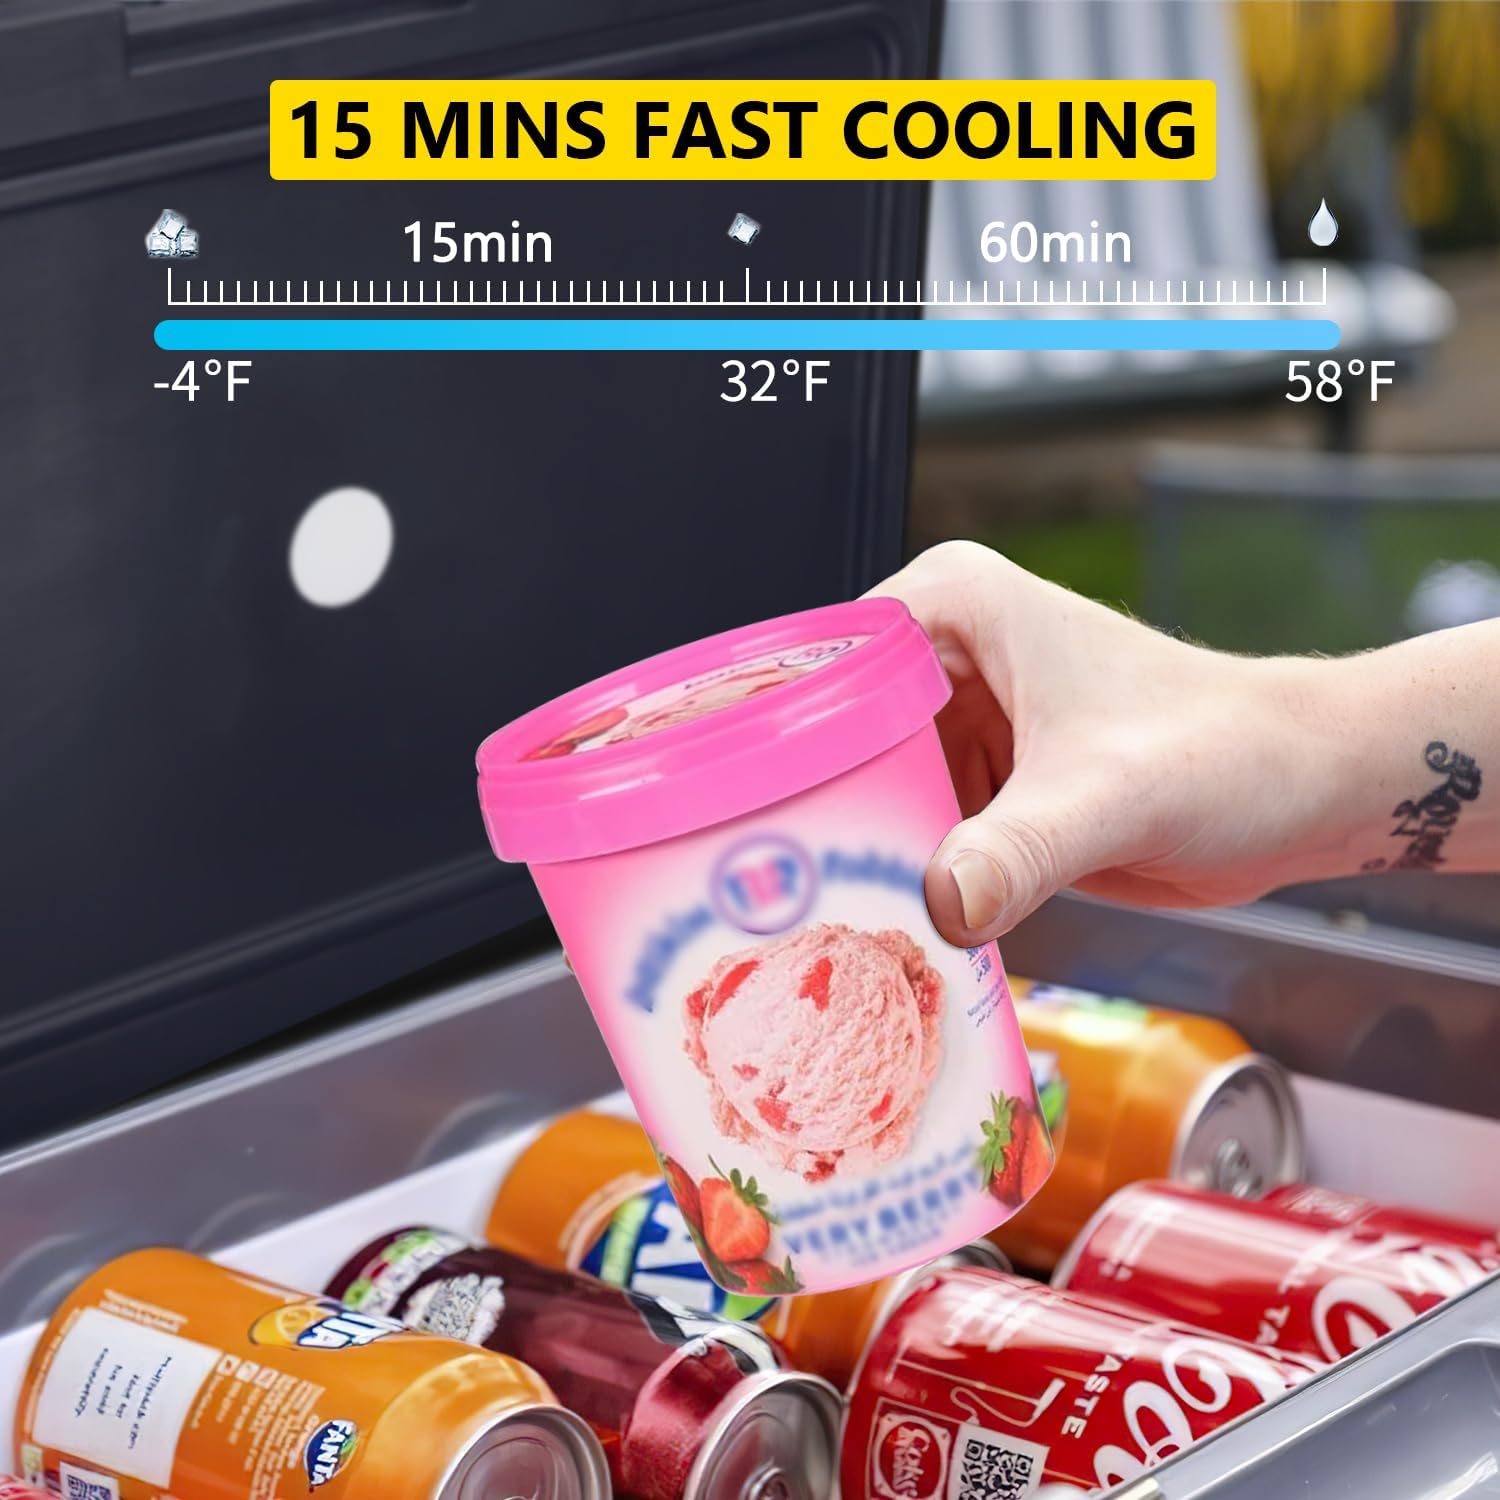
Figure 4: Rapid Cooling Performance
This image shows a timeline demonstrating the rapid cooling capability of the refrigerator. It indicates that the temperature can drop from 58°F to 32°F in 15 minutes, and further to -4°F in 60 minutes. A hand is shown placing a container of ice cream into the refrigerator, which contains several cans.
5.4 Car Battery Protection Modes
The refrigerator includes three car battery protection modes to prevent draining your vehicle's battery. These modes automatically cut off power to the refrigerator if the battery voltage drops below a certain level. Refer to the control panel or specific product documentation for details on how to select or adjust these modes (typically H, M, L for High, Medium, Low protection levels).
5.5 Additional Features
- Low Noise Operation: The unit operates at approximately 30dB, ensuring a quiet environment.
- Anti-Shaking Design: Designed to withstand vibrations and maintain stability, even on uneven terrain (up to 45° incline).
- Built-in LED Light: An internal LED light illuminates the compartment for easy access in low-light conditions.
- Portable Handles: Equipped with two sturdy handles for convenient transport.

Figure 5: Enhanced Features
This composite image highlights four key features: "45° ANTI-SHAKING" with a vehicle on an incline, "2 HANDLES" showing the ergonomic handles on the refrigerator, "≤30DB LOW NOISE" with a sleeping child, and "BUILT-IN LED LIGHT" showing the refrigerator in a camping setting with its internal light on.
6. Maintenance
6.1 Cleaning
- Always unplug the refrigerator before cleaning.
- Clean the interior and exterior with a damp cloth and mild detergent. Do not use abrasive cleaners or solvents.
- Ensure the interior is completely dry before reconnecting power or storing items.
- Regularly clean the ventilation grilles to ensure proper airflow.
6.2 Storage
When storing the refrigerator for an extended period:
- Empty all contents and clean the interior thoroughly.
- Leave the lid slightly ajar to prevent odors and mold growth.
- Store in a dry, well-ventilated area, away from direct sunlight and extreme temperatures.
7. Troubleshooting
Before contacting customer support, refer to the following common issues and solutions:
| Problem | Possible Cause | Solution |
|---|---|---|
| Refrigerator not turning on. | No power supply; loose connection; blown fuse in vehicle; low battery voltage (car battery protection activated). | Check power cable connections; ensure power source is active; check vehicle fuse; recharge vehicle battery or adjust battery protection mode. |
| Refrigerator not cooling sufficiently. | Lid not closed properly; insufficient ventilation; ambient temperature too high; ECO mode selected; too many items inside. | Ensure lid is sealed; clear ventilation openings; move to a cooler environment if possible; switch to HH mode; do not overfill. |
| Unusual noise from the unit. | Unit not level; items inside rattling; normal compressor operation. | Ensure unit is on a level surface; secure items inside; some compressor noise is normal. |
| Water accumulation inside. | Condensation; lid frequently opened; high humidity. | This is normal condensation; wipe dry as needed. Minimize lid opening. |
8. Specifications
| Feature | Specification |
|---|---|
| Brand | AUTOOMMO |
| Model Number | AT011 |
| Capacity | 44 Quarts (approx. 41.6 Liters) |
| Product Dimensions (L x W x H) | 56.9 x 43.69 x 37.08 cm (22.4 x 17.2 x 14.6 inches) |
| Weight | 14.97 kg (33 lbs) |
| Voltage | 12V/24V DC, 100V/240V AC |
| Freezer Zone Temperature Range | -4°F to 50°F (-20°C to 10°C) |
| Refrigeration Zone Temperature Range | 46°F to 50°F (8°C to 10°C) |
| Noise Level | ≤30dB |
| Configuration | Internal Freezer (Dual Zone) |
| Defrost System | Manual |
| Color | Grey |

Figure 6: Capacity and Dimensions
This image provides a visual representation of the 44-quart capacity of the refrigerator, along with its external dimensions: 22.4 inches (L), 14.6 inches (W), and 17.2 inches (H). It also shows examples of items it can hold, such as 60 cans of 330ml cola, 15 bottles of 550ml water, or 12 bottles of 750ml red wine.
9. Warranty and Support
For warranty information or technical support, please contact AUTOOMMO customer service. Refer to the product packaging or the official AUTOOMMO website for contact details.


