1. Introduction
This manual provides detailed instructions for the installation, operation, and maintenance of your Showasaki 10.1-inch Double Din Android Car Stereo. Please read this manual thoroughly before using the product to ensure proper function and safety.
The Showasaki 10.1-inch Double Din Android Car Stereo is a universal replacement head unit featuring a rotatable touchscreen, Android 10.1 operating system, CarPlay, Android Auto, Bluetooth 5.0, GPS navigation, and multimedia playback capabilities. It is designed to enhance your in-car entertainment and connectivity experience.
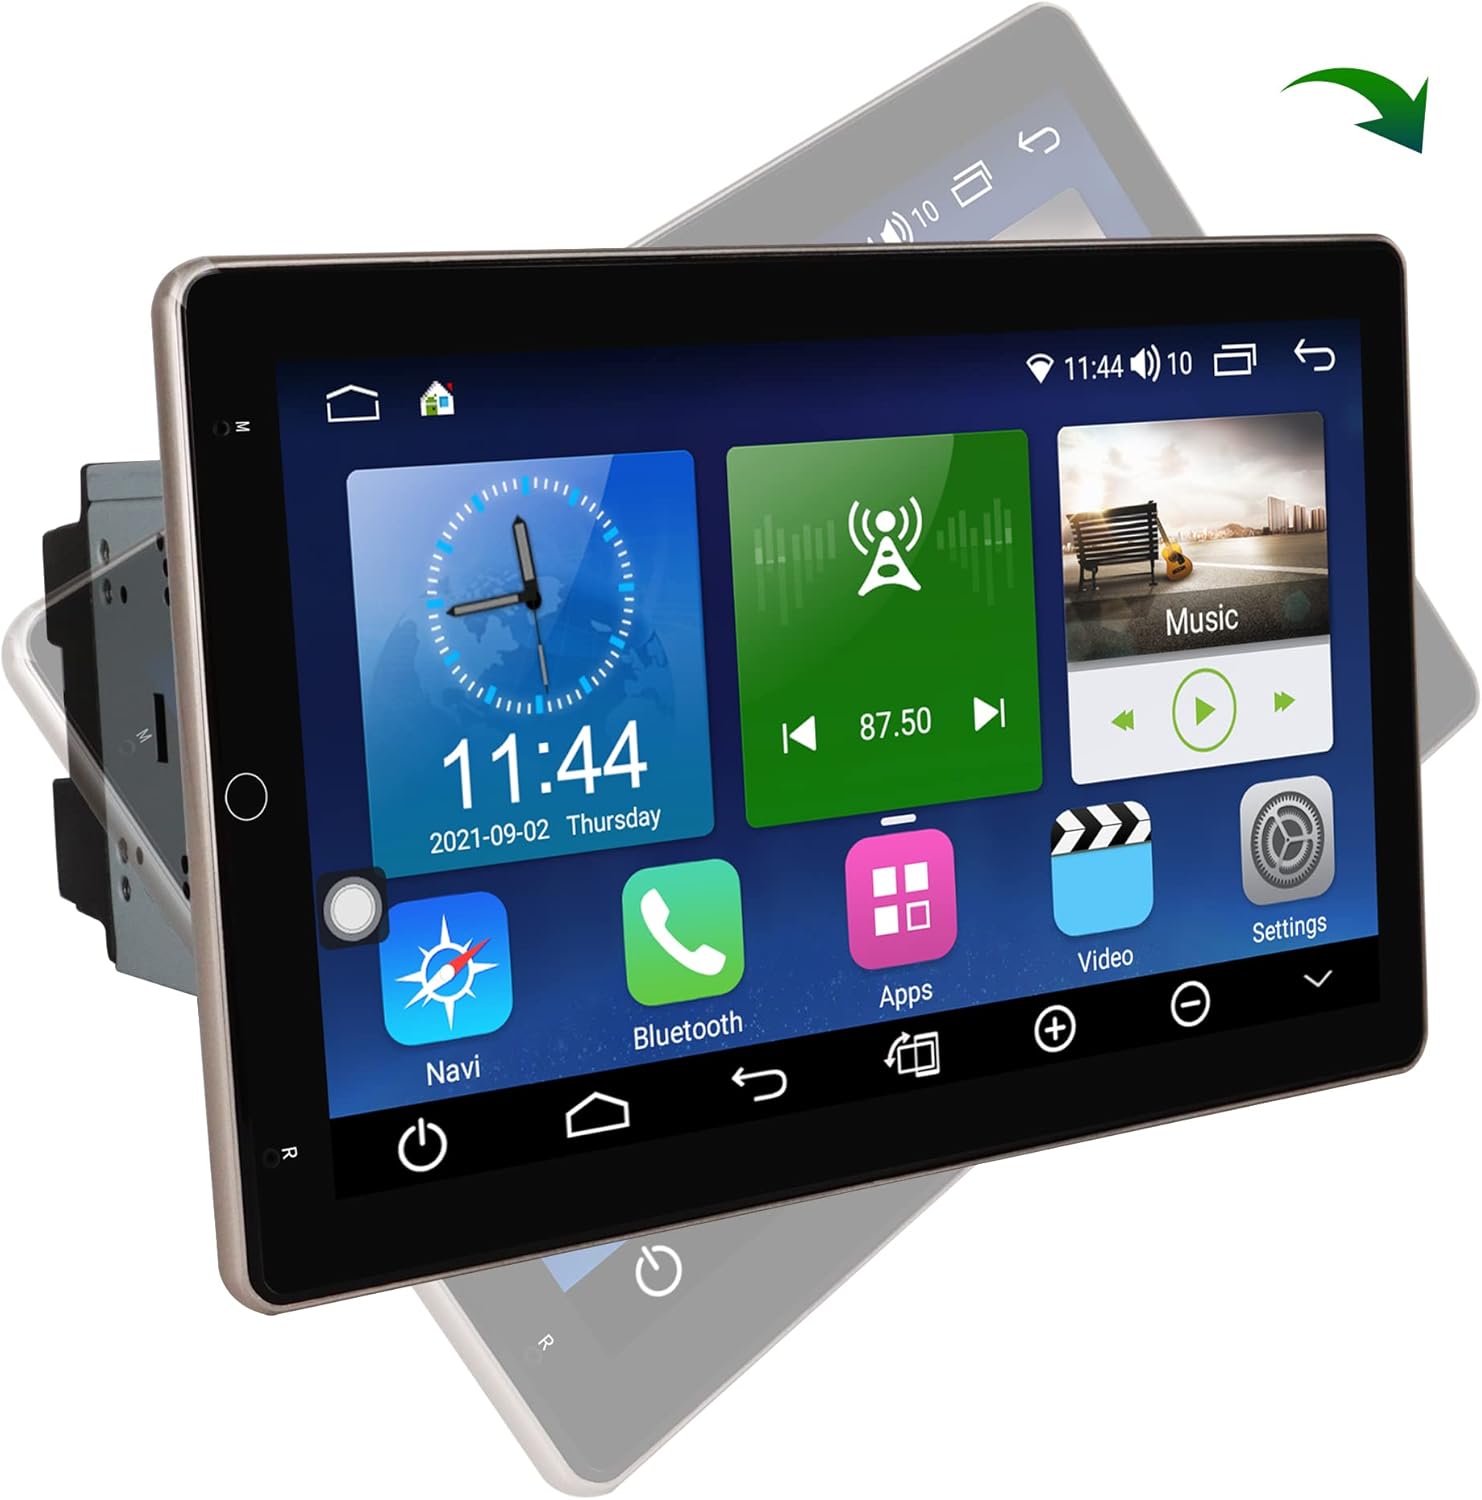
Image 1.1: The Showasaki 10.1-inch Double Din Android Car Stereo displaying its main interface.
2. Setup and Installation
2.1. Pre-Installation Check
Before beginning installation, verify the dimensions of your car's center console to ensure compatibility with the stereo unit. The standard 2 Din universal size is 178mm x 100mm. The 10.1-inch screen is designed to fit this standard.

Image 2.1: Diagram illustrating the dimensions of the stereo unit (178mm x 100mm) and an example of how it fits into a car's dashboard.
2.2. Package Contents
Ensure all components are present in the package:
- Android System 10.1 Inch Double Din Universal Rotatable Car Radio Replacement Unit
- Camera Input Cable
- Rear/RCA Output Cable
- Power Cable
- AV Output Cable
- 6P USB Cable
- 4P USB Cable
- GPS Antenna
- External Microphone

Image 2.2: All cables and accessories included with the Showasaki car stereo, laid out for identification.
2.3. Wiring and Connections
Connect the provided cables to their respective ports on the head unit and your vehicle's wiring harness. Refer to your vehicle's specific wiring diagram for accurate connections. Key connections include:
- Power Cable: Connect to vehicle's power, ground, and accessory wires.
- Speaker Wires: Connect to vehicle's speaker outputs.
- GPS Antenna: Mount in a location with a clear view of the sky for optimal signal reception.
- USB Cables: For connecting external devices or for wired CarPlay/Android Auto.
- Camera Input: For connecting a rearview camera (not included).
- External Microphone: For improved call quality.
Caution: Incorrect wiring can damage the unit or your vehicle's electrical system. If you are unsure, consult a professional installer.
3. Operating Instructions
3.1. Power On/Off and Basic Interface
Once installed, turn on your vehicle's ignition to power the unit. The system will boot up to the Android home screen. Navigate through applications using the capacitive touchscreen.
3.2. Rotatable Touchscreen
The 10.1-inch screen features a 90° rotation capability. Use the dedicated button on the unit to adjust the screen's orientation between vertical and horizontal viewing angles according to your preference.

Image 3.1: Illustration of the screen's 90-degree rotation capability, allowing for both horizontal and vertical display modes.
3.3. Android 10.1 Operating System
The unit runs on Android 10.1 with an A55 8-core processor, 4GB RAM, and 64GB ROM. This allows for smooth operation and the ability to download applications from the Google Play Store. The split-screen function enables multitasking.

Image 3.2: Visual summary of the stereo's core features including Android 10.0, Octa Core processor, 4GB RAM, 64GB ROM, GPS, WiFi, Bluetooth 5.0, FM/AM, 10.1" HD Screen, CarPlay, Android Auto, and Steering Wheel Control.
3.4. CarPlay and Android Auto
This head unit supports both Apple CarPlay and Android Auto for seamless smartphone integration.
- Wireless and Wired CarPlay: Connect your iPhone wirelessly or via a USB cable to access navigation, music, messages, and more directly on the stereo screen.
- Wired Android Auto: Connect your Android phone via a USB cable to use Google Maps, Spotify, and other compatible apps.

Image 3.3: The stereo displaying CarPlay and Android Auto interfaces, showing wireless CarPlay and wired Android Auto connections.

Image 3.4: Icons representing CarPlay and Android Auto features.
3.5. Bluetooth 5.0 Connection
Pair your smartphone via Bluetooth 5.0 for hands-free calling, Bluetooth music streaming, and syncing your phonebook. This feature is designed to minimize distractions while driving.

Image 3.5: The stereo displaying a phone dialer interface, demonstrating Bluetooth 5.0 for hands-free calls and music, emphasizing safe driving.

Image 3.6: Icon representing Bluetooth 5.0 connectivity.
3.6. GPS Navigation
The unit includes GPS navigation with worldwide map support. Utilize pre-installed navigation apps or download your preferred navigation software from the Google Play Store.

Image 3.7: Icon representing GPS Navigation functionality.
3.7. Steering Wheel Control (SWC)
The stereo supports factory steering wheel controls, allowing you to easily switch songs, change radio channels, and adjust volume without taking your hands off the wheel. This enhances safety and convenience.

Image 3.8: Icon representing Steering Wheel Control feature.
3.8. Multimedia Playback and Radio
Enjoy various multimedia formats and listen to AM/FM radio stations. The unit's Android system allows for diverse entertainment options.

Image 3.9: Icon representing AM/FM Radio functionality.
3.9. Wi-Fi and 4G Module
Connect to Wi-Fi networks or insert a 4G SIM card (if supported by the specific model) for internet access, enabling online navigation, app downloads, and streaming services.

Image 3.10: Icon representing WiFi and 4G Module connectivity.
3.10. Voice Control
Utilize voice commands for various functions, such as playing music, making calls, or navigating, to maintain focus on the road.

Image 3.11: Icon representing Voice Control functionality.
4. Maintenance
4.1. Cleaning the Screen
Use a soft, lint-free cloth to gently wipe the touchscreen. For stubborn smudges, slightly dampen the cloth with water or a screen-cleaning solution. Avoid harsh chemicals or abrasive materials.
4.2. Software Updates
Periodically check for software updates to ensure optimal performance and access to the latest features. Updates can typically be found in the system settings menu or on the manufacturer's website.
4.3. General Care
Avoid exposing the unit to extreme temperatures, direct sunlight for prolonged periods, or excessive moisture. Ensure proper ventilation around the unit to prevent overheating.
5. Troubleshooting
5.1. No Power
- Check all power connections and ensure they are securely fastened.
- Verify the vehicle's fuse for the stereo is intact.
- Ensure the vehicle's ignition is on.
5.2. No Sound
- Check speaker wire connections.
- Ensure the volume is not muted or set too low.
- Verify audio output settings in the system menu.
5.3. GPS Signal Issues
- Ensure the GPS antenna is properly connected and mounted in a location with a clear view of the sky.
- Move the vehicle to an open area away from tall buildings or dense foliage.
5.4. Bluetooth Connectivity Problems
- Ensure Bluetooth is enabled on both the stereo and your smartphone.
- Delete previous pairings and attempt to re-pair the devices.
- Restart both the stereo and your smartphone.
5.5. Touchscreen Unresponsive
- Restart the unit.
- Ensure the screen is clean and free of debris.
6. Specifications
| Feature | Specification |
|---|---|
| Display Size | 10.1 Inches |
| Operating System | Android 10.1 |
| Processor | A55 8 Core Processor |
| RAM | 4GB |
| ROM | 64GB |
| Screen Type | Capacitive Rotatable Touch Screen |
| Bluetooth Version | 5.0 |
| Connectivity Technology | Bluetooth, USB, Wi-Fi |
| Car Integration | Wireless/Wired CarPlay, Wired Android Auto |
| Map Type | Worldwide |
| Audio Output Mode | Stereo |
| Item Weight | 5.15 pounds |
| Package Dimensions | 11.14 x 10.67 x 7.17 inches |
7. Warranty Information
The Showasaki 10.1-inch Double Din Android Car Stereo comes with a 1-Year Warranty from the date of purchase. This warranty covers manufacturing defects and malfunctions under normal use. Please retain your proof of purchase for warranty claims.
The warranty does not cover damage caused by improper installation, misuse, accidents, unauthorized repairs, or normal wear and tear.
8. Support
For technical assistance, troubleshooting not covered in this manual, or warranty inquiries, please contact Showasaki customer support through the retailer where the product was purchased or refer to the official Showasaki website for contact information.