Introduction
This manual provides essential information for the safe and efficient installation, operation, and maintenance of your Nordlux Spot Link Rondie 2110649903 High-Voltage Track System Light. Please read this manual thoroughly before installation and keep it for future reference.
The Nordlux Spot Link Rondie is a high-voltage track system light designed for versatile illumination in various indoor environments. It utilizes a GU10 bulb and is part of the Nordlux Link system, allowing for flexible lighting configurations.
Safety Instructions
- Always disconnect power before installation, maintenance, or bulb replacement.
- Installation must be performed by a qualified electrician in accordance with local wiring regulations.
- Do not exceed the maximum wattage specified for the GU10 bulb (21W).
- Ensure the product is securely mounted to the track system.
- This product is designed for indoor use only.
- Do not cover the luminaire with insulating material.
- Avoid direct eye exposure to the light source when illuminated.
Package Contents
Verify that all components are present before beginning installation:
- 1 x Nordlux Spot Link Rondie 2110649903 Light Fixture
- 1 x GU10 Lamp Holder (bulb not included)
- Installation Guide (this manual)
Setup and Installation
Follow these steps for proper installation of the Nordlux Spot Link Rondie light fixture onto your high-voltage track system.
- Prepare the Track System: Ensure the high-voltage track system is properly installed and secured to the ceiling or wall according to its own installation instructions. Verify that the power to the track system is turned OFF at the main circuit breaker.
- Insert the Light Fixture: Align the connector of the Spot Link Rondie fixture with the track. Push the fixture firmly into the track until it clicks into place. Ensure the electrical contacts are properly engaged.
- Secure the Fixture: Some track systems may have a locking mechanism. If applicable, engage the locking mechanism to secure the fixture firmly in its position on the track.
- Install the GU10 Bulb: Gently insert a GU10 bulb (max 21W) into the lamp holder of the Spot Link Rondie fixture. Twist the bulb clockwise until it is securely seated.
- Adjust Position: The Spot Link Rondie can be slid along the track to adjust its position. Once in the desired location, ensure it is securely fastened.
- Restore Power: Once all fixtures are installed and secured, restore power to the track system from the main circuit breaker.

Image: The Nordlux Spot Link Rondie light fixture, a black cylindrical pendant, attached to a black track system. This illustrates how the light connects to the track.
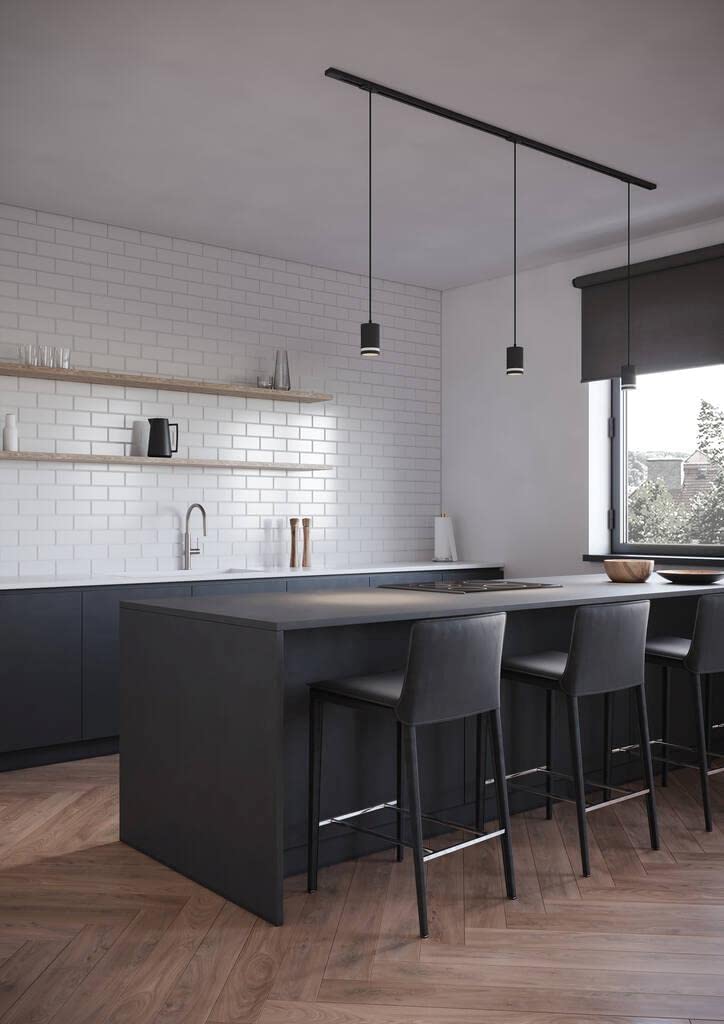
Image: Multiple Nordlux Spot Link Rondie lights installed on a black track system above a kitchen island. This demonstrates a typical application of the product in a home setting.
Operating Instructions
The Nordlux Spot Link Rondie is operated via the main power switch connected to your track system. There are no individual controls on the fixture itself.
- Turning On/Off: Use the wall switch or circuit breaker connected to your track system to turn the lights on or off.
- Adjusting Position: To adjust the position of the light along the track, gently slide the fixture to the desired location. Ensure it remains securely seated in the track.
- Directional Lighting: The cylindrical light head can be slightly pivoted to direct the light beam as needed.
Maintenance
Regular maintenance ensures the longevity and optimal performance of your Nordlux Spot Link Rondie light fixture.
- Cleaning: Disconnect power before cleaning. Wipe the fixture with a soft, dry cloth. Do not use abrasive cleaners, solvents, or liquids directly on the fixture.
- Bulb Replacement:
- Turn off power to the track system at the main circuit breaker.
- Allow the bulb to cool completely if it was recently in use.
- Gently twist the old GU10 bulb counter-clockwise and pull it out.
- Insert a new GU10 bulb (max 21W) by aligning the pins and twisting clockwise until secure.
- Restore power.
- Inspection: Periodically inspect the fixture and track connections for any signs of wear, damage, or loose connections. If any issues are found, disconnect power and consult a qualified electrician.
Troubleshooting
If you encounter issues with your Nordlux Spot Link Rondie, refer to the following common problems and solutions:
| Problem | Possible Cause | Solution |
|---|---|---|
| Light does not turn on. | No power to the track system. Bulb is faulty or not installed correctly. Fixture not properly connected to the track. | Check the main circuit breaker and wall switch. Replace the bulb or ensure it is twisted in securely. Ensure the fixture is fully inserted and locked into the track. |
| Light flickers. | Loose bulb connection. Incompatible dimmer switch (if applicable). Faulty bulb. | Ensure the bulb is securely twisted in. Verify dimmer compatibility with GU10 LED bulbs (if using LED). Replace the bulb. |
| Fixture feels loose on the track. | Locking mechanism not engaged. Improper installation. | Engage the locking mechanism if available. Remove and re-insert the fixture, ensuring it clicks into place. |
If the problem persists after attempting these solutions, please contact Nordlux customer support or a qualified electrician.
Specifications
| Feature | Detail |
|---|---|
| Model Number | 2110649903 |
| Brand | Nordlux |
| Product Type | High-Voltage Track System Light |
| Bulb Type | GU10 (bulb not included) |
| Max Wattage | 21W |
| Material | Plastic |
| Dimensions (L x W x H) | 9.3 x 6 x 215.2 cm (approx. 3.66 x 2.36 x 84.72 inches) |
| Item Weight | 500 g (approx. 1.1 lbs) |
| Power Source | Corded Electric |
| Mounting Type | Ceiling Mount (Track System) |
| Indoor/Outdoor Use | Indoor Only |
Warranty and Support
For information regarding warranty coverage, please refer to the warranty card included with your product or visit the official Nordlux website. Keep your proof of purchase for warranty claims.
For technical support, spare parts, or further assistance, please contact Nordlux customer service:
- Nordlux Official Website: www.nordlux.com
- Refer to the contact section on their website for regional support details.


