maisi 86608+4x34110+1TB
maisi 8-Channel 1080p DVR Security Camera System User Manual
Model: 86608+4x34110+1TB
1. Introduction
This manual provides detailed instructions for the installation, operation, and maintenance of your maisi 8-Channel 1080p DVR Security Camera System. This system is designed to provide reliable surveillance for your home or business, featuring 1080p HD video recording, 2MP cameras, a 1TB pre-installed hard drive, and remote access capabilities.
Please read this manual thoroughly before operating the system to ensure proper setup and functionality.
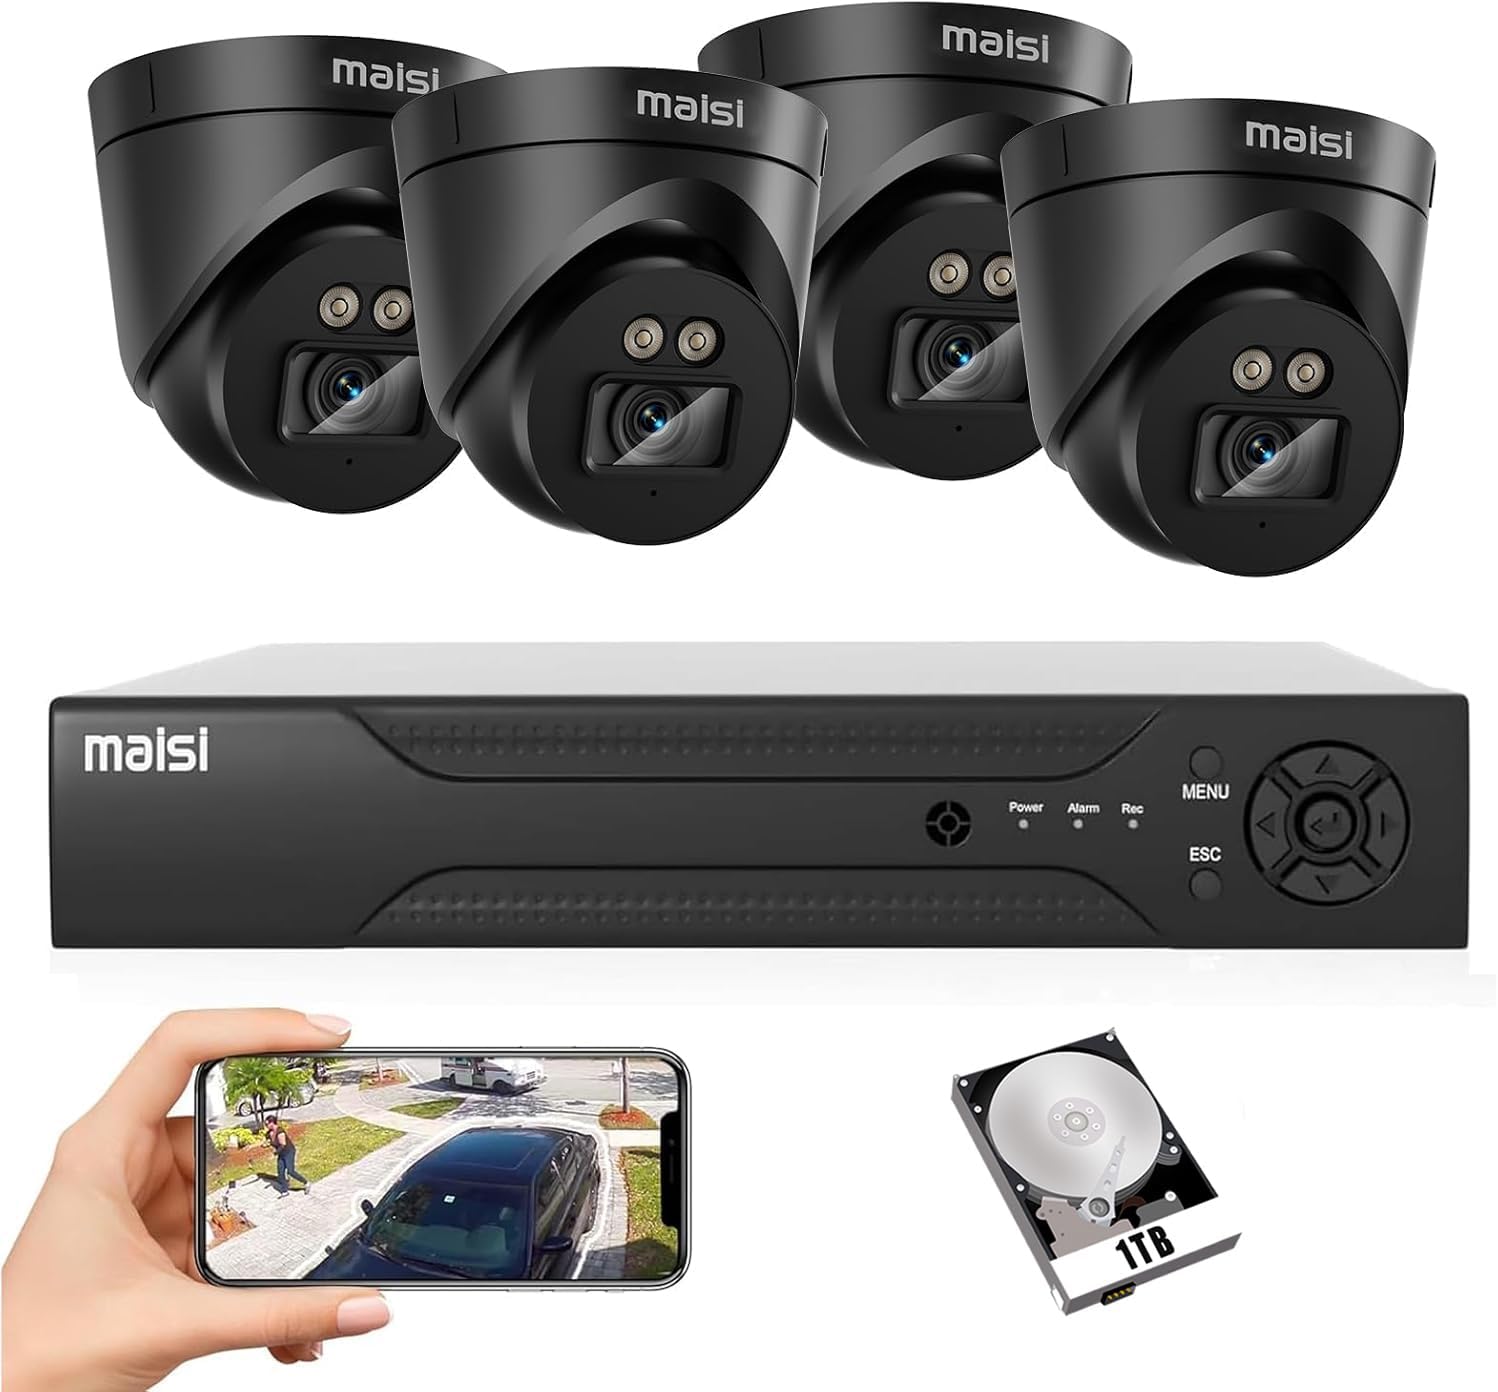
Image 1.1: Overview of the maisi 8-Channel DVR Security Camera System components.
2. Package Contents
Verify that all items listed below are included in your package. If any items are missing or damaged, please contact customer support.
- 1x 8-Channel 1080p DVR with 1TB Hard Drive (pre-installed)
- 4x 2MP Indoor Dome Cameras
- 4x BNC Video Cables (for camera connection)
- 1x Power Adapter (UK 3-pin plug)
- 1x USB Mouse
- 1x User Manual (this document)


Image 2.1: Example components included in the package.
3. System Setup
3.1 DVR and Camera Connection
- Connect Cameras to DVR: Connect each 2MP dome camera to the DVR using the provided BNC video cables. Each cable provides both video signal and power.
- Connect DVR to Monitor: Use an HDMI or VGA cable (not included) to connect the DVR to a monitor or TV.
- Connect USB Mouse: Plug the USB mouse into a USB port on the DVR for navigation.
- Connect to Power: Connect the DVR's power adapter to the DVR and then to a power outlet. The system will power on automatically.
- Network Connection (Optional for Remote Access): For remote viewing, connect the DVR to your router using an Ethernet cable (not included).
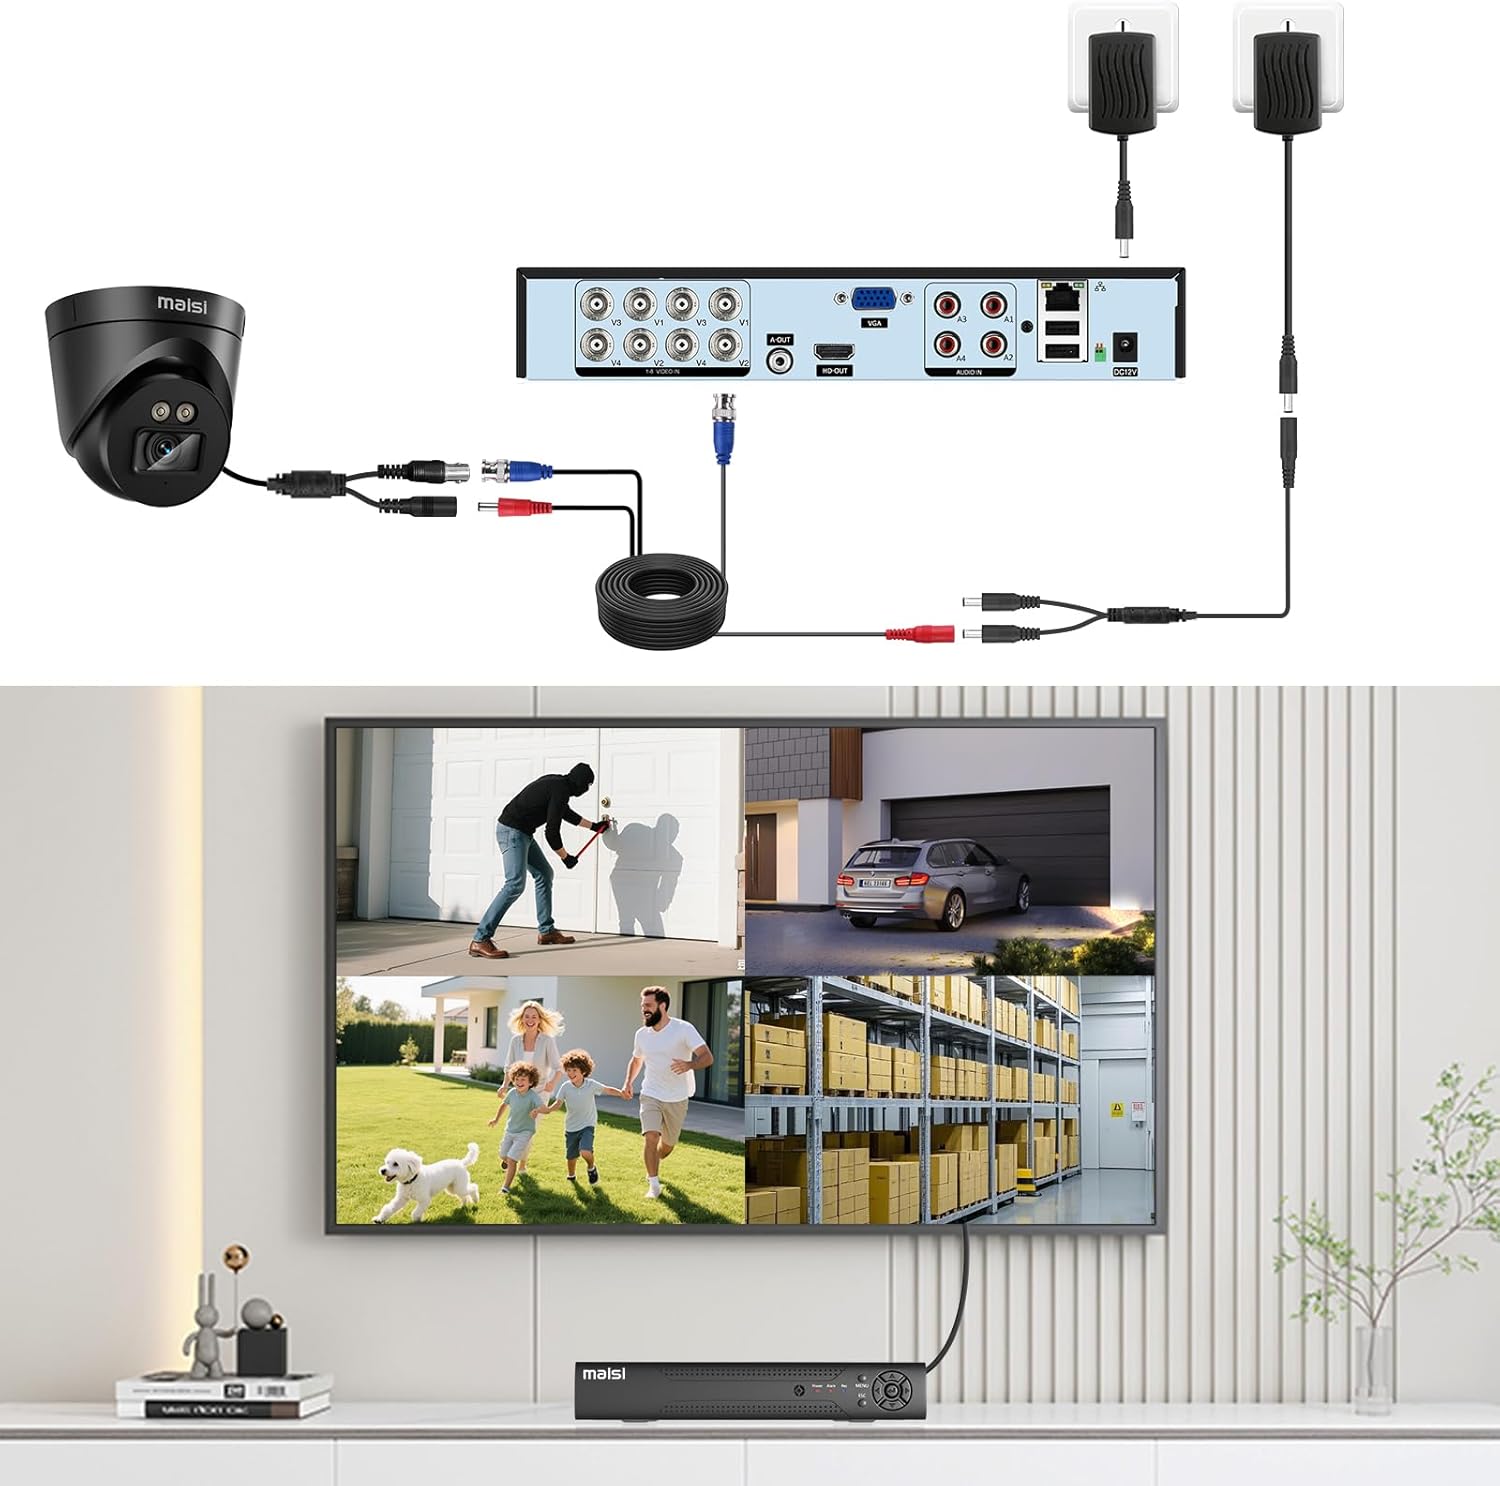
Image 3.1: Diagram illustrating the connection of cameras to the DVR and the DVR to a monitor.

Image 3.2: Rear view of the DVR with connection ports.
3.2 Initial Configuration
Upon first power-on, the system will guide you through an initial setup wizard. Follow the on-screen prompts to:
- Set up a password for the administrator account.
- Configure date and time settings.
- Format the pre-installed 1TB hard drive (if prompted).
- Adjust network settings (if connected to a router).
3.3 Camera Installation Guidelines
The cameras included in this system are designed for indoor use only. They are not waterproof. Choose suitable indoor locations for optimal coverage.
- Mounting: Cameras can be mounted on ceilings or walls. Ensure a stable surface for mounting.
- Angle Adjustment: Adjust the camera angle to cover the desired area.
- Cable Routing: Route cables securely to prevent damage and tampering.

Image 3.3: Examples of ceiling and wall mounting for the dome cameras.
4. Operating the System
4.1 Live View and Recording
Once the system is set up, you can view live feeds from all cameras on the connected monitor. The DVR is pre-configured for continuous recording to the 1TB HDD.
- Viewing Live Feed: The main screen displays live video from all connected cameras. Use the USB mouse to navigate the DVR interface.
- Recording Modes: The DVR supports continuous, scheduled, and motion-activated recording. These settings can be adjusted in the DVR's menu.
- Playback: Access recorded footage through the playback menu. You can search by date, time, and event type (e.g., motion detection).

Image 4.1: Comparison of day and night vision capabilities.
4.2 Motion Detection and Alerts
The system features advanced motion detection to alert you to activity. When motion is detected, the system can trigger recording, send email alerts, or push notifications to your mobile device.
- Configuring Motion Detection: Navigate to the DVR's menu to set up motion detection zones and sensitivity for each camera.
- Email Alerts: Configure your email settings in the DVR to receive alerts with snapshots when motion is detected.
- Push Notifications: Enable push notifications through the mobile application for instant alerts.

Image 4.2: Smart motion detection identifying different types of movement.

Image 4.3: Example of a motion detection alert received on a mobile phone.
4.3 Remote Access (Mobile & PC)
Access your security system remotely from your smartphone, tablet, or PC using the dedicated application. An internet connection is required for this feature.
- Mobile App: Download the "TSEye" app from Google Play Store or Apple App Store. Register an account and add your DVR using its unique ID.
- PC Client Software: Install the client software on your Windows or Mac PC. Follow the instructions to add your DVR for remote viewing and management.
- Web Browser: The system supports web browser access (e.g., Internet Explorer) for remote viewing.

Image 4.4: Remote viewing on a smartphone and other devices.
5. Maintenance
5.1 Hard Drive Management
- Continuous Recording: The 1TB HDD is designed for 24/7 surveillance. When the drive is full, the system will automatically overwrite the oldest footage.
- Backup Footage: Regularly back up important footage to an external USB drive or network storage to prevent loss.
- HDD Upgrade: The DVR supports hard drive upgrades up to 8TB. Refer to the DVR's internal manual for specific upgrade instructions.
5.2 Camera Care
- Lens Cleaning: Periodically clean camera lenses with a soft, dry cloth to ensure clear image quality. Avoid abrasive cleaners.
- Environmental Considerations: As cameras are for indoor use, ensure they are not exposed to moisture, extreme temperatures, or direct sunlight that could cause damage.
6. Troubleshooting
| Problem | Possible Cause | Solution |
|---|---|---|
| No video display on monitor. | Loose cable connection, incorrect input source on monitor, DVR not powered on. | Check HDMI/VGA cable connections. Ensure monitor is on correct input. Verify DVR power. |
| Cameras not showing video. | BNC cable loose/damaged, camera not receiving power, camera fault. | Check BNC cable connections. Ensure power is supplied to cameras via BNC cable. Test with another camera/cable if possible. |
| No recording. | HDD not formatted, HDD full (if overwrite is off), recording schedule not set. | Check DVR settings to ensure HDD is formatted and recording is enabled. Verify overwrite settings. |
| Remote access not working. | No internet connection, incorrect network settings, app not configured correctly. | Ensure DVR is connected to the internet. Check network settings on DVR. Reconfigure app settings. |
| Poor night vision. | Infrared LEDs obstructed, insufficient ambient light for IR, camera lens dirty. | Ensure no obstructions block IR LEDs. Clean camera lens. Note that night vision performance can be affected by external light sources. |
7. Specifications
| Feature | Detail |
|---|---|
| Brand | maisi |
| Model Number | 86608+4x34110+1TB |
| DVR Channels | 8 Channels |
| Video Recording Resolution | 1080p (2MP) |
| Camera Resolution | 2MP |
| Hard Drive Capacity | 1TB (pre-installed, expandable up to 8TB) |
| Connectivity Technology | Wired (Coaxial BNC) |
| Power Source | Electric Cable |
| Camera Usage Environment | Indoor Only (Not waterproof) |
| Video Compression | H.265 (for efficient storage) |
| Night Vision | Infrared LEDs, automatic IR-cut filter |
| Remote Access | iOS, Android (TSEye app), Windows/Mac PC Client, Web Browser (IE) |
| Included Components | DVR, 4 Cameras, BNC Video Cables, Power Adapter, USB Mouse |
| Product Dimensions (L x W x H) | 19 x 31 x 34 cm (approx. 7.5 x 12.2 x 13.4 inches) |
| Product Weight | 3.68 kg (approx. 8.11 lbs) |

Image 7.1: H.265 video compression technology for efficient storage.
8. Warranty and Support
For warranty information and technical support, please refer to the documentation provided with your purchase or contact maisi customer service directly. Information regarding spare parts availability is not provided.
Please retain your proof of purchase for any warranty claims.
Related Documents - 86608+4x34110+1TB
 |
Night Owl F6-DVR8-1TB: 8-Channel 1TB Security DVR System for Home & Business Discover the Night Owl F6-DVR8-1TB, an 8-channel 960H security DVR system with a 1TB HDD. Features remote monitoring via Night Owl HD App, motion detection, and easy setup. |
 |
Tonton Wireless Mini NVR User Manual This user manual provides comprehensive instructions for setting up, configuring, and operating the Tonton Wireless Mini NVR system. It covers interface descriptions, hard disk installation, system connection, initial setup wizard, network configuration, date/time settings, storage management, password setup, app integration, menu navigation, recording settings, intelligent detection, video playback, video backup, adding IP cameras, and expanding wireless coverage. |
 |
ZOSI POE NVR Security Camera System User Manual User manual for ZOSI POE NVR Security Camera Systems, detailing connectivity and system components. Includes English and Spanish references for product identification. |
 |
ANNKE Digital Video Recorder User Manual: Installation and Operation Guide This user manual provides comprehensive instructions for setting up, installing, and operating ANNKE Digital Video Recorders (DVRs). It covers hardware installation, menu operations, remote access, software downloads, and safety precautions for security camera systems. |
 |
Night Owl BTWN8 Series Wi-Fi NVR Security System Quick Setup Guide Quick setup guide for the Night Owl BTWN8 Series Wi-Fi NVR Security System, detailing installation, Bluetooth wireless setup, manual TV/monitor connection, and system configuration. |
 |
Nufebs C20HF Security Camera System Instructions for Use Comprehensive instructions for the Nufebs C20HF wireless security camera system, featuring 4x 2K PTZ dome cameras, 10-inch LCD display, 1TB HDD, night vision, motion detection, and waterproof capabilities. |