
1. Introduction
Thank you for choosing the BLACK+DECKER BEPW1750-IN Pressure Washer. This powerful 1500W unit, delivering 1740 PSI / 120 Bar, is designed for efficient cleaning tasks around your home and for vehicle washing. This manual provides essential information for safe operation, proper assembly, maintenance, and troubleshooting to ensure optimal performance and longevity of your pressure washer. Please read this manual thoroughly before first use and keep it for future reference.
2. Important Safety Information
Always observe basic safety precautions when using electrical appliances to reduce the risk of fire, electric shock, and personal injury.
- Read All Instructions: Familiarize yourself with the controls and proper use of the pressure washer.
- Eye Protection: Always wear safety glasses or goggles when operating the pressure washer.
- Keep Children Away: Do not allow children or untrained persons to operate this unit.
- Proper Electrical Connection: Ensure the power supply matches the specifications on the product label. Use a ground fault circuit interrupter (GFCI) for added safety.
- Water Connection: Connect the pressure washer to a cold water supply only.
- Avoid Direct Spray: Never direct the water jet at people, pets, electrical devices, or the unit itself.
- Secure Footing: Operate the pressure washer on a stable, level surface.
- Unplug When Not in Use: Disconnect from the power supply before servicing or cleaning.
3. Product Overview and Components
The BLACK+DECKER BEPW1750-IN Pressure Washer is designed for ease of use and effective cleaning. Below is an overview of the main unit and its included accessories.
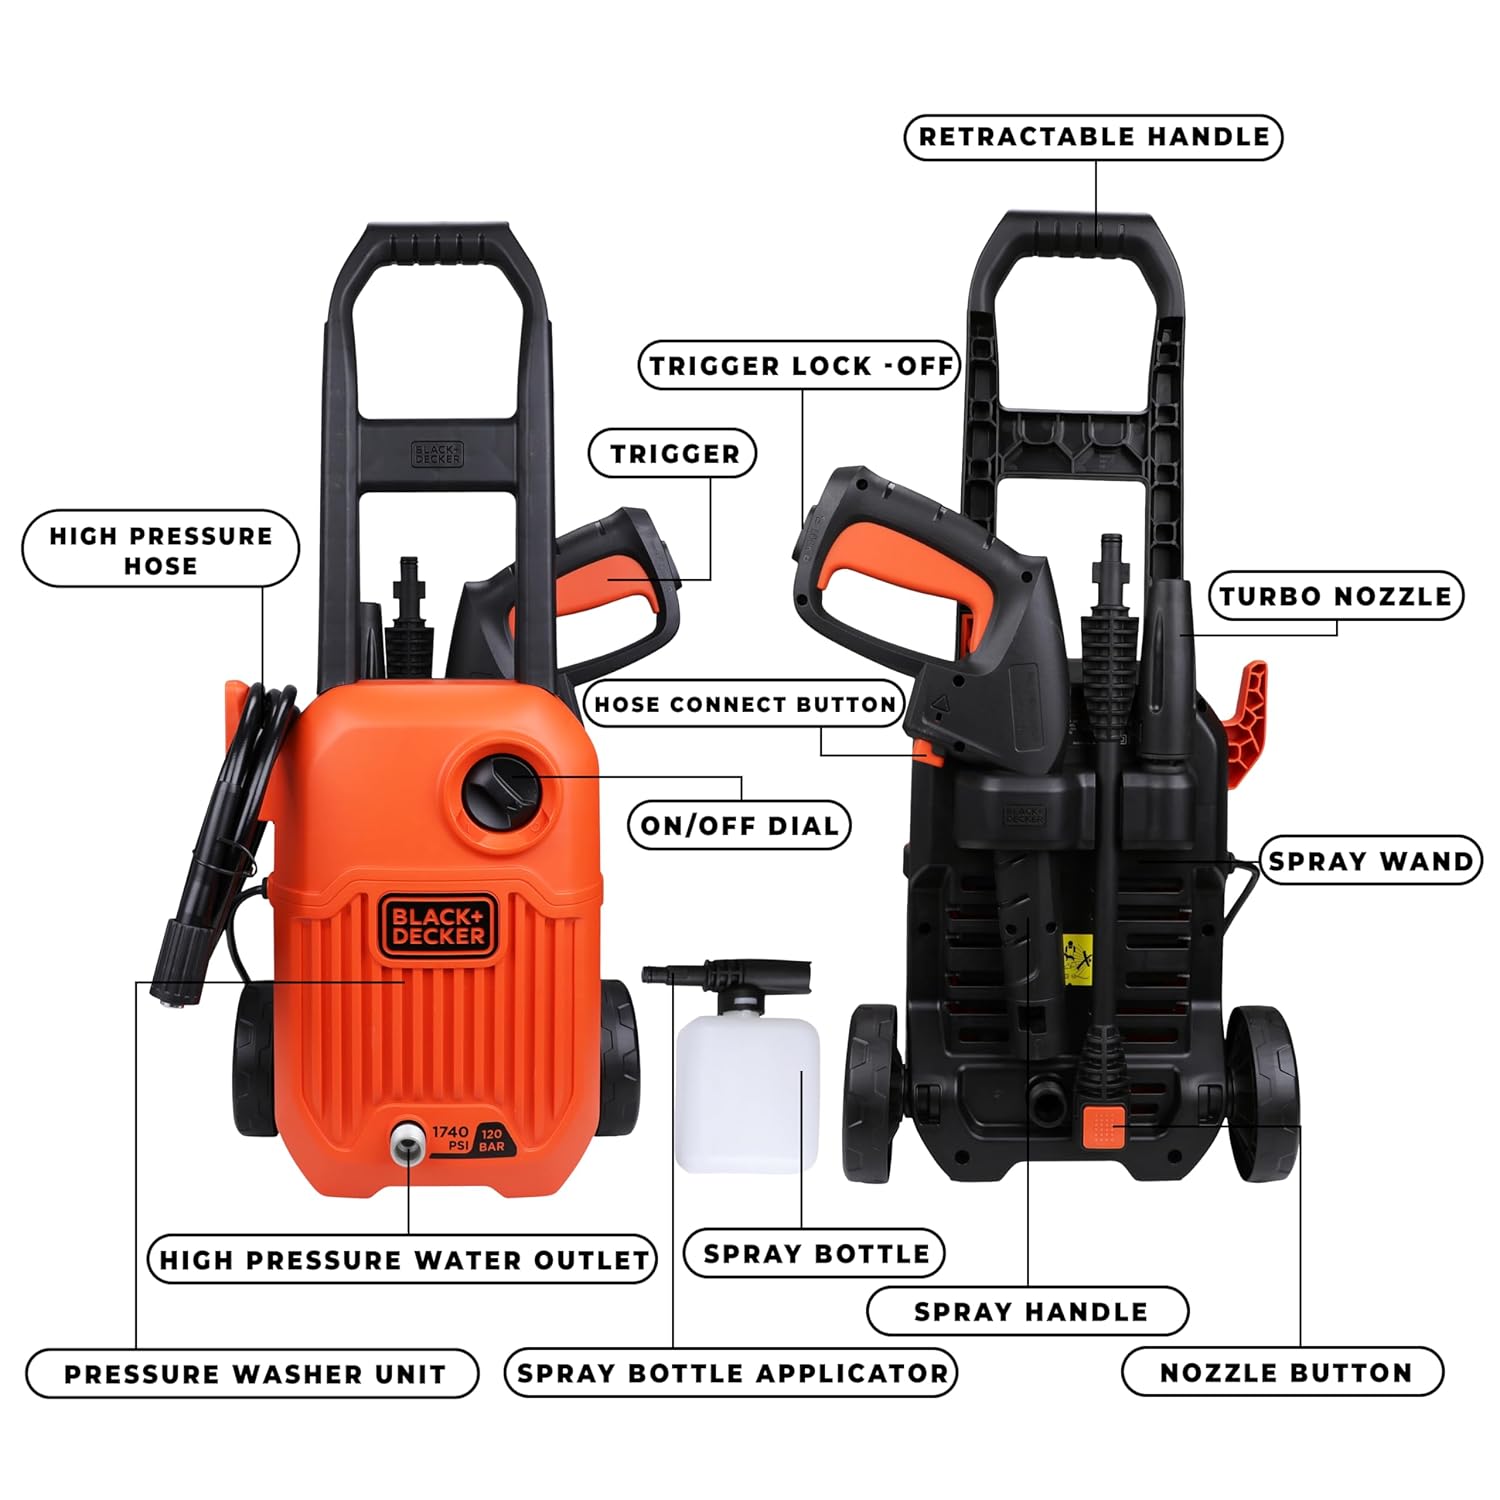
Figure 3.1: Main components of the pressure washer, including the retractable handle, trigger, hose connect button, ON/OFF dial, high pressure water outlet, high pressure hose, spray handle, spray wand, turbo nozzle, and spray bottle.
Included Components:
- Pressure Washer Unit
- Spray Gun
- Fan to Pencil Nozzle (Adjustable Spray Nozzle)
- Rotary Nozzle (Turbo Nozzle)
- Detergent Bottle (Soap Bottle)
- Cable Strap
- 3M High Pressure Hose
- Spray Wand
- Garden Connector
- Filter
- Power Cord
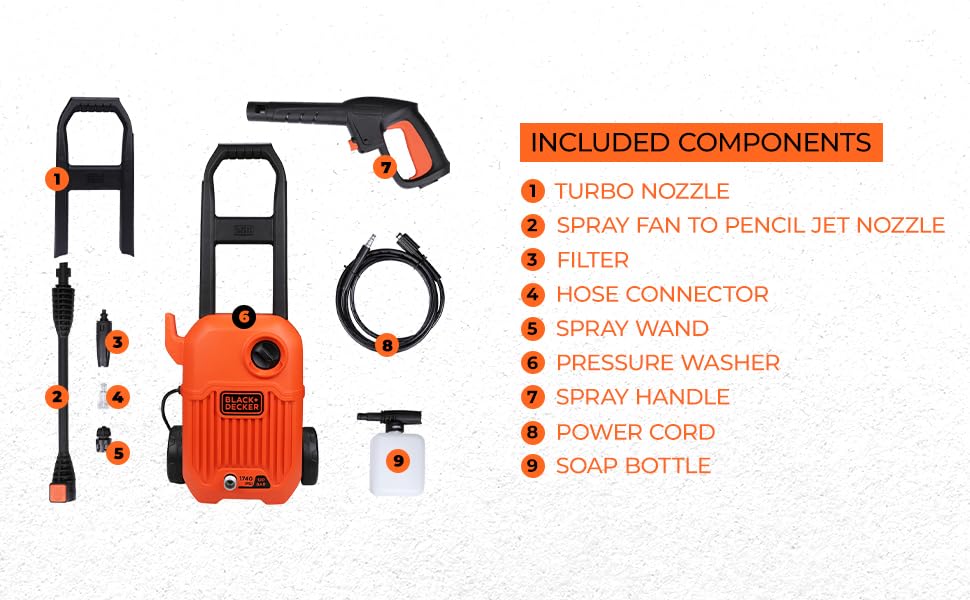
Figure 3.2: All accessories and the main unit included with your BLACK+DECKER BEPW1750-IN Pressure Washer.
4. Setup and Assembly
Follow these steps to assemble your pressure washer before first use.
- Attach the Handle: Secure the retractable handle to the main unit. Ensure it clicks into place or is fastened according to the diagram.

Figure 4.1: Attaching the retractable handle for easy movement.
- Connect the High-Pressure Hose: Connect one end of the high-pressure hose to the high-pressure water outlet on the pressure washer unit and the other end to the spray gun. Ensure connections are secure to prevent leaks.

Figure 4.2: High-pressure water outlet connection point.
- Attach the Spray Wand and Nozzle: Insert the spray wand into the spray gun and then attach your desired nozzle (e.g., Fan to Pencil Nozzle or Rotary Nozzle) to the end of the spray wand.
- Connect Water Supply: Connect a garden hose (not included) to the garden connector on the pressure washer. Ensure the water supply is turned on fully before starting the unit.
- Connect Power: Plug the power cord into a suitable grounded electrical outlet.
5. Operating Instructions
Once assembled and connected, follow these steps to operate your pressure washer.
- Purge Air from System: Before turning on the power, squeeze the trigger on the spray gun to allow water to flow through the system and expel any trapped air. Continue until a steady stream of water emerges.
- Start the Unit: Turn the ON/OFF dial to the "ON" position. The motor will start.

Figure 5.1: The ON/OFF dial for starting and stopping the unit.
- Begin Cleaning: Point the spray gun at the surface to be cleaned, maintaining a safe distance. Squeeze the trigger to start the high-pressure spray. The motor stops when the trigger is loosened, preserving the machine's life.
5.1. Using Different Nozzles
- Adjustable Spray Nozzle (Fan to Pencil): This nozzle allows you to adjust the spray pattern from a wide fan for general cleaning to a concentrated pencil jet for stubborn dirt. Rotate the nozzle head to change the pattern.
- Rotary Nozzle (Turbo Nozzle): This nozzle provides a powerful, rotating jet that combines the impact of a solid stream with the coverage of a fan spray. It is ideal for heavily ingrained dirt, such as removing moss from floors and walls.
5.2. Detergent Application
For enhanced cleaning, you can use the included detergent bottle:
- Fill the detergent bottle with appropriate pressure washer detergent.
- Attach the detergent bottle to the spray gun as indicated in the product overview.
- Apply detergent to the surface. For best results, allow the detergent to soak for a few minutes before rinsing with high-pressure water.

Figure 5.2: The pressure washer is effective for cleaning vehicles.
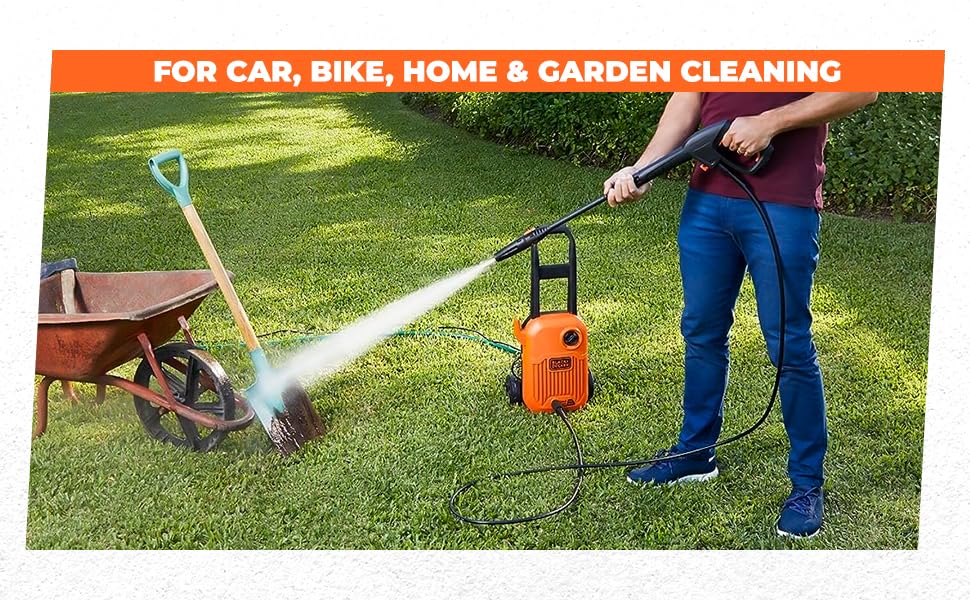
Figure 5.3: The pressure washer can be used for various home and garden cleaning tasks, such as cleaning walls.
6. Maintenance and Storage
Proper maintenance ensures the longevity and optimal performance of your pressure washer.
- After Each Use:
- Turn off the power and water supply.
- Squeeze the trigger to release any remaining pressure in the system.
- Disconnect the garden hose and high-pressure hose.
- Drain all water from the pump and hoses to prevent damage, especially in freezing temperatures.
- Nozzle Cleaning: Regularly clean the nozzles to prevent blockages. Use the provided nozzle cleaning tool if necessary.
- Filter Cleaning: Check and clean the water inlet filter periodically to ensure unrestricted water flow to the pump.
- Storage: Store the pressure washer in a dry, frost-free area. Utilize the onboard accessory storage for the hose and power cord for convenience. The folding, telescopic handle makes it easier to store.
7. Troubleshooting Common Issues
Refer to this table for solutions to common operational problems.
| Problem | Possible Cause | Solution |
|---|---|---|
| Motor does not start | No power supply; ON/OFF dial not engaged; GFCI tripped. | Check power connection; Ensure dial is ON; Reset GFCI. |
| Low pressure | Insufficient water supply; Clogged nozzle; Air in pump; Kinked hose. | Ensure water tap is fully open; Clean nozzle; Purge air from system; Straighten hose. |
| Pulsating pressure | Air in pump; Water supply restriction; Clogged nozzle. | Purge air; Check water inlet filter; Clean nozzle. |
| Water leaks | Loose connections; Damaged O-rings. | Tighten all connections; Replace damaged O-rings. |
8. Technical Specifications
Key technical details for the BLACK+DECKER BEPW1750-IN Pressure Washer.
| Specification | Value |
|---|---|
| Model | BEPW1750-IN |
| Power | 1500 Watt |
| Maximum Pressure | 1740 PSI / 120 Bar |
| Max Water Flow Rate | 6.8 L/min |
| Max Inlet Temperature | 50°C |
| Hose Length | 3 Metres |
| Material | Plastic |
| Item Weight | 4 kg |
| Product Dimensions (LxWxH) | 30 x 20 x 10 cm |
| Power Source | Corded Electric |
| Country of Origin | China |
9. Warranty and Customer Support
BLACK+DECKER stands behind the quality of its products.
Warranty Information:
This product comes with a 1 Year warranty offered from the date of purchase. Please retain your purchase receipt as proof of purchase for warranty claims.
Customer Support:
For any queries, service requests, or support, please contact BLACK+DECKER customer care:
Figure 9.1: BLACK+DECKER Total Care provides comprehensive support.
- Phone: 1800-203-0644
- Email: SBD-CUSTOMERCOMMUNICATIONS@SBDINC.COM
- WhatsApp: +91 96060 55835
- Operating Hours: Mon-Sat, 09:00 AM - 06:00 PM IST (Except Government Holidays)
- Service Network: Over 500+ authorized service centers.