Baseboard Heater Thermostat Control Knob
Baseboard Heater Thermostat Control Knob Instruction Manual
Brand: Generic
1. Introduction
This manual provides essential information for the installation, operation, and maintenance of your new Baseboard Heater Thermostat Control Knobs. These replacement knobs are designed for various baseboard electric heaters and wall heaters, offering a simple and effective solution for temperature control.
Please read this manual thoroughly before installation and use to ensure proper function and safety.
2. Product Overview
The Baseboard Heater Thermostat Control Knob is a direct replacement part for existing or missing temperature control dials on compatible heating units. Each knob features clear markings for OFF, LO, MED, and HI settings, and a ribbed side for easy grip.

Figure 2.1: Set of five replacement baseboard heater thermostat control knobs.

Figure 2.2: Comparison of white and cream colored knobs, highlighting the cream color of this product.
3. Specifications
The following table details the physical and compatibility specifications of the control knobs:
| Feature | Detail |
|---|---|
| Package Contents | 5 x Baseboard Heater Thermostat Control Knobs |
| Color | Cream (Off-white / Navajo White) |
| Outer Diameter (O.D.) | 2 inches (approximately 5.08 cm) |
| "D" Opening Dimensions | Approximately 1/4 inch (0.25") long x 5/32 inch (0.156") wide |
| Product Dimensions | 2 x 2 x 0.52 inches |
| Item Weight (per knob) | Approximately 1.44 ounces |
| Compatible Brands/Models | Fahrenheat, Dayton, Qmark, Berko, Leading Edge baseboard heaters; Engineered products 1800, 1900, 2500, 2600, C1800, and C2500 Series Model C baseboard heaters; Cadet F Series Baseboard Thermostat; FTA1A, FTA2A, TA1AW, TA2AW, TA1ANW, TA2ANW, TA1AWC, TA2AWC, TA1AWCA, TA2AWCA, TA1ANWCA, TA2ANWCA accessory kits. |
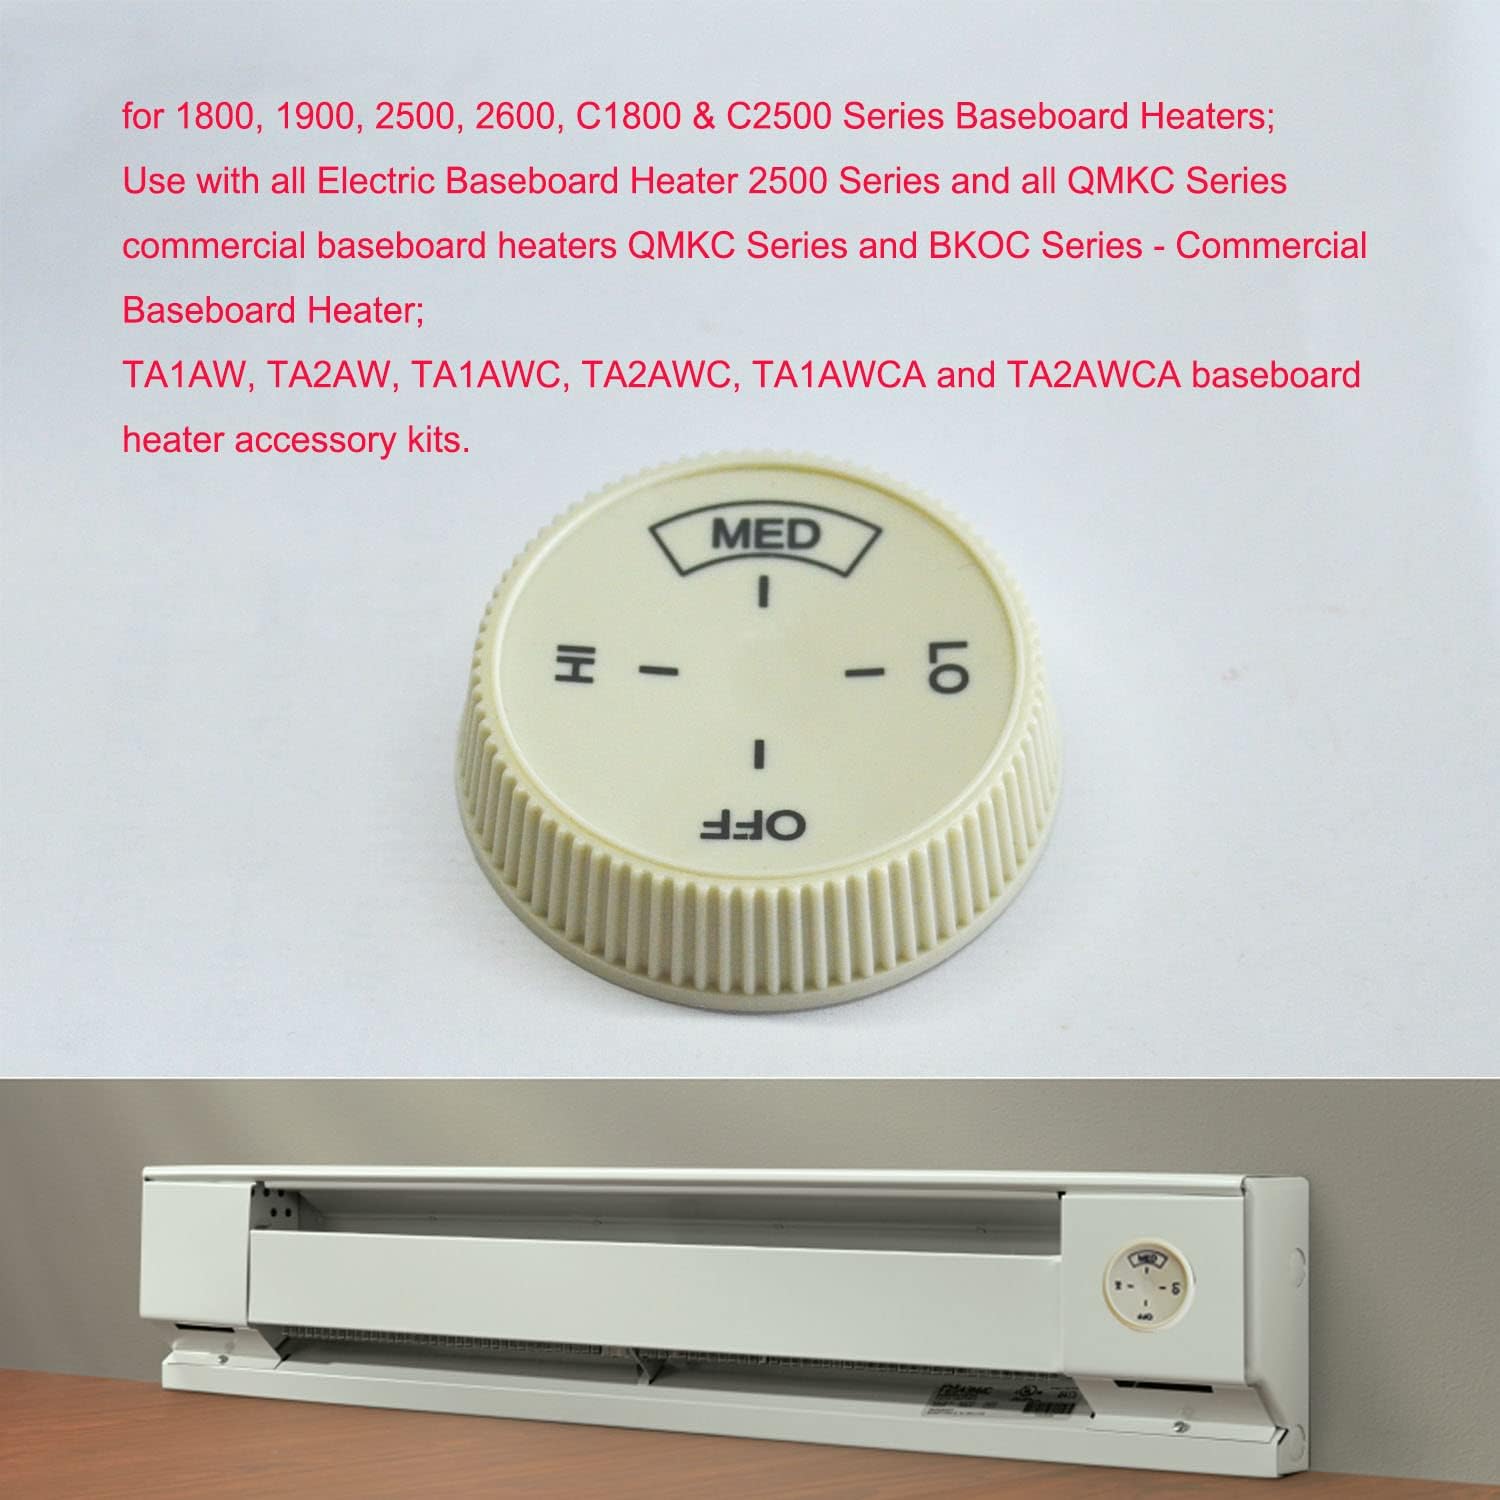
Figure 3.1: Dimensional drawing of the control knob.
4. Setup and Installation
These replacement knobs are designed for easy, tool-free installation. Ensure the heater unit is turned off and cool before proceeding.
- Identify the Thermostat Shaft: Locate the D-shaped shaft on your baseboard heater's thermostat. This knob is specifically designed to fit "half-moon" shaped shafts.
- Align the Knob: Orient the new control knob so that its D-shaped opening aligns with the shaft on the thermostat.
- Push to Install: Gently but firmly push the knob onto the shaft until it is fully seated. No tools are required; the knob should slide into place.
- Test Functionality: Once installed, carefully turn the knob through its range of motion (OFF, LO, MED, HI) to ensure it rotates smoothly and engages properly with the thermostat mechanism.

Figure 4.1: Knob installed on a baseboard heater.

Figure 4.2: Example of knob adaptation for Cadet F Series Baseboard Thermostat.
5. Operating Instructions
The control knob allows you to adjust the heat output of your baseboard heater. The settings are clearly marked on the knob's surface:
- OFF: Turns the heater completely off.
- LO (Low): Provides a low heat output.
- MED (Medium): Provides a medium heat output.
- HI (High): Provides the maximum heat output.
Rotate the knob clockwise or counter-clockwise to select your desired heat setting. The ribbed sides of the knob are designed for easy grip and turning.
6. Maintenance
These control knobs require minimal maintenance. Follow these guidelines to ensure longevity:
- Cleaning: Wipe the knob with a soft, damp cloth to remove dust or grime. Avoid using abrasive cleaners or solvents, as these may damage the finish or markings.
- Inspection: Periodically check that the knob remains securely attached to the thermostat shaft. If it becomes loose, gently push it back into place.
- Storage: If storing spare knobs, keep them in a cool, dry place away from direct sunlight and extreme temperatures to prevent material degradation.
7. Troubleshooting
Most issues related to the control knob are minor and can be resolved easily.
| Problem | Possible Cause | Solution |
|---|---|---|
| Knob does not fit the shaft. | Incorrect shaft shape (not D-shaped) or size. | Verify your thermostat has a "half-moon" or D-shaped shaft. Refer to the specifications section for knob dimensions. This knob is not universal for all heater types. |
| Knob is loose or falls off. | Not fully pushed onto the shaft, or shaft is worn. | Ensure the knob is pushed firmly onto the shaft until it clicks or is fully seated. If the shaft itself is worn, the knob may not hold securely, and the thermostat unit may need replacement. |
| Heater does not respond to knob turns. | Thermostat malfunction, or knob not properly engaging the shaft. | Remove the knob and inspect the D-shaped opening for any debris. Reinstall the knob, ensuring it is fully seated. If the issue persists, the problem likely lies with the heater's internal thermostat mechanism, not the knob itself. Consult a qualified technician for heater repair. |
8. Warranty and Support
As a generic replacement part, specific warranty information may vary. Please refer to the retailer or seller from whom you purchased the product for details regarding returns, replacements, or any applicable guarantees.
For further assistance or inquiries, please contact the seller directly through the platform where the purchase was made. Always provide your order number and a clear description of the issue for prompt support.
Ask a question about this manual
Ask about setup, troubleshooting, compatibility, parts, safety, or missing instructions. Manuals+ will review the question and use this page’s manual context to help answer it.