1. Introduction
Thank you for choosing the Luxsego Filtered Shower Head with Handheld Spray, Model FSH-SM01. This manual provides detailed instructions to ensure proper installation, effective operation, and regular maintenance of your new shower system. Please read this manual thoroughly before use and retain it for future reference.
2. Package Contents
Verify that all components are present in the package:
- Double-sided filtered showerhead x 1
- 59" Shower hose x 1
- Adjustable shower bracket x 1
- Extra filters x 2
- Teflon tape x 1
3. Installation Guide
The Luxsego Filtered Shower Head is designed for quick and easy installation, typically within minutes, without requiring specialized tools or professional assistance.
- Remove Your Old Shower Head: Unscrew your existing shower head from the shower arm. Clean any residue from the shower arm threads.
- Prepare the Filter: Ensure the rubber rings are correctly seated inside the blue caps of the filter cartridge.
- Attach Hose to Shower Arm: Apply Teflon tape clockwise around the threads of your shower arm. Twist one end of the 59" shower hose onto the shower arm until hand-tight.
- Install Bracket: Ensure the black filter screen is properly inserted into the adjustable shower bracket. Attach the bracket to the other end of the shower hose.
- Connect Shower Head: Twist the double-sided filtered showerhead onto the adjustable bracket.
- Adjust Angle: Adjust the bracket to your preferred showering angle.

After installation, turn on the water to check for leaks. If leaks occur, tighten connections or reapply Teflon tape.
4. Operating Modes and Features
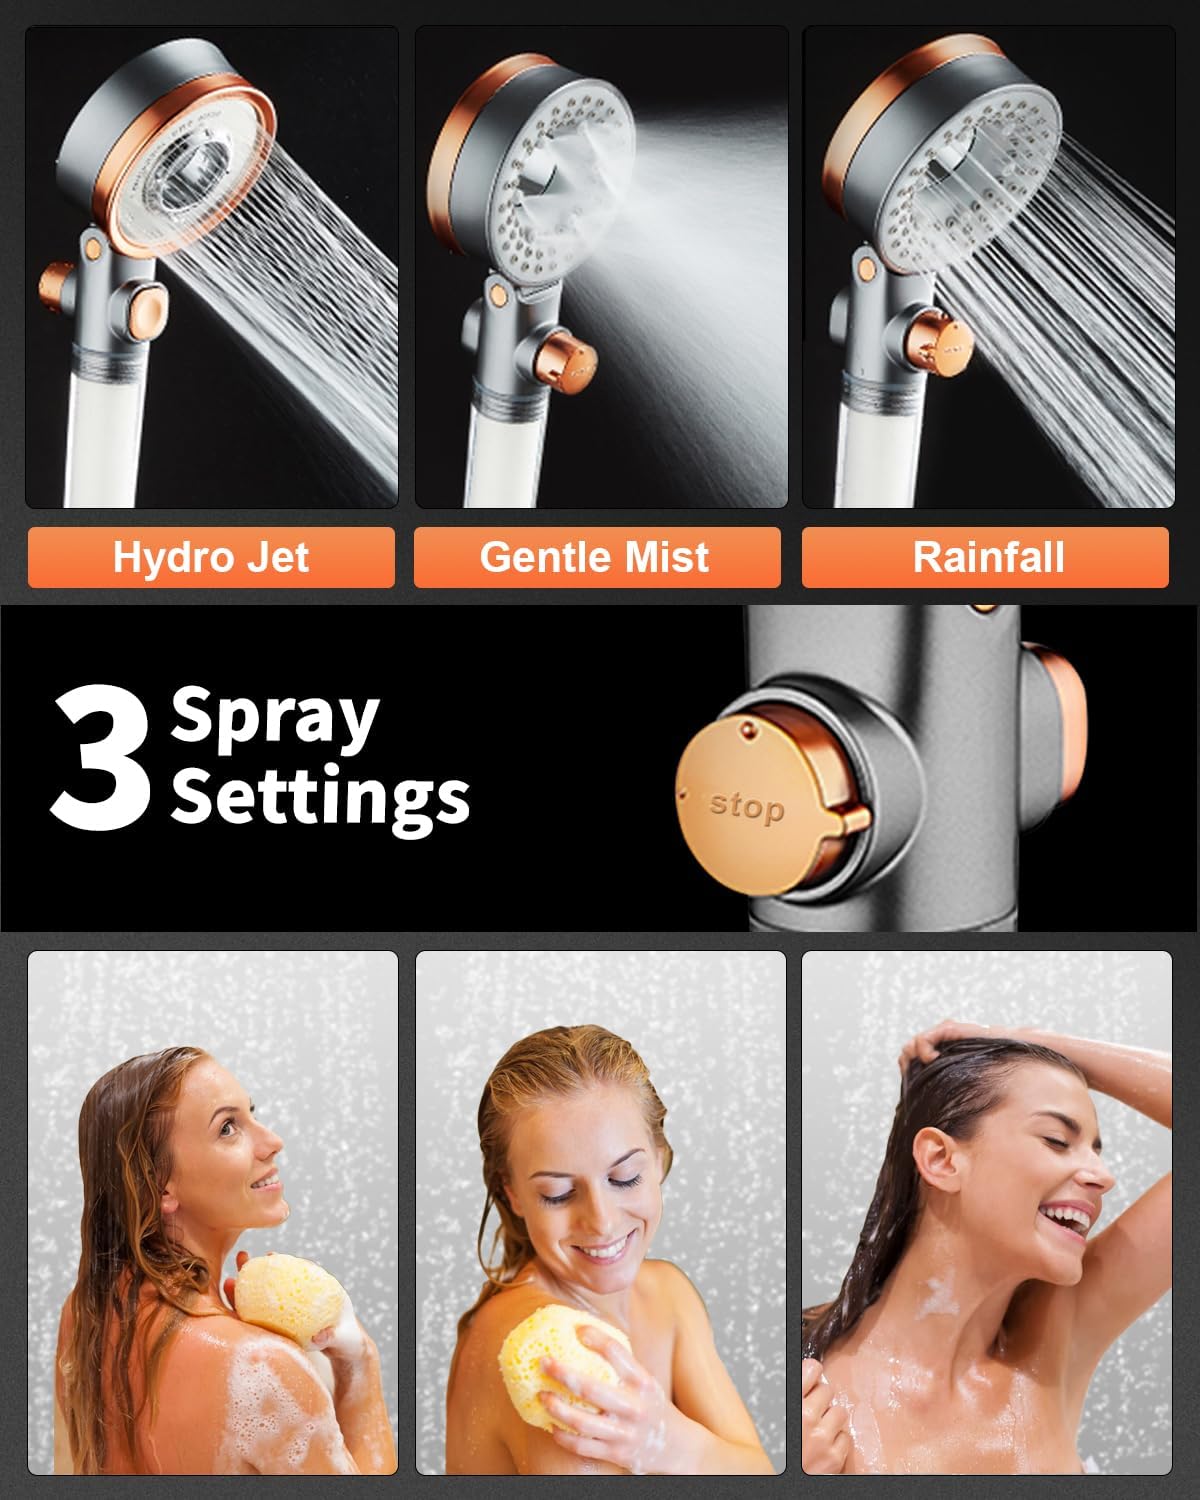
The Luxsego Filtered Shower Head offers three distinct spray modes and convenient controls for a customized showering experience.
4.1 Spray Modes
The shower head features a unique double-sided design. To switch between modes, simply tilt the shower head forward or backward.
- Hydro Jet Mode: Provides a focused, high-pressure spray, ideal for rinsing and a stimulating massage.
- Gentle Mist Mode: Delivers a soft, fine mist, suitable for sensitive skin or a relaxing experience.
- Rainfall Mode: Offers a full, wide coverage spray, mimicking natural rainfall for a comprehensive rinse.

4.2 Water Pressure Adjustment
The shower head includes an adjuster pressure knob, allowing you to control the water flow intensity. This feature is particularly useful for adjusting pressure for children or specific tasks.

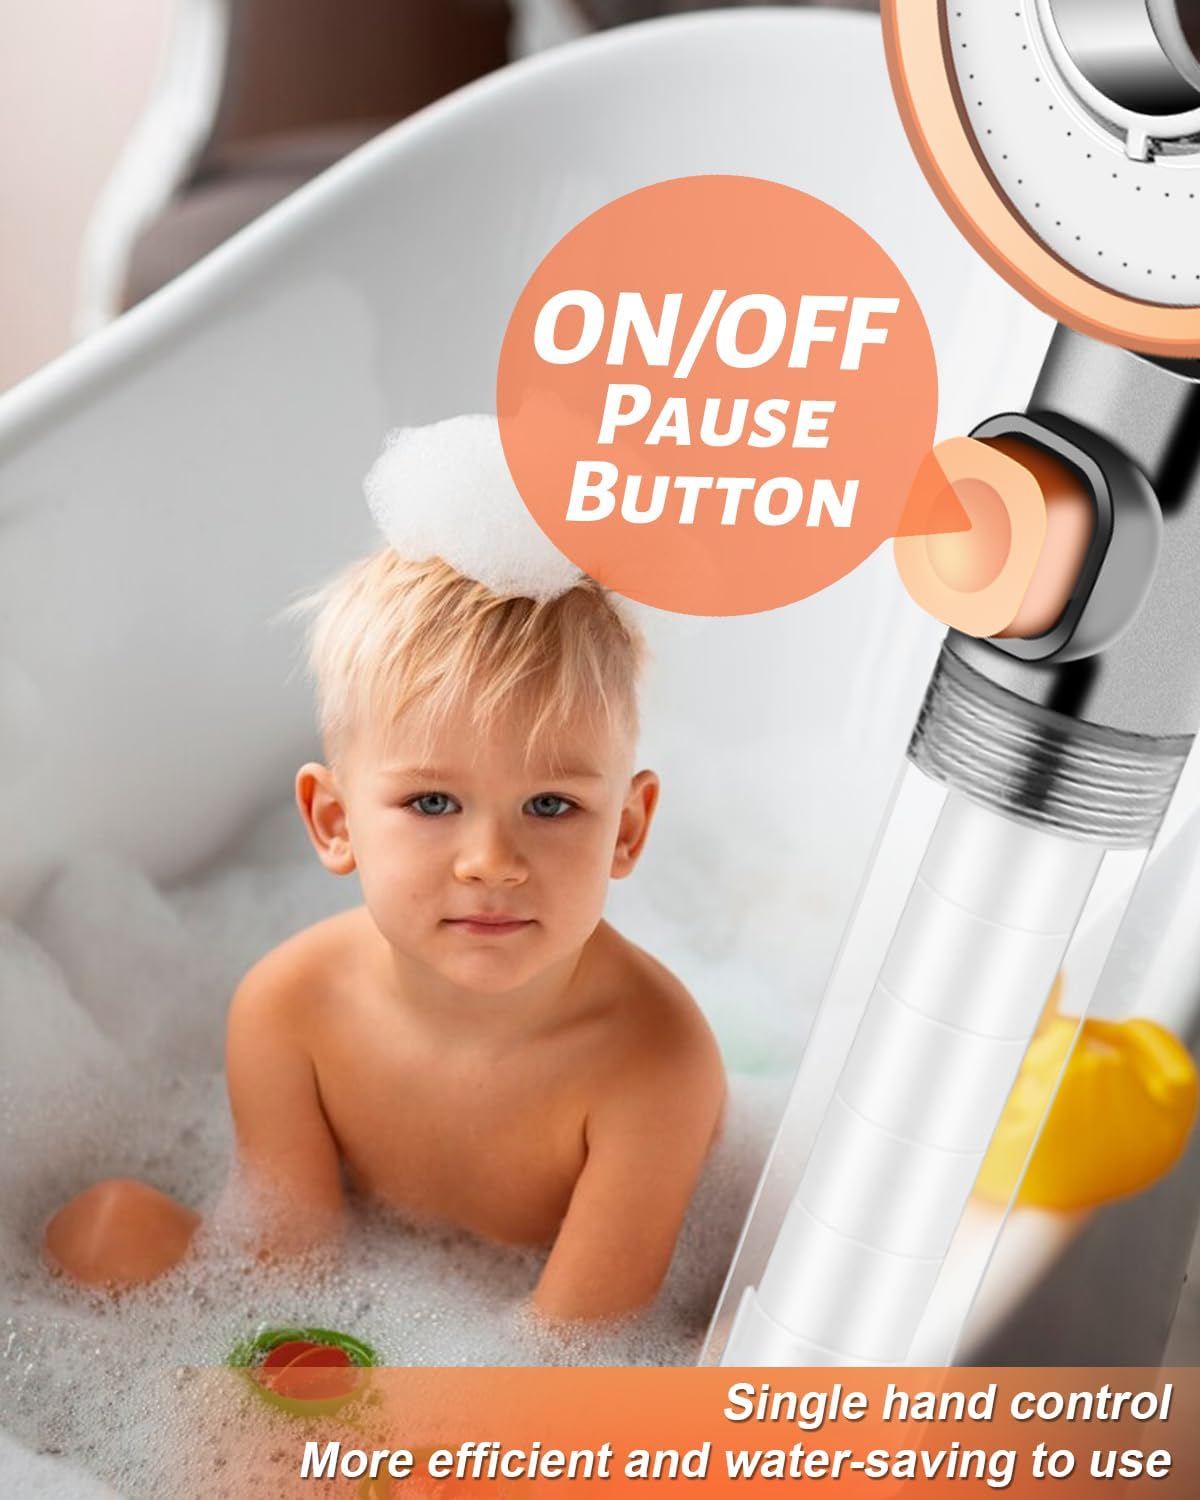
4.3 ON/OFF Pause Button
A convenient ON/OFF pause button is integrated into the handle, enabling you to temporarily stop water flow without adjusting the temperature settings. This feature helps conserve water during showering.
5. Filtration System
The Luxsego Filtered Shower Head incorporates a multi-stage filtration system designed to improve water quality for a better showering experience.
5.1 Filtration Mechanism
The system includes a high-density cotton filter and natural mineral stones. This combination is engineered to effectively remove impurities from your bath water.
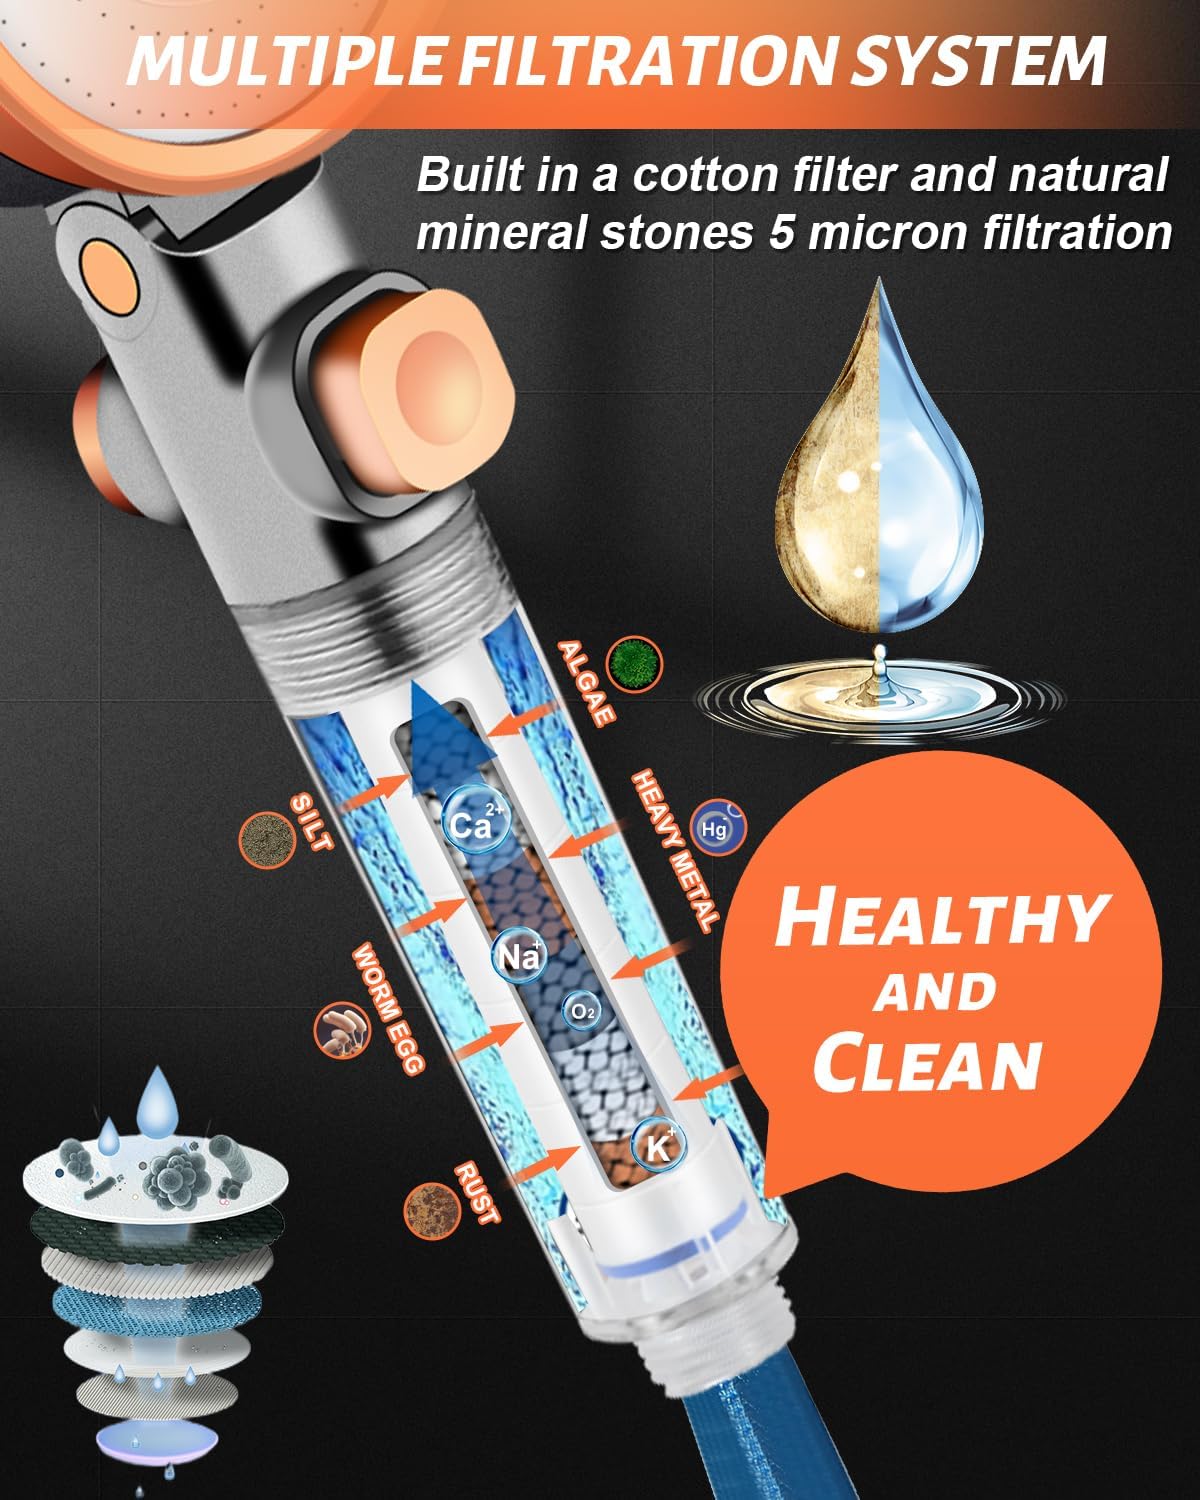
5.2 Benefits of Filtered Water
The filtration process aims to reduce various substances found in tap water:
- Removes Impurities: Effectively filters out rust, silt, parasite eggs, and other particles down to 5 microns in size.
- Reduces Chlorine: Helps to decrease chlorine content, which can contribute to skin and hair dryness.
- Softens Hard Water: Assists in softening hard water, potentially reducing issues like hair loss and breakage, and promoting shinier hair.


6. Maintenance
Regular maintenance ensures the longevity and optimal performance of your Luxsego Filtered Shower Head.
6.1 Filter Replacement
The filter cartridge should be replaced every 6-8 weeks. This interval may vary based on local water quality and frequency of use. Replace the filter when it changes to a brown color.
- Unscrew the lower part of the shower head handle.
- Carefully remove the old filter cartridge.
- Insert a new filter cartridge, ensuring it is properly seated.
- Screw the handle back together securely.

6.2 Cleaning the Shower Head
To prevent mineral buildup and maintain spray performance, periodically clean the shower head nozzles. You can gently rub the silicone nozzles to dislodge mineral deposits. For more stubborn buildup, a mild descaling solution or vinegar can be used, followed by a thorough rinse.
7. Troubleshooting
If you encounter issues with your Luxsego Filtered Shower Head, refer to the following common problems and solutions:
| Problem | Possible Cause | Solution |
|---|---|---|
| Low Water Pressure | Clogged nozzles, dirty filter, or low household water pressure. | Clean shower head nozzles. Replace the filter cartridge if it's discolored or old. Check household water supply. |
| Leaks at Connections | Loose connections, worn washers, or insufficient Teflon tape. | Ensure all connections are hand-tight. Check and replace any worn rubber washers. Reapply Teflon tape to threaded connections. |
| Water Spraying Incorrectly | Shower head not tilted correctly for desired mode, or clogged nozzles. | Adjust the tilt of the shower head to select the desired spray mode. Clean any clogged nozzles. |
| Filter Beads Dislodged | Improper filter assembly or missing screen. | Disassemble the handle and ensure all filter components, including any screens or caps, are correctly in place before reassembling. |
8. Specifications
| Feature | Detail |
|---|---|
| Brand | Luxsego |
| Model Number | FSH-SM01 |
| Style | PP FILTERS+MINERAL BEADS |
| Shape | Round |
| Material | Acrylonitrile Butadiene Styrene, Stainless Steel |
| Finish Type | Brushed |
| Installation Type | Wall Mounted |
| Flow Rate Description | 1.46 GPM at 80+/-1psi, 1.80 GPM at 80+/-1psi |
| Product Dimensions | 10.5"L x 3.7"W |
| Number of Settings | 3 |
| Hose Length | 59 Inches |
| Item Weight | 1.59 pounds |
| Certification | CEC test report, SGS test report |
| Usage | Filtered water impurities such as rust, silt, parasite eggs, etc. |
9. Warranty and Support
9.1 Warranty Information
Luxsego provides a 90-day warranty service for this product. This warranty covers non-human quality problems. If your product experiences any such issues within 90 days of purchase, please contact our customer support for assistance.
9.2 Customer Support
For any questions, concerns, or warranty claims, please contact Luxsego customer support. We are committed to handling returns or replacements within 48 hours for eligible issues.
For further assistance, please visit the official Luxsego store or contact your retailer.