
1. Introduction
The Homematic IP Smart Home Keypad (Model HmIP-WKP) is a code lock designed to provide convenient and secure access to your home. It operates in conjunction with the Homematic IP door lock drive, allowing you to open, unlock, or lock your front door by entering a numeric code. This keypad is an integral part of the comprehensive Homematic IP Smart Home system, offering seamless integration with over 150 products.
The keypad communicates wirelessly with the Homematic IP door lock drive, eliminating the need for external cabling and enhancing security against sabotage. It features an illuminated keypad with a proximity sensor for ease of use in low-light conditions.

Image 1.1: The Homematic IP Keypad integrated with the Homematic IP smartphone application for smart home control.

Image 1.2: The Homematic IP Keypad mounted on an exterior wall, providing keyless entry.
2. Setup and Installation
2.1 Required Components
- Homematic IP Smart Home Keypad (HmIP-WKP)
- Homematic IP Door Lock Drive (sold separately)
- Homematic IP Access Point (required for operation)
2.2 Included Components
- Homematic IP Keypad
- 2 x 1.5 V LR03/Micro/AAA batteries
- Wall mount
- Mounting material (screws and dowels)
- Instruction manual (this document)

Image 2.1: The Homematic IP Keypad shown with its power source (AAA batteries) and mounting hardware.
2.3 Mounting the Keypad
The Homematic IP Keypad is designed for attachment to an outer wall next to your entrance door. No cables are required for installation as the keypad communicates wirelessly via radio with the Homematic IP door lock drive.
- Select a suitable location on the outer wall, ensuring it is within range of your Homematic IP door lock drive and Access Point.
- Use the included mounting material (screws and dowels) to securely attach the wall mount to the chosen surface.
- Insert the two AAA batteries into the keypad.
- Attach the keypad to the mounted wall bracket. Ensure it clicks securely into place.
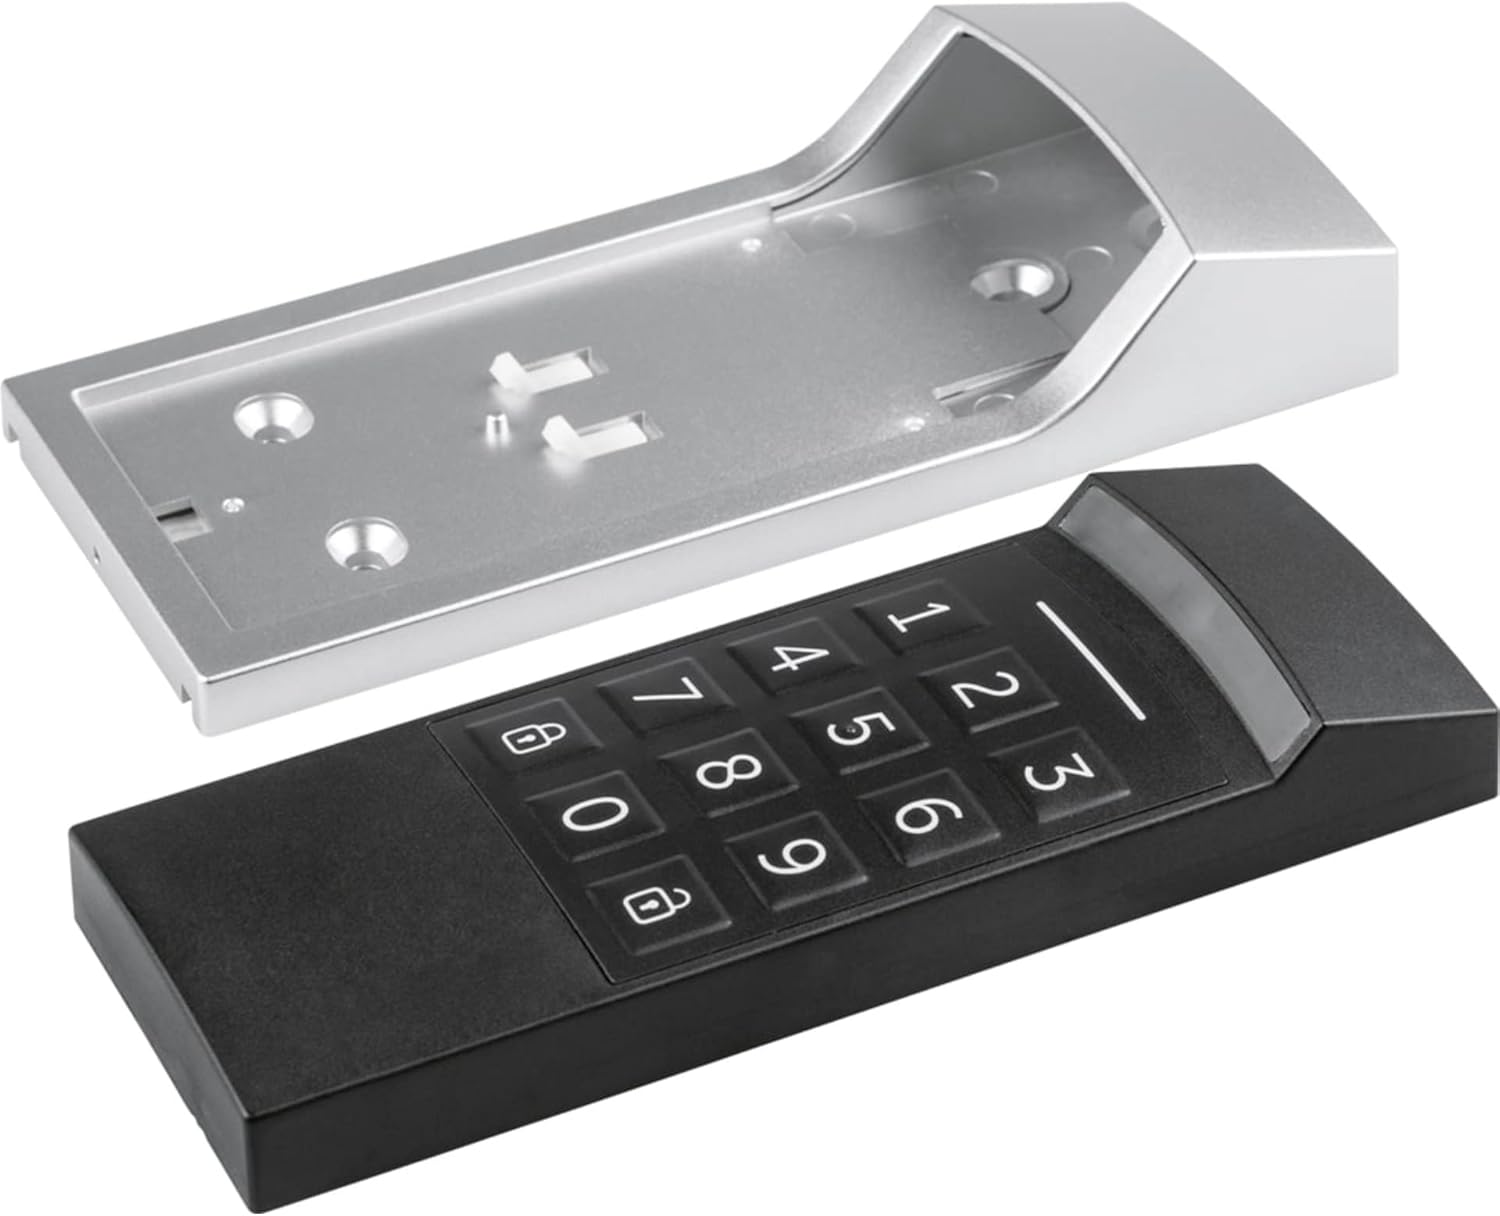
Image 2.2: The Homematic IP Keypad separated from its wall mount, illustrating the two main components.

Image 2.3: The Homematic IP Keypad securely installed on an exterior wall.
2.4 System Integration
For operation, the Homematic IP Keypad requires a Homematic IP Access Point. This device acts as the central control unit for your Homematic IP smart home system.

Image 2.4: The Homematic IP Access Point, essential for the keypad's operation, shown with security certifications.
3. Operating Instructions
3.1 Access Code Management
Manage all access codes using the free Homematic IP app. You can set up to eight individual access codes, each consisting of four to eight digits.
- Individual Assignment: Codes can be assigned for permanent access or restricted to specific times and days of the week. This allows you to grant temporary access to family members, friends, craftsmen, or guests.
- Code Entry: To operate the door lock, simply enter your assigned numeric code on the keypad. The keypad's automatic lighting activates as you approach, making it easy to use in the dark.

Image 3.1: The Homematic IP Keypad features an illuminated keypad and supports 4- to 8-digit numeric codes.
3.2 Security Features
The Homematic IP Keypad incorporates several features to ensure reliable protection:
- Encrypted Communication: All communication between the keypad and the Homematic IP system is encrypted, protecting against unauthorized access.
- Sabotage Contact: An integrated sabotage contact detects tampering attempts.
- Automatic Lockout: The keypad automatically locks if too many incorrect code inputs are detected, preventing brute-force attacks.
- Activity Log: The keypad logs every code input, providing a record of access attempts.
- Certified Safety: The system adheres to high security standards, confirmed and certified by independent testing institutes like VDE for protocol, IT, and data security.
3.3 Smart Home Integration
Beyond door access, the keypad can be configured within the Homematic IP app to trigger other smart home functions:
- Switching lighting in the entrance area.
- Operating a garage door.
- Activating or deactivating the alarm mode.

Image 3.2: The Homematic IP Keypad can control both the door and integrated lighting, even without an active internet connection.
4. Maintenance
4.1 Battery Replacement
The Homematic IP Keypad is powered by two 1.5 V LR03/Micro/AAA batteries. When the battery level is low, you will receive a notification via the Homematic IP app. To replace the batteries:
- Carefully remove the keypad unit from its wall mount.
- Open the battery compartment.
- Remove the old batteries and insert two new 1.5 V LR03/Micro/AAA batteries, ensuring correct polarity.
- Close the battery compartment and reattach the keypad to its wall mount.
4.2 Cleaning
Clean the keypad regularly with a soft, damp cloth. Do not use abrasive cleaners or solvents, as these can damage the surface or electronic components. Ensure no moisture enters the device.
5. Troubleshooting
- Keypad not responding: Check if the batteries are correctly inserted and have sufficient charge. Verify that the keypad is within range of the Homematic IP Access Point and the door lock drive.
- Incorrect code inputs: If too many incorrect codes are entered, the keypad will temporarily lock for security reasons. Wait for the lockout period to expire before attempting to enter the code again. Ensure you are entering the correct 4- to 8-digit code.
- Communication issues: Ensure there are no significant obstructions (e.g., thick walls, large metal objects) between the keypad, the door lock drive, and the Homematic IP Access Point that could interfere with radio communication.
- App connectivity problems: Ensure your Homematic IP Access Point is online and connected to your home network. Check the Homematic IP app for system status and error messages.
6. Specifications
| Feature | Detail |
|---|---|
| Brand | Homematic IP |
| Model Number | HmIP-WKP |
| Lock Type | Number lock |
| Special Features | Splash-proof (IP44), Illuminated keypad with proximity sensor |
| Dimensions (L x W x H) | 6.34 x 2.8 x 1.14 inches (approx. 161 x 71 x 29 mm) |
| Item Weight | 137 Grams |
| Material | Metal (housing), Plastic (keypad) |
| Power Source | 2 x 1.5 V LR03/Micro/AAA batteries |
| Connectivity Protocol | Homematic IP radio protocol |
| Security | Encrypted communication, sabotage contact, VDE certified |
| Color | Silver, Black |
7. Warranty and Support
The Homematic IP Keypad comes with a standard EU Spare Part Availability Duration of 1 year. For specific warranty terms and conditions, please refer to the documentation provided with your purchase or visit the official Homematic IP website.
If you encounter any issues that cannot be resolved using the troubleshooting guide, or if you require further assistance, please contact Homematic IP customer support. Contact information can typically be found on the manufacturer's website or in the product packaging.


