1. Introduction
This manual provides detailed instructions for the installation, operation, and maintenance of your Extralink 19-inch Rack Fan Panel, Model 14718. This fan panel is designed to provide efficient cooling for equipment within 19-inch server cabinets and racks, featuring four fans and an integrated thermostat for temperature control.
2. Safety Information
- Ensure the power supply matches the specifications of the fan panel (230 Volts).
- Always disconnect power before installation, maintenance, or troubleshooting.
- Do not obstruct the fan inlets or outlets to ensure proper airflow.
- This device is intended for indoor use in a controlled environment.
- Only qualified personnel should perform electrical connections.
3. Product Overview
The Extralink 19'' Rack Fan Panel (Model 14718) is a cooling solution for rack-mounted equipment. It includes:
- Four high-performance fans for optimal air circulation.
- An integrated digital thermostat for precise temperature management.
- A power switch for manual control.
- Standard 19-inch rack-mountable design.
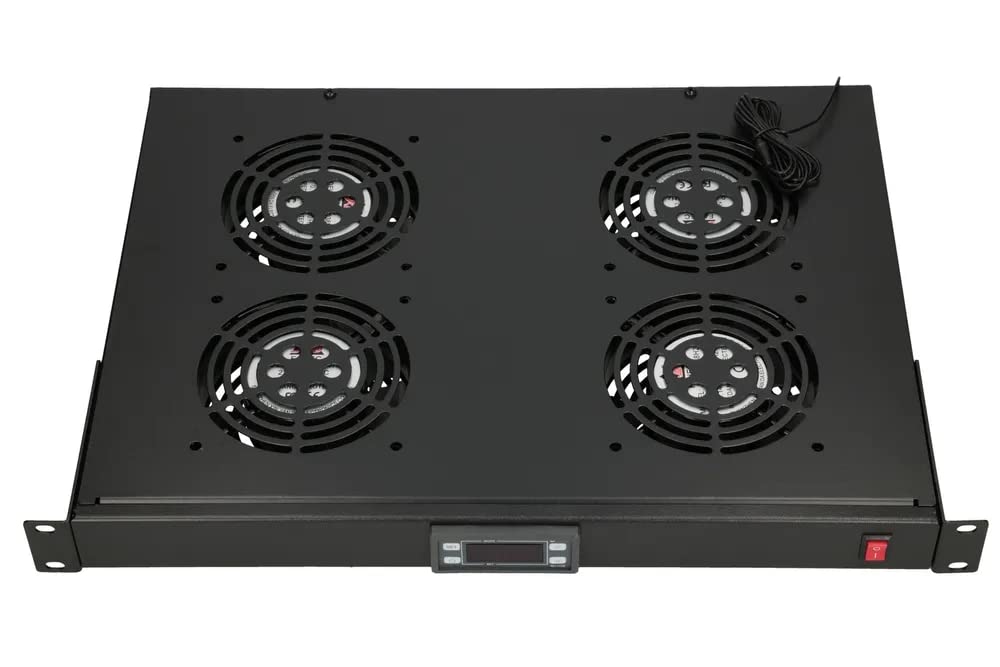
Figure 1: Front view of the Extralink 19-inch Rack Fan Panel showing the four fans, power switch, and thermostat display.
4. Setup and Installation
The Extralink 19'' Rack Fan Panel is designed for easy installation into any standard 19-inch server rack or cabinet. No special tools are required for basic mounting.
- Unpacking: Carefully remove the fan panel from its packaging. Inspect for any signs of damage.
- Mounting Location: Identify an appropriate 19-inch rack unit (U) space within your server cabinet. It is recommended to install the fan panel near the top of the rack for exhaust, or near the bottom for intake, depending on your cooling strategy.
- Secure Mounting: Align the mounting ears of the fan panel with the rack rails. Use appropriate rack screws (not included) to secure the panel firmly in place.
- Power Connection: Connect the power cable to the IEC C14 inlet located at the rear of the fan panel. Plug the other end into a suitable 230V power outlet or Power Distribution Unit (PDU) within the rack.

Figure 2: Rear view of the fan panel showing the power input connection.

Figure 3: Top view of the fan panel, illustrating the fan placement and cable routing.
5. Operating Instructions
The fan panel features both manual power control and an automatic thermostat for temperature regulation.
5.1 Powering On/Off
Locate the red power switch on the front panel. Flip the switch to the 'ON' position to power on the unit. Flip it to 'OFF' to power off.
5.2 Thermostat Operation
The integrated thermostat allows for automatic fan operation based on the ambient temperature within the rack. The temperature thresholds can be set between -40 and 50 degrees Celsius.
- Viewing Current Temperature: The digital display on the thermostat will show the current temperature.
- Setting Temperature Thresholds: Refer to the specific thermostat model's instructions (often included separately or printed on the thermostat itself) for detailed steps on how to adjust the fan activation and deactivation temperatures. Typically, this involves pressing a 'SET' button and using arrow keys to adjust the desired temperature.
- Automatic Operation: Once the thresholds are set, the fans will automatically turn on when the temperature exceeds the upper limit and turn off when it drops below the lower limit, ensuring optimal cooling and energy efficiency.
The thermostat is designed for DIN rail mounting, providing flexibility in its integration and placement within the control panel.
6. Maintenance
Regular maintenance ensures the longevity and efficient operation of your fan panel.
- Cleaning: Periodically clean the fan grilles and blades to prevent dust buildup, which can impede airflow and reduce cooling efficiency. Use a soft brush or compressed air. Ensure the unit is powered off and disconnected from the power source before cleaning.
- Inspection: Regularly inspect power cables for any signs of wear or damage. Check mounting screws to ensure the panel remains securely fastened.
- Fan Operation Check: Occasionally verify that all four fans are operating correctly when activated.
7. Troubleshooting
| Problem | Possible Cause | Solution |
|---|---|---|
| Fans do not turn on. | No power, power switch off, thermostat setting too high, faulty connection. |
|
| Fans run continuously. | Thermostat setting too low, high ambient temperature, faulty thermostat. |
|
| Reduced airflow. | Dust buildup on grilles/fans, obstructed vents. |
|
8. Specifications
| Feature | Detail |
|---|---|
| Brand | EXTRALINK |
| Model Number | 14718 |
| Number of Fans | 4 |
| Rack Size | 19-inch |
| Voltage | 230 Volts |
| Cooling Method | Air |
| Material | Metal |
| Dimensions (L x W x H) | 24 x 69 x 2.5 cm |
| Weight | 4.85 kilograms |
| Thermostat Temperature Range | -40 to 50 degrees Celsius |
| Compatible Devices | Rack Cabinets |
9. Warranty and Support
The Extralink 19'' Rack Fan Panel (Model 14718) comes with a 3-year availability of spare parts within the EU, ensuring long-term support for your product.
For further assistance, technical support, or warranty claims, please contact your retailer or the official Extralink support channels. Keep your purchase receipt as proof of purchase.