kunghei 1697
kunghei Electric Vertical Rotisserie Kebab Grill Machine User Manual
Model: 1697
1. Introduction
Thank you for purchasing the kunghei Electric Vertical Rotisserie Kebab Grill Machine, Model 1697. This appliance is designed for preparing various rotisserie-style dishes, including kebabs, shawarma, and roasted chicken, with convenience and efficiency. Please read this manual thoroughly before operating the machine to ensure safe and optimal performance. Keep this manual for future reference.
2. Important Safety Instructions
WARNING: To reduce the risk of fire, electric shock, or injury, always follow basic safety precautions.
- Read all instructions before using the appliance.
- Do not touch hot surfaces. Use handles or knobs.
- To protect against electrical shock, do not immerse cord, plugs, or the appliance in water or other liquid.
- Close supervision is necessary when any appliance is used by or near children.
- Unplug from outlet when not in use and before cleaning. Allow to cool before putting on or taking off parts.
- Do not operate any appliance with a damaged cord or plug, or after the appliance malfunctions or has been damaged in any manner.
- The use of accessory attachments not recommended by the appliance manufacturer may cause injuries.
- Do not use outdoors.
- Do not let cord hang over edge of table or counter, or touch hot surfaces.
- Do not place on or near a hot gas or electric burner, or in a heated oven.
- Extreme caution must be used when moving an appliance containing hot oil or other hot liquids.
- Always attach plug to appliance first, then plug cord into the wall outlet. To disconnect, turn any control to 'OFF', then remove plug from wall outlet.
- Do not use appliance for other than intended use.
- Ensure the appliance is placed on a stable, heat-resistant surface during operation.
3. Package Contents
Carefully unpack all items and ensure you have received the following:
- kunghei Electric Vertical Rotisserie Kebab Grill Machine (Main Unit)
- Rotisserie Spit Rod
- Meat Plate / Drip Tray
- Power Cord
- User Manual (This document)
If any parts are missing or damaged, please contact customer support immediately.
4. Product Overview
Familiarize yourself with the components of your vertical rotisserie grill:

Image: Front view of the rotisserie grill, highlighting the heating elements, rotating spit, and drip tray.
- Heating Pipes: Two internal heating elements for stable and efficient cooking.
- Rotisserie Spit Rod: Central rod for mounting food, designed for automatic rotation.
- Meat Plate / Drip Tray: Collects juices and fats during cooking, removable for cleaning.
- Control Panel: Includes power switch, temperature selection knob, power indicator, and heating indicator.
- Housing: Stainless steel construction for durability and easy cleaning.
5. Setup
- Unpack: Carefully remove the grill and all accessories from the packaging. Retain packaging for storage or future transport.
- Placement: Place the grill on a stable, flat, heat-resistant surface, away from walls and flammable materials. Ensure adequate ventilation around the unit.
- Initial Cleaning: Before first use, wipe down all removable parts (spit rod, meat plate) with warm, soapy water. Rinse thoroughly and dry completely. Wipe the exterior of the main unit with a damp cloth.
- Assembly: Insert the rotisserie spit rod into its designated slot, ensuring it is securely seated for rotation. Place the meat plate/drip tray at the bottom of the unit.
- Power Connection: Ensure the power switch is in the 'OFF' position. Plug the power cord into a grounded electrical outlet.
6. Operating Instructions
6.1 Preparing Food
- Prepare your desired food (e.g., whole chicken, kebab meat, vegetables). The grill can bear up to 10KG of food.
- Carefully skewer the food onto the rotisserie spit rod. Ensure the food is balanced to allow for even rotation. The spit rod's length is adjustable to accommodate various food sizes.
- Place the loaded spit rod back into the grill, ensuring it engages with the automatic rotation mechanism.
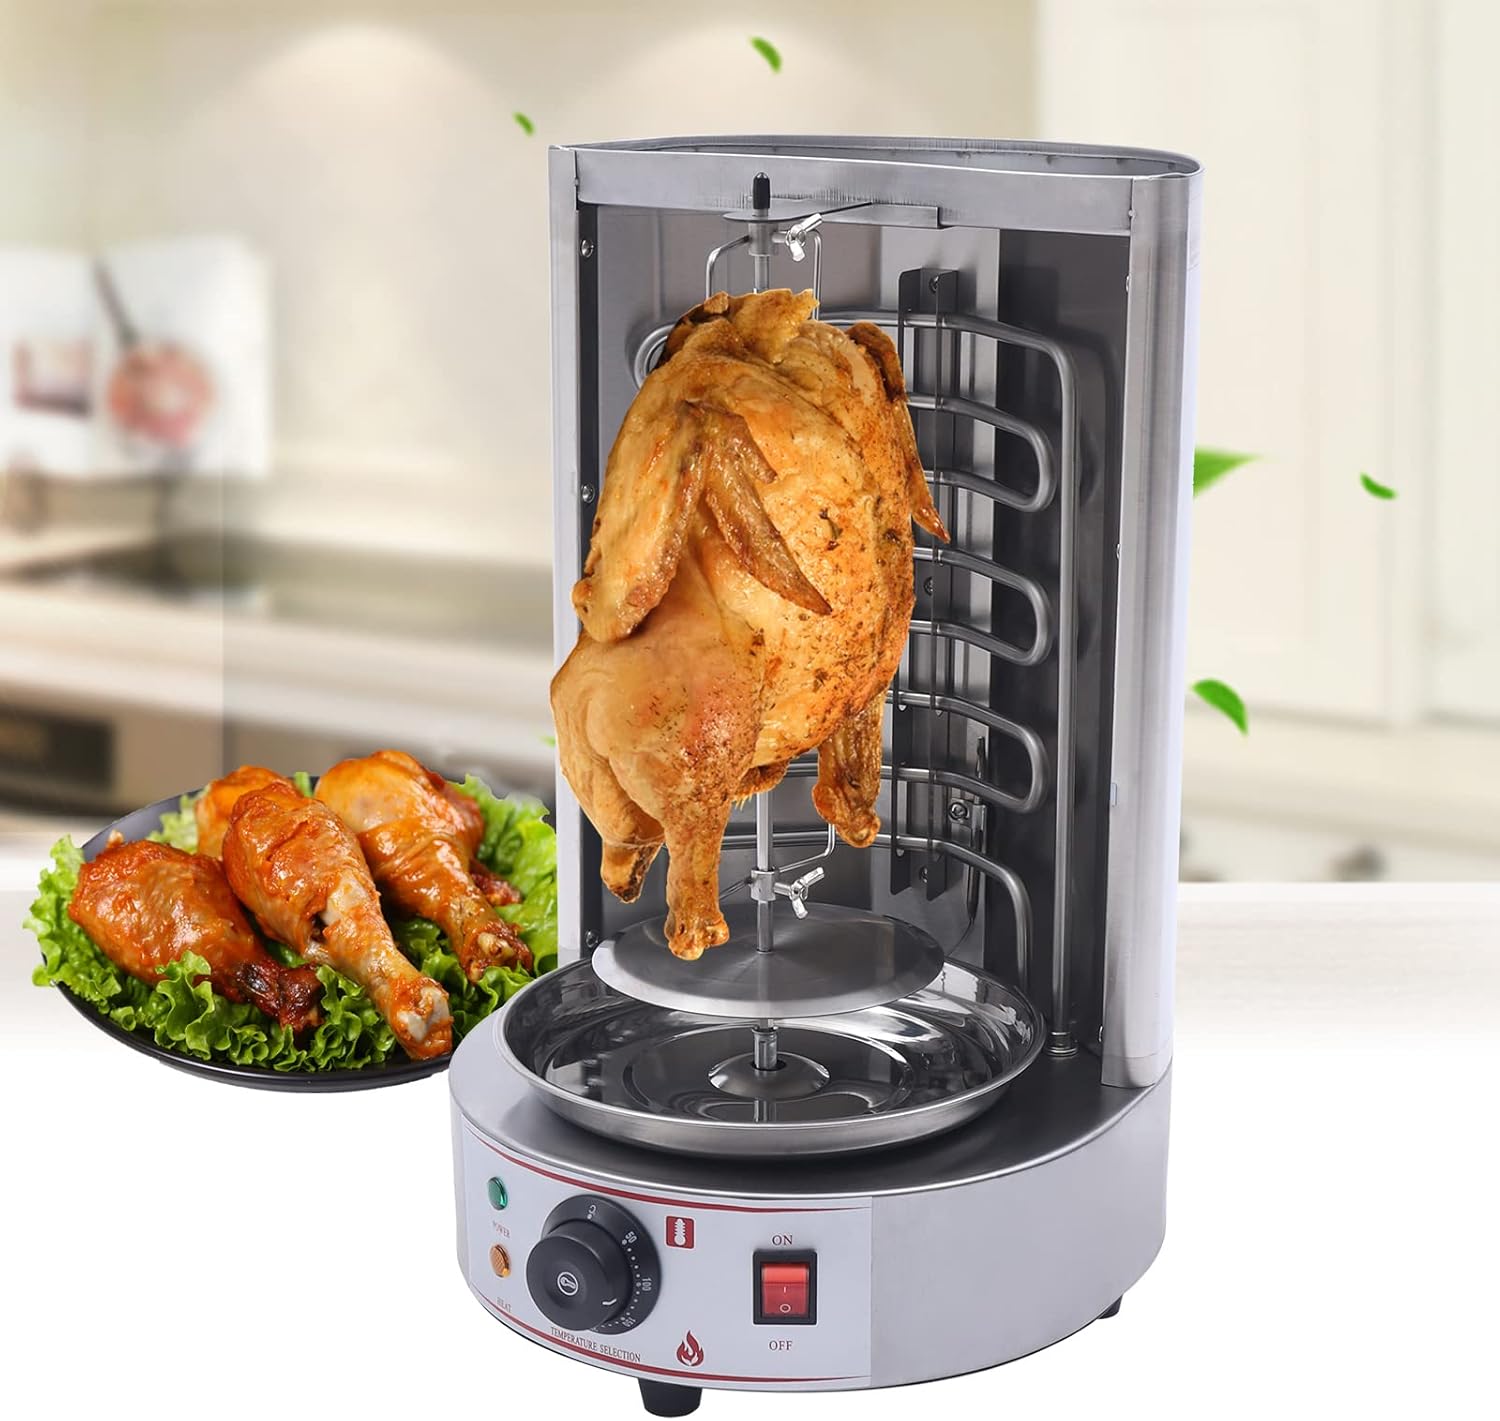
Image: The vertical rotisserie grill in operation, cooking a whole chicken to a golden brown.
6.2 Cooking Process
- Ensure the meat plate/drip tray is correctly positioned at the bottom to collect drippings.
- Turn the main power switch to the 'ON' position. The green 'POWER' indicator light will illuminate.
- Rotate the 'TEMPERATURE SELECTION' knob to your desired cooking temperature, ranging from 50°C to 300°C. The orange 'HEAT' indicator light will illuminate when the heating elements are active.
- The rotisserie spit will automatically begin to rotate at approximately 6 revolutions per minute, ensuring even cooking.
- Monitor the cooking process. Cooking times will vary based on food type, size, and desired doneness.
- Once cooking is complete, turn the 'TEMPERATURE SELECTION' knob to 'OFF' and then the main power switch to 'OFF'.
- Carefully remove the cooked food using heat-resistant gloves or appropriate utensils. Be cautious of hot surfaces and dripping liquids.

Image: A detailed view of the control panel, showing the power switch, temperature knob (50-300°C), and indicator lights.
7. Maintenance and Cleaning
Regular cleaning and maintenance will prolong the life of your appliance.
- Unplug and Cool: Always unplug the grill from the power outlet and allow it to cool completely before cleaning.
- Disassemble: Remove the rotisserie spit rod and the meat plate/drip tray.
- Clean Removable Parts: Wash the spit rod and meat plate/drip tray in warm, soapy water. For stubborn food residue, soak them before cleaning. Rinse thoroughly and dry completely. These parts are typically dishwasher safe, but hand washing is recommended for longevity.
- Clean Interior: Carefully wipe the interior surfaces of the grill with a damp cloth. Avoid direct contact with heating elements. Do not use abrasive cleaners or scouring pads, as they may damage the surface.
- Clean Exterior: Wipe the exterior stainless steel housing with a damp cloth and mild detergent. Dry thoroughly with a soft cloth.
- Storage: Ensure all parts are clean and dry before reassembling or storing the grill. Store in a cool, dry place.
- Do NOT Immerse: Never immerse the main unit (with electrical components) in water or any other liquid.
8. Troubleshooting
If you encounter issues with your grill, refer to the following common problems and solutions:
| Problem | Possible Cause | Solution |
|---|---|---|
| Grill does not turn on. | No power supply; Power switch is off; Faulty outlet. | Ensure the power cord is securely plugged in. Check if the power switch is 'ON'. Test the outlet with another appliance. |
| Heating elements not working. | Temperature knob set to 'OFF' or too low; Heating indicator not lit. | Turn the temperature knob to a desired setting (50-300°C). Ensure the orange 'HEAT' indicator is lit. |
| Spit rod not rotating. | Spit rod not correctly engaged; Motor malfunction; Overloaded with food. | Check if the spit rod is properly seated in the rotation mechanism. Reduce the amount of food if it exceeds the 10KG bearing weight. If the issue persists, contact customer support. |
| Uneven cooking. | Food not balanced on spit; Temperature too high/low. | Ensure food is evenly distributed and balanced on the spit rod. Adjust temperature as needed. |
If the problem persists after attempting these solutions, please contact customer support.
9. Specifications
Technical details for the kunghei Electric Vertical Rotisserie Kebab Grill Machine, Model 1697:
- Model: 1697
- Power: 3000W
- Voltage: 110V or 220V (model dependent)
- Temperature Range: 50-300°C
- Material: Stainless Steel
- Product Dimensions (L x W x H): 32cm x 30cm x 48cm (12.59" x 11.8" x 18.89")
- Product Weight: 5.8 KG (approx. 12.76 lbs)
- Bearing Weight Capacity: 10 KG
- Rotation Speed: 6 RPM
- Fuel Type: Electric

Image: Side view of the rotisserie grill with key dimensions (height, width, depth) indicated.
10. Warranty and Support
This product is covered by a standard manufacturer's warranty. Please refer to the warranty card included with your purchase or contact the seller for specific warranty terms and conditions.
For technical support, troubleshooting assistance, or to inquire about replacement parts, please contact your retailer or the manufacturer's customer service department. Have your model number (1697) and purchase date ready when contacting support.
Related Documents - 1697
 |
Grafco 1697-1 Exam Lamp Assembly and Operation Instructions Assembly, operation, and limited warranty information for the Grafco 1697-1 Exam Lamp with Chrome Plated Base, SOK-IT-GUARD® Lock, and 3-Pin Plug. |
 |
StrikePack Horizon Mod Pack for Xbox: User Manual and Setup Guide Comprehensive user manual for the Collective Minds StrikePack Horizon Mod Pack, an app-powered wired controller adapter for Xbox Series X|S and Xbox One. Learn about setup, operating modes, paddle mapping, firmware updates, factory reset, and FCC compliance. |
 |
HMD Arc Guide d'Utilisation - Manuel Complet Découvrez le HMD Arc avec ce guide d'utilisation complet. Apprenez à configurer, utiliser et protéger votre smartphone HMD Arc, incluant des instructions sur l'appareil photo, Internet, les applications et la sécurité. |
 |
HMD Arc User Guide: Comprehensive Manual for Smartphone Features and Operation This user guide provides detailed instructions and information for the HMD Arc smartphone, covering setup, features, safety, and troubleshooting. Learn how to use your HMD Arc device effectively. |
 |
HMD Aura² User Guide: Setup, Features, and Safety Information Comprehensive user guide for the HMD Aura² smartphone (models TA-1697, TA-1682). Learn about setup, basic functions, camera, connectivity, safety, and more. |
 |
HMD Arc User Guide: Setup, Features, and Safety Information Comprehensive user guide for the HMD Arc smartphone (models TA-1697, TA-1682), covering setup, features, security, connectivity, safety, and more. Get the most out of your device with HMD Global. |
Ask a question about this manual
Ask about setup, troubleshooting, compatibility, parts, safety, or missing instructions. Manuals+ will review the question and use this page’s manual context to help answer it.