Giosolar GSN-W412S
Giosolar 400W 12V Wind Turbine Generator User Manual
Model: GSN-W412S
1. Introduction
This manual provides essential information for the safe and efficient installation, operation, and maintenance of your Giosolar 400W 12V Wind Turbine Generator. Please read this manual thoroughly before installation and retain it for future reference.
The Giosolar 400W 12V Wind Turbine is designed to convert wind energy into electrical power, suitable for various applications including marine, RV, home, and hybrid solar-wind systems. It features a permanent magnet rotor alternator for low-speed startup and high wind energy utilization.
2. Safety Information
WARNING: Improper installation or operation can lead to serious injury or equipment damage. Always follow safety guidelines.
- Ensure all electrical connections are secure and properly insulated to prevent short circuits and electric shock.
- Do not attempt to install or service the wind turbine during high winds or stormy weather.
- Always disconnect power before performing any maintenance or repair.
- Wear appropriate personal protective equipment (PPE) during installation and maintenance.
- The wind turbine blades rotate at high speeds. Keep clear of the rotor area during operation.
- Ensure the tower is securely anchored and capable of withstanding local wind conditions.
3. Package Contents
Verify that all components listed below are present and undamaged upon unpacking.
- 1 x 400W 12V Wind Turbine (Pole NOT included)
- 1 x Wind Charge Controller
- Mounting Hardware (bolts, nuts, washers, wrenches)

Figure 3.1: Main components of the Giosolar 400W 12V Wind Turbine Generator package, including the turbine body, blades, tail fin, charge controller, and mounting hardware. The tower pole is not included.
4. Technical Specifications
| Parameter | Value |
|---|---|
| Nominal Voltage | DC 12V |
| Rated Power | 400W |
| Cut-in Wind Speed | 2.5 m/s |
| Rated Wind Speed | 10.5 m/s |
| Maximum Wind Speed | 35 m/s |
| Rotor Diameter | 1.2 M |
| Recommended Tower Diameter | > 48mm |
| Recommended Tower Height | 4.5M - 10M |
| Net Weight | 8 kg (17.64 lbs) |
| Generator Type | Permanent Magnet Alternator |
| Special Feature | Low Wind Speed Start |
5. Setup and Installation
Careful installation is crucial for optimal performance and safety. It is recommended to have at least two people for installation.
5.1 Site Selection
Choose a location with unobstructed wind flow, away from buildings, trees, and other obstacles that could create turbulence. The recommended tower height is 4.5M to 10M.
5.2 Tower Preparation
A sturdy tower with a diameter greater than 48mm is required (not included). Ensure the tower is properly anchored to the ground or mounting surface according to local building codes and engineering standards.

Figure 5.1: Key structural features of the wind turbine, highlighting the automatic wind direction adjustment, permanent magnet generator, heat dissipation design, and tower mounting points. Note that the pole is not included.
5.3 Turbine Assembly
- Attach Blades: Securely fasten the three blades to the rotor hub using the provided hardware. Ensure they are balanced and tightened according to specifications.
- Mount Tail Fin: Attach the tail fin assembly to the main body of the turbine. This allows the turbine to orient itself into the wind.
- Connect to Tower: Carefully lift the assembled turbine and mount it onto the prepared tower. Use the four mounting holes and appropriate bolts to secure it firmly. Ensure the outer diameter of the tower tube is at least 50mm for proper fit.

Figure 5.2: The three-leaf fan design of the wind turbine, which contributes to efficient energy capture, and a close-up of the internal permanent magnet generator.
5.4 Electrical Connections
Connect the wind turbine's output wires to the wind charge controller. Then, connect the charge controller to your 12V battery bank. Follow the wiring diagram provided with the charge controller for correct polarity and connections.
- Ensure all connections are tight and protected from weather.
- Use appropriate gauge wiring for the distance and current to minimize power loss.
- The charge controller manages the charging process and protects the battery from overcharging.
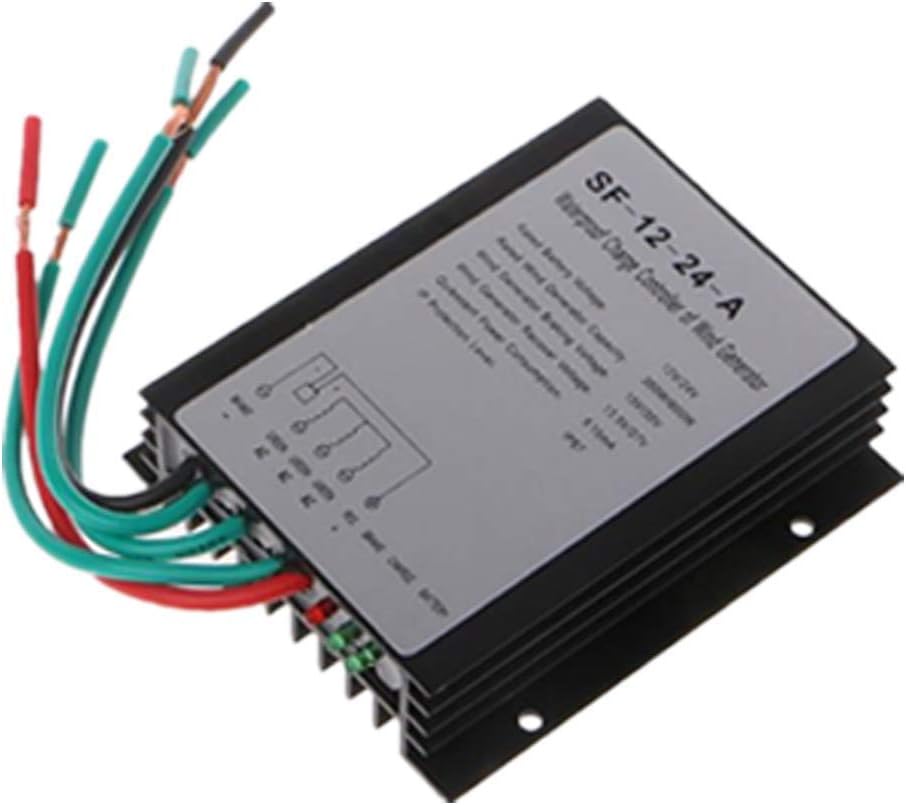
Figure 5.3: The Giosolar SF-12-24-A Wind Charge Controller, showing its input and output terminals for connecting to the wind turbine and battery bank.
6. Operating Instructions
Once installed and wired correctly, the Giosolar wind turbine operates automatically. It begins generating power at a cut-in wind speed of 2.5 m/s.
- The turbine's unique rail design automatically adjusts its direction to face the wind, optimizing power generation.
- The charge controller will regulate the power output to safely charge your 12V battery bank.
- Monitor the charge controller's indicators (if available) to ensure proper operation and battery charging status.

Figure 6.1: The Giosolar wind turbine in operation, demonstrating its ability to generate power efficiently even at low wind speeds, with minimal vibration.
7. Maintenance
Regular maintenance ensures the longevity and optimal performance of your wind turbine.
- Visual Inspection (Monthly): Check blades for any cracks, chips, or damage. Inspect all bolts and connections for tightness. Look for any signs of corrosion on metal parts.
- Cleaning (As Needed): Clean the blades and turbine body to remove dirt, dust, or debris that could affect aerodynamic efficiency. Use a soft cloth and mild detergent.
- Electrical Connections (Annually): Verify all electrical connections are secure and free from corrosion. Ensure wiring insulation is intact.
- Bearing Check (Annually): Listen for unusual noises from the turbine head, which could indicate bearing wear.
- Tower Integrity (Annually): Inspect the tower for structural integrity, rust, or damage. Ensure guy wires (if applicable) are properly tensioned.
8. Troubleshooting
| Problem | Possible Cause | Solution |
|---|---|---|
| No power output | Low wind speed; Loose electrical connections; Damaged charge controller; Faulty generator. | Check wind speed; Inspect all wiring; Test charge controller; Contact support if generator is suspected faulty. |
| Turbine not rotating | Insufficient wind; Obstruction; Bearing issue; Brake engaged (if applicable). | Wait for higher wind; Check for obstructions; Inspect bearings; Ensure no brake is active. |
| Excessive vibration/noise | Unbalanced blades; Loose mounting bolts; Worn bearings. | Inspect blades for damage/balance; Tighten all mounting hardware; Contact support for bearing replacement. |
| Battery not charging | Charge controller malfunction; Battery fault; Incorrect wiring. | Check charge controller status; Test battery; Verify wiring connections. |
9. Warranty and Support
For warranty information, please refer to the documentation provided at the time of purchase or contact Giosolar customer support directly. Keep your purchase receipt as proof of purchase.
If you encounter issues not covered in this troubleshooting guide, or require technical assistance, please contact Giosolar customer service through their official website or the retailer from whom you purchased the product.
Giosolar Contact Information: Refer to your purchase documentation or visit the official Giosolar website for the most current contact details.
Ask a question about this manual
Ask about setup, troubleshooting, compatibility, parts, safety, or missing instructions. Manuals+ will review the question and use this page’s manual context to help answer it.