1. Product Overview
The GENSHED Generator Shed Model GCE is an innovative enclosure designed to protect your portable generator during both operation and storage. It features a robust steel frame and durable waterproof fabric covers, ensuring your generator is shielded from various weather conditions while allowing for proper ventilation and accessibility.
Key features include:
- Dual Functionality: Serves as both a running generator cover and a storage enclosure at the same outdoor location.
- Easy Portability: Designed to sit and lock onto the generator's top frame, allowing the generator to be moved or rotated with the shed attached.
- Enhanced Safety: Fabric covers are attached to the outside of the steel frame, preventing contact with hot running generator parts and reducing melt risk in windy conditions.
- Optimal Ventilation & Observation: Side covers can be opened and locked at various heights to meet ventilation requirements or for observation.
- Tool-Free Assembly: Utilizes a unique hand-twist quick coupler design for easy assembly and disassembly without tools.


2. Setup and Assembly
The GENSHED Generator Shed is designed for straightforward, tool-free assembly. Follow these steps to set up your shed:
- Unpack Components: Carefully remove all components from the packaging. Verify that all parts are present according to the packing list.
- Assemble Steel Frame: Connect the steel frame components using the unique hand-twist quick couplers. Ensure all connections are secure. The frame forms the structural base for the shed.
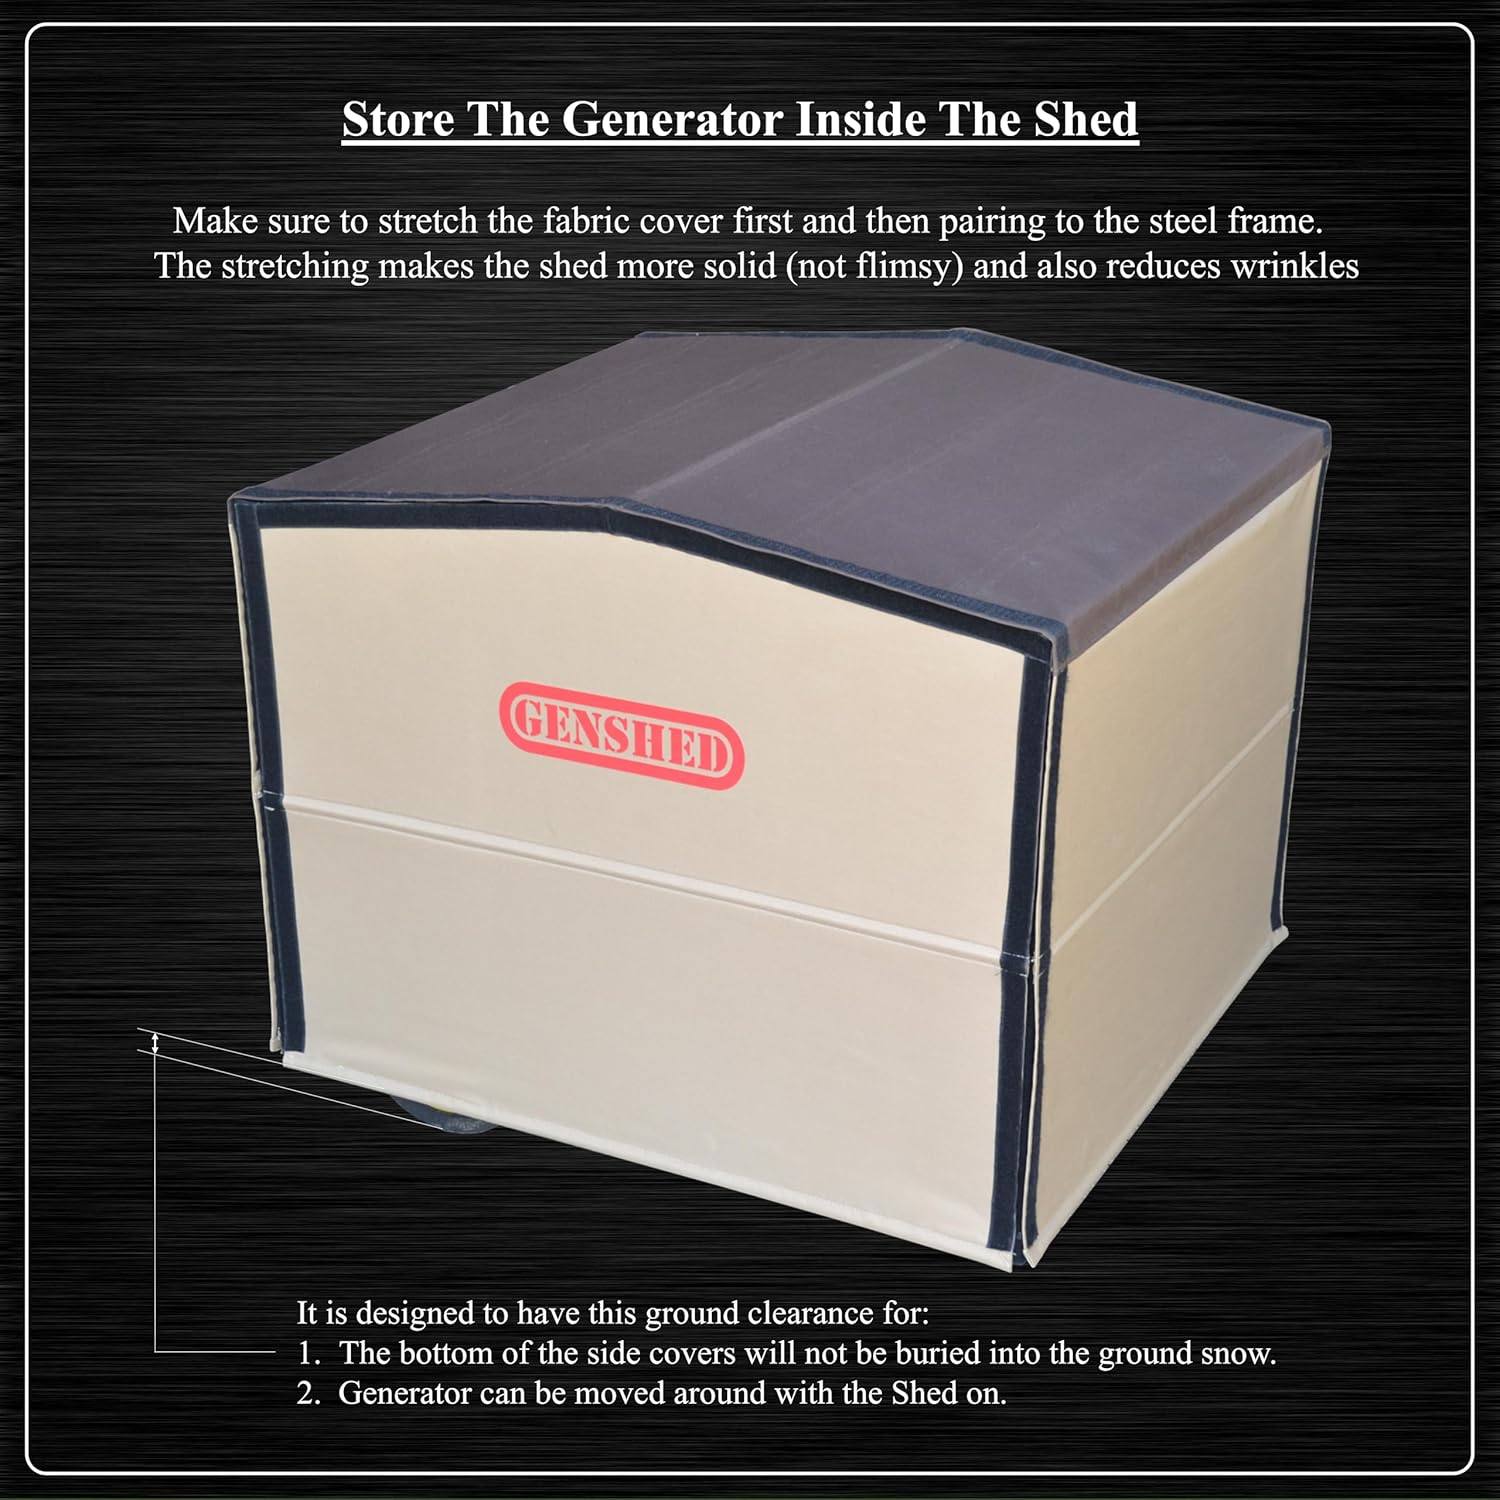
- Attach Fabric Covers: Secure the waterproof fabric covers to the assembled steel frame. The covers are designed to attach to the outside surface of the frame. Ensure they are stretched properly to make the shed solid and reduce wrinkles.
- Position on Generator: Place the assembled shed over your generator. The shed is designed to sit and lock to the top frame of your generator with some ground clearance.
- Secure to Generator: Use the provided velcro straps to pair the shed to the generator's top frame. Note: Some users have found that additional or different types of velcro straps may be beneficial for a more secure tie between the generator and the cover.
- Insert Fabric Reinforce Bars: Insert the reinforce bars into the designated pockets within the fabric covers to maintain their shape and stability.


For proper sizing, measure your generator's length and width and refer to the table in the Specifications section to select the appropriate model (GCE, GCL, or GCM) with inner dimensions slightly larger than your generator.
3. Operating Instructions
The GENSHED Generator Shed offers versatile operation for both running and storing your generator.
3.1. Running the Generator
To operate your generator safely within the shed, ensure adequate ventilation:
- Ventilation: Open the side covers along the steel frame's outside surface. They can be locked at any needed height to provide sufficient ventilation for the running generator.
- Fresh Air Intake: Partially open the front cover to allow fresh air into the generator's filter area.
- Exhaust Gas Out: Fully open the right cover (muffler side) to ensure exhausted air can exit the shed freely.
- CO Sensor Consideration: If your generator is equipped with a CO sensor, ensure the cover around the sensor area is opened as much as possible to prevent carbon monoxide accumulation that could trigger the sensor.
- Observation/Cord Access: The front cover can be rolled to any needed height for observation of the generator or to plug in power cords.

3.2. Refueling the Generator
To refuel your generator while it is inside the shed:
- Remove Cross Beam: The cross beam located above the fuel cap can be easily removed before fueling.
- Refuel: Proceed with refueling your generator according to its manufacturer's instructions.
- Replace Cross Beam: After fueling, re-place the cross beam securely.
3.3. Moving the Generator with Shed On
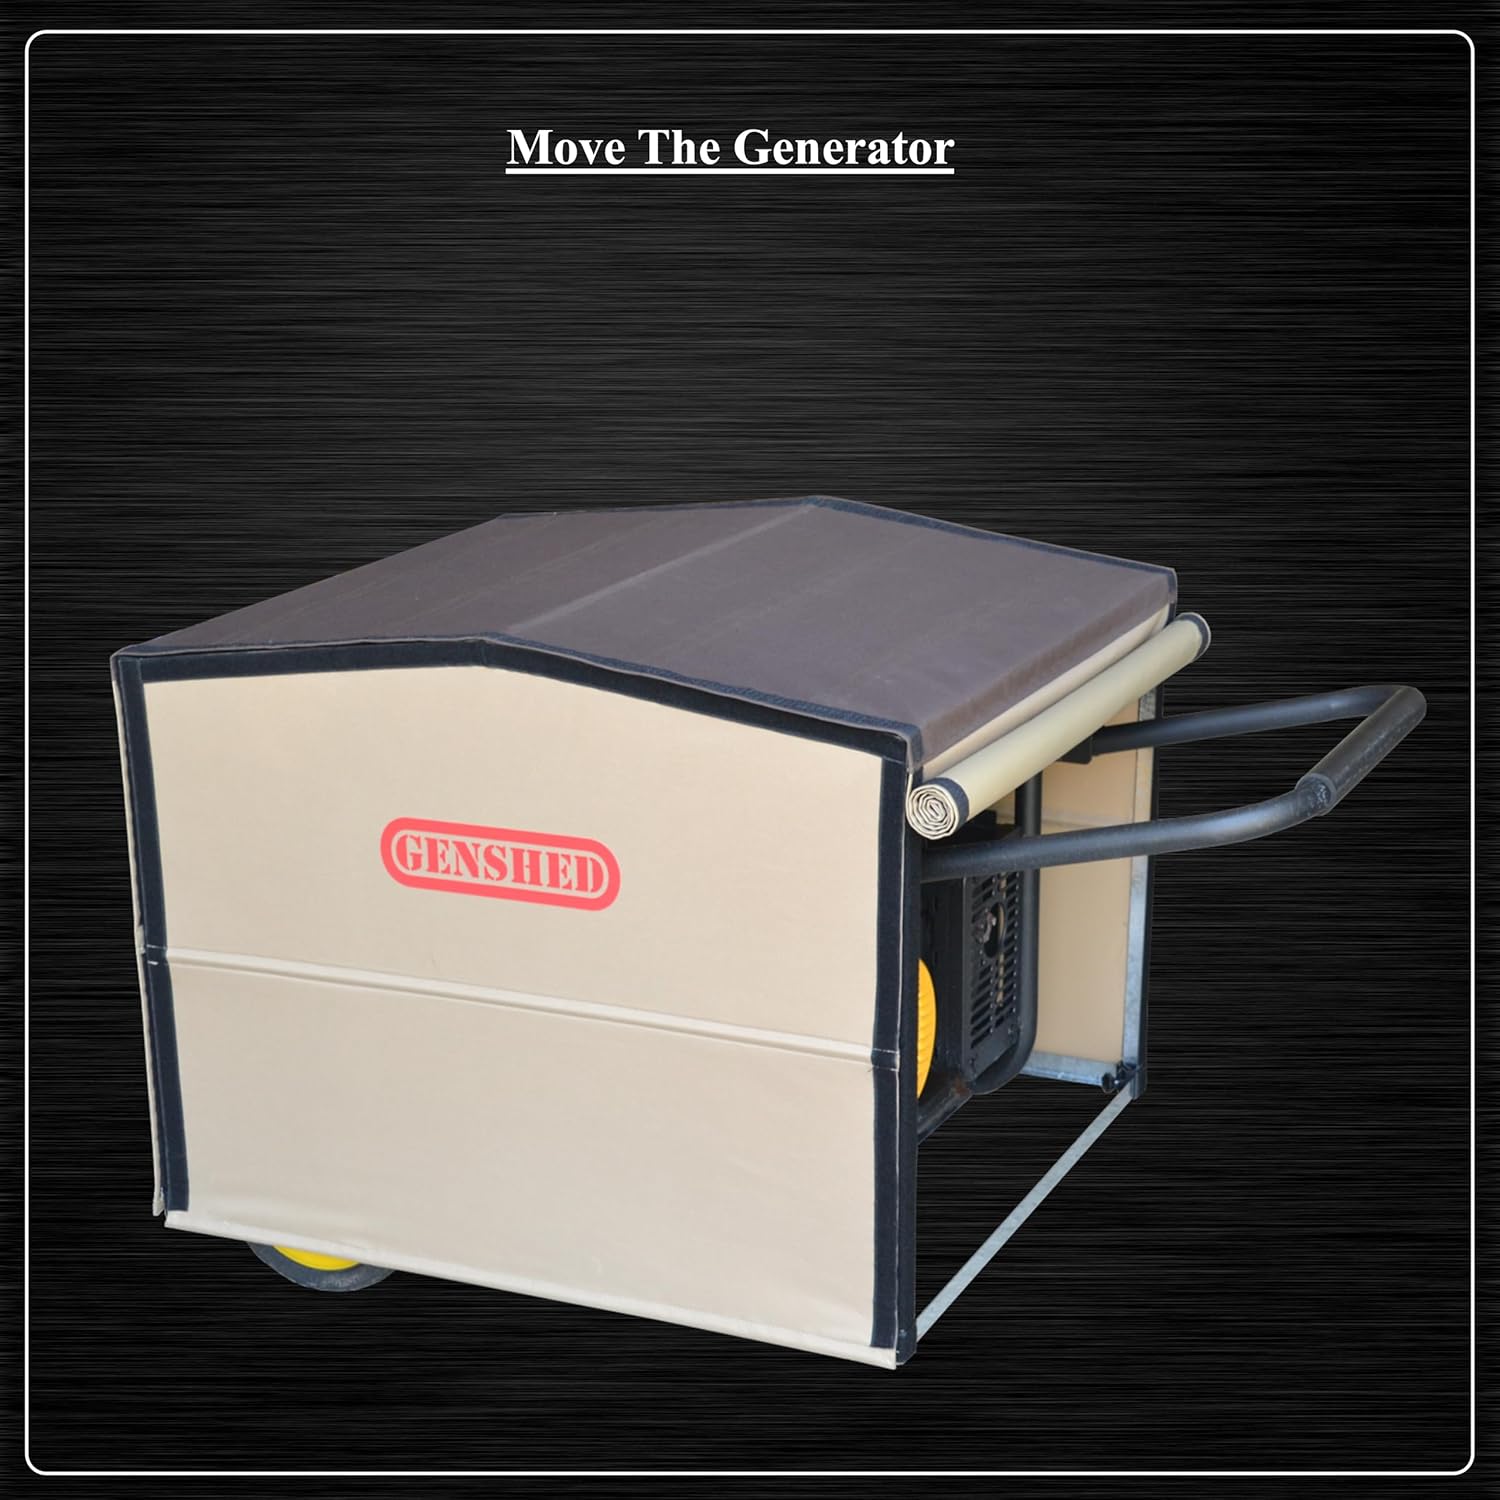
The GENSHED is designed to allow easy movement of your generator without removing the shed:
- Unfold Generator Handle: Simply unfold the generator's handle.
- Move/Rotate: You can then move or rotate the generator as needed, with the shed remaining securely attached.
3.4. Storing the Generator
For long-term storage or protection from elements when not in use:
- Close All Covers: Flip down or roll down all side and front/back covers to fully enclose the generator.
- Secure Covers: Ensure all covers are securely fastened to the steel frame using the integrated velcro or other fastening mechanisms.
- Ground Clearance: The shed is designed with ground clearance to prevent the bottom of the side covers from being buried in snow and to allow the generator to be moved with the shed on.

4. Maintenance
Regular maintenance will ensure the longevity and effectiveness of your GENSHED Generator Shed:
- Cleaning: Periodically clean the fabric covers with a damp cloth and mild soap. Avoid harsh chemicals that could damage the material.
- Frame Inspection: Regularly inspect the steel frame for any signs of rust, bending, or damage. Ensure all quick couplers remain secure.
- Fabric Inspection: Check the fabric for tears, fraying, or excessive wear. Promptly repair any damage to maintain waterproof integrity.
- Velcro Condition: Inspect the velcro straps for wear and tear. Replace or reinforce them if they lose their adhesive properties to ensure the shed remains securely attached to the generator.
- Storage: If disassembling for storage, keep the original packaging to protect components during transport or off-season storage.
5. Troubleshooting
This section addresses common issues you might encounter with your GENSHED Generator Shed.
| Problem | Possible Cause | Solution |
|---|---|---|
| Shed feels flimsy or covers are loose. | Fabric covers not stretched tightly enough or not properly secured to the frame. | Ensure fabric covers are stretched taut and securely fastened to the steel frame. Re-check all velcro attachments. |
| Rods along the bottom of flaps fall out. | Rods are not fully inserted or secured within their pockets. | Ensure rods are fully inserted into their designated pockets. If they continue to fall out, consider adding a small piece of tape or adhesive to the ends to create a tighter fit, or contact support for replacement rods. |
| Shed does not securely tie to the generator. | Provided velcro straps are insufficient or not properly applied. | Ensure the velcro is applied correctly. If the provided sticky-back velcro is not effective for tying the shed to the generator, consider purchasing and using stronger, non-adhesive velcro straps or alternative tie-down methods. |
| Generator overheats or CO sensor triggers during operation. | Insufficient ventilation. | Ensure all side covers are opened to the maximum extent for ventilation. The front cover should be partially open for fresh air intake, and the right (muffler) side fully open for exhaust. Pay special attention to opening the area around the CO sensor. |
6. Product Specifications
| Feature | Detail |
|---|---|
| Model | GCE |
| Brand | GENSHED |
| Material | Steel & Waterproof Fabric |
| Color | Brown |
| Item Weight | 16 pounds |
| Product Dimensions (L x W x H) | 32 x 24 x 27.5 inches |
| Water Resistance Level | Waterproof |
| Closure Type | Hook & Loop |
| Special Features | All-Around Steel Frame, Tool-Free Assembly |
6.1. Model Sizing Guide
To select the correct GENSHED model for your generator, compare your generator's dimensions and peak power to the table below. Choose a shed model with inner length and width slightly larger than your generator.

| Model | General Guideline (By Generator's Peak Power) | Shed's Inner Length x Width | Shed's Inner Height |
|---|---|---|---|
| GCE | Up to 9.2K | 31.5" L x 27.5" W | 24" |
| GCL | 9.5K - 12.5K (e.g., Honda EU7000iS) | 35.5" L x 31.5" W | 26" |
| GCM | 12.5K - 18K | 42" L x 34" W | 30" |
Note: The shed is coupled to the generator's top frame if the shed's height is less than the generator's height. Otherwise, it can be anchored to the ground through 8 holes on the shed's bottom steel frame.
7. Warranty and Support
7.1. Warranty Information
The GENSHED Generator Shed Model GCE comes with a 1-year limited warranty from the date of purchase. This warranty covers defects in materials and workmanship under normal use. It does not cover damage resulting from misuse, abuse, accidents, unauthorized modifications, or normal wear and tear.
Please retain your proof of purchase for warranty claims.
7.2. Customer Support
For any questions, concerns, or assistance with your GENSHED Generator Shed, please contact our customer support team. When contacting support, please have your product model (GCE) and purchase information ready.
Manufacturer: GenShed LLC
For the most current contact information, please visit the official GENSHED store on Amazon or the manufacturer's website.
You can visit the GENSHED Store at: GENSHED Amazon Store