1. Introduction
This manual provides essential information for the safe and effective operation, maintenance, and troubleshooting of your VEVOR Wet Electric Polisher. Please read this manual thoroughly before using the product and retain it for future reference.
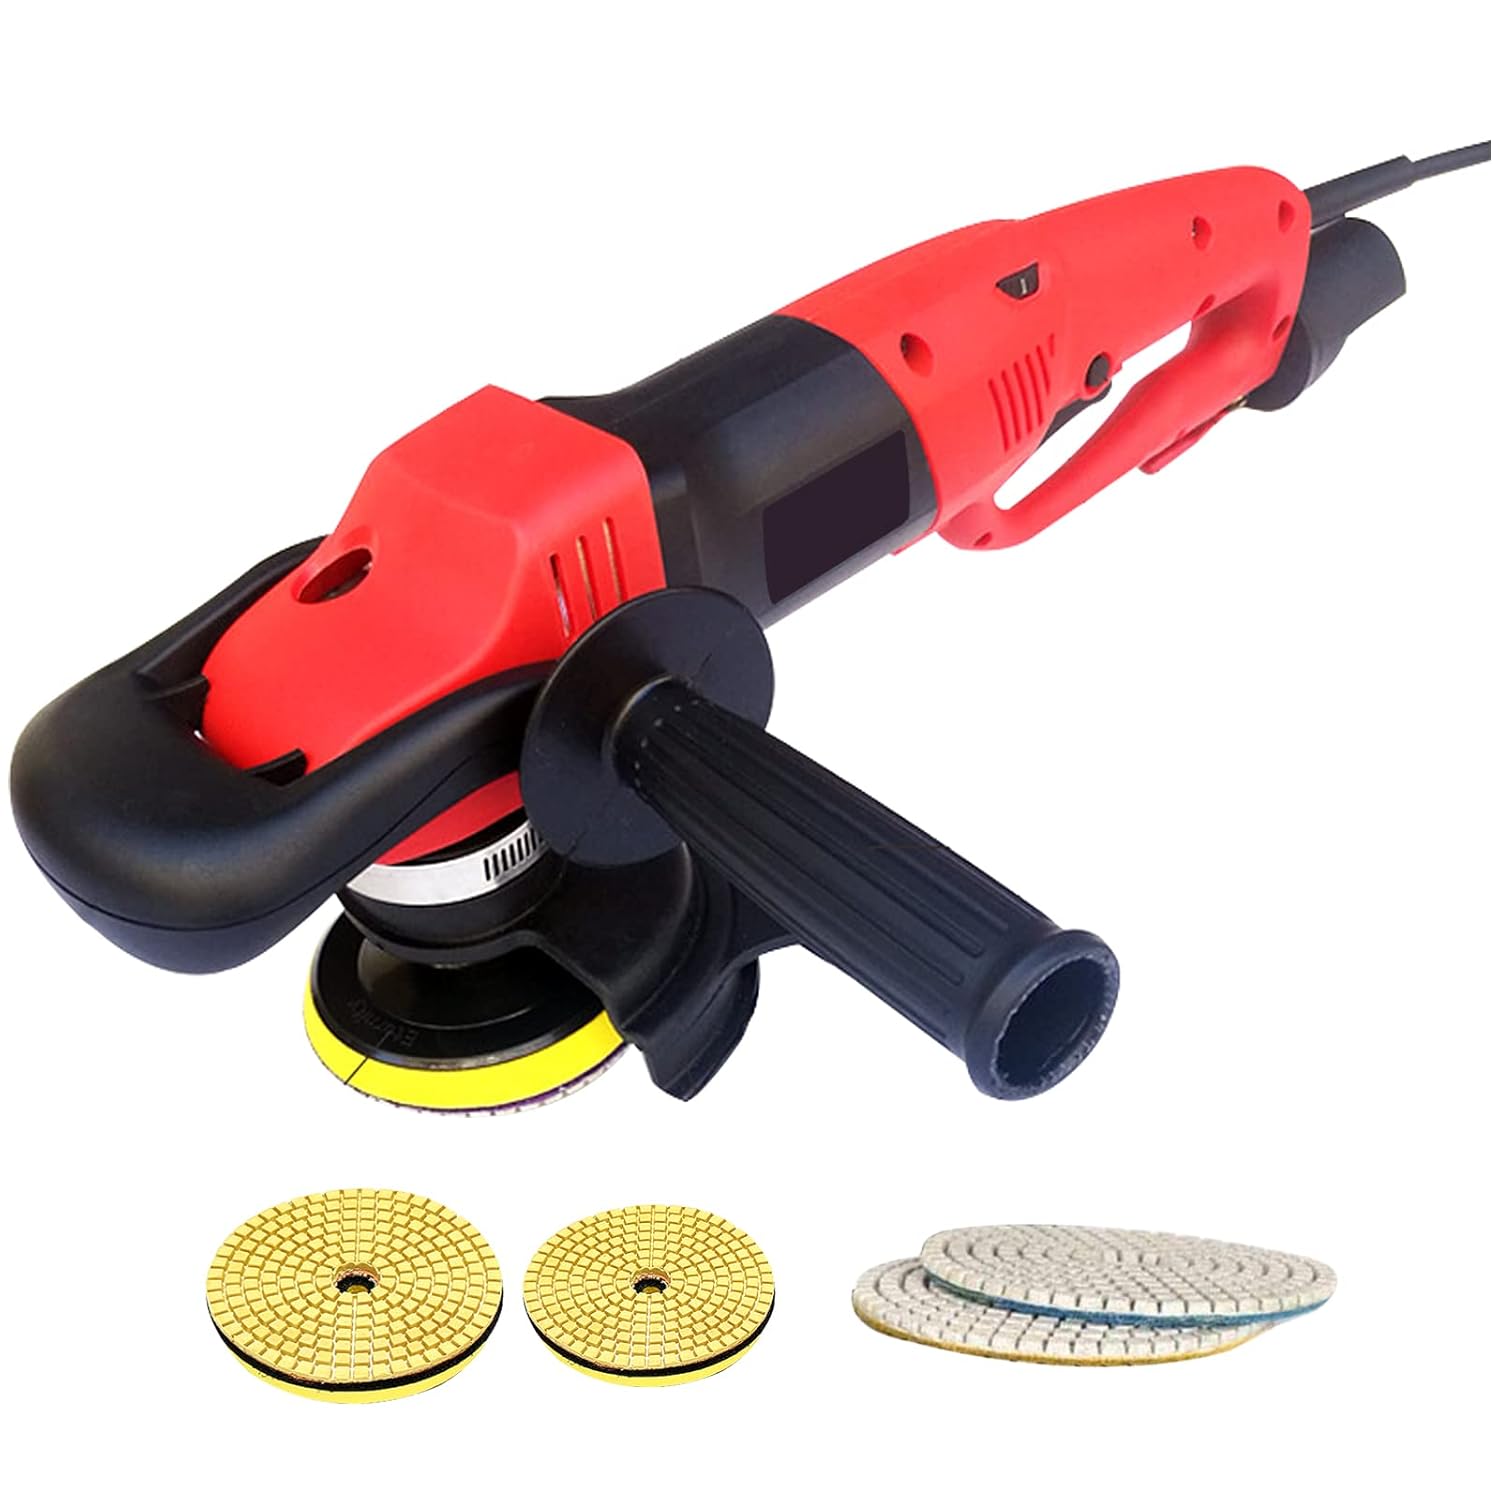
The VEVOR Wet Electric Polisher is designed for professional masonry work, offering powerful and precise polishing for various stone surfaces. Its robust 1200W motor and variable speed control ensure optimal performance for polishing, buffing, and sanding tasks on materials such as marble, granite, concrete, and ceramic tiles.
2. Safety Instructions
Always follow basic safety precautions to reduce the risk of fire, electric shock, and personal injury when operating this tool.
- Electrical Safety: The polisher features enhanced electrical safety with a Class-A GFCI (Ground Fault Circuit Interrupter) and leakage protection to prevent hazardous electrical shock. Always ensure the GFCI is functioning correctly before use. The tool has double insulation and an extra-long 2m industrial-grade power cable for safe operation.
- Water Management: This is a wet polisher. Ensure proper water flow control and use the unique waterproof safety shield to avoid electrical shocks. The three-hole water heads are positioned at 120 degrees for uniform water distribution.
- Personal Protective Equipment (PPE): Always wear appropriate PPE, including safety glasses, gloves, and hearing protection, during operation.
- Work Area: Keep the work area clean, well-lit, and free from obstructions. Do not operate in explosive atmospheres, such as in the presence of flammable liquids, gases, or dust.
- Tool Handling: Ensure all handles (rear, top, and side) are securely attached and provide a firm grip. Do not force the tool; let the tool do the work.
- Maintenance: Disconnect the power supply before performing any maintenance, cleaning, or changing accessories.

Figure 2.1: Enhanced Electrical Security. This image illustrates the safety features of the polisher, including leakage protection, double-insulation motor, rubber handle cover, and an extra-long industrial cable, all designed to safeguard against electrical shock.
3. Product Features
- Powerful 1200W Motor: Provides significant polishing force for efficient work.
- 6 Variable Speeds: Adjustable from 1100 to 4200 RPM, allowing precise control for various polishing, buffing, and sanding tasks. Speed can be controlled via a dial and a one-key switch during operation.
- Comfortable Operation: Features water flow control via a valve, a waterproof safety shield, and three-hole water heads for even water distribution.
- Ergonomic Design: Equipped with rear, top, and side handles for extended use and comfortable operation. The top handle provides adequate pressure, and the additional side handle enhances power and stability.
- Versatile Application: Ideal for wet polishing concrete countertops, stone countertops, floor surfaces, marble, and ceramic tiles.
- M14 Output Thread: Compatible with most polishing pads available on the market.

Figure 3.1: Versatile Applications. This image demonstrates the polisher's suitability for various surfaces, including concrete countertops, stone countertops, floor surfaces, and ceramic tiles.

Figure 3.2: 6 Variable Speeds. The image highlights the adjustable speed settings (1100-4200 RPM) with a dial control, ensuring low noise, high stability, and high efficiency.
4. Package Contents
Upon opening the package, verify that all items listed below are present and undamaged:
- 1 x Wet Polishing Grinder
- 2 x Grinding Wheels (100 mm & 127 mm)
- 2 x Wet Polishing Pads
- 1 x Allen Wrench
- 1 x Carbon Brush
- 1 x 2m Hose Connector
- 1 x Side Handle
- 1 x Splash Shield
5. Specifications
| Specification | Value |
|---|---|
| Model | Wet Polisher 100 mm & 127 mm (Buffing Machine 3) |
| Color | Red |
| Material | Aluminum |
| Water Injection Mode | Low |
| Power | 1200 W |
| Voltage | 220 V 50 - 60 Hz |
| Polishing Wheel Diameter | 4" / 100 mm |
| No-Load Speed | 1100 - 4200 RPM |
| Output Thread | M14 |
| Adjustable Speed Gears | 6 |
| Water Injection Holes | 3 |
| Water Pipe Length | 78.7" / 2 m |
| Net Weight | 8 lbs / 3.6 kg |
| Product Dimensions (L x W x H) | 65 x 30 x 45 cm |

Figure 5.1: Product Dimensions. This image provides a visual representation of the polisher's dimensions, including length (25in / 65cm) and height (17in / 45cm and 12in / 30cm for different parts).
6. Setup and Assembly
Follow these steps to prepare your polisher for use:
- Attach Handles: Securely attach the side handle to the polisher. The ergonomic design allows for two kinds of handle installation for optimal comfort and control.
- Install Polishing Disc: Take out the desired polishing disc and stick the pad onto the polisher's base. Ensure it is centered and firmly attached.
- Connect Water Hose: Connect the 2m water hose to the polisher's water inlet. Tighten the waterproof plastic hose clamp to prevent leaks.
- Water Flow Control: Ensure the water flow control valve is accessible and can be freely turned to regulate the water flow during operation.
- Splash Shield: Attach the flexible splash shield to protect against water and debris during operation.

Figure 6.1: Comfortable to Operate & Effortless Installation. This image shows the installation process, including tightening the hose clamp, attaching the polishing disc, and controlling water flow.

Figure 6.2: Humanized Design. This image illustrates ergonomic features such as the collision-proof head cover, flexible splash guard, water flow control, and options for handle installation.
7. Operating Instructions
Before starting, ensure you have read and understood all safety instructions.
- Power Connection: Plug the polisher into a suitable 220V 50-60Hz power outlet. Ensure the GFCI is engaged.
- Start-up: Turn on the polisher using the power switch. The soft start feature ensures smooth initial operation.
- Adjust Speed: Use the 6-speed variable control dial to select the appropriate RPM (1100-4200 RPM) for your specific polishing task. A lower speed is generally used for initial grinding or rough surfaces, while higher speeds are for fine polishing.
- Control Water Flow: Adjust the water flow valve to ensure a continuous and adequate supply of water to the polishing surface. This is crucial for wet polishing to reduce dust and cool the polishing pads.
- Polishing Technique: Apply even pressure and move the polisher steadily across the surface. Overlapping passes will ensure uniform results.
- Shut-down: Once finished, turn off the polisher and disconnect it from the power supply. Turn off the water supply.
8. Maintenance
Regular maintenance ensures the longevity and optimal performance of your VEVOR Wet Electric Polisher.
- Cleaning: After each use, clean the polisher thoroughly, especially the water channels and polishing pad area, to prevent mineral buildup and clogging. Wipe down the exterior with a damp cloth. Do not use harsh chemicals.
- Carbon Brushes: Periodically check and replace the carbon brushes as they wear down. The polisher features replaceable carbon brushes for easy maintenance.
- Storage: Store the polisher in a dry, clean place, away from direct sunlight and extreme temperatures. Ensure it is disconnected from power and all water is drained before storage.
- Cord Inspection: Regularly inspect the power cord and GFCI for any signs of damage. Do not use the tool if the cord is damaged.
9. Troubleshooting
This section addresses common issues you might encounter. For problems not listed here, contact VEVOR customer support.
| Problem | Possible Cause | Solution |
|---|---|---|
| Polisher does not start. | No power supply; GFCI tripped; Faulty switch. | Check power connection and outlet. Reset GFCI. If problem persists, contact service. |
| Insufficient water flow. | Water valve closed; Hose kinked or clogged; Water source issue. | Open water valve. Check hose for kinks or blockages. Ensure water source is active. |
| Excessive vibration or noise. | Polishing disc improperly installed; Worn carbon brushes; Internal damage. | Re-install polishing disc correctly. Replace carbon brushes. If noise persists, seek professional repair. |
| Poor polishing results. | Incorrect speed setting; Worn polishing pad; Insufficient water. | Adjust speed according to material. Replace worn polishing pad. Ensure adequate water flow. |
10. Warranty and Support
For warranty information or technical support, please refer to the official VEVOR website or contact their customer service directly. Keep your purchase receipt as proof of purchase for any warranty claims.
Visit the VEVOR store for more products and support: VEVOR Official Store