
Introduction
This manual provides essential information for the safe and efficient operation of your amiciSmart 80A Solar Charge Controller. This 4-stage PWM controller is designed to regulate the charge from your solar panel to your battery, supporting 12V, 24V, 36V, and 48V systems with lead-acid, lithium iron, and phosphate battery types. It features multiple intelligent protections to ensure system longevity and safety.
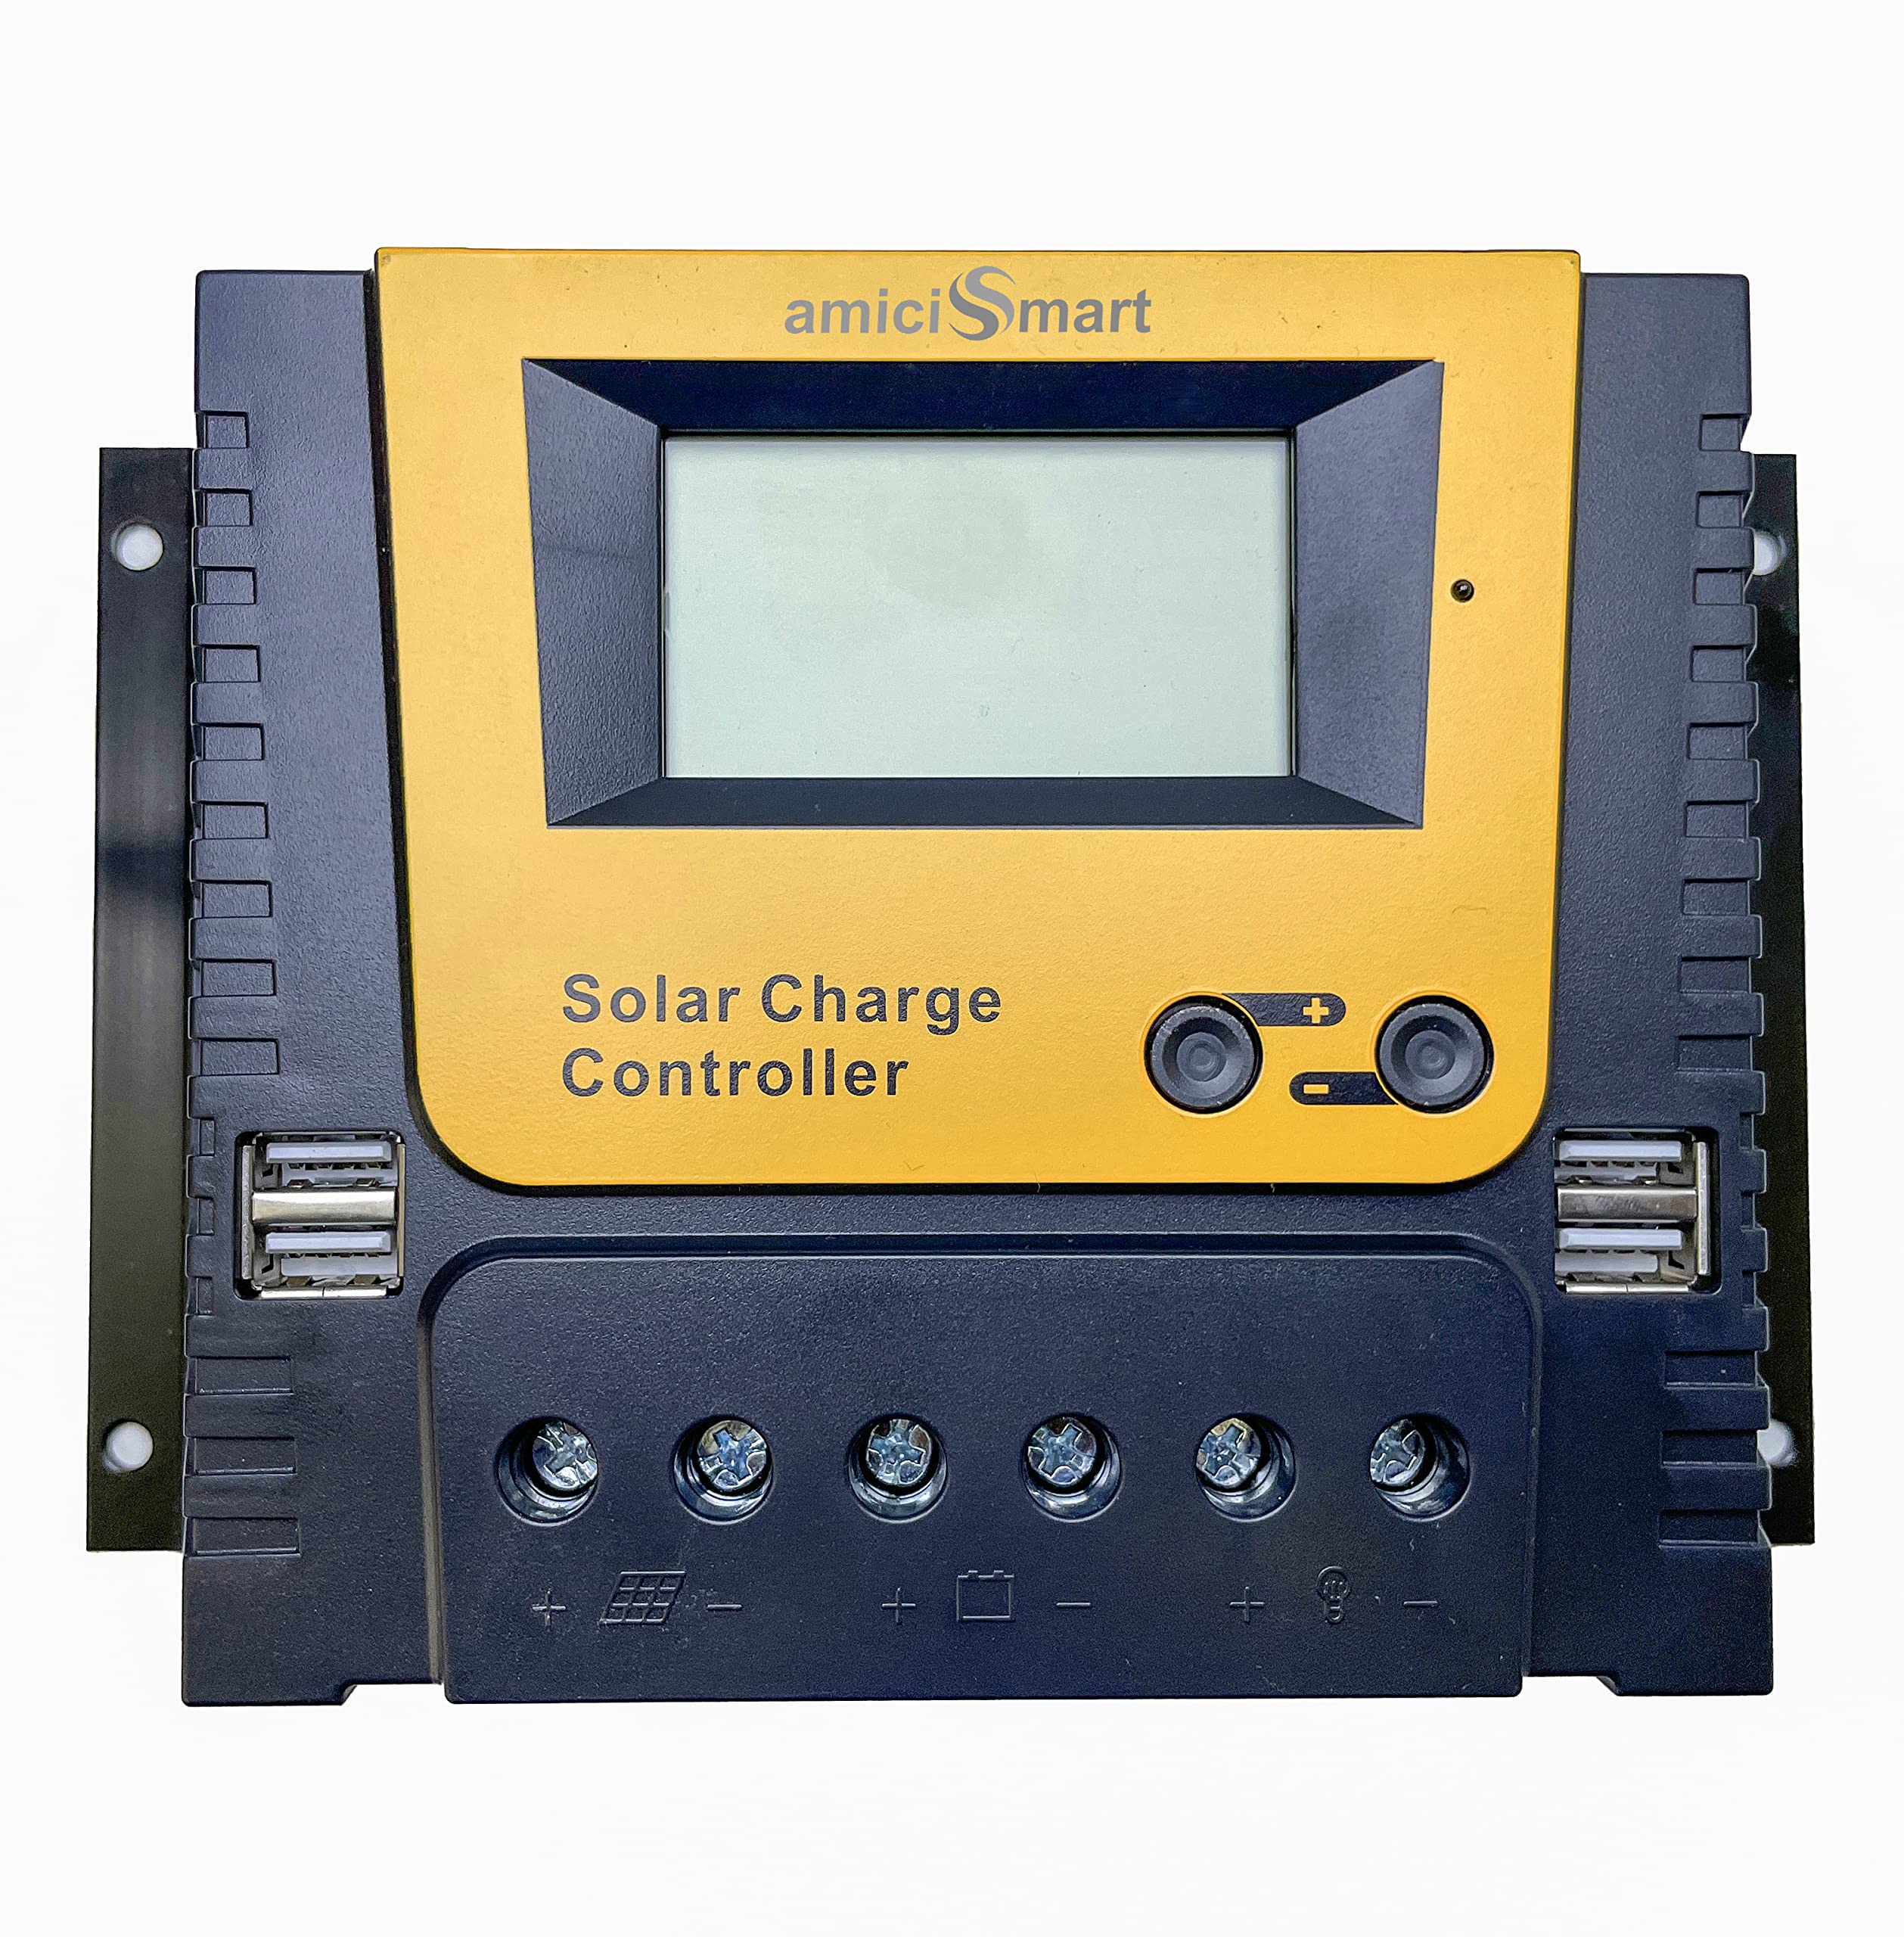
Figure 1: amiciSmart Solar Charge Controller 80A with LCD display and USB ports.

Figure 2: Front view of the amiciSmart Solar Charge Controller, highlighting its robust design and display.
Installation Guide
Proper installation is crucial for the safe and correct functioning of the solar charge controller. Please follow the connection sequence carefully:
- Connect the Battery: First, connect the battery to the charge controller. Ensure correct polarity. The controller will automatically detect the system voltage (12V/24V/36V/48V).
- Connect the Load: Next, connect your DC load to the charge controller. Ensure correct polarity.
- Connect the Solar Panel: Finally, connect the solar panel to the charge controller. Ensure correct polarity.
Important: Always connect the battery first and disconnect the solar panel last when disassembling the system.
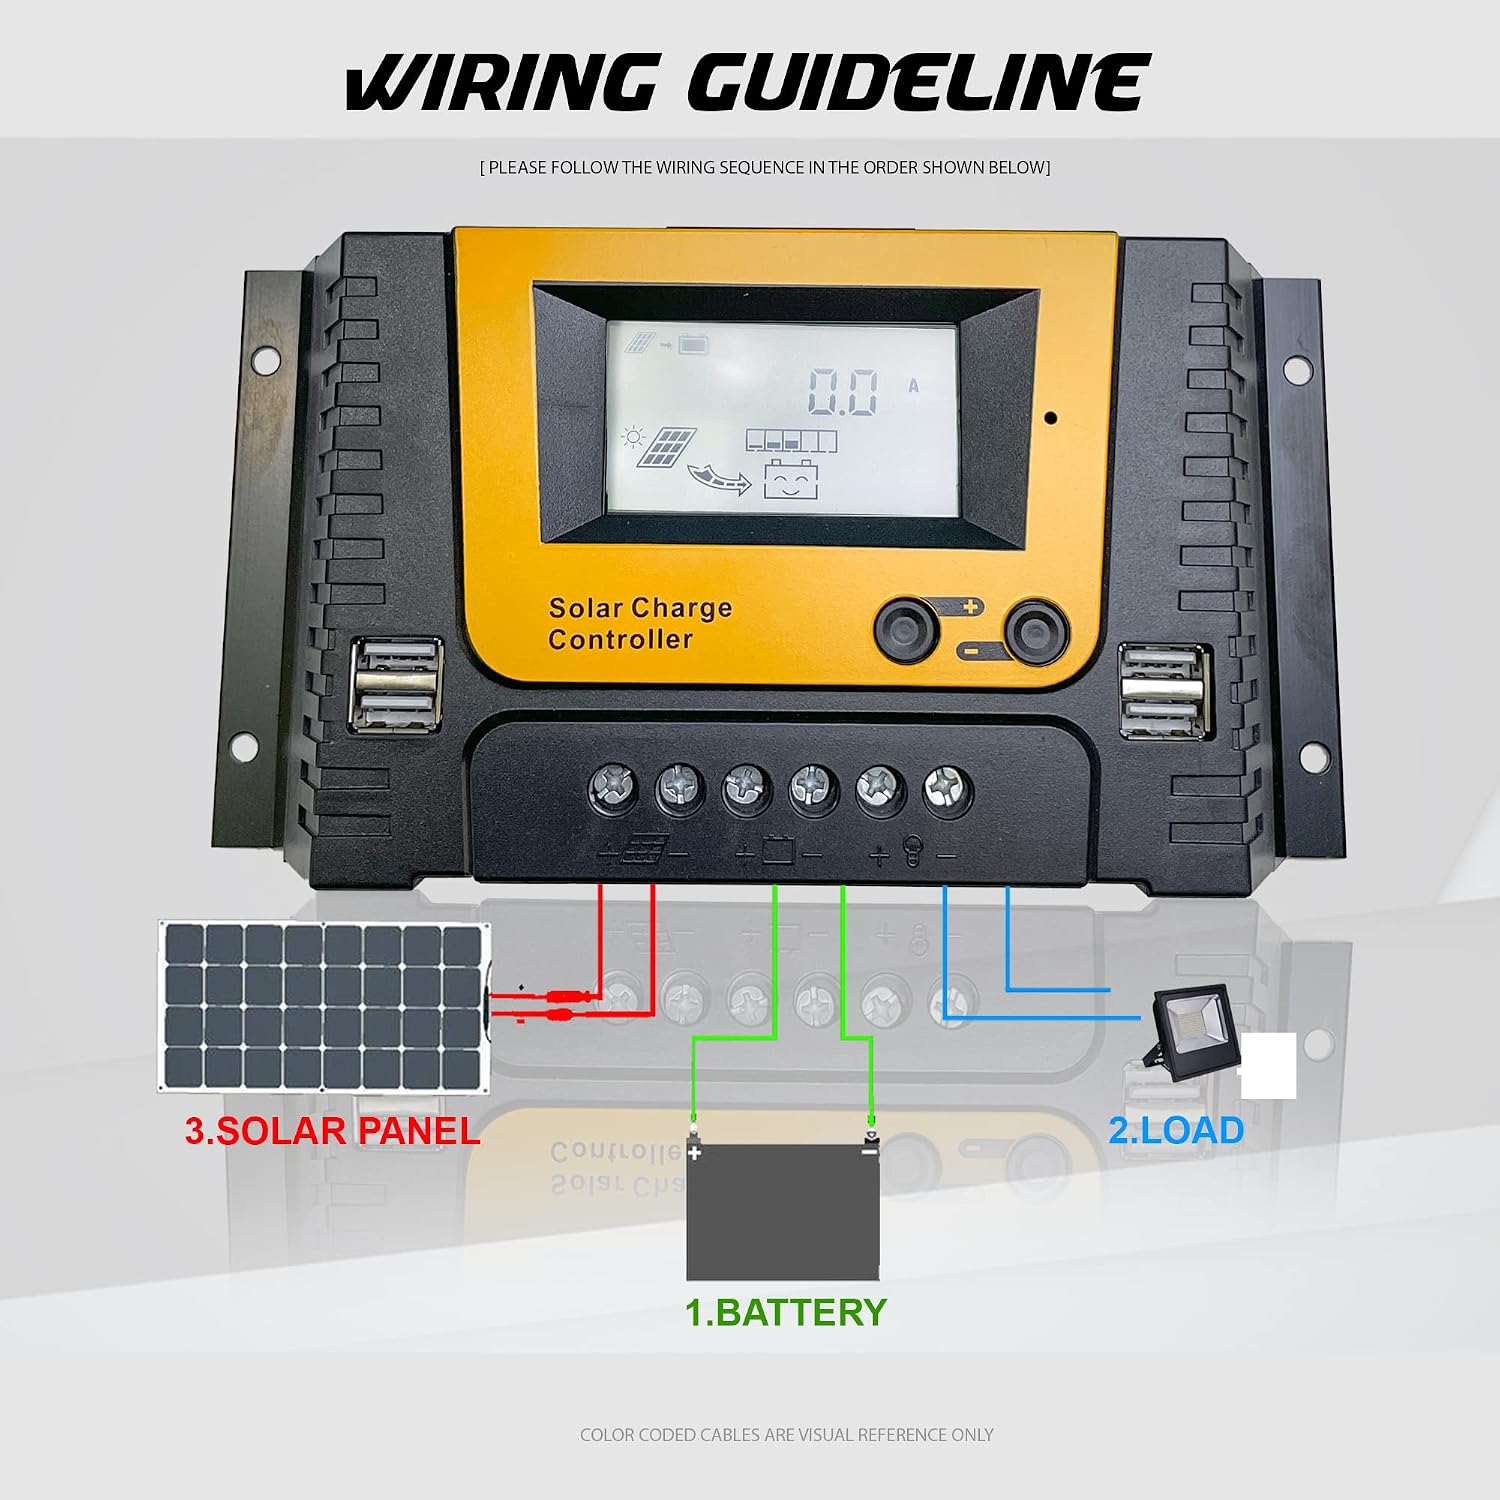
Figure 3: Wiring diagram for the amiciSmart Solar Charge Controller, showing connections for battery, load, and solar panel. Color-coded cables are for visual reference only.
Operation
Battery Type Selection
The controller supports lead-acid, lithium iron, and phosphate battery types. Select the appropriate battery type in the controller settings. Once selected, the controller will automatically sense the 12V/24V/36V/48V system voltage. Ensure that the battery voltage and solar panel voltage are compatible.
4-Stage PWM Charging
The amiciSmart Solar Charge Controller utilizes an advanced 4-stage Pulse Width Modulation (PWM) charging process to optimize battery health and extend its lifespan. These stages include:
- Bulk: The battery is charged at its maximum current until it reaches approximately 80% of its capacity.
- Absorption: The voltage is held constant, and the current gradually decreases as the battery approaches full charge.
- Float: Once fully charged, the voltage is reduced to a lower level to maintain the battery at 100% charge without overcharging.
- Equalization: Periodically, a higher voltage charge is applied to lead-acid batteries to balance cell voltages and prevent sulfation. This stage is not typically used for lithium batteries.

Figure 4: Side view of the amiciSmart Solar Charge Controller, illustrating the 4-stage PWM charging process.
Maintenance
To ensure optimal performance and longevity of your solar charge controller, consider the following maintenance guidelines:
- Keep Clean: Regularly clean the controller's exterior to prevent dust and debris buildup, which can affect heat dissipation.
- Check Connections: Periodically inspect all wiring connections to ensure they are secure and free from corrosion. Loose connections can lead to power loss or overheating.
- Environmental Conditions: Ensure the controller is installed in a well-ventilated area, away from direct sunlight, moisture, and extreme temperatures.
- Battery Inspection: Regularly check the battery terminals for corrosion and ensure the battery itself is in good condition according to its manufacturer's guidelines.
Troubleshooting
The controller is equipped with diagnostic features to help identify potential issues. Refer to the LCD display for error codes:
| Error Code | Description | Possible Solution |
|---|---|---|
| E01 | Battery Low Voltage | Charge the battery. Check battery connections and health. |
| E02 | Load Overload | Reduce the connected load. Check for short circuits in the load circuit. |
| E03 | Load Short-Circuit | Identify and remove the short circuit in the load wiring. |
| E04 | Load Over-Voltage | Verify the load's voltage compatibility. Disconnect and reconnect the load. |
| E05 | Solar Panel Over-Current | Check solar panel configuration. Ensure panel current does not exceed controller's maximum input. |
If you encounter issues not listed here or if the problem persists after attempting solutions, please contact customer support.

Figure 5: Diagram illustrating various protection features of the amiciSmart Solar Charge Controller, including short-circuit, overcharge, and reverse polarity protection.
Technical Specifications
| Feature | Specification |
|---|---|
| Brand | amiciSmart |
| Model | 80A Solar Charge Controller |
| Colour | Black |
| Product Dimensions (L x W x H) | 21.5 x 7.9 x 14 Centimeters |
| Item Weight | 900 Grams |
| Display Type | LCD |
| Battery Voltage | 12V/24V/36V/48V (Auto-sensing) |
| Charging Type | 4-Stage PWM (Bulk, Absorption, Float, Equalization) |
| Supported Battery Types | Lead-acid, Lithium Iron, Phosphate |
| Protections | Reverse Polarity, Over Charge, Short-Circuit, Reverse Current, Overload, Low-Voltage, Over Discharge, Lightning Protection |
| Included Components | 1*Manual |
| Country of Origin | China |
Warranty Information
This amiciSmart Solar Charge Controller comes with a 1 Year Warranty from the date of purchase. Please retain your proof of purchase for warranty claims. The warranty covers manufacturing defects under normal use. It does not cover damage caused by improper installation, misuse, accidents, or unauthorized modifications.
Customer Support
For technical assistance, warranty claims, or any other inquiries regarding your amiciSmart Solar Charge Controller, please contact:
Amicikart Online Services Pvt Ltd
B-36, Sector 57
Noida, India
Contact No.: 9809709898


