1. Introduction
This manual provides detailed instructions for the safe and effective operation of your VANPO Digital Torque Screwdriver, Model VP027. This precision instrument is designed for accurate torque management in various applications, including electronics, machinery, and precision equipment. Please read this manual thoroughly before use and retain it for future reference.

Image 1.1: The VANPO Digital Torque Screwdriver, its assortment of screwdriver bits, and the protective storage case.
2. What's in the Box
Upon opening the package, verify that all components are present:
- 1x VANPO Digital Torque Screwdriver (Model VP027)
- 20x Screwdriver Bits (S2 material)
- 2x AAA Batteries
- 1x Auxiliary Screwdriver (for battery compartment)
- 1x Product Manual (this document)
- 1x Protective Case Box
3. Key Features
- Accurate Measurement: Digital display with an accuracy of ±2%. Supports four measurement units: N-m, kgf-cm, lbf-ft, and lbf-in.
- Value Memory: Features 6 preset modes for commonly used torque values. In PEAK mode, it automatically records torque data, storing up to 500 sets for review.
- Quick Release Design: The ratchet head incorporates a quick-release mechanism for efficient bit changes and secure retention. Includes 20 S2 screwdriver bits.
- Audible and Visual Alerts: Provides a buzzer sound and LED indicator (red/green lights) to notify when approaching or reaching the preset torque, preventing under-tightening or over-tightening.
- Durable Construction: The screwdriver head is made from hardened chrome vanadium steel. The handle is designed for comfortable grip, and the screen is robust.
4. Setup
4.1. Battery Installation
- Locate the battery compartment cover at the base of the handle.
- Use the auxiliary screwdriver to loosen the screw securing the battery cover.
- Remove the cover and insert two AAA batteries, ensuring correct polarity (+/-).
- Replace the battery cover and tighten the screw.

Image 4.1: Illustration of the battery installation process, showing the compartment, batteries, and auxiliary screwdriver.
4.2. Bit Installation
- Select the appropriate screwdriver bit for your task.
- Insert the bit into the quick-release chuck at the end of the screwdriver.
- Ensure the bit is fully seated and securely held by the chuck.

Image 4.2: The quick-release mechanism allows for easy and secure insertion of screwdriver bits.
5. Operating Instructions
5.1. Power On/Off
- To power on, press the U button.
- The device will automatically power off after 5 minutes of inactivity to conserve battery.
5.2. Unit Selection
The screwdriver supports four measurement units: N-m, kgf-cm, lbf-ft, and lbf-in.
- Press the M button to cycle through the available units.
- Select the desired unit for your application.

Image 5.1: The digital display clearly shows the selected measurement unit and torque value.
5.3. Setting Torque Value
- Use the ^ (Up) and v (Down) buttons to adjust the target torque value.
- The value will increase or decrease with each press. Hold the button for faster adjustment.
5.4. Track Mode vs. Peak Mode
The screwdriver offers two operational modes:
- Track Mode: Displays the real-time torque value as it is applied. The display resets when the torque is removed.
- Peak Mode: Captures and displays the maximum torque value achieved during the tightening process. This value remains on the screen until cleared.
- To switch between modes, press the U button for 1 second to enter "Mode". Then press U again to enter the Peak/Track change mode. Use ^ or v to toggle, then press U to confirm.
- To clear the peak torque value in Peak Mode, press the C button.

Image 5.2: The display differentiates between real-time torque (Track) and maximum torque (Peak) readings.
5.5. Preset Modes (M1-M6) and Data Storage
The device allows for storing up to 6 preset torque values and records up to 500 sets of data in Peak mode.
- Setting Presets: The manual states that changing the torque value with the up or down button automatically stores the new value in the currently selected preset register. To access different preset registers (M1-M6), refer to the detailed instructions in the included product manual.
- Data Recall: In "Mode" (press U for 1 second), select "Dat" mode using ^ or v, then press U to enter. Use ^ or v to browse stored data points.

Image 5.3: The screwdriver supports multiple preset torque values and extensive data storage.
5.6. Buzzer and LED Indicators
The device provides feedback during operation:
- When the applied torque reaches 85%-90% of the preset value, the LED lights will flash green, and a short beep will sound.
- When the applied torque reaches 100% of the preset value, the LED lights will flash red, and a continuous long beep will sound.
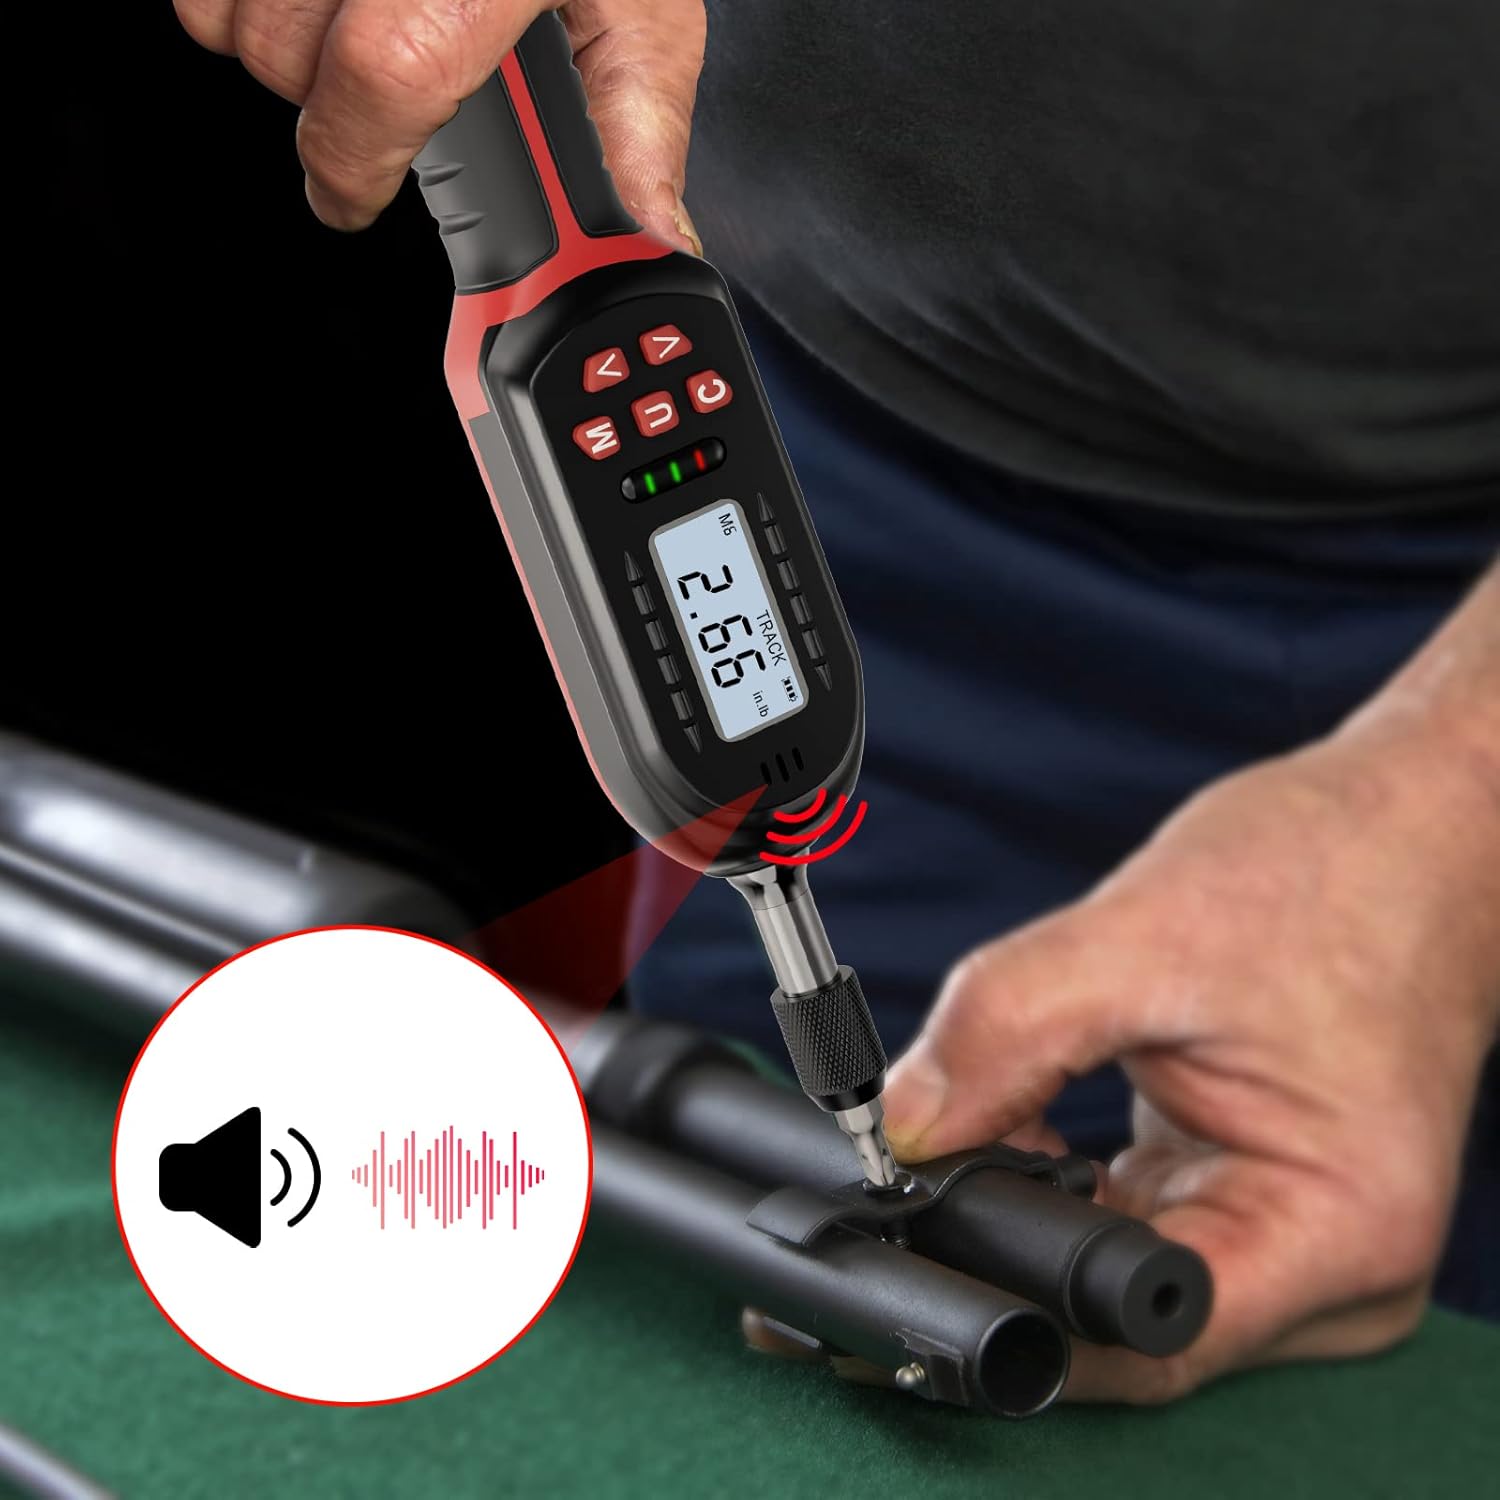
Image 5.4: Visual and audible alerts guide the user to achieve the correct torque.
5.7. Lock Function
To prevent accidental changes to settings, the device features a lock function.
- Press and hold the U button for approximately 3 seconds to lock or unlock the settings. A lock icon will appear/disappear on the display.

Image 5.5: The lock icon confirms that the current settings are protected from unintended modifications.
6. Maintenance
- Cleaning: Wipe the screwdriver with a soft, dry cloth. Do not use abrasive cleaners or solvents.
- Storage: Store the screwdriver and bits in the provided protective case in a dry, cool environment away from direct sunlight and extreme temperatures.
- Battery Replacement: Replace batteries when the low battery indicator appears on the display. Always use new AAA alkaline batteries.
- Calibration: For continued accuracy, periodic calibration by a qualified service center is recommended.

Image 6.1: Proper storage in the case helps protect the tool and ensures its longevity, aided by automatic sleep mode.
7. Troubleshooting
- Device does not power on:
- Check if batteries are installed correctly with proper polarity.
- Replace with new AAA batteries.
- Inaccurate readings:
- Ensure the correct measurement unit is selected.
- Verify the bit is fully seated in the chuck.
- Consider professional calibration if accuracy issues persist.
- Buzzer/LED not activating:
- Confirm the target torque value is set correctly and within the device's range.
- Check battery level.
- Difficulty with battery compartment cover:
- Ensure the cover is aligned precisely before attempting to close and screw it in. Avoid forcing it to prevent damage.
8. Specifications
| Specification | Detail |
|---|---|
| Model Number | VP027 |
| Torque Range | 2.66-53.1 in-lbs / 0.3-6 Nm |
| Accuracy | ±2% (Clockwise) |
| Measurement Units | N-m, kgf-cm, lbf-ft, lbf-in |
| Display | Digital LCD |
| Data Storage | Up to 500 sets (Peak Mode) |
| Preset Modes | 6 groups |
| Power Source | 2x AAA Batteries (Alkaline) |
| Automatic Shut-off | 5 minutes of inactivity |
| Material | Chrome Vanadium Steel (head), Metal (body) |
| Item Weight | 0.93 Kilograms / 2.05 pounds |
| Item Length | 14 Inches |
9. Warranty and Support
VANPO products are manufactured to high-quality standards. For warranty information, technical support, or service inquiries, please refer to the contact details provided with your purchase documentation or visit the official VANPO website. Keep your proof of purchase for warranty claims.