Introduction
This manual provides comprehensive instructions for the safe and efficient use of your Dyson Pure Cool Purifier Fan TP4A. This device is designed to purify and circulate air, helping to maintain a cleaner and healthier indoor environment. Please read all instructions carefully before operating the appliance and retain this manual for future reference.
Important Safety Information
Always follow basic safety precautions when using electrical appliances to reduce the risk of fire, electric shock, or injury.
- This appliance is for indoor use only. Do not use outdoors or on wet surfaces.
- Ensure the appliance is placed on a stable, level surface.
- Unplug the appliance before cleaning, performing maintenance, or replacing filters.
- Do not operate any appliance with a damaged cord or plug. If the supply cord is damaged, it must be replaced by the manufacturer, its service agent, or similarly qualified persons to avoid a hazard.
- Keep the appliance out of reach of children and individuals with reduced physical, sensory, or reasoning capabilities.
- Do not block air openings or operate near heat sources.
- Only use Dyson-recommended accessories and replacement parts.
What's in the Box
Carefully unpack your Dyson Pure Cool Purifier Fan TP4A and ensure all components are present:
- Dyson Pure Cool Purifier Fan (Base and Loop Amplifier)
- Remote Control
- HEPA and Activated Carbon Filter (pre-installed or separate)

Image: Overview of the Dyson Pure Cool Purifier Fan, highlighting its components and features such as the remote, oscillation, sensors, filtration system, LCD screen, and Air Multiplier technology.
Setup
Follow these steps to set up your Dyson Pure Cool Purifier Fan:
- Unpack: Remove all packaging materials from the appliance.
- Filter Installation: If the filter is not pre-installed, twist the filter cover counter-clockwise to remove it. Insert the HEPA and activated carbon filter, ensuring it clicks into place. Replace the filter cover by twisting clockwise until secure.
- Placement: Place the fan on a firm, level surface, ensuring adequate space around the unit for optimal airflow.
- Power Connection: Plug the power cord into a suitable electrical outlet.

Image: The Dyson Pure Cool Purifier Fan TP4A, a tall, sleek white and silver tower fan with a perforated base and an oval-shaped loop amplifier.
Operating Instructions
Your Dyson Pure Cool Purifier Fan TP4A can be controlled using the included remote control or the power button on the base.
Remote Control Functions

Image: The silver remote control for the Dyson Pure Cool Purifier Fan, showing buttons for power, information, auto mode, fan speed adjustment, oscillation, and night mode.
- Power Button (O): Turns the appliance on or off.
- Information Button (i): Cycles through air quality information on the LCD screen.
- Auto Mode Button (AUTO): Activates intelligent purification, automatically adjusting fan speed based on detected air quality.
- Fan Speed Control (+/-): Increases or decreases airflow speed.
- Oscillation Button (arrows): Controls the oscillation angle (0° to 350°) to project purified air around the room.
- Night-time Mode Button (moon icon): Operates with the quietest settings and a dimmed display.
- Backwards Airflow Mode Button (arrow pointing back): Projects air through the back of the machine to purify without cooling.
LCD Screen Display
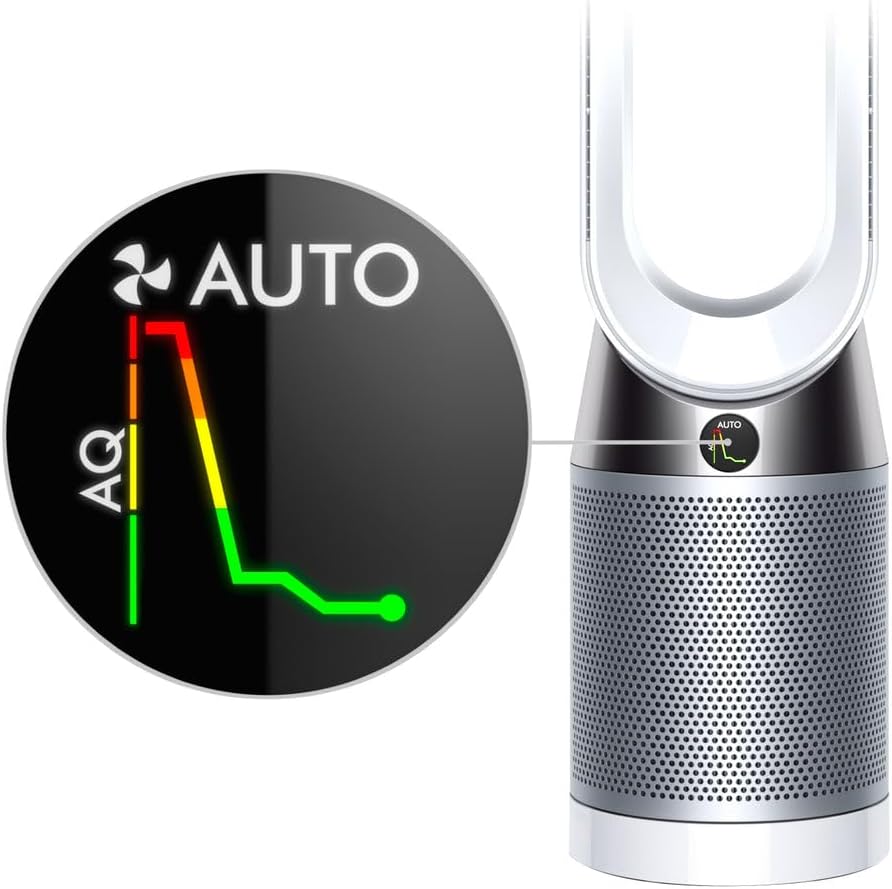
Image: Close-up of the Dyson Pure Cool Purifier Fan's LCD screen, displaying an air quality graph with green, yellow, and red segments, indicating real-time pollution levels and the fan's automatic response.
The LCD screen provides real-time air quality reports and operational status. In Auto mode, it displays a graph showing changes in air quality (AQ) over time.

Image: A visual representation of the Dyson Pure Cool Purifier Fan in operation, showing polluted air being drawn into the base and purified air being projected out through the loop amplifier, illustrating the Air Multiplier technology.
Maintenance
Filter Replacement
The appliance will indicate when the filter needs replacement on the LCD screen. Filter life varies based on usage and air quality. To replace the filter:
- Unplug the appliance from the power outlet.
- Twist the filter cover counter-clockwise to remove it.
- Carefully remove the old filter and dispose of it according to local regulations.
- Insert a new Dyson HEPA and Activated Carbon filter, ensuring it clicks into place.
- Replace the filter cover by twisting clockwise until secure.
- Plug the appliance back in. Reset the filter life indicator by holding the 'i' button on the remote for 5 seconds.
Cleaning
Regular cleaning helps maintain optimal performance.
- Always unplug the appliance before cleaning.
- Wipe the exterior surfaces with a soft, damp cloth. Do not use detergents or polishes.
- Clean the air inlet holes on the base and the aperture of the loop amplifier with a soft brush or cloth to remove dust.
- Do not immerse the appliance in water or allow water to enter the motor housing.
Troubleshooting
If you encounter issues with your Dyson Pure Cool Purifier Fan, refer to the table below for common problems and solutions.
| Problem | Possible Cause | Solution |
|---|---|---|
| Appliance does not turn on | Not plugged in; Power outlet fault; Remote control batteries low | Ensure power cord is securely plugged in; Test outlet with another device; Replace remote control batteries. |
| Poor airflow or purification | Blocked air inlets/outlets; Dirty filter; Filter needs replacement | Check for obstructions and clean; Replace filter if indicated on LCD screen. |
| Appliance not oscillating | Oscillation function not activated | Press the oscillation button on the remote control. |
| Remote control not working | Batteries low or incorrectly inserted; Obstruction between remote and appliance | Replace batteries, ensuring correct polarity; Remove any obstructions. The remote is magnetic and stores on top of the machine. |
Specifications
- Model: TP4A
- Part Number: 420083-01
- Dimensions (L x W x H): 4 x 9 x 40 inches (approx.)
- Weight: 16 pounds (approx.)
- Filtration: 360° Sealed HEPA and Activated Carbon Filter
- Oscillation: Up to 350°
- UPC: 885609028705
- Manufacturer: Dyson
Warranty and Support
Your Dyson appliance comes with a limited warranty. Please refer to the warranty card included with your product or visit the official Dyson website for detailed warranty terms and conditions specific to your region.
For technical support, replacement parts, or further assistance, please contact Dyson Customer Service or visit their official support portal. You can find contact information on the Dyson website: www.dyson.com/support