1. Introduction
This manual provides essential information for the safe and efficient operation of your Vamvo Mini Projector. Designed for portability and versatility, this projector supports native 1080P resolution with 4K compatibility, features WiFi 6 and Bluetooth 5.4 connectivity, and includes a 180° adjustable stand for flexible projection. Please read this manual thoroughly before use and retain it for future reference.

Figure 1: Vamvo Mini Projector highlighting key features.
2. What's in the Box
Verify that all the following items are included in your package:
- Vamvo Mini Projector
- Remote Control
- HDMI Cable
- Power Adapter
- User Manual
- Warranty Card
3. Product Overview
The Vamvo Mini Projector is designed for ease of use and high-quality projection. Its compact form factor includes an integrated 180° adjustable stand, allowing for versatile placement and projection angles.
3.1 Key Features
- Native 1080P Resolution with 4K Support: Delivers crisp and clear visuals.
- High Brightness & Contrast: Features 15,000 lumens brightness and a 10,000:1 contrast ratio for vivid colors and sharp details.
- 180° Adjustable Stand: Provides flexible positioning for projection on walls, ceilings, or other surfaces.
- WiFi 6 & Bluetooth 5.4: Ensures fast and stable wireless connectivity for streaming and audio.
- Built-in Speakers: Integrated speakers provide audio output.
- Auto Keystone & Motorized Focus: Simplifies setup by automatically correcting image distortion and allowing precise focus adjustments via remote.

Figure 2: Projector's visual performance metrics.
3.2 Ports and Connections
The projector offers various ports for connecting external devices:
- HDMI: For connecting TV sticks, laptops, gaming consoles (PS5, Xbox), etc.
- USB: For connecting USB drives or other USB-compatible devices.
- Type-C: For one-touch wireless mirroring with iOS/Android devices (adapters and cables not included).
- 3.5mm AUX: For connecting external speakers or headphones.
- DC In: Power input.
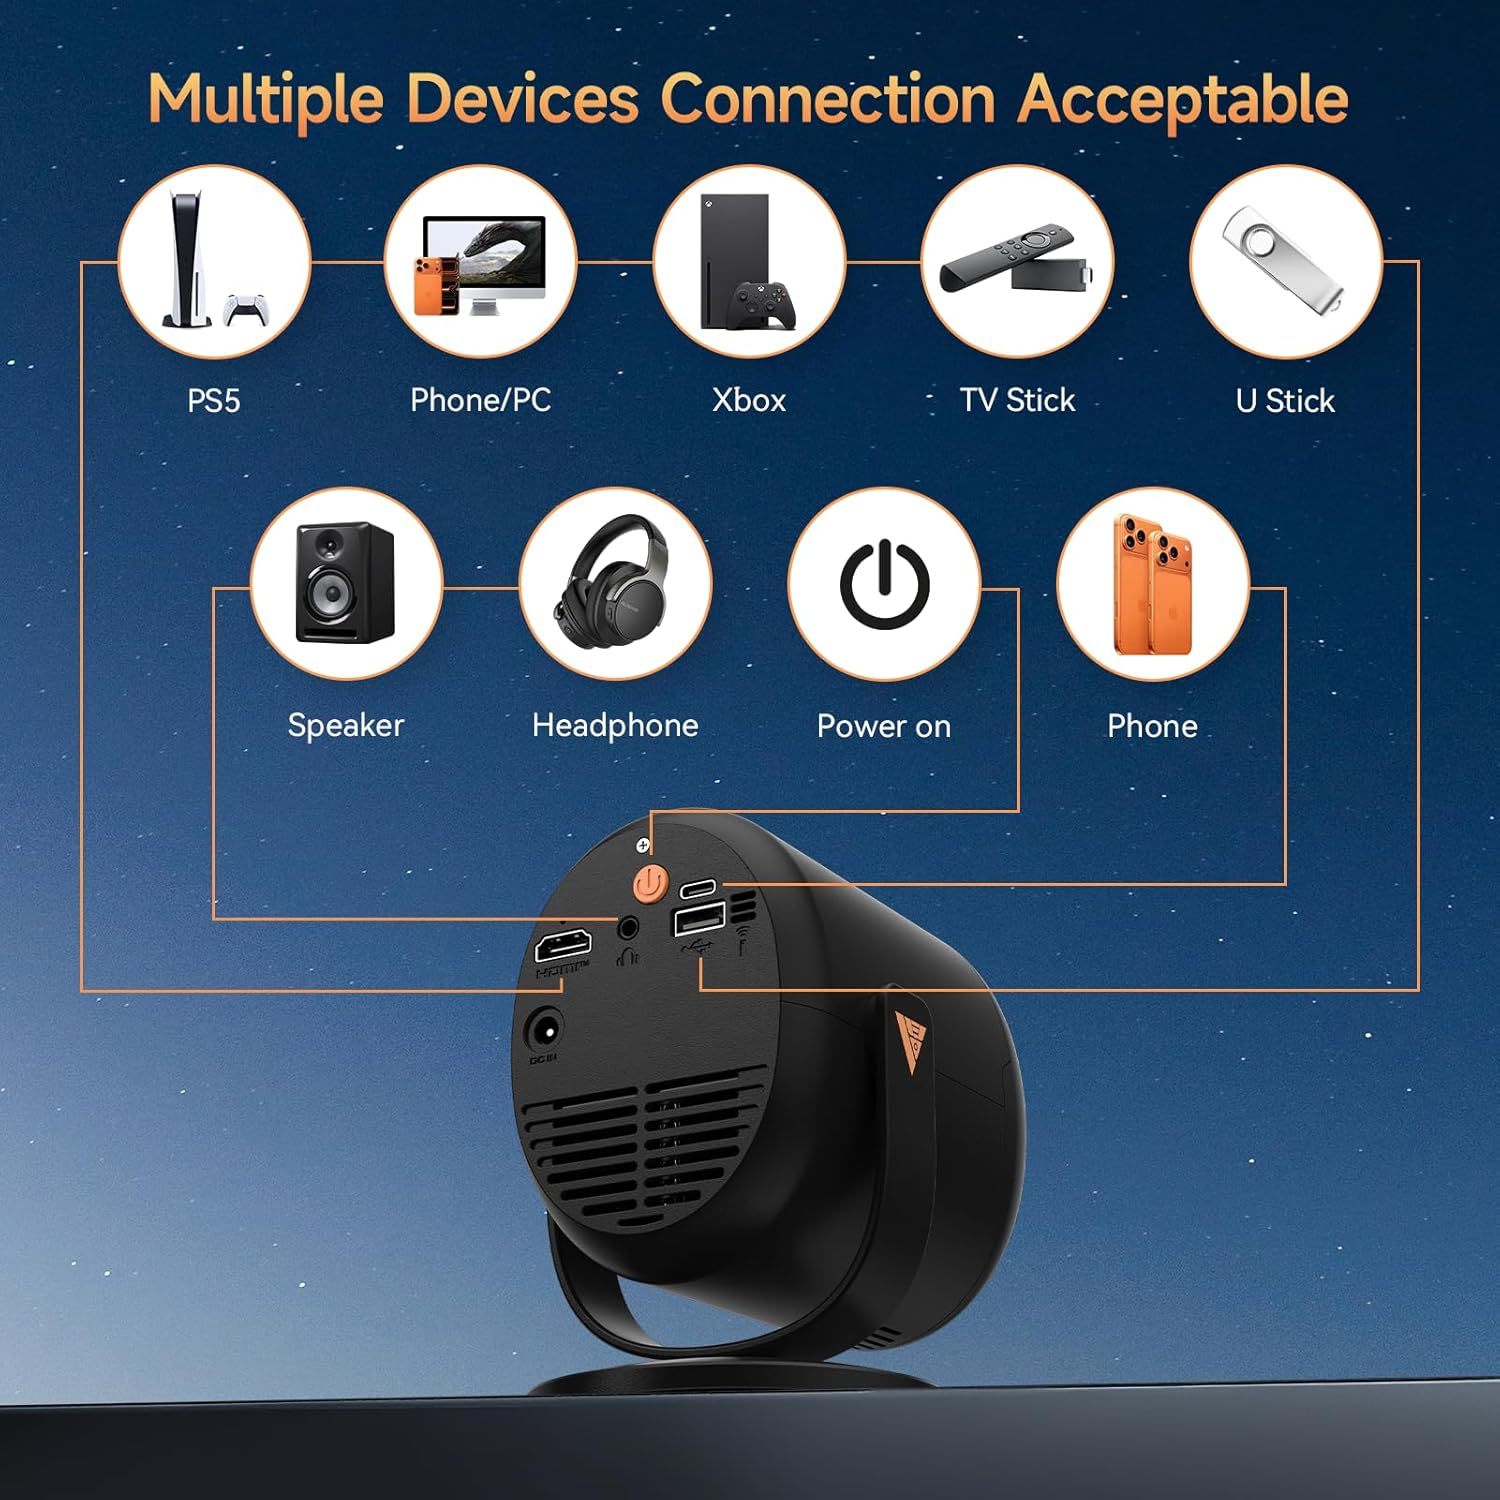
Figure 3: Available ports and compatible devices.
4. Setup
4.1 Initial Power-On
- Connect the provided power adapter to the projector's DC In port and then to a power outlet.
- Press the power button on the projector or remote control to turn it on.
4.2 Placement and Projection
Utilize the 180° adjustable stand to position the projector for optimal viewing. The projector can project images up to 180 inches. For the best projection experience, select a distance between 5ft to 10ft from the projection surface.

Figure 4: Flexible 180° projection angles.

Figure 5: Example of a large 180-inch display.
4.3 Focus and Keystone Correction
The projector features automatic vertical keystone correction and motorized focus. Use the remote control to fine-tune the focus (F+ / F- buttons) for a clear image. The auto keystone feature will adjust the image shape to be rectangular.

Figure 6: Motorized focus and keystone adjustment via remote.
5. Operating Instructions
5.1 Navigation and Streaming
Use the provided remote control to navigate the projector's interface. The projector comes with pre-installed streaming platforms like Netflix, Prime Video, and YouTube. You can also access the App Store to download additional applications.
5.2 Screen Mirroring
The projector supports screen mirroring from iOS and Android devices:
- Wireless Mirroring: Connect your smartphone or tablet via WiFi 6 for a smooth audio and video experience.
- Wired Mirroring: Use a Type-C cable (not included) for one-touch mirroring with compatible devices.
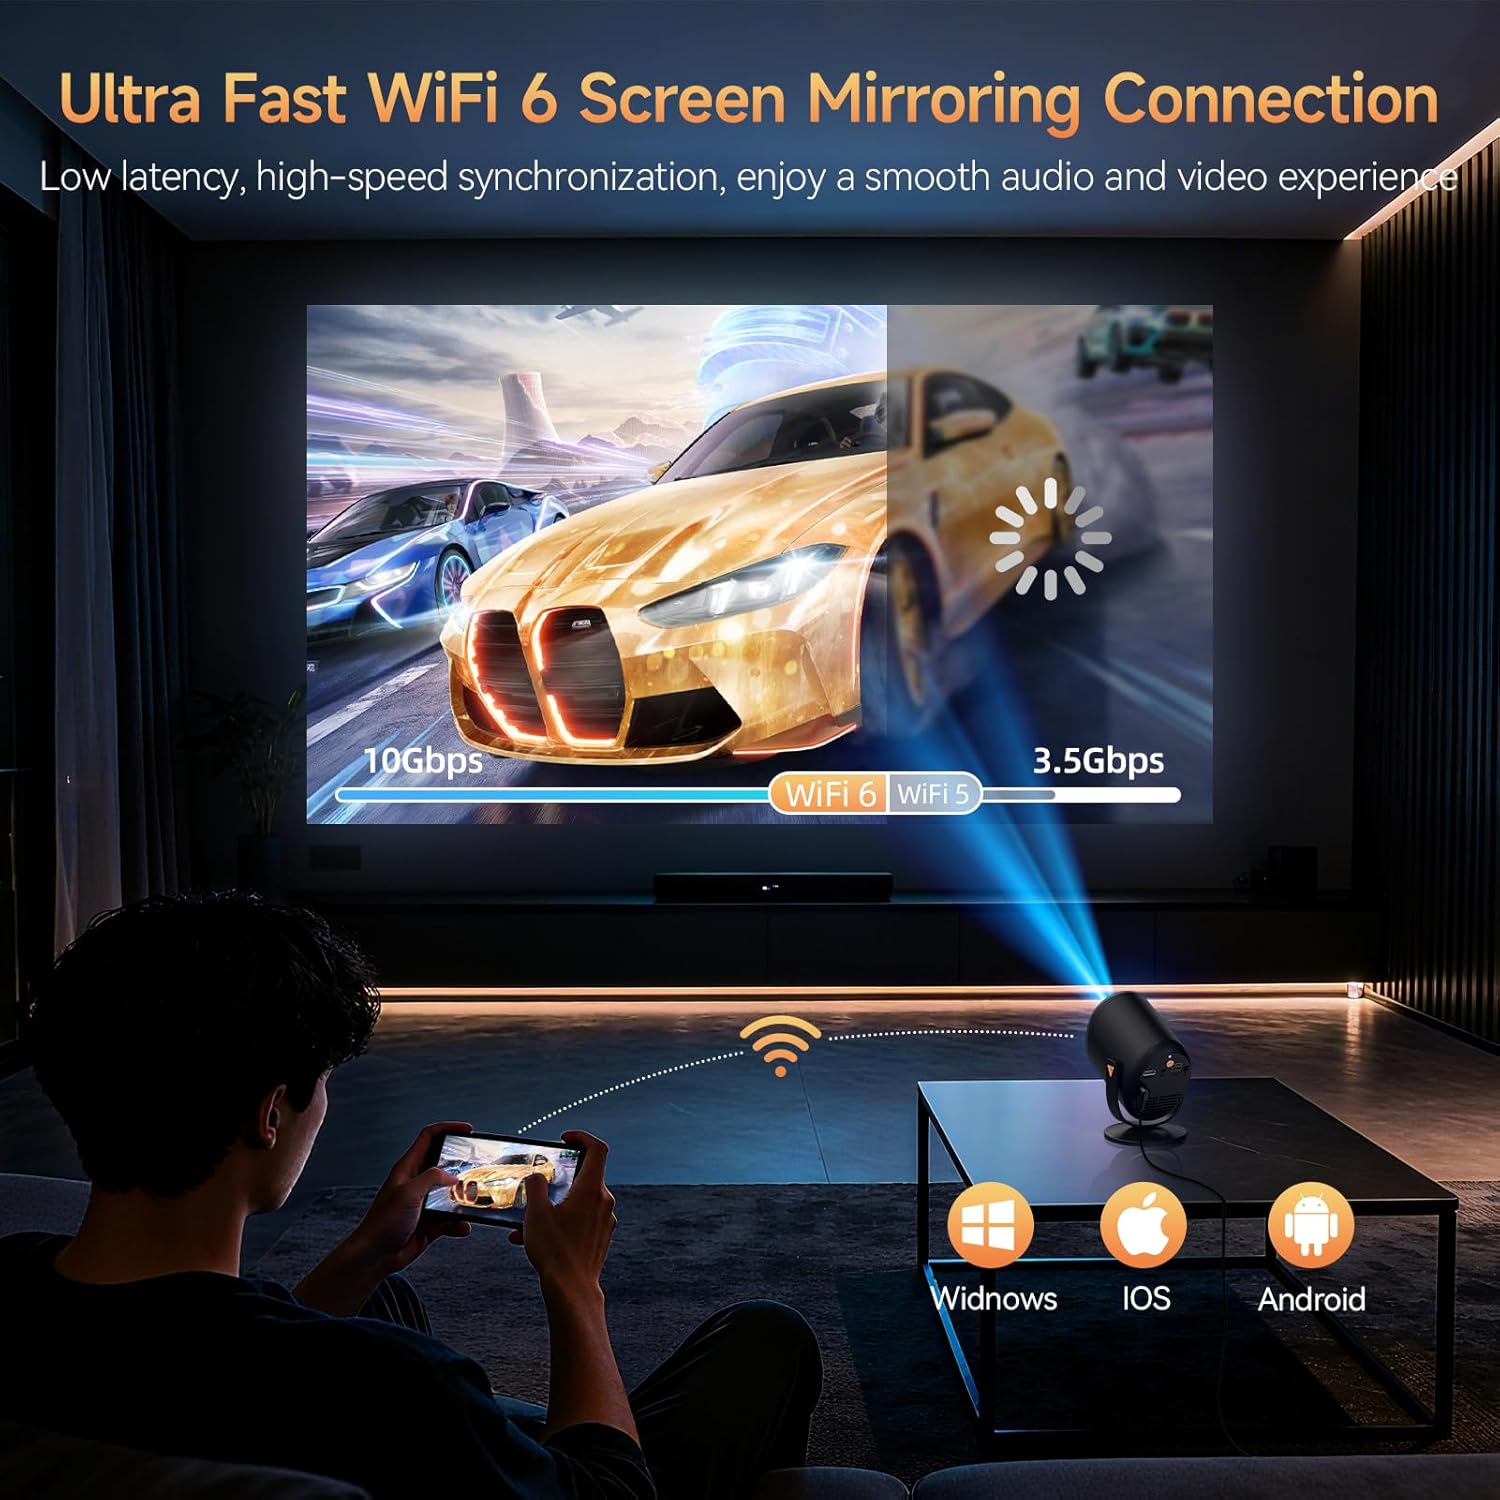
Figure 7: Ultra-fast WiFi 6 screen mirroring.
5.3 Connecting External Devices
You can connect various devices to the projector:
- HDMI: For TV sticks (Fire TV Stick, Roku, Chromecast), laptops, and gaming consoles.
- USB: For U-sticks or other USB storage devices.
- Bluetooth 5.4: For connecting external speakers or headphones.
- 3.5mm AUX: For wired audio output to speakers or headphones.
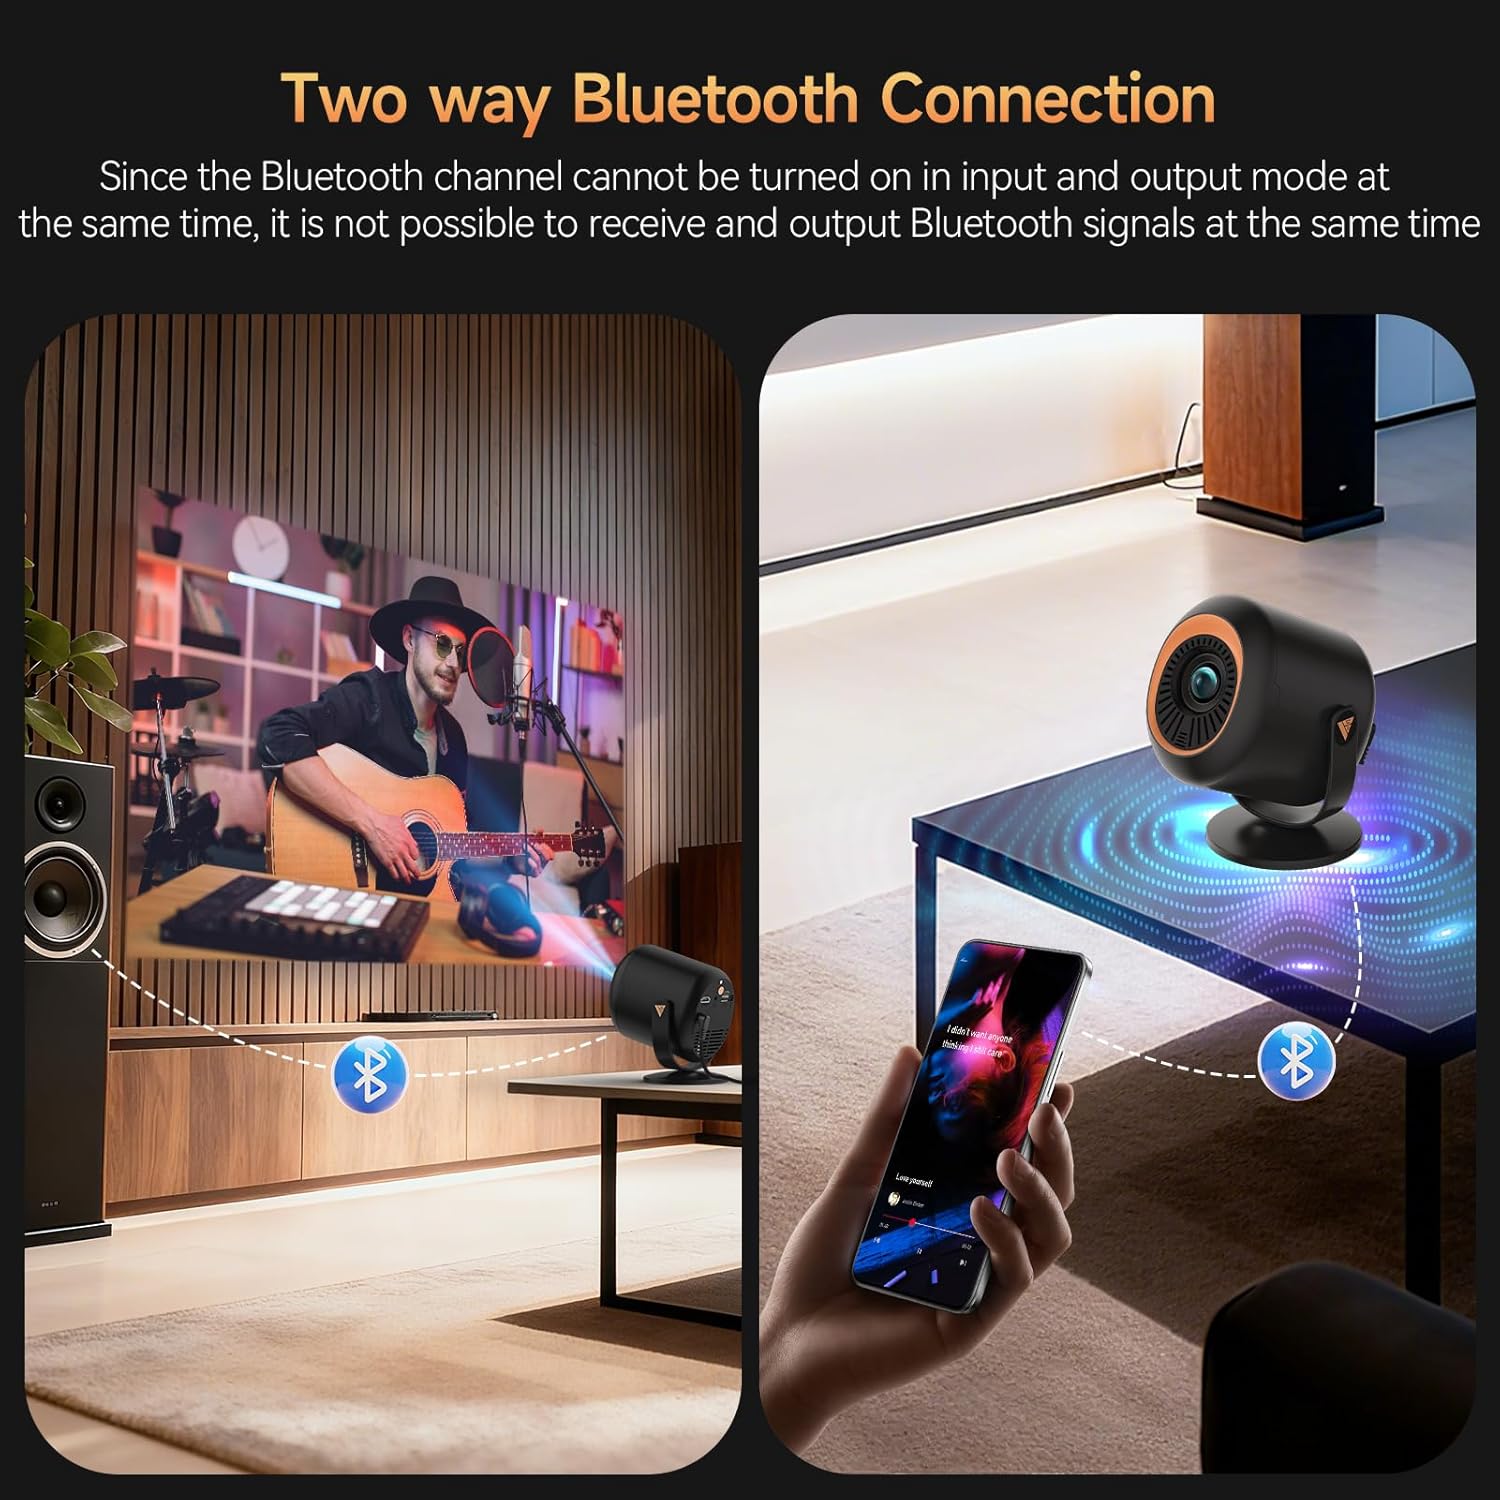
Figure 8: Two-way Bluetooth connection for audio.
Important Note:
Due to content protection agreements (HDCP), screen mirroring may not display video or audio for certain apps like Amazon Prime Video, Hulu, or Netflix. For these apps, connect your streaming device (e.g., Fire TV Stick, Roku, Chromecast) directly to the projector via HDMI, or use an HDMI cable from your laptop/computer.
6. Settings
The projector offers a comprehensive settings menu to customize your viewing and audio experience.
6.1 Picture Settings
Adjust visual parameters to your preference:
- Picture Mode: Standard, Softness, Dynamic, Energy Saving, Vivid, User (customizable).
- Brightness: Adjust the overall luminance of the image.
- Contrast: Control the difference between light and dark areas.
- Saturation: Adjust the intensity of colors.
- Sharpness: Enhance edge definition.
- Color Tone: Modify the color balance.
- Color Temperature: Adjust the warmth or coolness of the colors.
- Eye Protection Mode: Reduces blue light for comfortable viewing.
6.2 Sound Settings
Customize audio output:
- Sound Mode: Standard, Music, Movie, News, Game, User (customizable).
- Balance: Adjust audio balance between left and right channels.
- Audio Output Devices: Select between auto (speaker) or other connected devices.
6.3 Network Settings
Manage your projector's connectivity:
- Wi-Fi: Connect to available Wi-Fi networks.
- Bluetooth: Search for and connect to Bluetooth devices.
6.4 Lens Settings
Control projection display and adjustments:
- Projection Direction: Front, Rear, Ceiling Front, Ceiling Rear.
- Autofocus Settings: Enable/disable automatic refocus when moved or power-on autofocus.
- Keystone Correction: Auto Keystone Correction, 4-corner correction, Obstacle Recognition, Screen Recognition.
- Digital Zoom: Adjust the size of the projected image.
6.5 Device Preferences
General device management:
- Language: Select your preferred language.
- Date & Time: Set the current date and time.
- Keyboard: Configure keyboard settings.
- Screen Saver: Adjust screen saver options.
- Sleep Timer: Set a timer for automatic shutdown.
- Factory Settings: Reset the projector to its original factory settings.
- Reset Projector/Restart Projector: Perform a soft or hard reset.
7. Maintenance
To ensure the longevity and optimal performance of your Vamvo Mini Projector, follow these maintenance guidelines:
- Lens Cleaning: Gently wipe the projector lens with a soft, lint-free cloth. Avoid abrasive materials or harsh chemicals.
- Ventilation: Ensure the projector's ventilation openings are clear and unobstructed to prevent overheating. Regularly clean dust from the vents using a soft brush or compressed air.
- Storage: When not in use, store the projector in a cool, dry place, away from direct sunlight and extreme temperatures.
8. Troubleshooting
If you encounter issues with your projector, refer to the following common problems and solutions:
- No Signal:
- Ensure the HDMI cable is securely connected to both the projector and the source device.
- Verify that the correct input source (HDMI, USB, etc.) is selected on the projector.
- Check if the source device (laptop, TV stick) is powered on and outputting a signal.
- Fuzzy or Unclear Image:
- Adjust the focus using the F+ / F- buttons on the remote control.
- Ensure the projector lens is clean and free from dust or smudges.
- Check the projection distance and adjust if necessary to match the desired screen size.
- No Sound or Low Volume:
- Increase the volume on both the projector and the source device.
- Check if the projector is muted.
- If using external speakers, ensure they are properly connected and powered on.
- Screen Mirroring Issues (No Video/Audio):
- Some streaming apps (Netflix, Hulu, Prime Video) have HDCP content protection that prevents screen mirroring. Connect a streaming device directly via HDMI for these apps.
- Ensure your device and projector are connected to the same Wi-Fi network for wireless mirroring.
9. Specifications
| Feature | Detail |
|---|---|
| Brand | Vamvo |
| Item Weight | 2.61 pounds |
| Package Dimensions | 11.57 x 7.91 x 5.08 inches |
| Color Name | Ink |
| Special Features | Built-In Speaker |
| Recommended Uses For Product | Gaming, Home Cinema |
| Connectivity Technology | HDMI |
| Display Resolution | 1920 x 1080 |
10. Warranty & Support
Your Vamvo Mini Projector comes with a warranty. Please refer to the included Warranty Card for detailed information regarding warranty coverage, terms, and conditions. For technical support or further assistance, please consult the contact information provided on your Warranty Card or visit the official Vamvo website.


