1. Introduction
Thank you for purchasing the Neakhmer Portable Air Compressor. This compact and powerful device is designed to quickly and efficiently inflate various items such as car tires, motorcycle tires, bicycle tires, sports balls, and other inflatables. Featuring a built-in rechargeable battery, digital pressure gauge, automatic shut-off, and an integrated LED light, it offers convenience and reliability for your inflation needs.
2. Important Safety Information
Please read all safety warnings and instructions carefully before using this product. Failure to follow these instructions may result in electric shock, fire, and/or serious injury.
- Keep out of reach of children.
- Do not operate the compressor in wet conditions or near flammable liquids or gases.
- Do not leave the compressor unattended while in operation.
- Ensure the correct pressure setting for the item being inflated to prevent over-inflation and potential damage or injury.
- Do not block the air inlet/outlet during operation.
- If the compressor makes unusual noises or becomes excessively hot, turn it off immediately and allow it to cool down.
- Store the compressor in a cool, dry place when not in use.
3. Package Contents
Verify that all items listed below are included in your package:
- Neakhmer Portable Air Compressor
- Inflation Hose
- USB Type-C Charging Cable
- Car Charging Cable
- Needle Valve Adapter (for balls)
- Presta Valve Adapter (for some bicycles)
- Nozzle Adapter (for inflatables)
- Storage Bag

Figure 3.1: Neakhmer Portable Air Compressor with included accessories.
4. Product Overview
Familiarize yourself with the components of your portable air compressor:
- Digital Display: Shows current pressure, target pressure, and battery level.
- Control Buttons: Power, unit selection, pressure adjustment (+/-), and LED light control.
- Inflation Port: Where the inflation hose connects.
- USB Output Port: For power bank function.
- USB Type-C Input Port: For charging the device.
- LED Light: Provides illumination for nighttime use or emergencies.
5. Setup and Initial Use
5.1 Charging the Compressor
Before first use, fully charge the air compressor. The built-in 4500 mAh battery (3 x 1500 mAh) ensures long-lasting performance.
- Connect the USB Type-C charging cable to the compressor's input port.
- Connect the other end of the cable to a suitable USB power adapter (not included) or use the car charging cable for in-vehicle charging.
- The battery indicator on the digital display will show charging status. Charge until the battery icon indicates full.
5.2 Attaching the Inflation Hose
Securely attach the inflation hose to the compressor's inflation port by screwing it clockwise until tight.
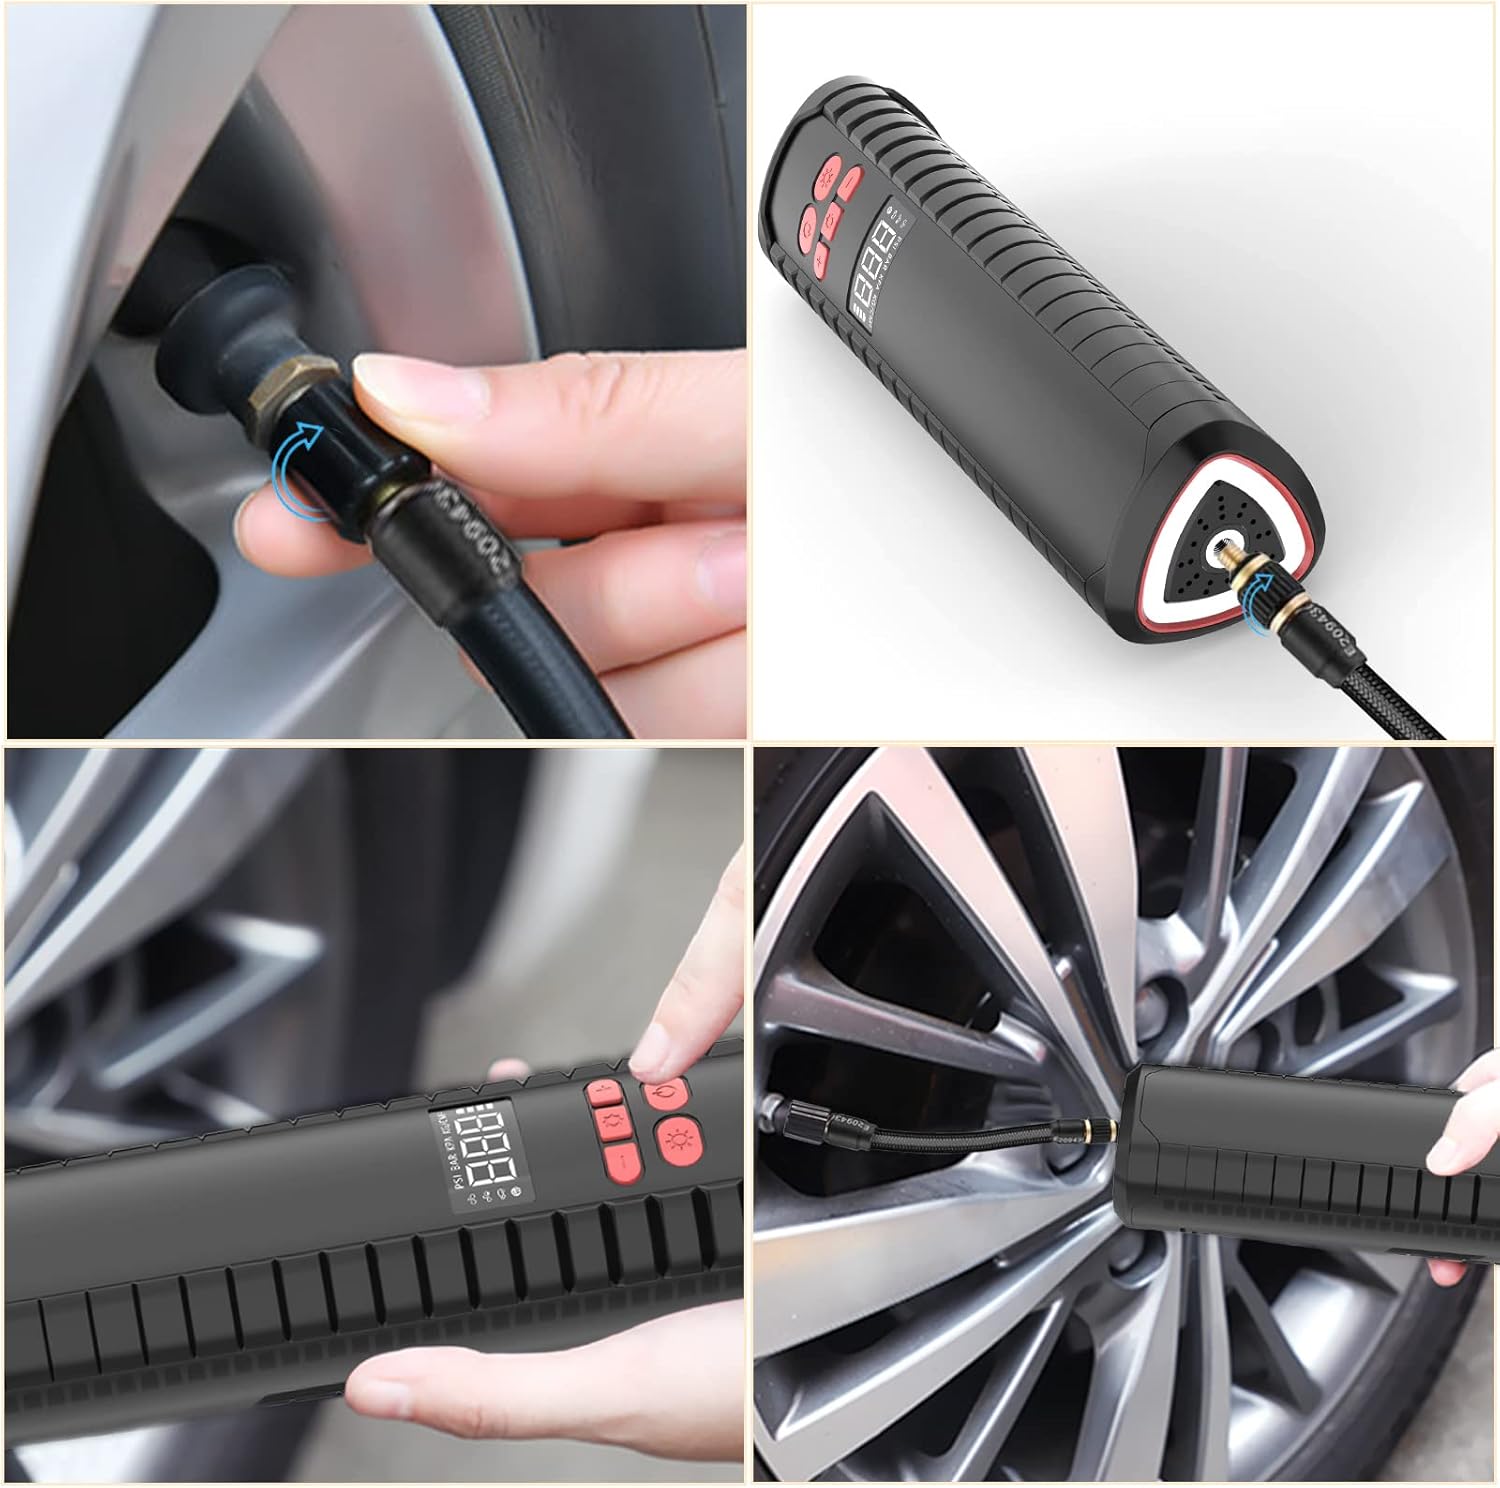
Figure 5.1: Proper connection of the inflation hose to the compressor and tire valve.
6. Operating Instructions
The Neakhmer Portable Air Compressor features an automatic stop function and memory chip for convenience.
6.1 Powering On and Unit Selection
- Press the power button to turn on the compressor. The digital display will light up.
- Press the unit selection button (often labeled 'R' or 'M') to cycle through available pressure units: PSI, BAR, KPA, Kg/cm². Select your desired unit.
6.2 Setting Target Pressure
- Use the '+' and '-' buttons to adjust the target pressure to the recommended level for your item.
- The compressor's memory function will automatically save your last preset pressure for the next time you inflate the same product.
6.3 Inflating an Item
- Connect the inflation hose to the valve of the item you wish to inflate. Use the appropriate adapter if necessary (e.g., needle for balls, Presta for certain bike tires).
- Ensure the connection is secure to prevent air leakage.
- Press the power button again to start inflation. The compressor will automatically stop once the preset pressure is reached.
- Disconnect the hose from the item and the compressor.
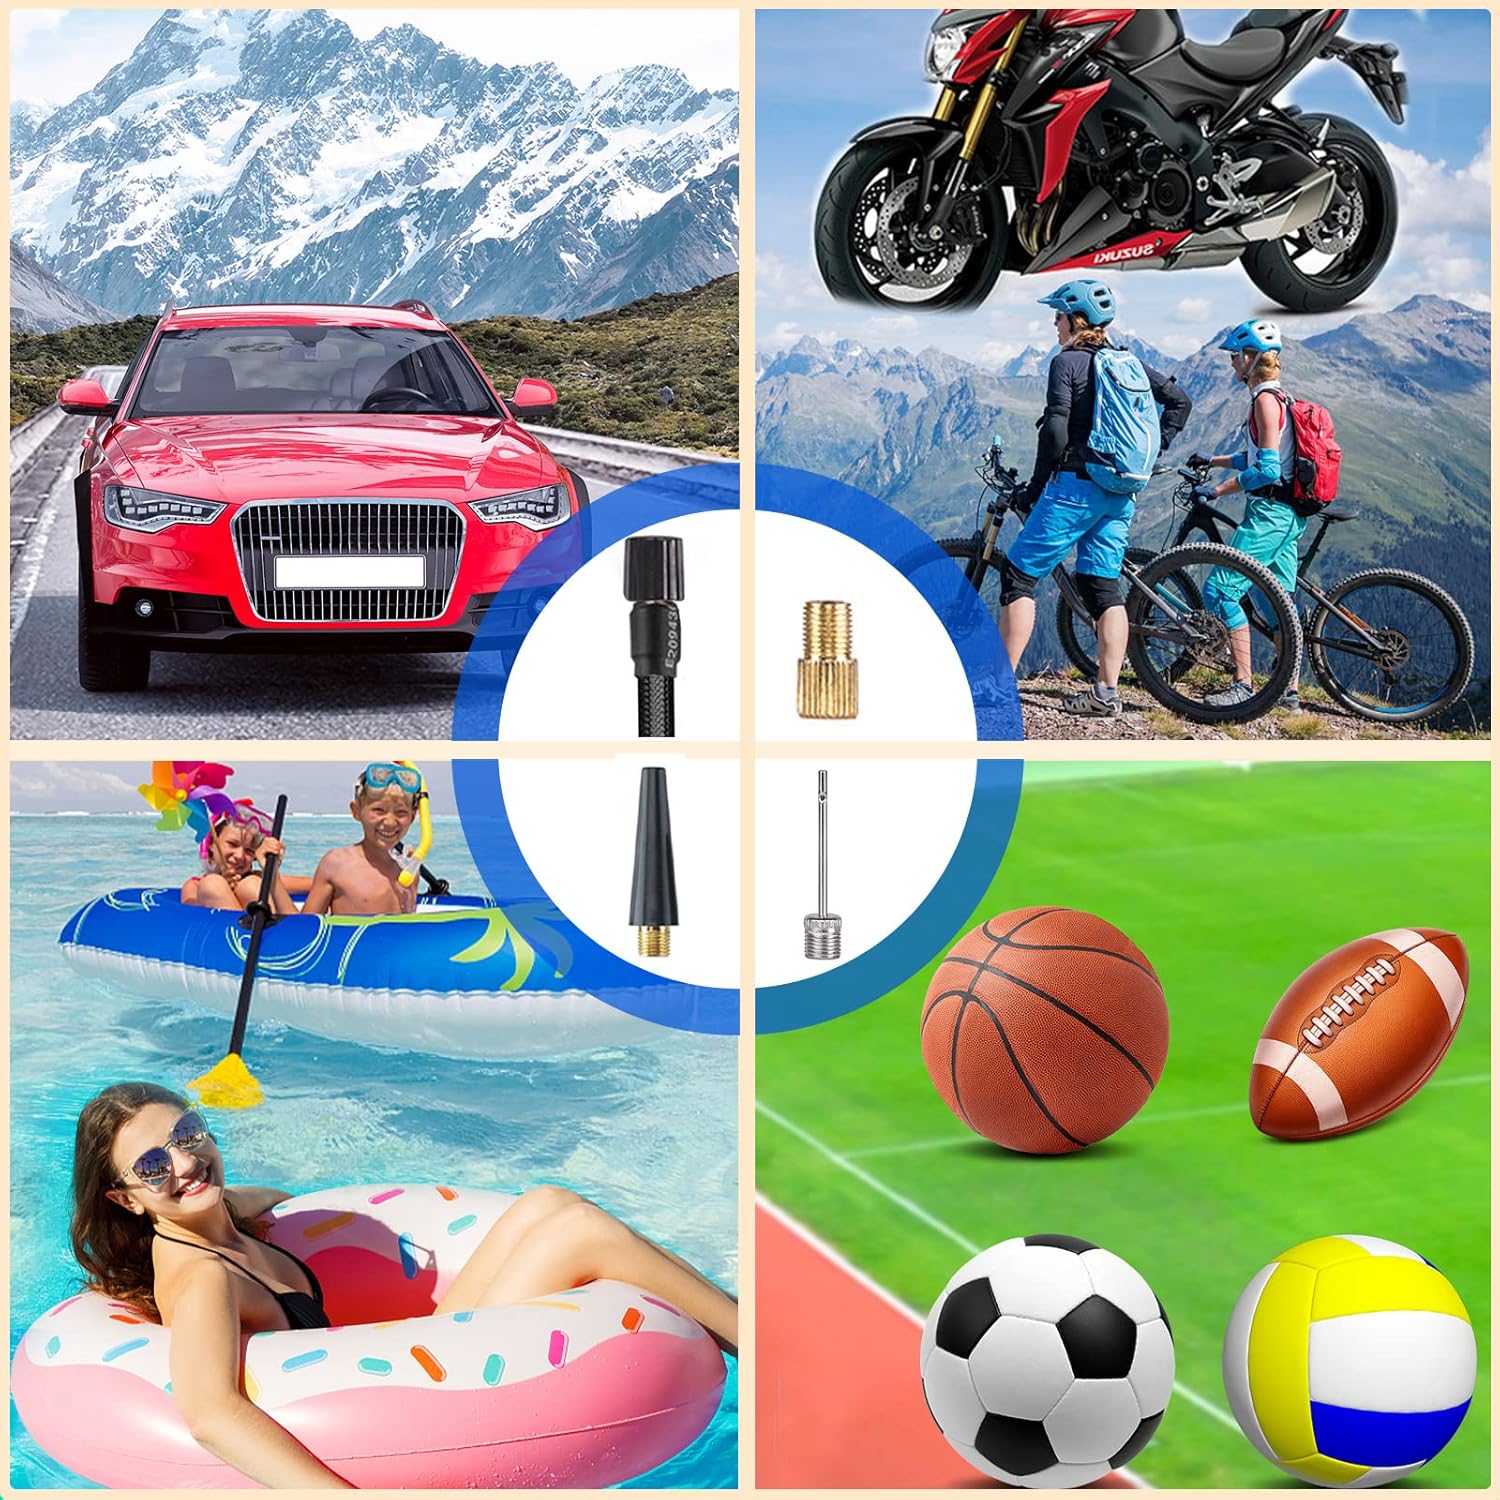
Figure 6.1: The compressor is suitable for inflating various items.
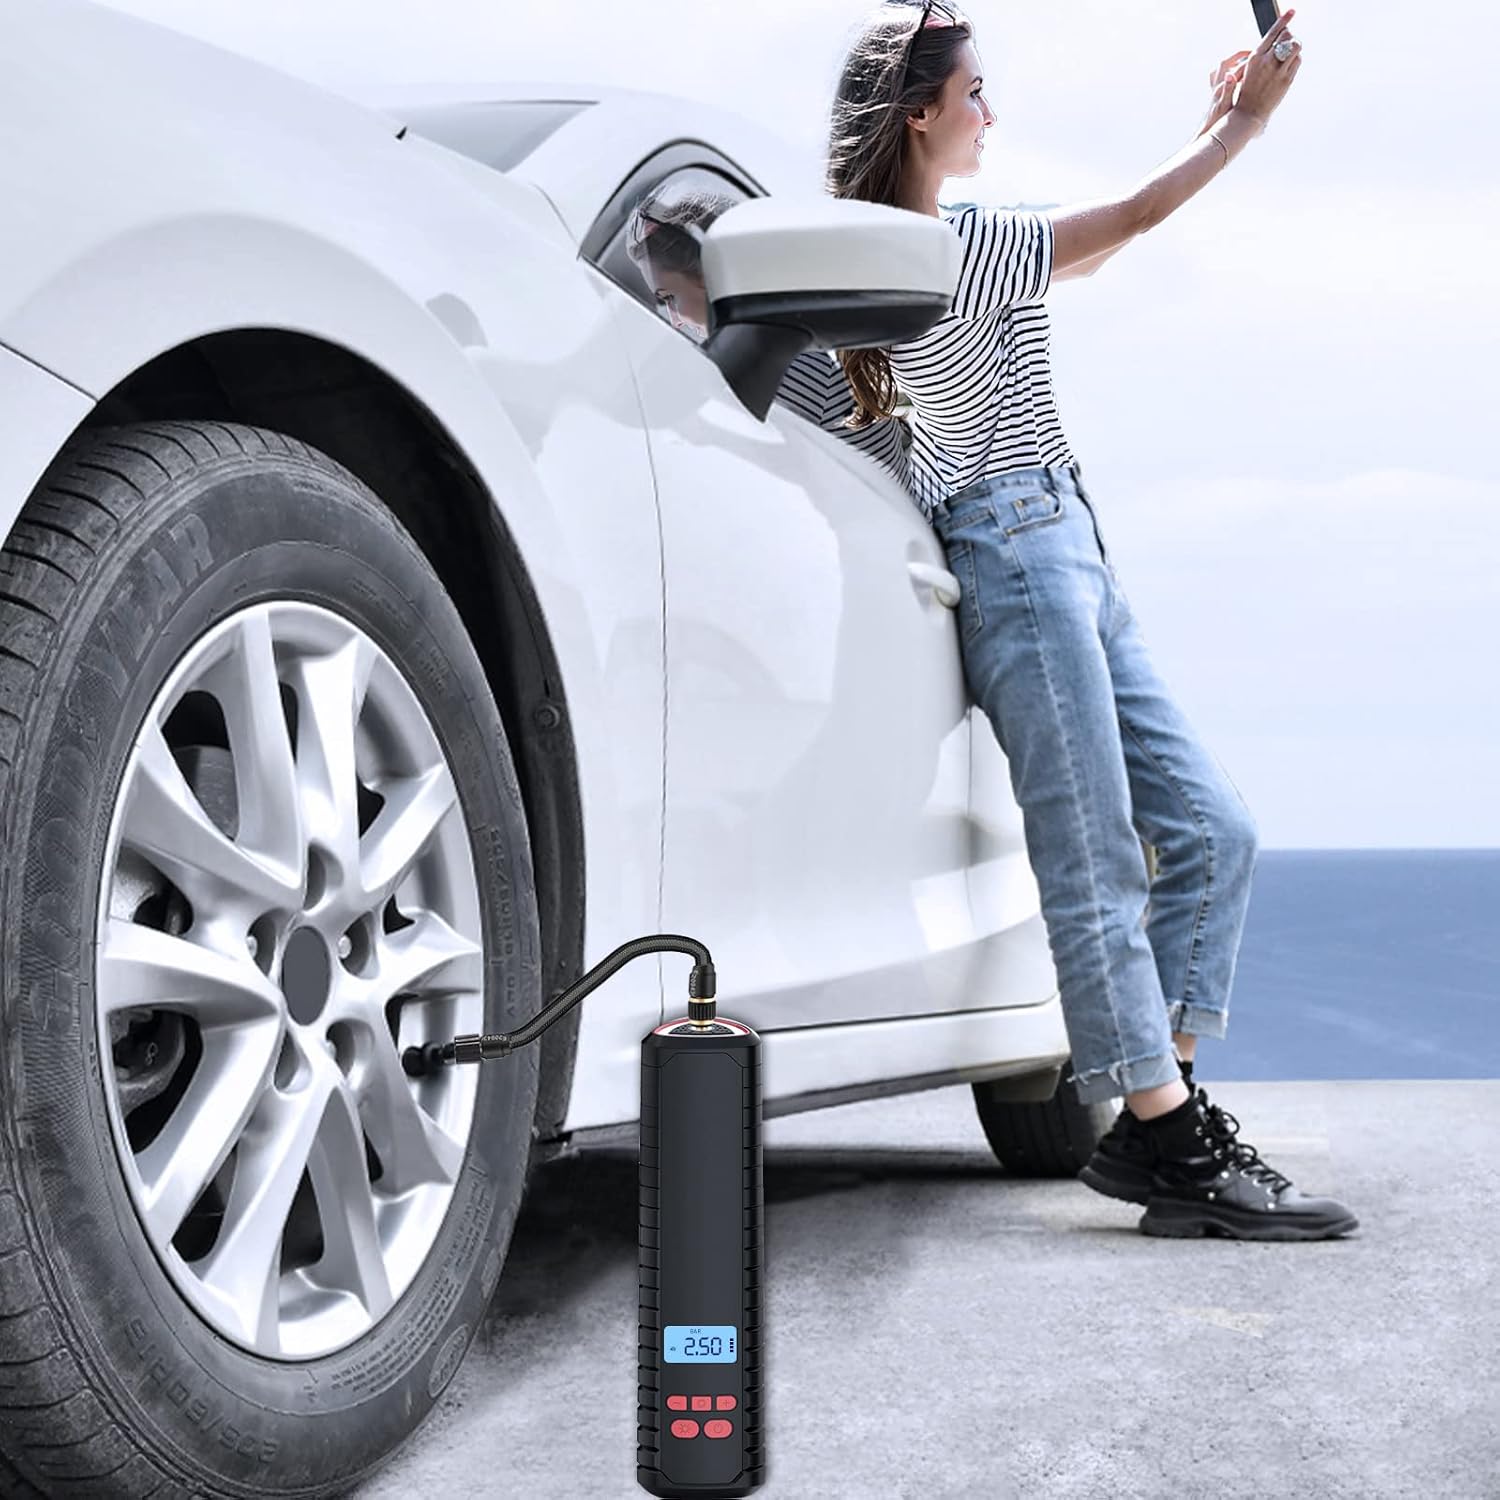
Figure 6.2: Inflating a car tire with the portable compressor.

Figure 6.3: Digital display showing real-time pressure during inflation.
6.4 Using the LED Light
The compressor is equipped with an LED light for illumination in low-light conditions or emergencies.
- Press the light button (often a sun or lightbulb icon) to turn on the LED light.
- Press again to cycle through different light modes (e.g., steady on, flashing, SOS).
- Press a third time to turn off the light.

Figure 6.4: Using the integrated LED light for visibility.
6.5 Power Bank Function
The compressor can also serve as a power bank to charge your mobile devices in an emergency.
- Connect your device's charging cable to the USB output port on the compressor.
- The compressor will begin charging your device.

Figure 6.5: The compressor's power bank and flashlight capabilities.
7. Maintenance
Proper maintenance ensures the longevity and optimal performance of your air compressor.
- Cleaning: Wipe the exterior of the compressor with a soft, damp cloth. Do not use harsh chemicals or abrasive cleaners.
- Storage: Store the compressor and its accessories in the provided storage bag in a cool, dry place, away from direct sunlight and extreme temperatures.
- Battery Care: If storing for extended periods, charge the battery every 3-6 months to maintain its health.

Figure 7.1: Compact design allows for easy storage.
8. Troubleshooting
If you encounter issues with your Neakhmer Portable Air Compressor, refer to the following common problems and solutions:
| Problem | Possible Cause | Solution |
|---|
| Compressor does not turn on. | Low battery. | Charge the compressor fully. |
| Compressor turns on but does not inflate. | Hose not securely connected; valve not properly attached; target pressure already reached. | Ensure hose is tightly screwed on. Check valve connection. Verify current pressure on display. |
| Air leaks during inflation. | Loose connection; damaged hose/adapter. | Tighten all connections. Inspect hose and adapters for damage and replace if necessary. |
| Inaccurate pressure reading. | Incorrect unit selected; sensor issue. | Ensure the correct pressure unit (PSI, BAR, KPA, Kg/cm²) is selected. If problem persists, contact customer support. |
| Compressor overheats. | Continuous operation for too long. | Allow the compressor to cool down for at least 15-20 minutes before resuming use. Avoid prolonged continuous operation. |
9. Specifications
| Feature | Detail |
|---|
| Model Number | BX-25684 |
| Max Pressure | 150 PSI |
| Battery Capacity | 3 x 1500 mAh (4500 mAh total) |
| Power Source | Battery Powered, Electric Cord |
| Dimensions (approx.) | 26.5 x 8.8 x 8.3 cm |
| Weight | 500 Grams |
| Special Features | Portable, Digital Gauge, Auto-Stop, LED Light, Power Bank Function |

Figure 9.1: Approximate dimensions of the compressor.
10. Warranty and Customer Support
Neakhmer provides a 24-hour after-sales service. If you encounter any issues or have questions regarding your product, please do not hesitate to contact us through the order details page on Amazon. Please refer to your purchase receipt for specific warranty terms and conditions.
For further assistance, please visit the official Neakhmer support website or contact their customer service directly.


