Introduction
This manual provides detailed instructions for the safe and effective use of your OLIGHT I3T EOS 180 Lumens Dual-Output Slim EDC Flashlight and Warrior 3S 2300 Lumens Rechargeable Tactical Flashlight. Please read this manual thoroughly before operation and retain it for future reference.
Product Overview
OLIGHT I3T EOS
The OLIGHT I3T EOS is a compact and lightweight EDC (Everyday Carry) flashlight designed for convenience and portability. It features dual brightness settings and a dual-direction pocket clip.

Image: OLIGHT I3T EOS flashlight, highlighting its compact design and knurling for grip.
OLIGHT Warrior 3S
The OLIGHT Warrior 3S is a powerful rechargeable tactical flashlight with dual switches, multiple output modes, and a proximity sensor for enhanced safety and performance.

Image: OLIGHT Warrior 3S tactical flashlight, showcasing its robust build and side switch.
Setup
I3T EOS Battery Installation
The I3T EOS uses a single AAA battery. To install, unscrew the tail cap, insert the battery with the positive (+) end facing the head of the flashlight, and then screw the tail cap back on securely.

Image: OLIGHT I3T EOS, illustrating its compact size and AAA battery requirement.
Warrior 3S Charging
The Warrior 3S features magnetic charging. Connect the MCC3 magnetic charging cable to the tail cap of the flashlight. The indicator on the charger will show red when charging and green when fully charged. Ensure the battery is properly inserted before charging.
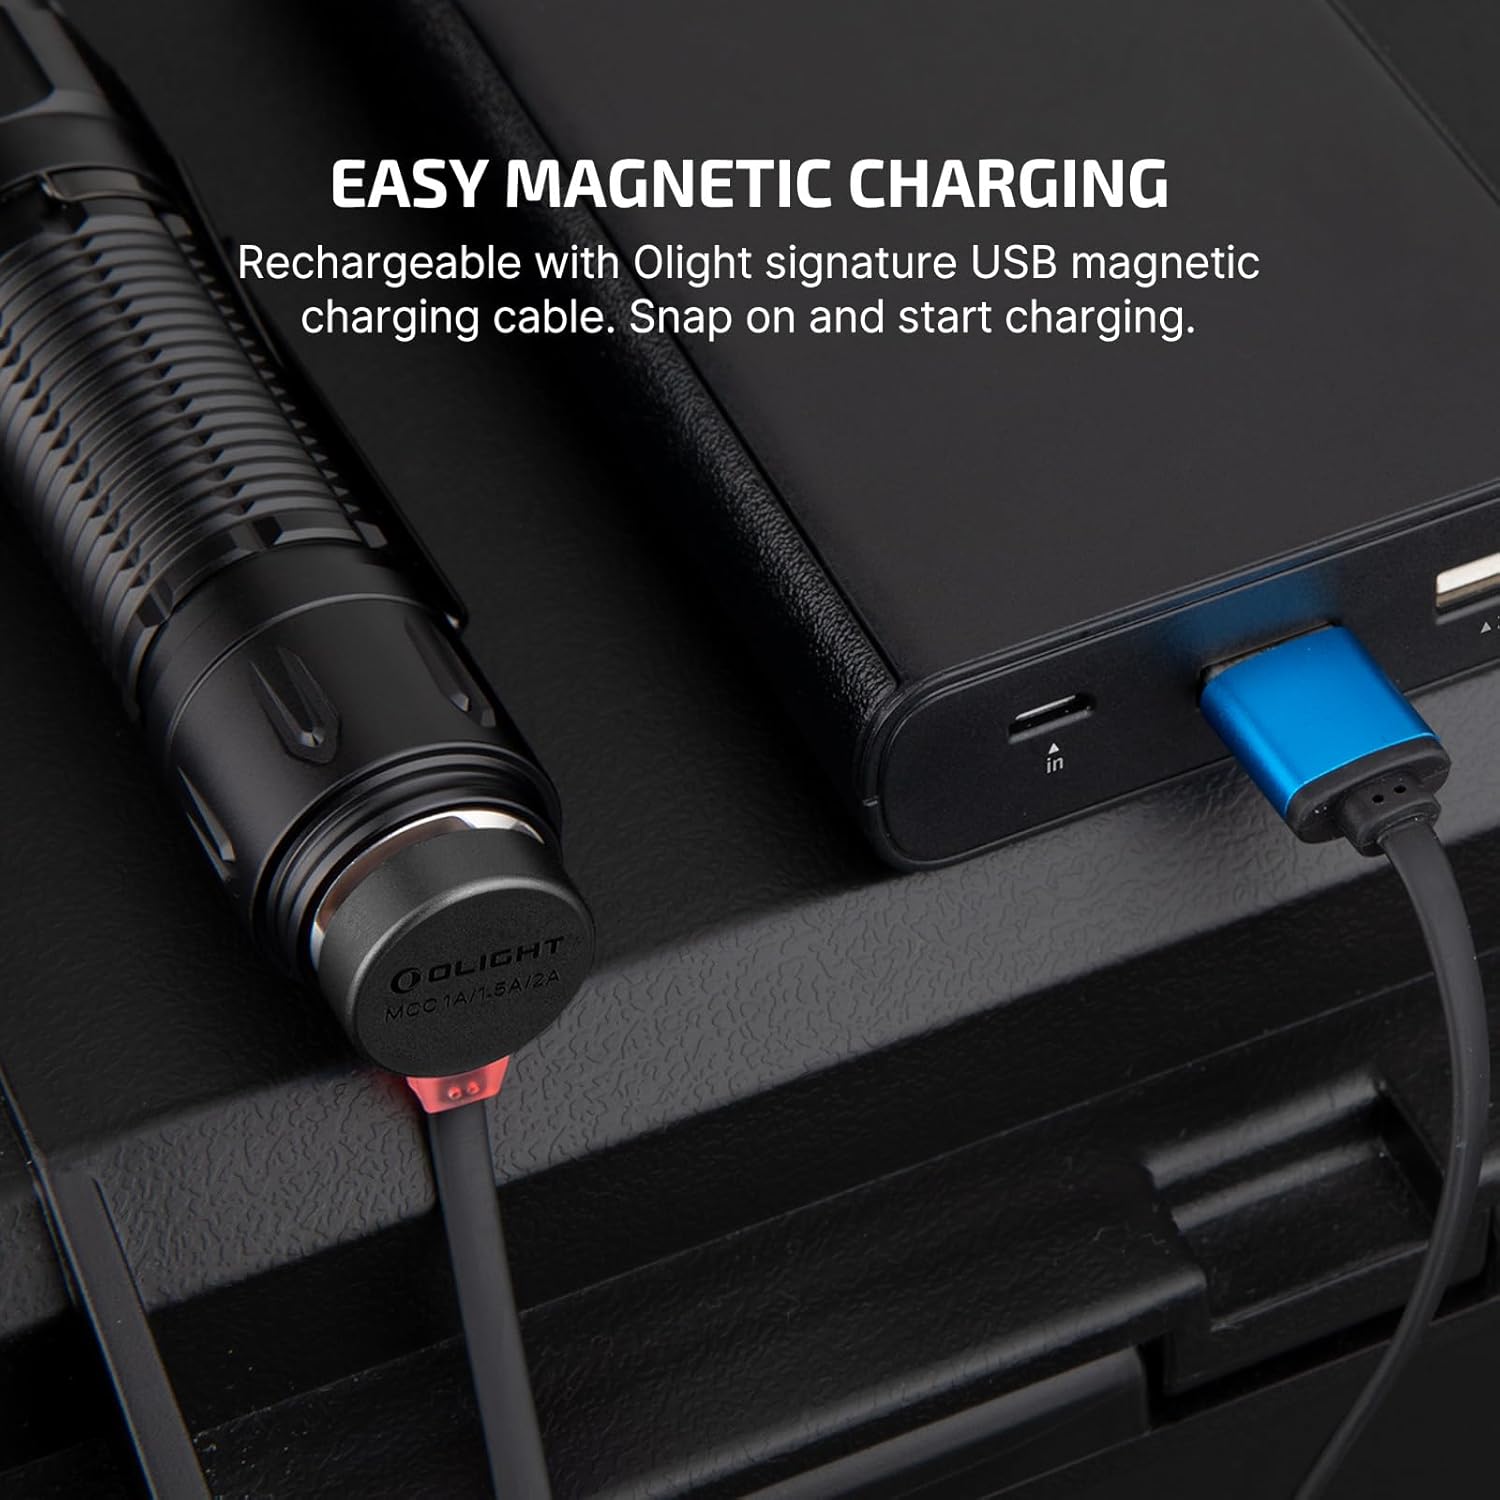
Image: Warrior 3S demonstrating easy magnetic charging.
Operating Instructions
I3T EOS Operation
The I3T EOS is operated via its tail switch:
- Momentary On: Soft press the tail switch without fully clicking for temporary low output. Release to turn off.
- Constant On/Off: Deep press the tail switch to click for constant low output. Press again to turn off.
- Change Brightness: From constant low mode, quickly turn off and on again to switch to high output.

Image: Demonstrating easy operation of the I3T EOS with its tail switch.
Warrior 3S Operation
The Warrior 3S features both a side switch and a dual-stage tail switch:
- Side Switch: Use for accessing six different output modes (Moon, Low, Mid, High, Turbo, Strobe) and lockout function. The indicators around the switch show battery level and brightness level.
- Dual-Stage Tail Switch: Provides immediate access to Turbo and Strobe functions for tactical situations. A light press activates medium mode, a deep press activates high mode. Holding the button from off activates momentary mode.
- Proximity Sensor: The flashlight has a built-in proximity sensor that automatically reduces brightness levels (High, Turbo, Strobe) when an object is too close to the lens, preventing overheating or accidental damage. This sensor can be temporarily disabled by double-pressing the side switch within 5 seconds of auto-dimming.

Image: Warrior 3S handy side switch with brightness and battery level indicators.
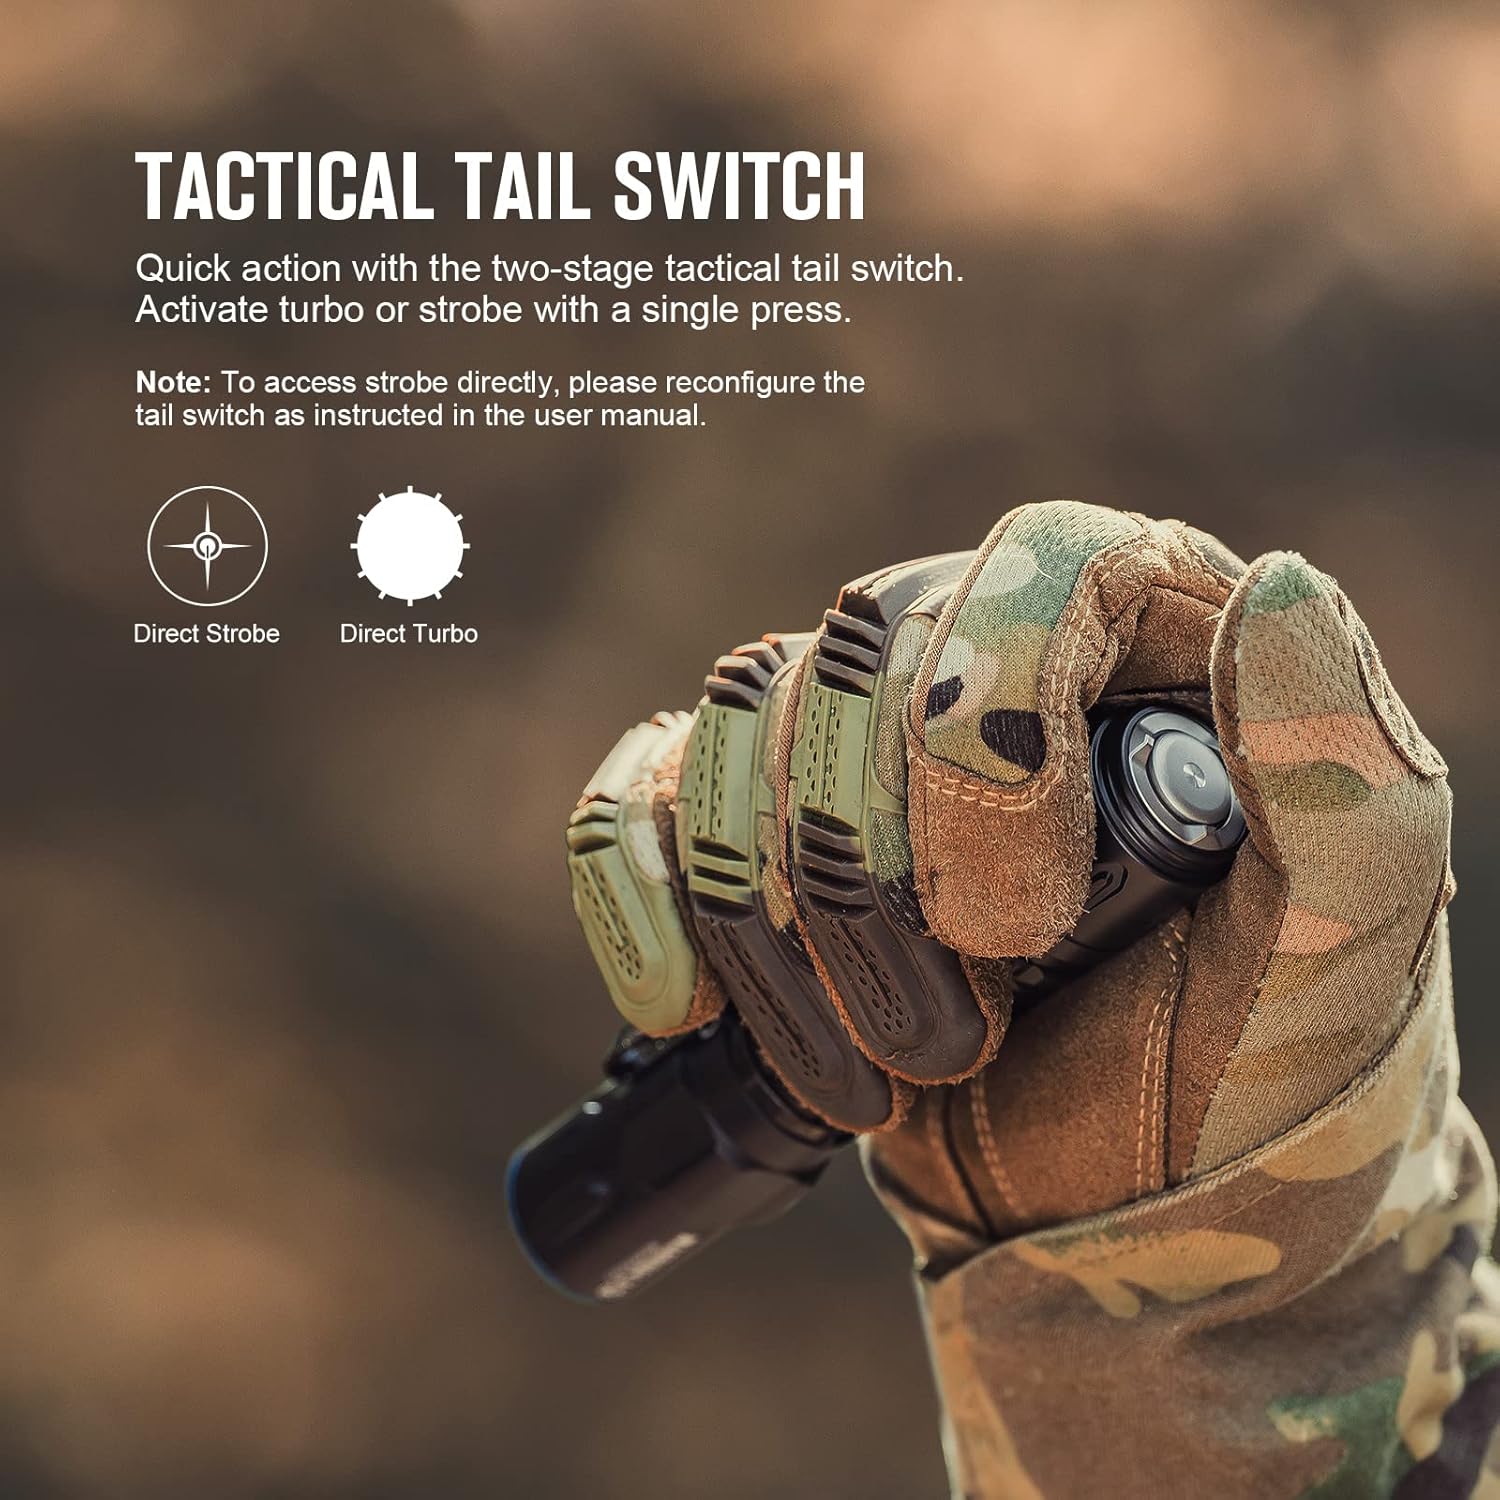
Image: Warrior 3S tactical tail switch for quick access to turbo or strobe.

Image: Warrior 3S proximity sensor in action, dimming the light when blocked.
Maintenance
- Keep the flashlight clean and dry. Wipe with a soft cloth.
- Lubricate O-rings regularly with silicone grease to maintain water resistance.
- If the flashlight is not used for an extended period, remove the battery (I3T EOS) or ensure the Warrior 3S is fully charged and stored in a cool, dry place.
- Avoid direct eye exposure to the light beam.
Troubleshooting
- Flashlight not turning on: Check battery installation (I3T EOS) or ensure Warrior 3S is charged. Clean contact points if necessary.
- Intermittent operation: Ensure tail caps are fully tightened. Check for loose battery connections.
- Dim light output: Recharge battery (Warrior 3S) or replace battery (I3T EOS).
- Proximity sensor issues (Warrior 3S): Ensure the sensor area is clean. Double-press the side switch within 5 seconds of auto-dimming to temporarily disable it if needed.
Specifications
| Feature | I3T EOS | Warrior 3S |
|---|---|---|
| Max Lumens | 180 Lumens | 2300 Lumens |
| Power Source | AAA Battery | Rechargeable Lithium Ion |
| Special Features | Dual-Output, Slim EDC, Dual-Direction Pocket Clip | Dual-Switches, Proximity Sensor, Magnetic Charging, Battery/Brightness Indicators |
| Material | Aluminum | |
| Water Resistance | IPX8 | |
Warranty and Support
OLIGHT strives to deliver high-quality illumination tools. This product is covered by a Lifetime Warranty. For support or warranty claims, please visit the official OLIGHT website or contact customer service.
Official OLIGHT Store: OLIGHT Store on Amazon
Product Videos
OLIGHT Warrior 3S Preview: Tactical Flashlight with Proximity Sensor
Video: A short preview demonstrating the OLIGHT Warrior 3S tactical flashlight, highlighting its proximity sensor feature.
OLIGHT Warrior 3S vs. Warrior X3: Which one should you get?
Video: A detailed comparison between the OLIGHT Warrior 3S and Warrior X3 flashlights, discussing their features and ideal use cases.
Beamshots - Olight Warrior 3S vs Warrior X 3 @ 200m
Video: A demonstration of the beam throw of the OLIGHT Warrior 3S and Warrior X3 at a distance of 200 meters, showcasing their illumination capabilities.


