1. Introduction
Thank you for choosing the Veise RZ-C Keyless Entry Door Lock. This electronic deadbolt system offers enhanced security and convenience for your home or office. Featuring a backlit keypad, automatic locking, and multiple access code options, this lock is designed for ease of use and reliable performance. This manual provides detailed instructions for installation, programming, operation, and maintenance to ensure optimal functionality.
The Veise RZ-C deadbolt combines a secure 4 to 10 digit code entry with traditional lever handles, offering a versatile solution for various door types. Its robust construction and intelligent features aim to provide peace of mind and effortless access control.
2. Safety Information
- Read all instructions carefully before installation and use.
- Do not attempt to disassemble or modify the lock beyond the instructions provided in this manual. This may void the warranty and compromise security.
- Use only the specified battery type (4 AA alkaline batteries). Do not mix old and new batteries or different types of batteries.
- Keep backup keys in a secure location outside the property.
- Protect your access codes. Avoid sharing them with unauthorized individuals.
- Ensure the door frame and door are structurally sound before installation.
3. Package Contents
Verify that all components are present before beginning installation:
- 1 x Keyless Entry Door Lock (RZ-C)
- 2 x Lever Handles
- 2 x Backup Keys
- 1 x Latch
- 1 x Strike Plate
- 1 x Mounting Plate
- Screws (various sizes)
- Installation Instructions
- Programming Instructions
4. Specifications
| Feature | Specification |
|---|---|
| Model Number | RZ-C |
| Door Thickness Compatibility | 35 mm - 50 mm (1-3/8" to 2") |
| Backset | 60 mm or 70 mm (2-3/8" or 2-3/4") |
| Door Hole Diameter | 54 mm (2-1/8") |
| Latch Hole Diameter | 25 mm (1") |
| Power Supply | 4 x AA Alkaline Batteries (not included) |
| Operating Temperature | -30 °C to 70 °C |
| Material | Metal (Sturdy Zinc Alloy) |
| Special Features | Keyless Entry, Automatic Locking, Backlit Keypad, Anti-Peeping Passcode, Silent Mode, Vacation Mode, Low Battery Alert |
5. Installation
Follow these steps carefully for proper installation. A screwdriver is typically the only tool required.
5.1 Pre-Installation Check
Before starting, ensure your door dimensions are compatible with the lock. Refer to the diagram below.

- Door Thickness: 35mm - 50mm (1-3/8" to 2")
- Backset: 60mm or 70mm (2-3/8" or 2-3/4")
- Door Hole Diameter: 54mm (2-1/8")
- Latch Hole Diameter: 25mm (1")
5.2 Installation Steps
- Install the Latch: Insert the latch into the door edge. Ensure the 'UP' arrow on the latch is facing upwards. Secure it with screws. Adjust the backset if necessary.
- Install the Exterior Assembly: Feed the cable from the exterior keypad assembly through the door hole. Align the exterior assembly with the latch and secure it to the door.
- Install the Mounting Plate: Attach the interior mounting plate to the door, securing it with screws through the exterior assembly. Ensure the cable passes through the plate.
- Connect the Cable: Connect the cable from the exterior assembly to the interior assembly.
- Install the Interior Assembly: Mount the interior assembly onto the mounting plate, ensuring the thumb turn spindle engages correctly with the latch mechanism. Secure with screws.
- Install Batteries: Open the battery cover on the interior assembly. Insert 4 new AA alkaline batteries, observing polarity (+/-). Close the battery cover.
- Install Lever Handles: Attach the lever handles to both sides of the door, ensuring they operate smoothly.
6. Operating Instructions
The Veise RZ-C lock offers various functions for secure and convenient access.

6.1 Programming Codes
All programming is done via the keypad. Refer to the separate programming instructions for detailed steps on setting up Master Codes, User Codes, and One-Time Codes.
- Master Code: This is the primary code used to program other codes and settings. It should be kept confidential.
- User Codes: Up to 20 unique 4-10 digit codes can be created for regular users (family, friends).
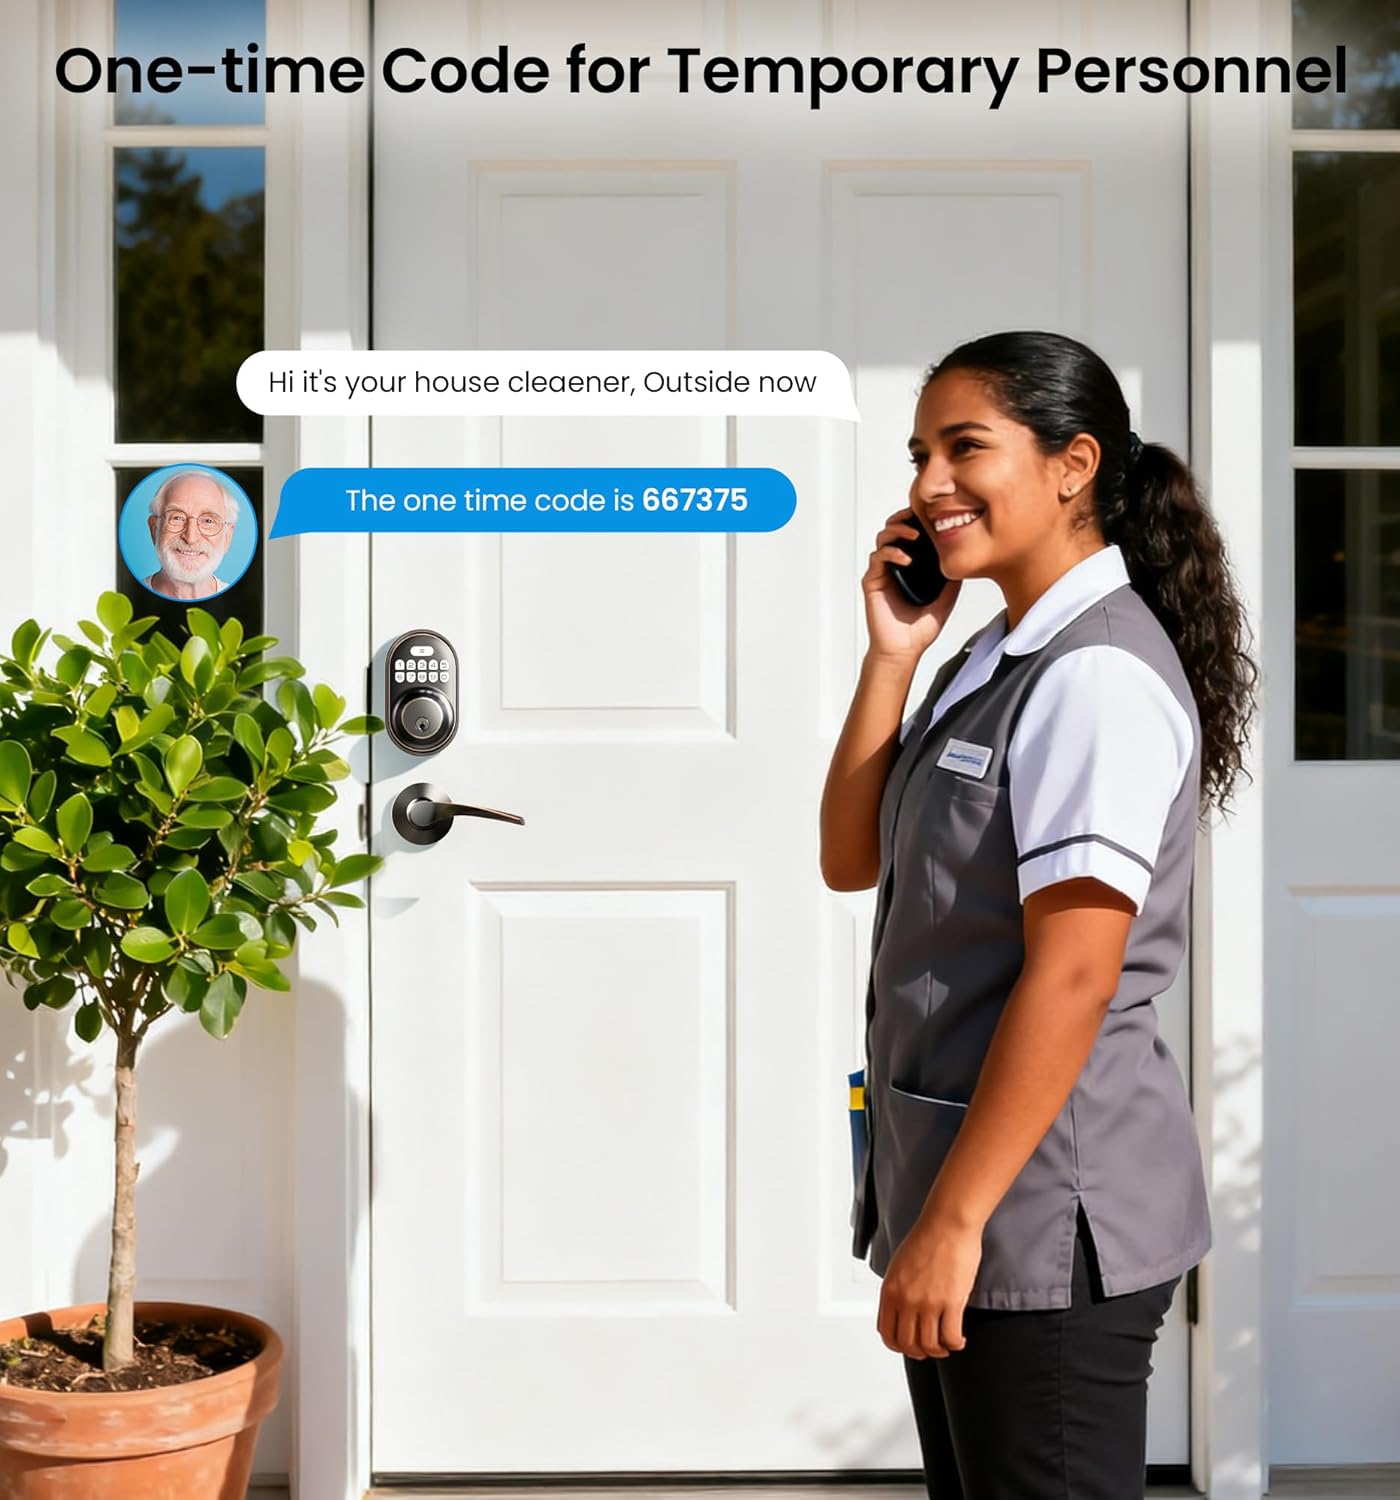
- One-Time Codes: Generate temporary codes for single use, ideal for visitors or service personnel. These codes expire after one use.

6.2 Locking and Unlocking
- Unlocking with Code: Enter your 4-10 digit user code followed by the '#' key. The lock will retract, and you can open the door.
- Unlocking with Key: In case of battery failure or emergency, use the physical backup key to unlock the deadbolt.
- Automatic Locking: The lock can be set to automatically re-lock after 10-99 seconds. This feature ensures the door is always secured after entry or exit.
- Manual Locking: Press and hold the '#' key for 2 seconds on the exterior keypad, or use the thumb turn on the interior assembly to manually lock the door.

6.3 Special Features

- Anti-Peeping Passcode: To prevent others from guessing your code, you can enter random digits before or after your actual code. The lock will still recognize the correct sequence within the longer entry.
- Silent Mode: This mode disables keypad beeps for quiet operation, useful for late-night entries or exits.
- Vacation Mode: When activated, this mode restricts all access except for the Master Code. Physical keys will also be disabled, providing enhanced security when you are away.
- Low Battery Alert: The keypad will flash a red light when batteries are low, indicating it's time for replacement.
- LED Backlit Keypad: The keypad illuminates for easy visibility in low-light conditions.

7. Maintenance
7.1 Battery Replacement
When the low battery alert activates (red light on keypad), replace all four AA alkaline batteries. Do not wait for the batteries to completely drain, as this may lead to loss of settings or inability to operate the lock electronically.
- Remove the battery cover on the interior assembly.
- Remove the old batteries.
- Insert four new AA alkaline batteries, ensuring correct polarity.
- Replace the battery cover.
7.2 Cleaning
Clean the lock's exterior with a soft, damp cloth. Avoid using abrasive cleaners, solvents, or chemical sprays, as these can damage the finish and electronic components.
8. Troubleshooting
| Problem | Possible Cause | Solution |
|---|---|---|
| Keypad does not respond. | Dead batteries; Incorrect battery installation; Loose cable connection. | Replace batteries; Check battery polarity; Ensure cable is securely connected. |
| Lock does not engage/disengage. | Incorrect code; Latch misalignment; Obstruction in door frame. | Re-enter code; Check latch alignment; Clear any obstructions. |
| Low battery alert persists after replacement. | Used old/low-quality batteries; Incorrect battery type. | Ensure new, high-quality AA alkaline batteries are used. |
| Lock beeps continuously. | Tamper alarm triggered; Error during programming. | Check for tampering; Re-program codes if necessary. |
9. Warranty and Support
For warranty information, technical support, or further assistance, please refer to the manufacturer's official website or contact Veise customer service directly. Keep your purchase receipt as proof of purchase.


