Introduction
This manual provides detailed instructions for the installation and maintenance of your replacement door gasket seal. This part is designed to restore the proper sealing function of your freezer door, ensuring optimal temperature retention and energy efficiency. It is compatible with various Kenmore and Frigidaire freezer models.
Compatibility
This replacement door gasket seal is compatible with a wide range of Kenmore and Frigidaire freezer models. Please verify your freezer's model number against the list below to ensure proper fit.
Compatible Kenmore Models:
- 253.28452803
- 253.21401101
- 253.20402003
- 253.28262805
- 253.21421105
- 253.21421102
- 253.28432809
- 253.21402102
- 253.28432800
Compatible Frigidaire Models:
- LFFU14F5HWS
- FFU14F5HWN
- FFU14FC4AW1
- GLFU1467FW0
- MFU14M2GW0
- FFU12F2HW2
- LFFU14F5HWC
- FFU14M5HWF
- FFU12F2HW8
- FFU14C3AW0
- LFFU1424DW16
- FFU12F2HW0
- FFU14C3CW0
If your model number is not listed, please use the "Ctrl + F" (or Command + F on Mac) function on your device to search for your specific model within the product description or consult the manufacturer's documentation.
Safety Information
Always prioritize safety when performing appliance repairs. Failure to follow these safety guidelines may result in injury or damage to the appliance.
- Disconnect Power: Before beginning any work, always unplug the freezer from the electrical outlet to prevent electric shock.
- Wear Protective Gear: Consider wearing gloves to protect your hands during the installation process.
- Handle with Care: The gasket may have stiff sections; handle carefully to avoid pinching or injury.
- Proper Disposal: Dispose of the old gasket according to local regulations.
Installation Guide (Setup)
Follow these steps carefully to replace your freezer door gasket seal.
Prepare the New Gasket: Unpack the new gasket. If it appears creased or flattened from shipping, you can gently warm it to make it more pliable. This can be done by soaking it in warm water for 10-15 minutes or by placing it in a warm room. Ensure it is completely dry before installation.
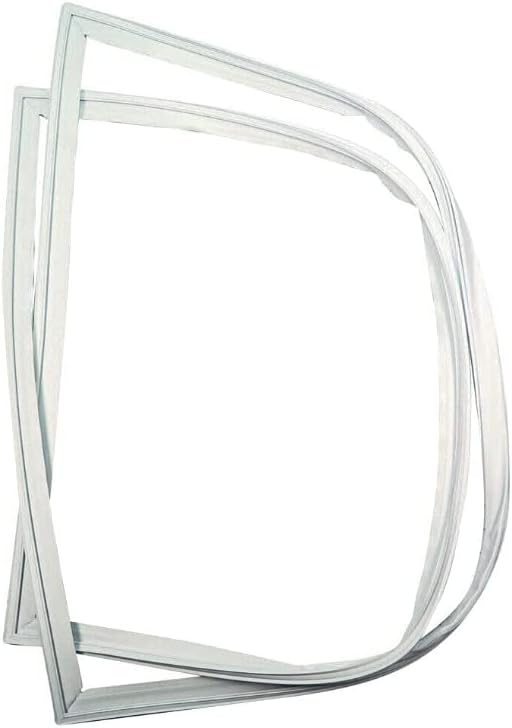
Image: The new door gasket seal, showing its flexible, rectangular shape. This image illustrates the product in its typical form before installation.
Disconnect Power: Unplug the freezer from the wall outlet.
Remove the Old Gasket: Open the freezer door. The old gasket is typically held in place by screws, clips, or simply pressed into a channel around the door panel. Carefully locate any fasteners. If screws are present, use a screwdriver to remove them. Gently pull the old gasket away from the door, working your way around the perimeter.

Image: Two door gasket seals, demonstrating their flexible and contoured design. This image helps visualize the shape and material of the gasket.
Clean the Gasket Channel: Once the old gasket is removed, thoroughly clean the channel or groove where the new gasket will sit. Use a mild detergent and water to remove any dirt, grime, or adhesive residue. Ensure the surface is completely dry before proceeding.
Install the New Gasket: Begin by aligning one corner of the new gasket with a corner of the freezer door. Carefully press the gasket into the channel, working your way around the entire perimeter. Ensure the gasket is seated firmly and evenly. If there are screws, reinsert and tighten them, but do not overtighten. The magnetic strip within the gasket should face inwards towards the freezer cavity.
Check for Proper Sealing: Once installed, close the freezer door and check for any gaps or areas where the gasket is not sealing properly. You can use a dollar bill test: place a dollar bill between the door and the freezer frame, then close the door. If you can easily pull the bill out, the seal is not tight enough in that area. Adjust the gasket by gently pressing it further into the channel or by slightly adjusting the door hinges if necessary (consult your freezer's specific manual for hinge adjustments).
Reconnect Power: Plug the freezer back into the electrical outlet.
Post-Installation Check (Operating)
After installation, perform the following checks to ensure optimal performance:
- Visual Inspection: Ensure the gasket is uniformly seated around the entire door frame with no visible gaps or twists.
- Dollar Bill Test: Repeat the dollar bill test at several points around the door to confirm a tight seal.
- Temperature Monitoring: Monitor the freezer's internal temperature for the next 24-48 hours to ensure it maintains the desired coldness.
Care and Maintenance
Proper care of your new gasket will extend its lifespan and maintain freezer efficiency.
- Regular Cleaning: Clean the gasket regularly with a soft cloth, warm water, and mild soap. Avoid abrasive cleaners or harsh chemicals that can damage the material.
- Inspect for Damage: Periodically inspect the gasket for cracks, tears, or hardening. Address any issues promptly to prevent cold air leaks.
- Avoid Obstructions: Ensure no food items or debris are caught in the door seal when closing the freezer door.
Troubleshooting
| Problem | Possible Cause | Solution |
|---|---|---|
| Freezer door not sealing tightly. | Gasket not fully seated; gasket twisted; door hinges misaligned; new gasket needs to "settle." |
|
| Ice buildup around the door. | Air leak through the gasket; high humidity in the room. |
|
| Gasket feels stiff or hard. | Cold temperatures; prolonged use. |
|
Specifications
- Part Type: Freezer Door Gasket Seal Replacement
- Brand: Generic
- Compatible Appliance Type: Freezer (Upright and Chest models, depending on specific model compatibility)
- Material: Flexible rubber/PVC composite with magnetic strip
- Manufacturer Part Number: 253.28452803 (primary reference)
- UPC: 824252672156
- Date First Available: September 5, 2022
Support
For further assistance or if you encounter issues not covered in this manual, please refer to your freezer's original manufacturer manual or contact a qualified appliance technician. For product-specific inquiries regarding this replacement part, please contact the seller or distributor from whom you purchased the item.