1. Introduction and Overview
The VEVOR 20'' Pressure Washer Surface Cleaner is designed for efficient and thorough cleaning of large flat surfaces such as driveways, sidewalks, patios, and decks. Featuring a durable stainless steel frame, dual high-speed rotating nozzles, and an adjustable handle with universal castors, this unit provides a wide 20-inch cleaning path, significantly reducing cleaning time and effort compared to standard pressure washer wands. It is engineered to operate with pressure washers up to 4000 PSI, delivering powerful and consistent cleaning results.

Figure 1.1: VEVOR 20-inch Pressure Washer Surface Cleaner. This image shows the complete assembly of the surface cleaner, including the circular cleaning head with wheels, the long handle, and the trigger gun at the top.
2. Safety Instructions
Always observe the following safety precautions when operating the pressure washer surface cleaner:
- Pressure Compatibility: Ensure the high-pressure washer connected to this surface cleaner has a minimum working pressure of 1000 PSI. Do not exceed the maximum rated pressure of 4000 PSI for this unit.
- Eye and Ear Protection: Always wear appropriate eye protection (safety glasses or goggles) and ear protection when operating the pressure washer and surface cleaner.
- Footwear: Wear sturdy, non-slip footwear to maintain balance and protect your feet from high-pressure spray.
- Clear Debris: Before operation, clear the cleaning area of any large rocks, sticks, or other debris that could damage the nozzles or be propelled by the high-pressure water.
- Nozzle Blockage: The nozzles are small and can become blocked. If one nozzle is blocked, the unit will not function correctly. Always ensure nozzles are clear before and during operation.
- Secure Connections: Ensure all hose and gun connections are secure to prevent leaks and accidental disconnections under high pressure.
- Trigger Safety: Utilize the security trigger feature on the trigger gun to prevent accidental activation.
- Maintain Control: Always maintain a firm grip on the handle during operation. The unit may exert force due to water pressure.
- Children and Pets: Keep children and pets away from the operating area.
3. Product Components
The VEVOR 20'' Pressure Washer Surface Cleaner consists of the following main components:
- Surface Cleaner Head: The main circular housing containing the rotating spray bar and nozzles.
- Dual High-Pressure Nozzles: Two rotating jets inside the head, designed for efficient cleaning.
- Handle Assembly: The ergonomic handle with adjustable height and angle for comfortable operation.
- Trigger Gun: The control handle with a security trigger for water flow activation.
- Universal Castors (4): Wheels attached to the cleaning head for smooth and flexible movement.
- Stiff Bristle Skirt: Located around the base of the cleaning head to contain water spray.
- 3/8'' Quick Connector: For connecting the trigger gun to the pressure washer hose.
- 1/4'' Quick Connector Adapters (2): Provided for optional use with different hose connections.

Figure 3.1: Connector Design. This image highlights the trigger gun, the 3/8'' quick plug, and the two 1/4'' quick-connector adapters included with the unit, demonstrating how the hose connects to the trigger gun.
4. Setup
Follow these steps to set up your VEVOR Pressure Washer Surface Cleaner:
- Assemble Handle: Attach the handle assembly to the surface cleaner head. Ensure all connections are secure and tightened according to the included hardware. The handle's height and angle can be adjusted for user comfort.
- Connect Trigger Gun: Securely connect the trigger gun to the top of the handle assembly.
- Connect Pressure Washer Hose: Connect your pressure washer's high-pressure hose to the 3/8'' quick connector on the trigger gun. If your hose requires a 1/4'' connection, use one of the provided adapters. Ensure the connection is tight and leak-free.
- Inspect Nozzles: Before first use, and periodically thereafter, inspect the dual rotating nozzles inside the cleaning head to ensure they are free from debris and blockages.
- Prepare Cleaning Area: Remove any large debris, such as rocks, leaves, or sticks, from the surface to be cleaned. This prevents damage to the unit and ensures optimal cleaning performance.
5. Operation
Operating the surface cleaner is straightforward:
- Start Pressure Washer: Turn on your pressure washer and allow it to reach its operating pressure.
- Engage Trigger: With the surface cleaner positioned over the area to be cleaned, depress the trigger on the trigger gun to activate the water flow. The dual nozzles will begin to rotate, creating a powerful cleaning action.
- Begin Cleaning: Guide the surface cleaner across the surface using smooth, overlapping passes. The 4 universal castors provide easy maneuverability, allowing for flexible and stable movement.
- Control Spray: The stiff bristle skirt around the base of the cleaning head helps to contain the high-pressure water spray, minimizing splash-back and keeping the operator drier.
- Adjust Handle: Adjust the handle height and angle as needed during operation to maintain a comfortable and ergonomic working posture.
- Observe Results: For heavily soiled areas, slower passes or multiple passes may be required to achieve optimal cleanliness.

Figure 5.1: Pressure Washer Surface Cleaner in Use. This image depicts the surface cleaner being used on a driveway, illustrating its wide cleaning path and the effective removal of dirt and grime.
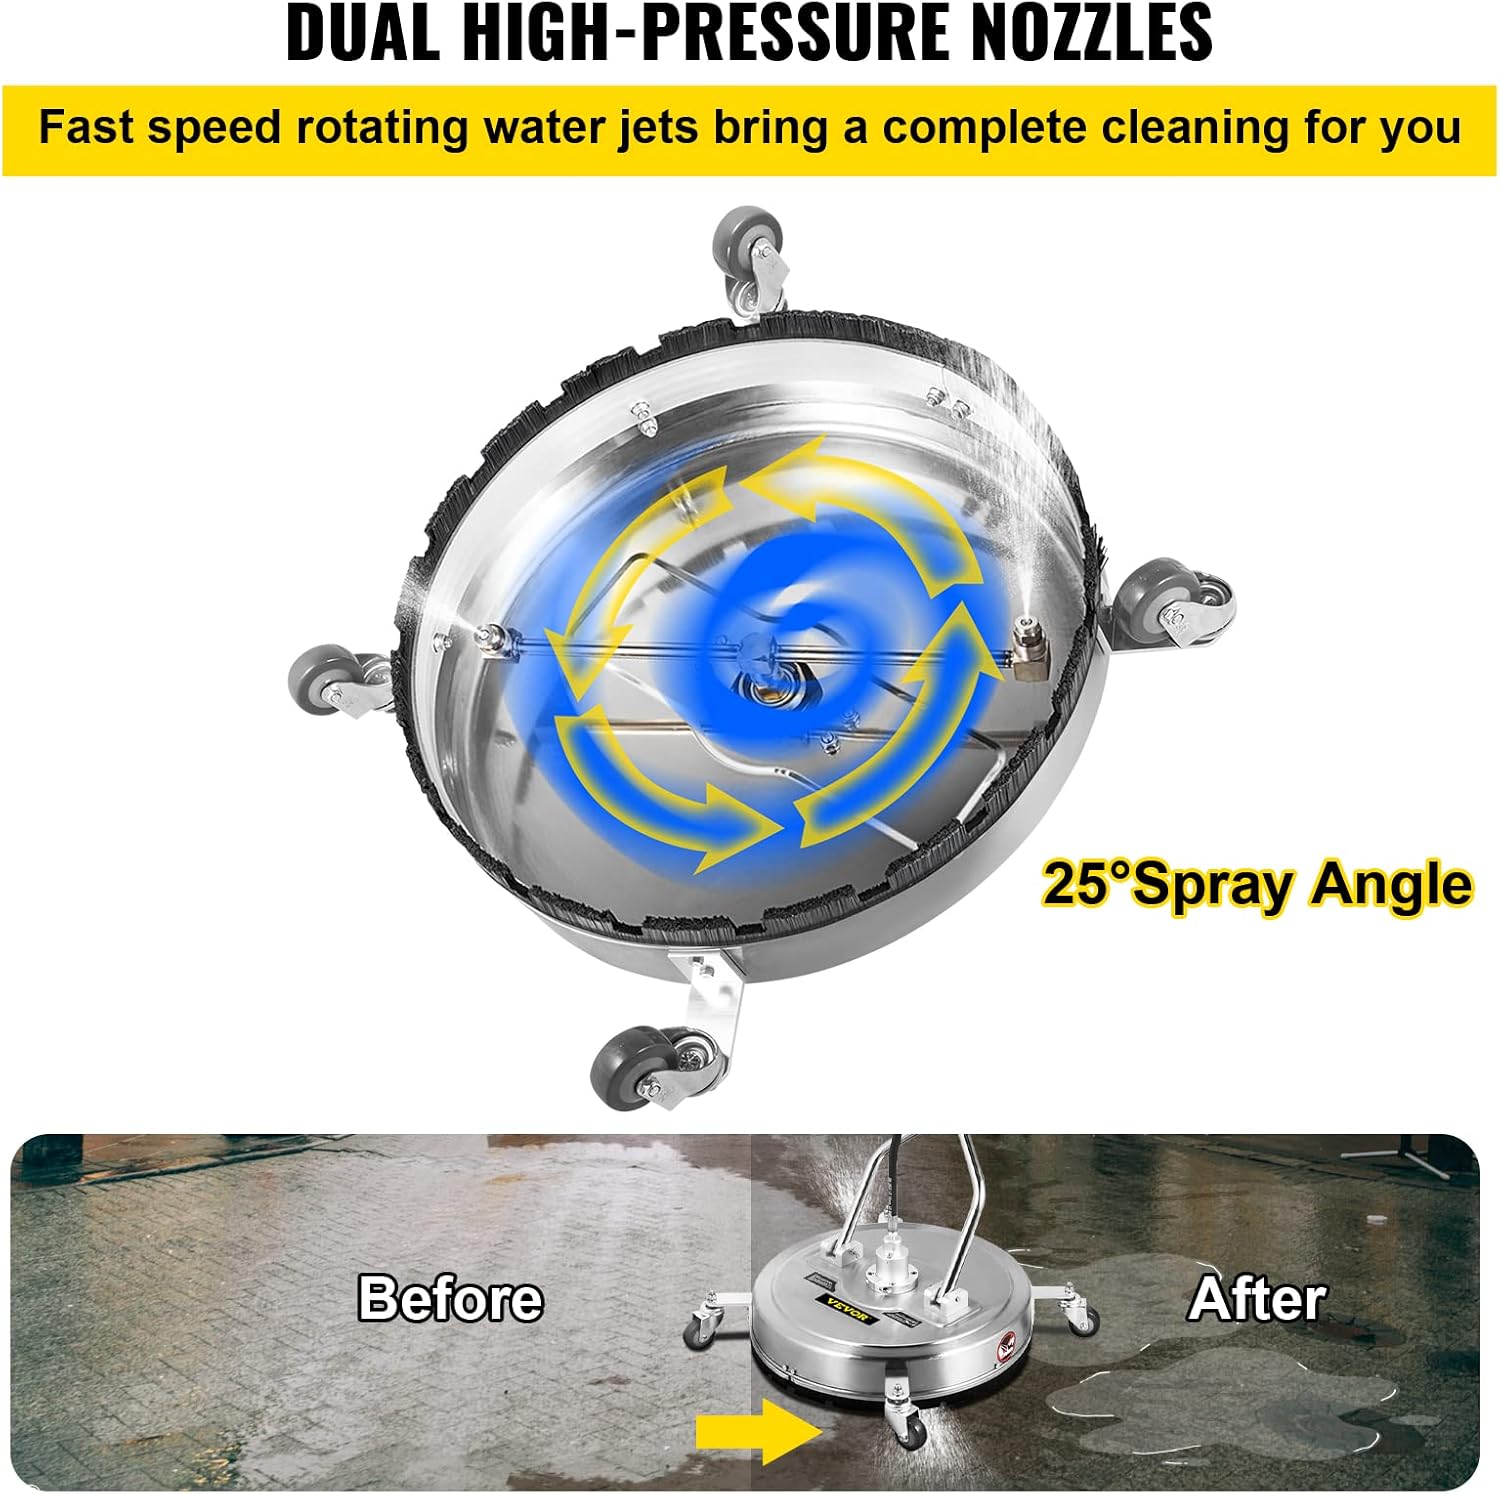
Figure 5.2: Dual High-Pressure Nozzles and Cleaning Effect. This image shows an internal view of the dual rotating nozzles with a 25-degree spray angle, and a 'before and after' comparison of a cleaned surface.
6. Maintenance
Regular maintenance ensures the longevity and optimal performance of your surface cleaner:
- Nozzle Cleaning: If you notice a decrease in pressure or uneven spray, the nozzles may be clogged. Use a nozzle cleaning tool (often supplied with pressure washers) or a thin wire to clear any obstructions.
- General Cleaning: After each use, rinse the surface cleaner thoroughly with clean water to remove dirt, grime, and detergent residues. Wipe down the stainless steel frame to prevent water spots and maintain its appearance.
- Check Connections: Periodically inspect all hose connections and fittings for wear, damage, or leaks. Replace any worn seals or O-rings as needed.
- Storage: Store the surface cleaner in a clean, dry place, away from direct sunlight and extreme temperatures. If storing in freezing conditions, ensure all water is drained from the unit to prevent damage.
- Wheel Inspection: Check the universal castors for smooth rotation and clear any debris that may have accumulated around them.

Figure 6.1: Stainless Steel Frame and Reinforced Interface. This image highlights the durable 304 stainless steel construction, emphasizing its non-deformed and corrosion-proof properties, along with a close-up of the reinforced metal interface for durability and leak prevention.
7. Troubleshooting
Refer to the table below for common issues and their solutions:
| Problem | Possible Cause | Solution |
|---|---|---|
| No pressure or very low pressure from nozzles. |
|
|
| Uneven cleaning pattern. |
|
|
| Unit difficult to move. |
|
|
| Water leaking from connections. |
|
|
8. Specifications
Key specifications for the VEVOR 20'' Pressure Washer Surface Cleaner:
| Feature | Specification |
|---|---|
| Product Model Number | 20'' Pressure Washer Surface Cleaner |
| Maximum Working Pressure | 4000 PSI |
| Minimum Working Pressure | 800 PSI |
| Maximum Flow Rate | 8.5 GPM |
| Minimum Flow Rate | 2 GPM |
| Cleaning Path Diameter | 20 inches (51 cm) |
| Product Height | 66 inches (168 cm) |
| Item Weight | 29.8 Pounds |
| Material | 304 Stainless Steel |
| Nozzle Spray Angle | 25-degree |
| Connector Type | 3/8'' Quick Connector (with 1/4'' adapters included) |

Figure 8.1: Product Specifications and Applications. This image visually represents the product's dimensions (20 inches wide, 66 inches high) and illustrates its wide application for cleaning driveways, sidewalks, and patios.

Figure 8.2: Product Dimensions. This image provides a clear visual representation of the surface cleaner's length, width, and height measurements.
9. Warranty and Support
For warranty information, technical support, or replacement parts, please contact VEVOR customer service. Refer to your purchase documentation or the VEVOR official website for contact details.