1. Introduction
Thank you for choosing the Gevi 20 Bar Compact Professional Espresso Coffee Machine. This manual provides essential information for the safe and efficient operation, maintenance, and troubleshooting of your new espresso machine. Please read this manual thoroughly before first use and keep it for future reference.

Figure 1.1: Gevi GECME418E-U Espresso Machine with accessories.
This image displays the Gevi 20 Bar Compact Professional Espresso Coffee Machine in stainless steel finish, accompanied by two espresso cups, a milk frothing pitcher, a coffee scoop, and two filter baskets. The machine is actively brewing espresso into the cups.
2. Important Safety Instructions
When using electrical appliances, basic safety precautions should always be followed to reduce the risk of fire, electric shock, and/or injury to persons, including the following:
- Read all instructions.
- Do not touch hot surfaces. Use handles or knobs.
- To protect against fire, electric shock, and personal injury, do not immerse cord, plugs, or appliance in water or other liquid.
- Close supervision is necessary when any appliance is used by or near children.
- Unplug from outlet when not in use and before cleaning. Allow to cool before putting on or taking off parts, and before cleaning the appliance.
- Do not operate any appliance with a damaged cord or plug or after the appliance malfunctions, or has been damaged in any manner.
- The use of accessory attachments not recommended by the appliance manufacturer may result in fire, electric shock, or personal injury.
- Do not use outdoors.
- Do not let cord hang over edge of table or counter, or touch hot surfaces.
- Do not place on or near a hot gas or electric burner, or in a heated oven.
- Always attach plug to appliance first, then plug cord into the wall outlet. To disconnect, turn any control to "off", then remove plug from wall outlet.
- Do not use appliance for other than intended use.
- This appliance is for household use only.

Figure 2.1: Smart and Safe Design Features.
This image highlights the safety and smart features of the espresso machine, including a water shortage reminder, cleaning reminder, ETL listing for safety, and an auto shut-off function, emphasizing user convenience and safety.
3. Product Components
Familiarize yourself with the parts of your Gevi espresso machine:

Figure 3.1: Main Components of the Espresso Machine.
This diagram provides an exploded view of the Gevi espresso machine, clearly labeling its key components: Water tank, Steam/water knob, Pressure gauge, Manual, Removable cup shelf, Drip tray, Steam wand, One-cup filter, Two-cup filter, Froth nozzle, Ground Coffee Portafilter, and Spoon & Tamper.
- Water Tank: Removable for easy filling and cleaning.
- Control Panel: Buttons for power, single shot, double shot, and steam.
- Pressure Gauge: Indicates brewing pressure for optimal extraction.
- Portafilter: Holds ground coffee or capsules.
- Filter Baskets: Includes one-cup and two-cup filters for ground coffee.
- Steam Wand: For frothing milk and dispensing hot water.
- Drip Tray: Collects excess liquid and is removable for cleaning.
- Cup Warmer Grill: Located on top to pre-heat cups.
- Spoon & Tamper: For measuring and tamping ground coffee.
4. Setup and First Use
Before using your espresso machine for the first time, follow these steps:
- Unpack: Carefully remove all packaging materials and ensure all components are present.
- Clean: Wash the water tank, portafilter, filter baskets, and drip tray with warm soapy water. Rinse thoroughly and dry.
- Fill Water Tank: Fill the removable water tank with fresh, cold water up to the MAX line. Place it back securely.
- Prime the Machine:
- Plug the machine into a grounded electrical outlet.
- Place a large cup under the brew head.
- Press the power button to turn on the machine.
- Once the machine is heated (indicator light solid), press the single shot button to run water through the brew head until water flows out. Repeat for the steam wand by turning the steam knob to release hot water. This primes the pump and removes any air.
5. Operating Instructions
5.1 Making Espresso (Ground Coffee)
- Pre-heat: Ensure the machine is pre-heated. The cup warmer grill on top can be used to warm your espresso cups.
- Prepare Portafilter: Insert the desired filter basket (single or double shot) into the portafilter.
- Add Coffee: Use the measuring spoon to add finely ground espresso coffee into the filter basket. For a single shot, use one level scoop; for a double shot, use two.
- Tamp Coffee: Use the tamper to press the coffee grounds firmly and evenly. Ensure the surface is level.
- Attach Portafilter: Align the portafilter with the brew head and twist it firmly to the right until it is securely locked.
- Place Cup(s): Place one or two pre-heated espresso cups under the portafilter spouts.
- Brew Espresso: Press the single shot or double shot button. The machine will automatically dispense the programmed volume of espresso (25-60ml for single, 60-130ml for double).
- Remove Portafilter: Once brewing is complete, carefully remove the portafilter by twisting it to the left. Dispose of the used coffee grounds.
Figure 5.1: 2-in-1 Powder and Nespresso Capsules Extraction System.
This image illustrates the process for both ground coffee and Nespresso capsules. For ground coffee, it shows fixing the filter, adding powder, tamping, inserting the portafilter, and brewing. For capsules, it shows inserting the capsule, closing the capsule box, putting it into the portafilter, inserting the portafilter, and brewing.

Figure 5.2: Extraction Guide with Built-in Pressure Gauge.
This image displays the espresso machine with a prominent pressure gauge, indicating the optimal "Espresso Range" for brewing. It visually guides the user on correct extraction versus under or over extraction, helping to achieve barista-quality results.
5.2 Making Espresso (Nespresso Capsules)
Your Gevi machine is compatible with Nespresso capsules (capsule portafilter accessories not included, but compatible).
- Prepare Capsule Portafilter: If you have the compatible capsule portafilter accessory, insert it into the machine.
- Insert Capsule: Place a Nespresso capsule into the designated slot in the capsule portafilter.
- Close and Lock: Close the capsule box and insert the portafilter into the machine, twisting to lock it securely.
- Place Cup: Place your cup under the spout.
- Brew Espresso: Press the single shot or double shot button to brew.
- Remove Capsule: After brewing, carefully remove the portafilter and dispose of the used capsule.
5.3 Milk Frothing with Steam Wand
- Prepare Milk: Fill a stainless steel frothing pitcher with cold milk (dairy or non-dairy) to just below the spout.
- Activate Steam: Press the steam button on the control panel. Wait for the steam indicator light to become solid, indicating the machine is ready.
- Purge Steam Wand: Position the steam wand over the drip tray and briefly turn the steam/water knob to release any condensed water. Turn the knob off.
- Froth Milk: Immerse the tip of the steam wand just below the surface of the milk. Slowly turn the steam/water knob to release steam.
- Create Microfoam: Keep the tip near the surface to create a swirling motion and incorporate air, producing a fine microfoam. As the milk heats and expands, lower the pitcher to keep the tip just below the surface.
- Monitor Temperature: Continue frothing until the milk reaches the desired temperature (around 140-150°F or 60-65°C). The pitcher will be hot to the touch.
- Stop Steaming: Turn the steam/water knob off, then remove the pitcher.
- Clean Steam Wand: Immediately wipe the steam wand with a damp cloth to remove any milk residue. Briefly turn the steam/water knob on again to purge any milk from inside the wand.
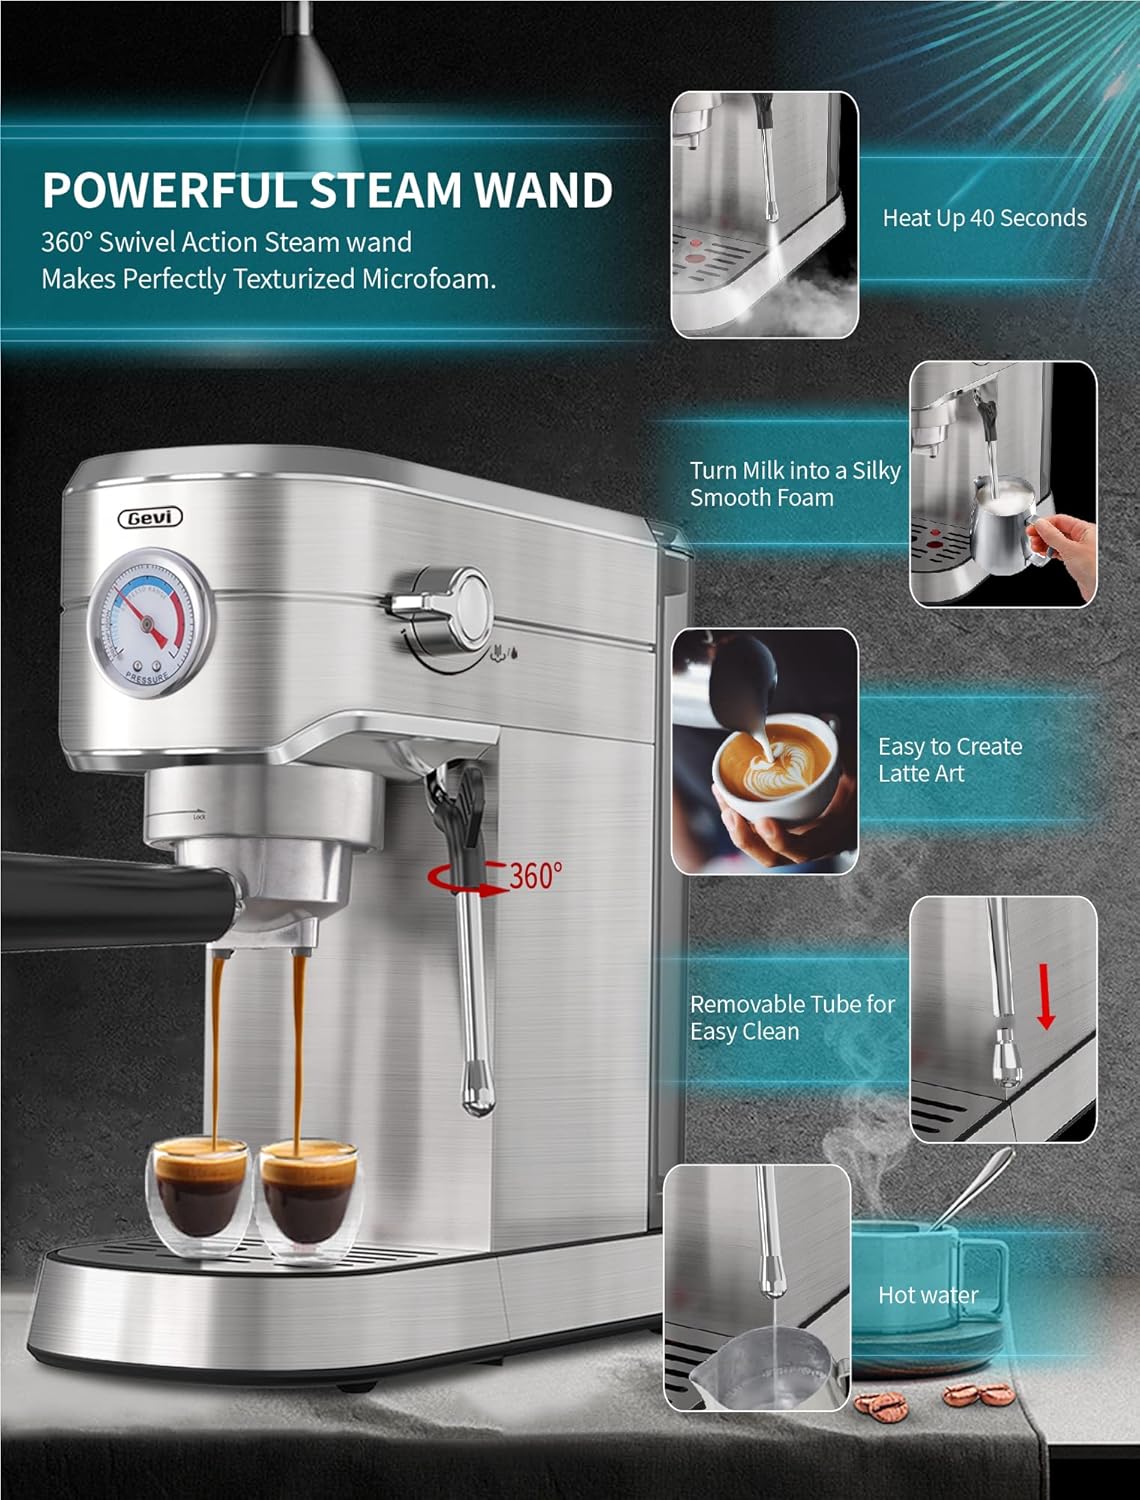
Figure 5.3: Powerful Steam Wand Features.
This image demonstrates the versatility of the 360° swivel action steam wand. It shows the wand heating up, turning milk into silky smooth foam, enabling latte art creation, and its removable tube for easy cleaning. It also highlights the hot water dispensing function.
6. Maintenance and Cleaning
Regular cleaning and maintenance will ensure the longevity and optimal performance of your espresso machine.
- Daily Cleaning:
- Drip Tray: Empty and rinse the drip tray daily.
- Portafilter & Filter Baskets: After each use, remove coffee grounds and rinse the portafilter and filter baskets under warm water.
- Steam Wand: Always wipe and purge the steam wand immediately after frothing milk to prevent milk residue from drying inside.
- Exterior: Wipe the exterior of the machine with a soft, damp cloth.
- Weekly Cleaning:
- Water Tank: Remove and wash the water tank with mild detergent and rinse thoroughly.
- Brew Head: Use a damp cloth to wipe the brew head screen and gasket.
- Descaling:
Depending on water hardness and usage, descaling should be performed every 2-3 months. Use a commercial descaling solution designed for coffee machines and follow the product's instructions. The machine also features a cleaning reminder.
7. Troubleshooting
If you encounter issues with your machine, refer to the table below for common problems and solutions.
| Problem | Possible Cause | Solution |
|---|---|---|
| No coffee dispenses. | No water in tank; Tank not seated correctly; Clogged filter basket; Machine not heated. | Fill water tank; Re-seat tank; Clean filter basket; Wait for machine to heat up. |
| Coffee flows too slowly or not at all. | Coffee ground too fine; Too much coffee in filter; Coffee tamped too hard; Clogged filter. | Use coarser grind; Reduce coffee amount; Tamp lighter; Clean filter basket. |
| Coffee flows too quickly, weak espresso. | Coffee ground too coarse; Not enough coffee; Coffee not tamped enough. | Use finer grind; Increase coffee amount; Tamp more firmly. |
| Steam wand not producing steam. | Machine not hot enough for steam; Steam wand clogged; No water in tank. | Wait for steam indicator; Clean steam wand; Fill water tank. |
| Water leaking from machine. | Water tank not seated correctly; Drip tray full; Gasket issue. | Re-seat water tank; Empty drip tray; Contact customer support if gasket is damaged. |
8. Specifications
- Model: GECME418E-U
- Brand: Gevi
- Pressure: 20 Bar
- Power: 1350W
- Dimensions: 7.1 x 15.9 x 13.4 inches
- Item Weight: 10.21 pounds
- Filter Type: Reusable (compatible with Nespresso capsules with optional accessory)
- Operation Mode: Fully Automatic
- Special Features: Milk Frother, Removable Tank, Pressure Gauge, Low Pressure Pre-infusion, NTC Precise Temperature Control, Auto Shut-off, Water Shortage Reminder, Cleaning Reminder.
- UPC: 738530367200
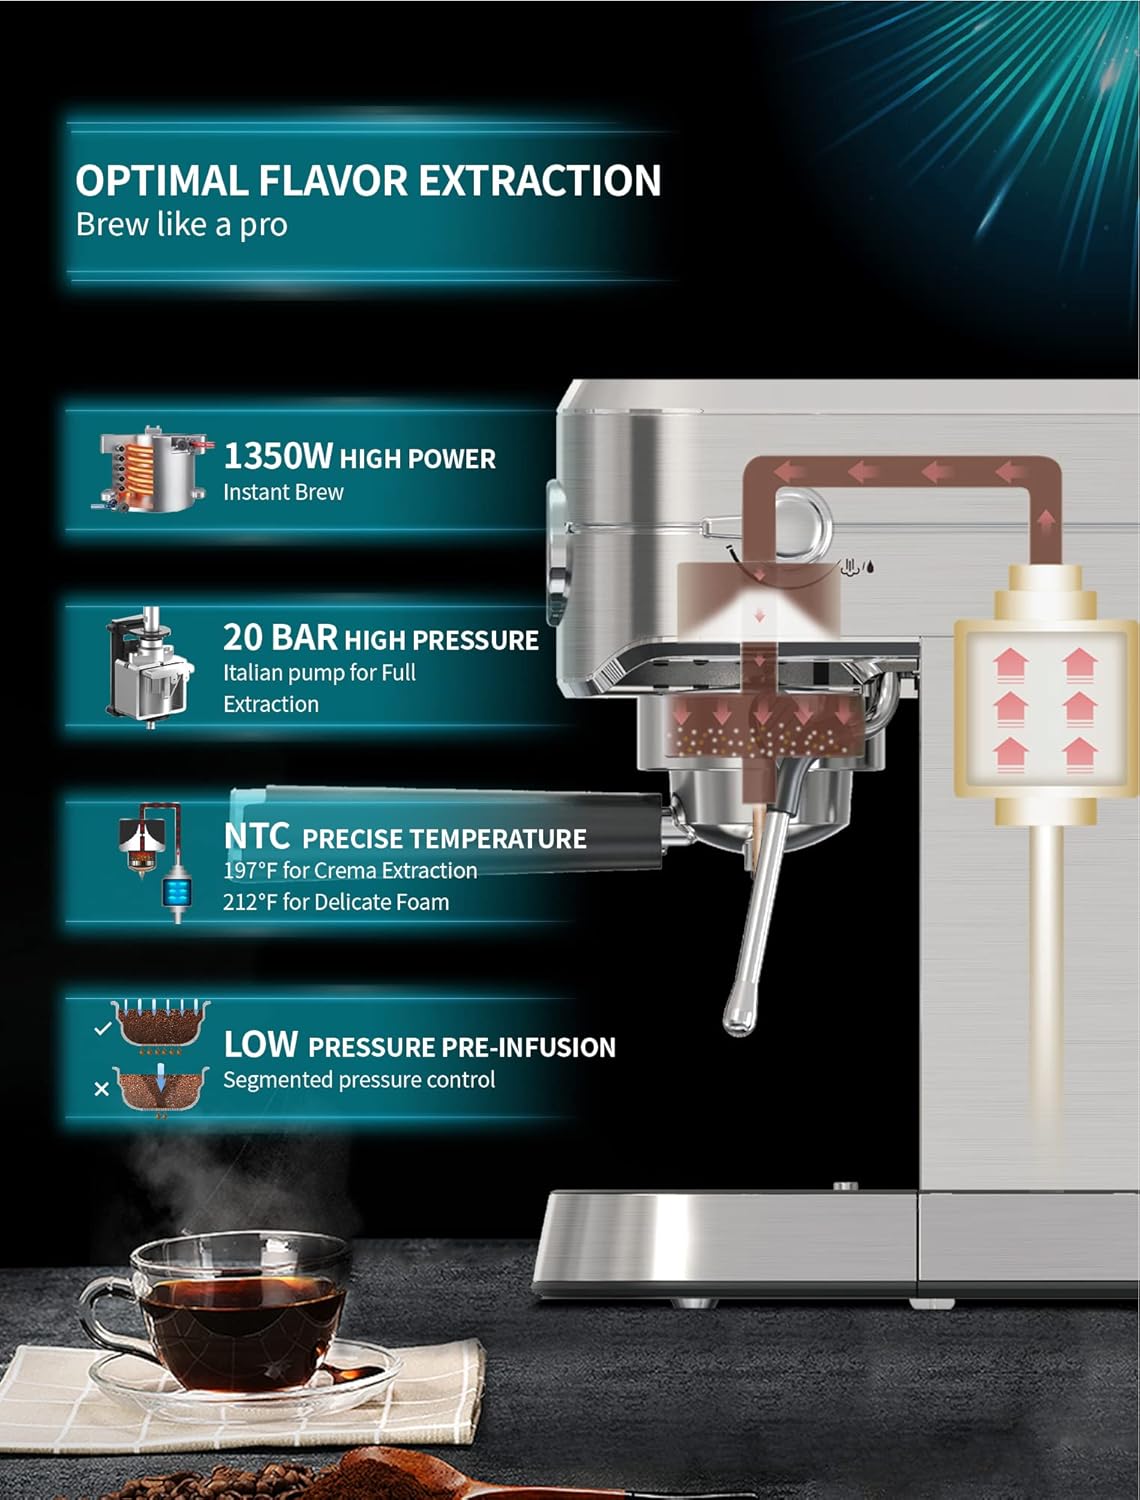
Figure 8.1: Optimal Flavor Extraction Technologies.
This image details the advanced technologies within the Gevi espresso machine designed for optimal flavor extraction. It highlights the 1350W high power for instant brew, 20 BAR high pressure Italian pump, NTC precise temperature control (197°F for crema, 212°F for foam), and low pressure pre-infusion for segmented pressure control.
9. Warranty and Support
Gevi products are manufactured to the highest quality standards. For warranty information, technical support, or service inquiries, please refer to the warranty card included with your product or visit the official Gevi website.
Gevi Official Store: Visit the Gevi Store on Amazon


