
1. Introduction
This manual provides essential information for the installation and operation of your GEAMENT LED Light Kit, designed specifically for the Lego 1989 Batmobile (Lego Model 76139). This lighting kit is intended to enhance the visual display of your completed model.
Important Note: This product includes only the LED lighting kit. The Lego 1989 Batmobile model set is NOT included.

Image 1.1: Packaging clearly stating that the model set is not included.

Image 1.2: The GEAMENT LED Light Kit installed on a Lego 1989 Batmobile model, demonstrating the lighting effect.
2. Package Contents
Please verify that all components are present in your package:
- GEAMENT LED Lighting Kit (various LED lights and connecting wires)
- Battery Box (requires 3x AA batteries, not included)
- Simple User Manual (for initial guidance and PDF instruction download)
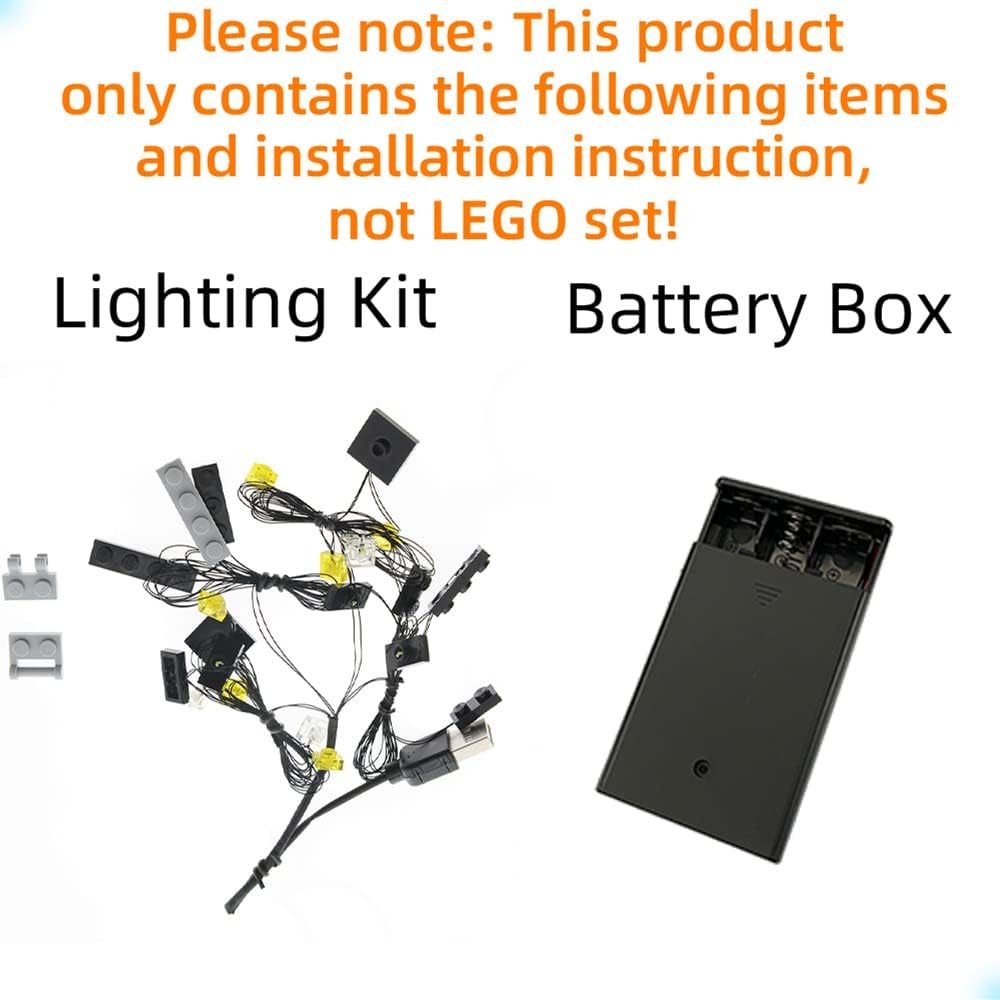
Image 2.1: The lighting kit components and battery box.
3. Setup & Installation
The installation process for the GEAMENT LED Light Kit is designed to be integrated with your completed Lego 1989 Batmobile model. It is recommended to complete the model assembly first before proceeding with the light kit installation.
3.1. Preparation
- Ensure your Lego 1989 Batmobile model (76139) is fully assembled.
- Locate the simple user manual included in your package. This manual contains instructions on how to download the detailed PDF installation guide.
- Gather necessary tools, such as tweezers, which may assist in handling small wires and components.
- Install 3x AA batteries (not included) into the battery box.
3.2. Installation Steps
Follow the step-by-step instructions provided in the detailed PDF installation guide. The guide will illustrate how to carefully integrate the LED wires and lights into your model. Pay close attention to the routing of wires to avoid pinching or damaging them during reassembly of model sections.
The wires are delicate; handle them with care to prevent breakage. If a wire breaks, the circuit may be interrupted, affecting the functionality of connected lights.
4. Operating Instructions
Once the GEAMENT LED Light Kit is fully installed and connected to the battery box, operating the lights is straightforward.
4.1. Powering On/Off
- To power on the lights, ensure batteries are correctly installed in the battery box and switch the power button to the 'ON' position.
- To power off the lights, switch the power button on the battery box to the 'OFF' position.
4.2. Alternative Power Source
The kit can also be powered via a USB power bank or other compatible USB power sources, offering flexibility in display options.
4.3. Lighting Effects
The installed lights will illuminate various sections of your Lego 1989 Batmobile model, enhancing its display. Examples of the lighting effects are shown below:

Image 4.1: Front lighting effect.

Image 4.2: Rear lighting effect.

Image 4.3: Top lighting effect.

Image 4.4: Interior cockpit lighting.

Image 4.5: Side lighting detail.
5. Maintenance
5.1. Cleaning
To clean the LED lights and wires, gently wipe with a dry, soft cloth. Avoid using liquids or abrasive cleaners, as these can damage the components.
5.2. Battery Replacement
When the lights dim or stop working, it may be time to replace the batteries in the battery box. Open the battery compartment, remove the old batteries, and insert three new AA batteries, ensuring correct polarity.
5.3. Wire Care
The wires are thin and can be fragile. Avoid excessive bending, pulling, or sharp angles during handling and display. Ensure wires are not pinched by Lego bricks or other objects.
6. Troubleshooting
If you encounter issues with your GEAMENT LED Light Kit, please refer to the following common solutions:
- Lights Not Turning On:
- Check if the battery box switch is in the 'ON' position.
- Verify that fresh AA batteries are correctly installed in the battery box.
- Ensure all connectors are securely plugged into their respective ports.
- Some Lights Not Working:
- Inspect the wiring for any visible damage, such as cuts or breaks. A single broken wire can affect a series of lights.
- Gently check the connection points for the affected lights to ensure they are fully inserted.
- Flickering Lights:
- This may indicate low battery power. Replace the batteries.
- Check for loose connections at the battery box or between light segments.
If these steps do not resolve the issue, please contact GEAMENT customer support for further assistance.
7. Specifications
| Feature | Detail |
|---|---|
| Product Dimensions | 5.91 x 3.94 x 1.18 inches |
| Item Weight | 3.88 ounces |
| Item Model Number | 76139D |
| Manufacturer | GEAMENT |
| Recommended Age | 15 years and up |
| Power Source | Battery Box (3x AA batteries, not included) or USB power |
8. Warranty and Support
For any questions, concerns, or technical support regarding your GEAMENT LED Light Kit, please contact GEAMENT customer service. Refer to the contact information provided in your product packaging or visit the official GEAMENT store online.
While specific warranty details are not provided in this manual, GEAMENT is committed to customer satisfaction. Please retain your proof of purchase for any support inquiries.
You can find more information and products from GEAMENT by visiting their store: GEAMENT Store on Amazon.