1. Introduction
Welcome to your new Solpex Solar Outdoor Sensor Light. This manual provides essential information for the safe and efficient use of your device. Please read it thoroughly before installation and operation, and retain it for future reference.
Key Features
- High Brightness & Wide Coverage: Equipped with 300 high-brightness LED chips, offering 2500 lumens of daylight white (7000K) illumination with 5-sided light output.
- Adjustable Design: Features 5 adjustable lighting heads and a solar panel that can be rotated 360 degrees, allowing for flexible lighting direction.
- Durable & Weatherproof: IP65 waterproof and dustproof rating ensures reliable performance in various outdoor weather conditions, including rain, snow, and wind.
- Energy Efficient: Powered by a high-efficiency solar panel (25% conversion rate) and a built-in 2200mAh large capacity lithium-ion battery, providing zero electricity cost.
- Smart Sensing: Integrated with a high-sensitivity human motion sensor (120° detection angle, up to 8m distance) and a light sensor for automatic operation.
- Multiple Lighting Modes: Remote control operation with three intelligent lighting modes to suit different needs.
- Power Outage Ready: Functions independently of grid power, making it a reliable lighting solution during power outages.
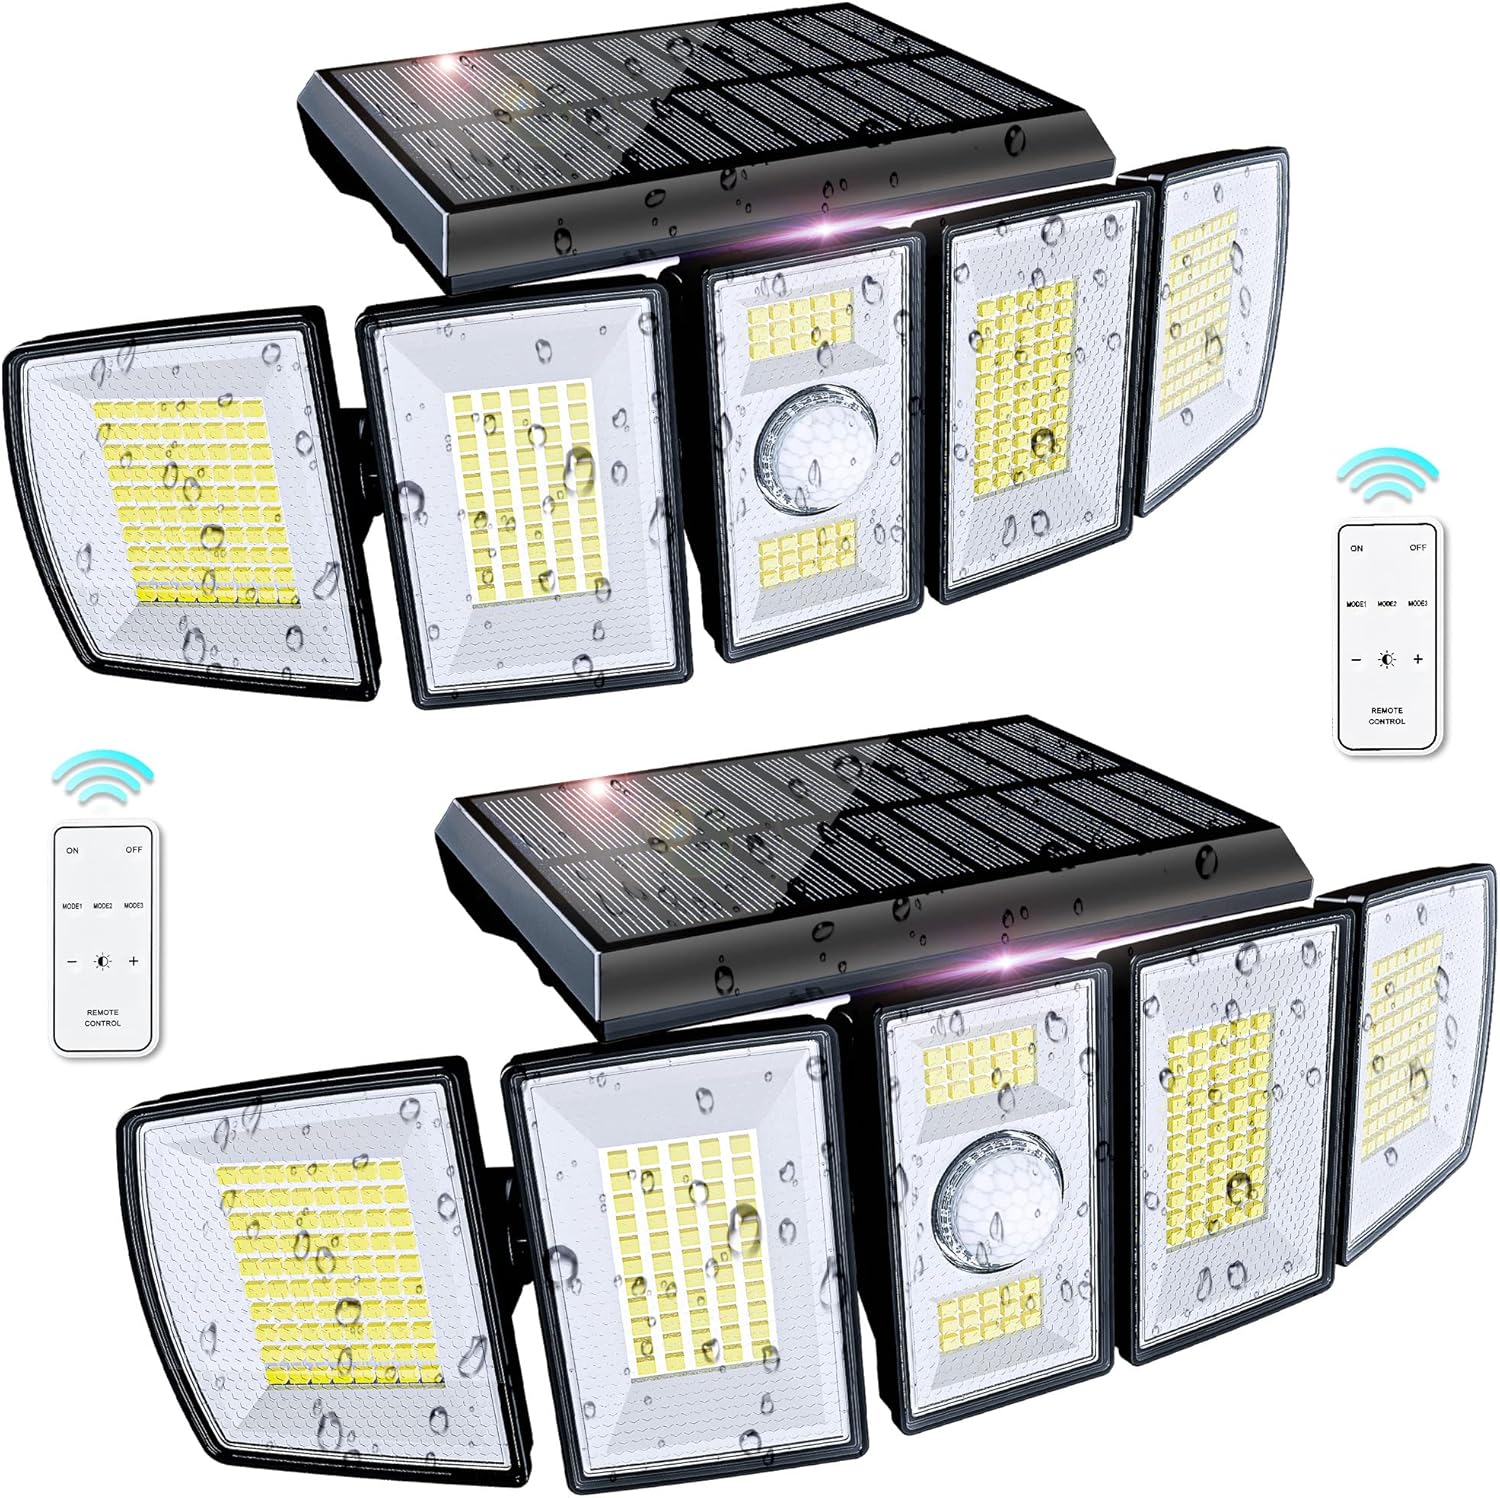
Figure 1: Solpex Solar Outdoor Sensor Light units with remote controls.
2. Package Contents
Please check the package contents to ensure all items are present and undamaged.
- Solpex Solar Outdoor Sensor Light Unit
- Remote Control
- Mounting Screws (4 pcs)
- Wall Plugs (4 pcs)

Figure 2: All items included in the Solpex Solar Light package.
3. Installation Guide
Choosing a Location
Select a location where the solar panel can receive direct sunlight for at least 6-8 hours daily. This ensures optimal charging and maximum light duration at night. Avoid areas under eaves, trees, or other obstructions that may block sunlight.
Mounting Instructions
The recommended installation height is approximately 3 meters (10 feet) for optimal motion detection and light coverage.
- Mark the desired mounting position on the wall.
- Drill holes for the wall plugs at the marked positions.
- Insert the wall plugs into the drilled holes.
- Secure the mounting bracket (hinge pillar) to the wall using the provided screws.
- Attach the main light unit to the mounting bracket, ensuring it slides and clicks securely into place.
- Adjust the solar panel and the five light heads to your preferred angles for optimal sunlight exposure and lighting direction. The light heads and solar panel can be rotated 360 degrees.

Figure 3: Step-by-step installation process.

Figure 4: Product dimensions and adjustable light heads.
4. Operation
Initial Activation
Before first use, ensure the light is fully charged under direct sunlight for at least 8 hours. This will activate the battery and ensure optimal performance.
Remote Control Functions
Use the provided remote control to select your desired operating mode. The remote has a maximum operating distance of 15 meters.
- ON/OFF Button: Press to manually turn the light on or off.
- MODE 1 (Sensor Mode): In darkness, the light remains off. When motion is detected, it illuminates at high brightness for approximately 30 seconds. If no further motion is detected, it turns off. If motion continues, the bright light remains active.
- MODE 2 (Constant Light Mode): In darkness, the light automatically turns on at a low brightness level and stays on continuously. It automatically turns off at dawn.
- MODE 3 (Sensor Mode + Dim Light): In darkness, the light automatically turns on at a low brightness level. When motion is detected, it switches to high brightness for approximately 30 seconds, then returns to the dim light state.

Figure 5: Explanation of the three intelligent lighting modes.
Motion Sensor
The integrated motion sensor detects movement within a 120° angle and up to 8 meters distance. This feature is active in Mode 1 and Mode 3, providing security and convenience.

Figure 6: Motion sensor detection range and angle.
5. Maintenance
To ensure the longevity and optimal performance of your Solpex Solar Outdoor Sensor Light, follow these maintenance guidelines:
- Clean Solar Panel: Regularly wipe the surface of the solar panel with a soft, damp cloth to remove dust, dirt, and debris. A clean panel ensures maximum sunlight absorption and efficient charging.
- Clear Sensor: Keep the motion sensor lens clear of any obstructions (e.g., leaves, spiderwebs) that might interfere with its detection capabilities.
- Check Mounting: Periodically inspect the mounting screws and bracket to ensure they remain tight and secure.
- Avoid Harsh Chemicals: Do not use abrasive cleaners, solvents, or harsh chemicals on any part of the light, as these can damage the finish or internal components.
- Battery Care: While the battery is designed for long life, extreme temperatures can affect its performance. Ensure the light is installed in a location suitable for outdoor use.
6. Troubleshooting
If you encounter issues with your Solpex Solar Outdoor Sensor Light, refer to the following common problems and solutions:
- Light does not turn on at night:
- Ensure the solar panel is receiving sufficient direct sunlight (6-8 hours daily) for charging.
- Verify that the light is set to an appropriate operating mode (Mode 1, 2, or 3) using the remote control.
- Check if the ON/OFF button on the remote has been pressed to turn the light on.
- The battery might be completely drained. Allow several days of full sunlight charging.
- Motion sensor is not responding or is too sensitive:
- Confirm the light is in Mode 1 or Mode 3, as these modes utilize the motion sensor.
- Ensure there are no obstructions (e.g., branches, tall grass) blocking the sensor lens.
- The sensor may be detecting movement from distant objects or small animals. Adjust the light's position or angle if possible.
- Ensure the installation height is within the recommended range (approx. 3 meters).
- Light duration is too short:
- Insufficient sunlight exposure during the day will result in a reduced battery charge and shorter illumination time at night.
- Heavy usage in high-brightness modes (especially Mode 1 with frequent activation) will consume battery power faster. Consider using Mode 2 or Mode 3 for longer duration.
- Extreme cold weather can temporarily reduce battery capacity and performance.
- Ensure the solar panel is clean and free from dirt or snow.
7. Specifications
| Feature | Specification |
|---|---|
| Brand | Solpex |
| Model Number | ZM-FL-5T-2 |
| LED Quantity | 300 LEDs |
| Lumen Output | 2500 lumens |
| Color Temperature | 7000K (Daylight White) |
| Battery Capacity | 2200mAh Lithium-ion |
| Waterproof Rating | IP65 |
| Motion Sensor Angle | 120° |
| Motion Sensor Distance | Up to 8 meters |
| Remote Control Distance | Up to 15 meters |
| Adjustable Lighting Heads | 5 (360° rotation) |
| Material | ABS, Silicone |
| Product Dimensions | 32 x 12.5 x 11.51 cm |
| Product Weight | 907.18 g |
| Recommended Installation Height | Approx. 3 meters |
| Application Areas | Garage, Entrance, Garden, Patio, Yard |

Figure 7: High-efficiency solar panel and IP65 waterproof rating.
8. Warranty and Support
For warranty information, technical support, or any inquiries regarding your Solpex Solar Outdoor Sensor Light, please contact Solpex customer service through the retailer where you purchased the product. When contacting support, please have your model number (ZM-FL-5T-2) and purchase date available to expedite the process.


