1. Introduction
This manual provides detailed instructions for the assembly, operation, maintenance, and troubleshooting of your BIQU B1 SE Plus 3D Printer. Please read this manual thoroughly before operating the device to ensure safe and efficient use.
2. Key Features
- Auto Leveling: Simplifies bed leveling for consistent first layers.
- Large Print Size: Offers a generous build volume of 310 x 310 x 340mm for larger projects.
- 32-bit Silent Motherboard: Equipped with a powerful STM32 control chip and TMC 2225 quiet stepper motor drivers for silent operation.
- Resume Printing Function: Automatically resumes printing from the last recorded position after power outages.
- Filament Runout Detection: Pauses printing and alerts the user when filament runs out.
- Touch Screen Interface: User-friendly interface for easy control and monitoring.
- Open Source Compatibility: Supports customization and upgrades with modules like Raspberry Pi, WiFi, Dual-Z axis, BL Touch, and RGB light (modules sold separately).
- Fast Printing Speed: Achieves a maximum printing speed of 180mm/s, with an average speed of 100mm/s.
- Wide Filament Compatibility: Supports PLA, PETG, TPU, TPE, ABS, and Nylon filaments.
3. Setup Guide
Follow these steps to assemble your BIQU B1 SE Plus 3D Printer.
3.1 Unboxing and Parts Inspection
Carefully unpack all components and verify against the packing list. Ensure no parts are missing or damaged.
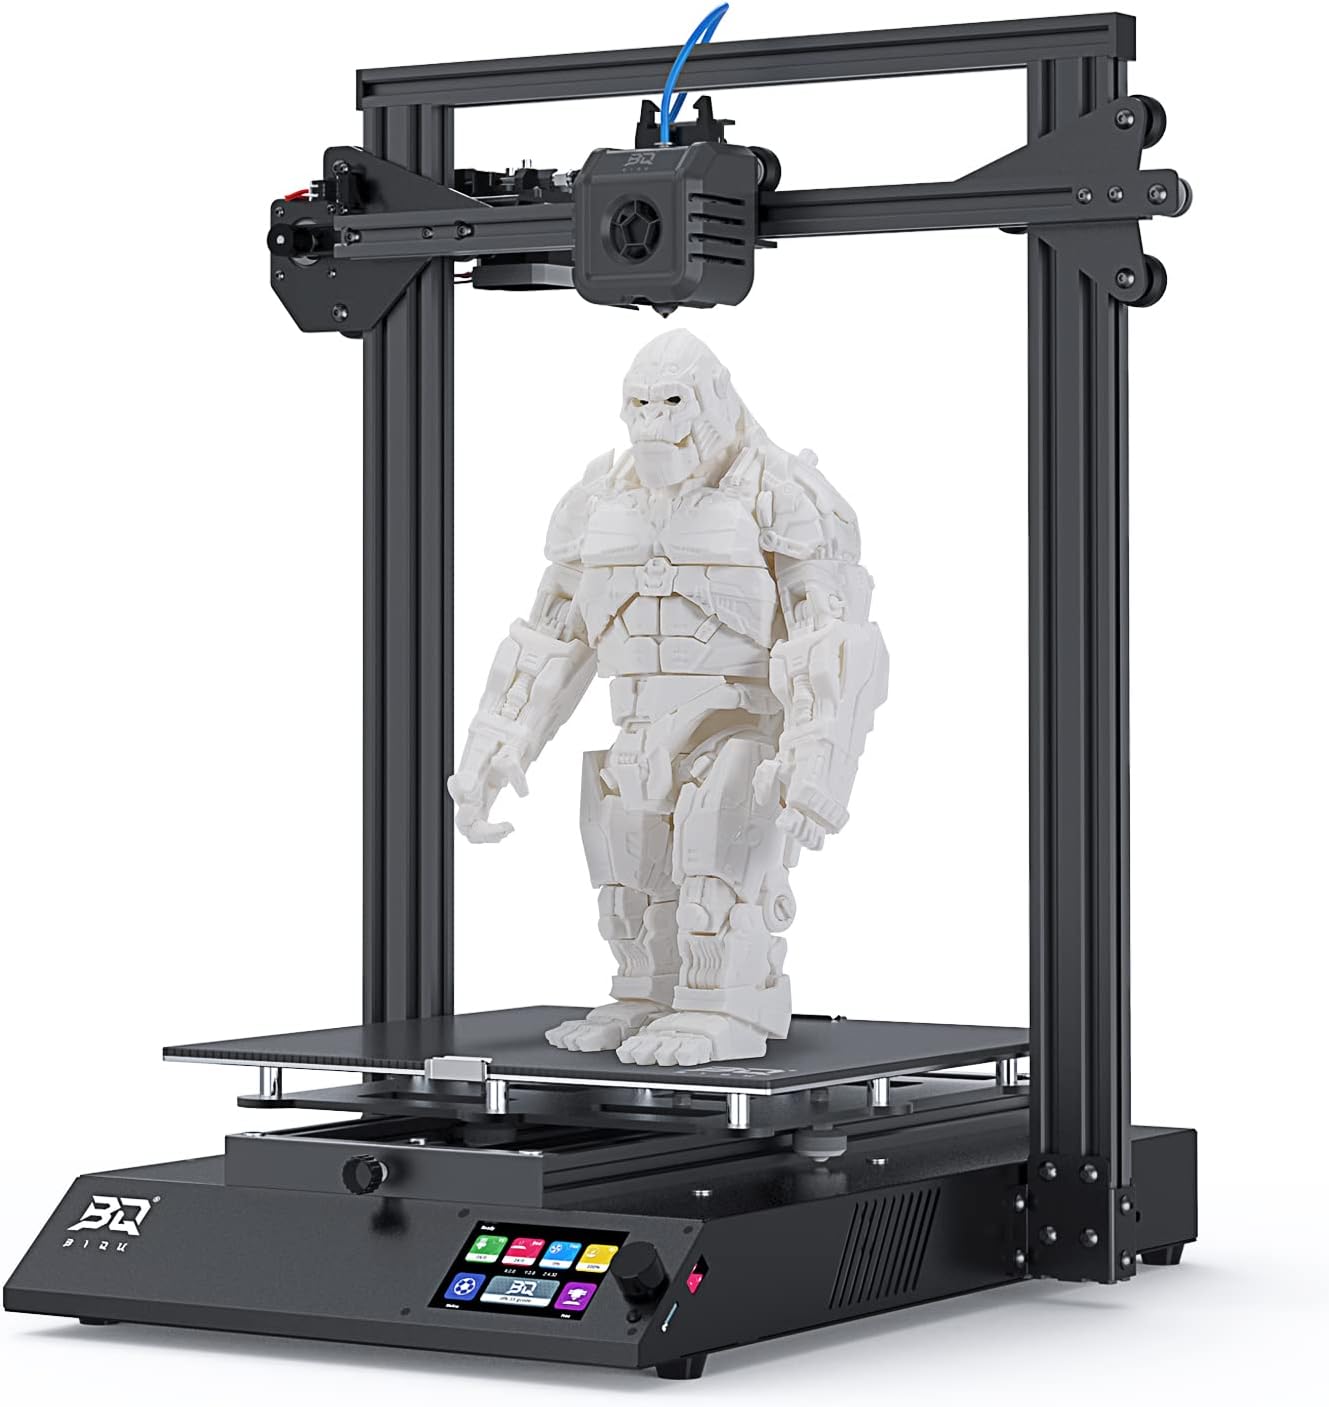
Image: All components of the BIQU B1 SE Plus 3D Printer laid out after unboxing, including the base, gantry, print head, filament holder, and accessory box.

Image: A visual representation of the packing list, showing the main printer components and included accessories like power cable, data cable, nozzle, scraper, SD card, screws, tools, and 50g filament.
3.2 Machine Installation
- Install the Gantry: Attach the gantry to the chassis using the provided M5x50 bolts (1pc on each side) and M5x8 bolts (4pcs on each side). Ensure it is securely fastened.
Video: This video demonstrates the unboxing and initial setup steps, including attaching the gantry to the printer base. It shows the process of securing the gantry with screws.
- Install the Print Head: Fix the print head to the X-axis using the M3x6 bolts (3pcs).
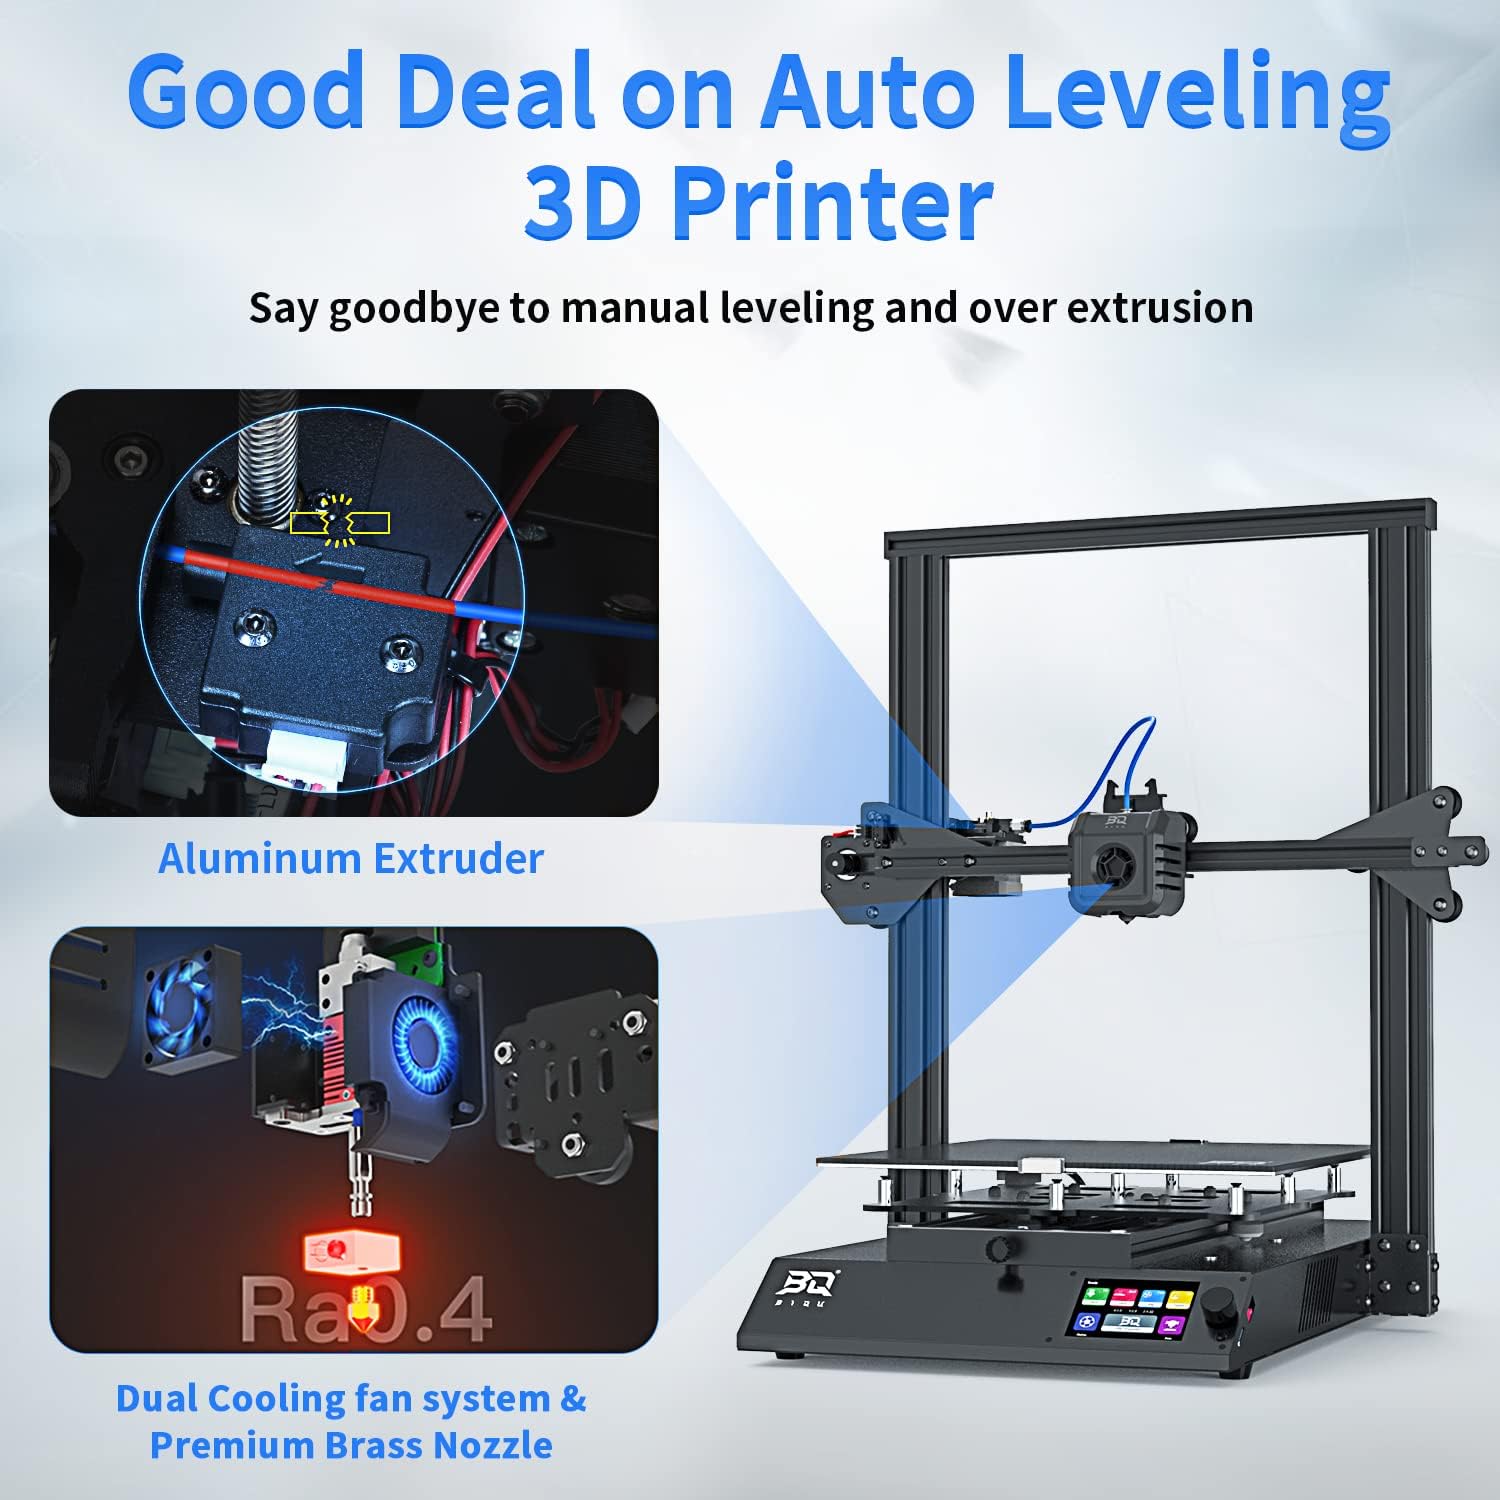
Image: A detailed view of the print head assembly, highlighting the nozzle and cooling fans, which are crucial for precise filament extrusion and cooling.
- Connect Cables:
- Insert the Teflon tube into the print head.
- Connect the cable of the print head.
- Connect the extrusion motor cable (6P terminal with "E" label).
- Connect the filament detection module cable (3P terminal with "FLD" label).
- Connect the X-axis motor connection line (6P terminal with "X" label).
- Connect the X-axis limit switch line (3P terminal with "X" label).
- Secure Cables: Use cable ties to fix all lines neatly to prevent interference during operation.
- Attach Glass Plate: Place the glass plate onto the hot bed and secure it with clips.
- Install Filament Bracket: Assemble the mental bracket and place it in the channel on top of the gantry, then fix it to the printer.
3.3 Power On
- Connect Power: Plug in the power cord to the printer and then to a power outlet.
- Turn On: Press the power switch located at the back of the printer. The touch screen will illuminate.
4. Operating Instructions
4.1 Screen Instructions
Control the printer by touching the screen. Navigate through menus to access various functions like leveling, heating, and printing.

Image: The vibrant touch screen interface of the BIQU B1 SE Plus 3D Printer, displaying various control options and settings.
4.2 Filament Installation
Feed the filament to the extruder. Ensure it passes smoothly through the filament detection module and into the print head.

Image: A filament spool is mounted on the printer's holder, with the filament feeding into the extruder mechanism.
4.3 Auto Leveling
The BIQU B1 SE Plus features automatic bed leveling. Access the leveling function through the touch screen to initiate the process. This ensures optimal first layer adhesion and print quality.

Image: The print head of the BIQU B1 SE Plus 3D Printer is shown in close-up, with a grid pattern indicating the auto-leveling process on the print bed.
Video: This video demonstrates the auto-leveling feature of the BIQU B1 SE Plus 3D Printer, showing the print head probing the bed to ensure a level surface for printing.
4.4 Printing
Insert the TF card with your sliced model files into the printer. Select the desired file from the touch screen and start printing. Monitor the print progress on the screen.
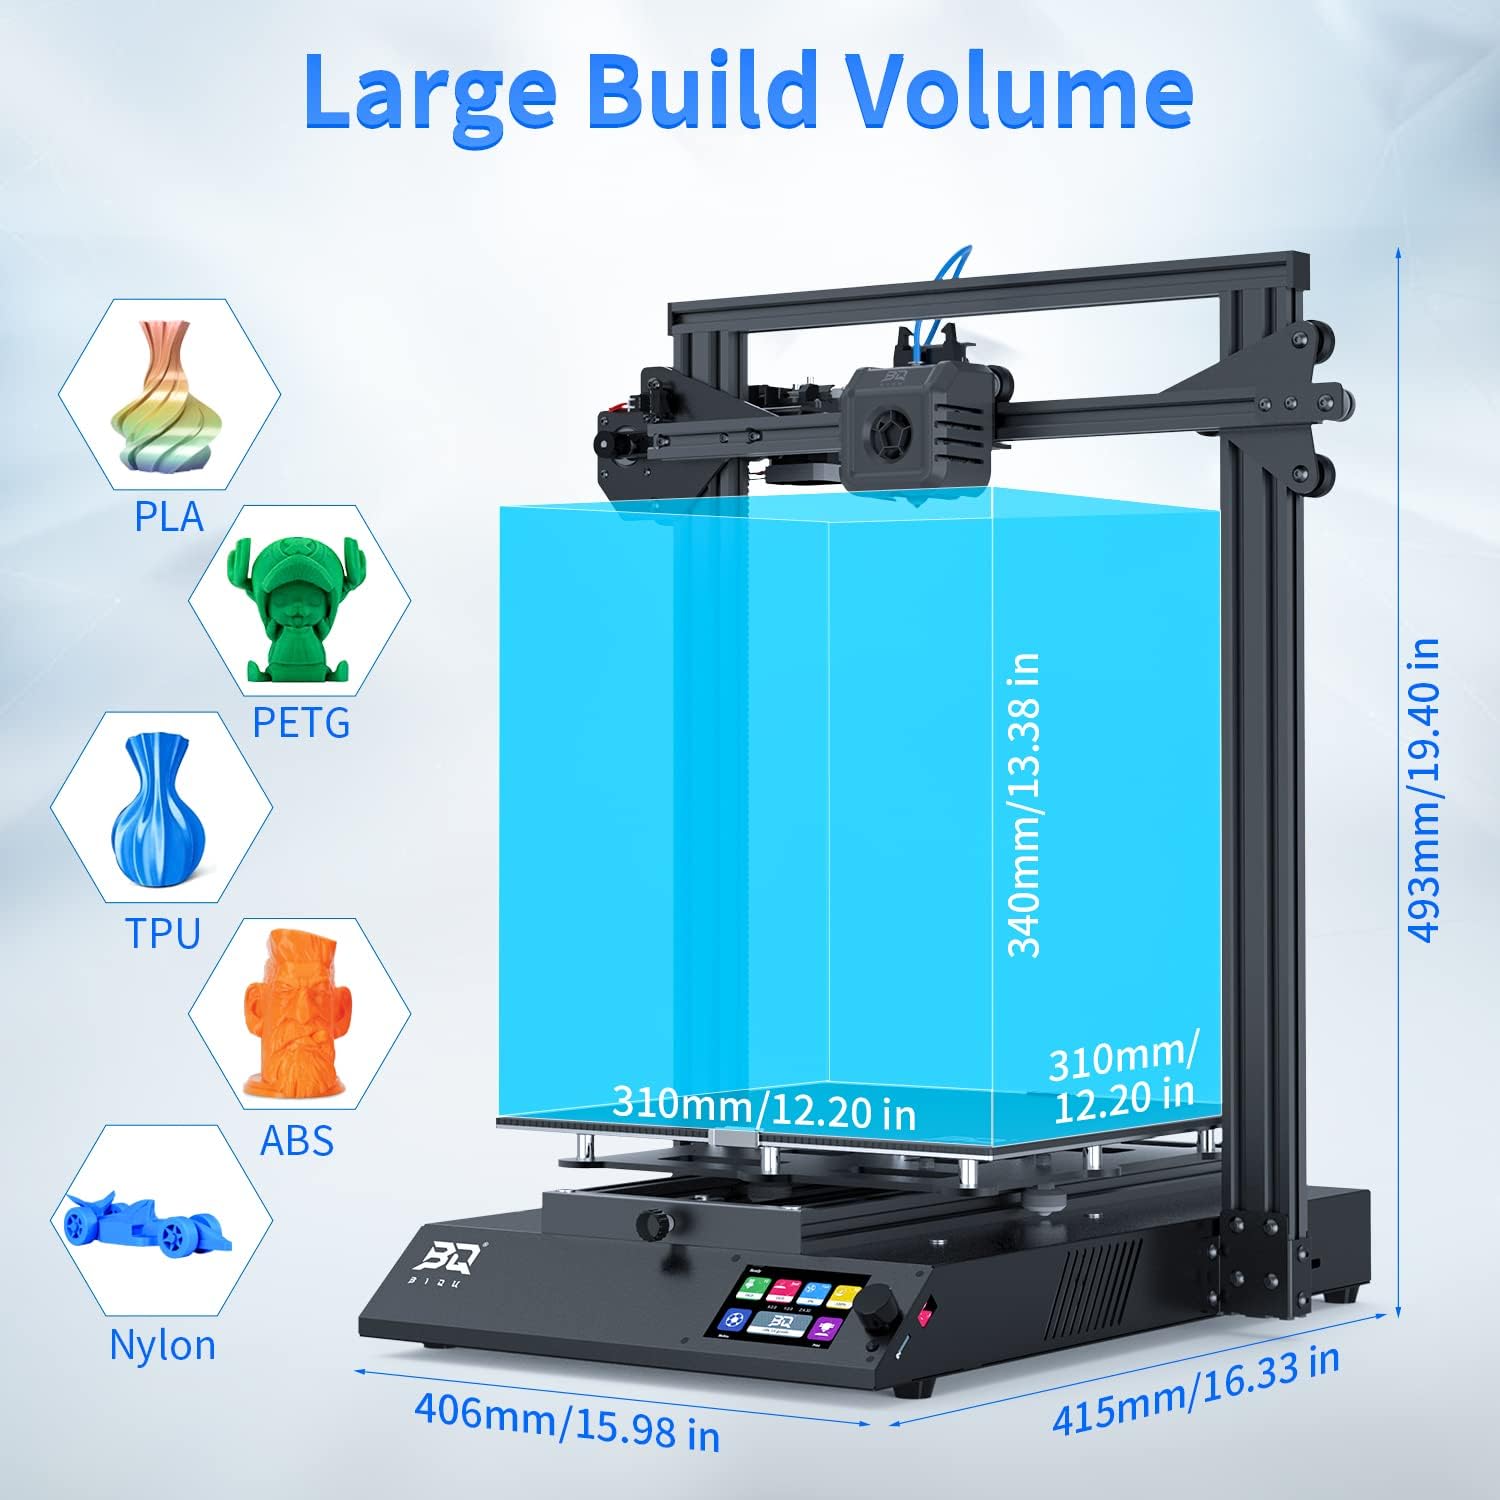
Image: The BIQU B1 SE Plus 3D Printer in action, extruding filament to create a detailed 3D model on the print bed.
5. Maintenance
Regular maintenance ensures the longevity and optimal performance of your 3D printer.
- Clean the Print Bed: After each print, allow the print bed to cool and carefully remove the printed object. Clean the print surface with isopropyl alcohol to ensure good adhesion for future prints.
- Clean the Nozzle: Periodically check the nozzle for clogs or debris. Use the provided needle or a brass brush to clean it.
- Lubricate Moving Parts: Apply a small amount of lubricant to the Z-axis lead screw and smooth rods every few months to ensure smooth movement.
- Check Belts: Ensure the X and Y axis belts are properly tensioned. They should be taut but not overly tight.
- Inspect Cables: Regularly check all cables for wear or damage. Ensure connections are secure.
6. Troubleshooting
This section addresses common issues you might encounter with your 3D printer.
| Problem | Possible Cause | Solution |
|---|---|---|
| Filament not extruding | Clogged nozzle, tangled filament, incorrect temperature. | Clean the nozzle, check filament path, verify print temperature settings. |
| Poor first layer adhesion | Unleveled bed, dirty print surface, incorrect bed temperature. | Perform auto-leveling, clean the print bed, adjust bed temperature. |
| Prints detaching from bed | Similar to poor adhesion, or excessive cooling. | Ensure proper bed adhesion, reduce cooling for the first few layers. |
| Layer shifting | Loose belts, motor skipping steps, print head hitting the print. | Check and tension belts, reduce print speed, ensure print head clearance. |
| Printer not powering on | Power cable disconnected, faulty power supply, tripped circuit. | Check power connections, verify power outlet, contact support if issue persists. |
7. Specifications
- Product Dimensions: 12.2 x 12.2 x 13.39 inches
- Item Weight: 32 pounds
- Model Number: BIQI B1 SE Plus 3D printer
- Brand: Heegkqu
- Material: Metal
- Max Printing Speed: 180mm/s (Average: 100mm/s)
- Build Volume: 310 x 310 x 340mm
- Motherboard: 32-bit Silent Motherboard with STM32 control chip and TMC 2225 drivers
- Features: Auto Leveling, Resume Printing, Filament Runout Detection, Touch Screen
- Filament Compatibility: PLA, PETG, TPU, TPE, ABS, Nylon
8. Warranty and Support
BIQU FDM 3D printers come with lifetime technical assistance and 24-hour professional customer service. For any issues or inquiries, please contact our after-sales team for effective and professional help.
For further assistance, visit the official Heegkqu Store.