Product Overview
This manual provides instructions for the safe assembly, operation, and maintenance of your Outsunny 4+1 Burner Liquid Propane Gas Grill. This grill features four main burners and one side burner, a warming rack, side shelves, a storage cabinet, and a built-in thermometer. It is designed for outdoor use only.

Image: Outsunny 4+1 Burner Gas Grill in an outdoor patio setting.
Important Safety Information
Read all instructions before assembling and operating this appliance. Failure to follow these instructions could result in fire, explosion, or burn hazard which could cause property damage, personal injury, or death.
- Outdoor Use Only: This grill is for outdoor use only. Do not operate indoors or in an enclosed area.
- LP Gas Only: Use only liquid propane (LP) gas. Do not use natural gas or any other fuel.
- Ventilation: Ensure adequate ventilation around the grill. Keep clear of combustible materials.
- Leak Testing: Always perform a leak test on all gas connections before initial use and after each cylinder change.
- Cylinder Handling: Store LP cylinders outdoors in a well-ventilated area, out of reach of children. Never store a spare LP cylinder under or near the grill.
- Clearance: Maintain minimum clearances from sides and back of unit to combustible construction.
- Supervision: Never leave the grill unattended while in use.
- Hot Surfaces: The grill will be hot during and after use. Use heat-resistant gloves and avoid touching hot surfaces.
Package Contents
Verify that all components are present before beginning assembly. If any parts are missing or damaged, do not attempt to assemble or operate the grill. Contact customer service for assistance.
- Grill Hood and Firebox Assembly
- Main Burners (4)
- Side Burner (1)
- Warming Rack
- Cooking Grates (2)
- Side Shelves (2)
- Storage Cabinet Components
- Wheels (4, with 2 brakes)
- Regulator and Hose Assembly
- Hardware Pack
- User Manual
Setup and Assembly
Assembly of this grill is required. It is recommended to have two people for assembly. Follow the detailed assembly instructions provided in the separate assembly guide included with your product. Ensure all connections are secure before proceeding to operation.

Image: Side shelves and gas tank cabinet for storage.
Key Assembly Notes:
- Place the grill on a flat, stable, non-combustible surface.
- Attach the regulator and hose to the LP cylinder securely.
- Perform a leak test on all gas connections using a soapy water solution. Bubbles indicate a leak. Tighten connections or replace parts as necessary.
- Ensure the wheels are properly installed, with the two locking wheels engaged during stationary use.

Image: Grill mobility with four universal wheels, two with brakes.
Operating Instructions
Lighting the Main Burners:
- Ensure the LP cylinder valve is fully open.
- Open the grill lid.
- Turn one main burner control knob to the HIGH position.
- Press and hold the electronic igniter button (if applicable) or use a long match/lighter to ignite the burner.
- Once lit, turn on adjacent burners one by one, starting from the lit burner, to the HIGH position.
- Close the lid and allow the grill to preheat to the desired temperature.
Using the Side Burner:
- Open the side burner lid.
- Turn the side burner control knob to the HIGH position.
- Press and hold the electronic igniter button or use a long match/lighter to ignite the burner.
- Adjust the flame as needed.
Temperature Control:
The built-in thermometer on the grill lid indicates the internal temperature. Adjust burner control knobs to regulate heat. Lower settings reduce flame size and temperature.

Image: Temperature control features including grill lid, thermometer, and back vent.
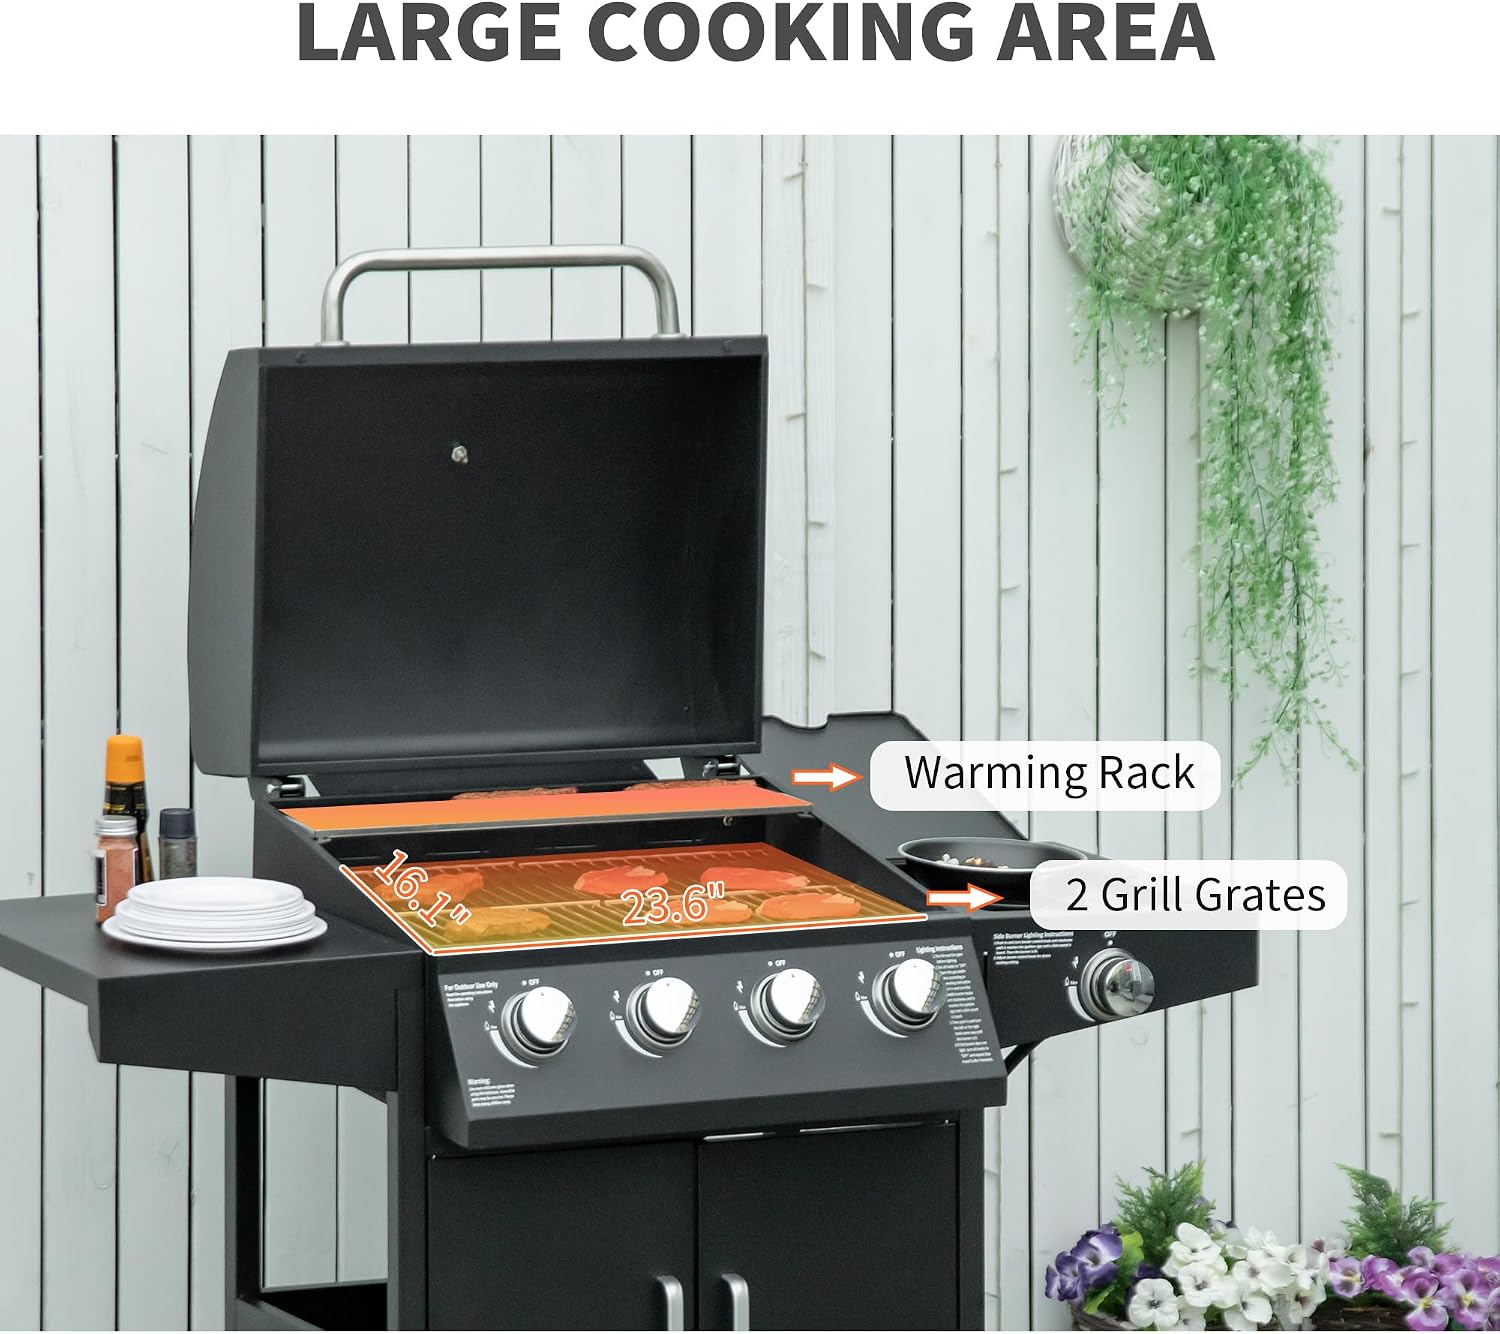
Image: Large cooking area with grill grates and warming rack.
Maintenance and Care
Cleaning:
- After Each Use: Clean cooking grates with a grill brush while warm. Empty and clean the grease drip cup.
- Exterior: Wipe exterior surfaces with a damp cloth and mild detergent. Avoid abrasive cleaners.
- Interior: Periodically clean the inside of the grill lid and firebox to remove grease buildup.
- Burners: Ensure burner ports are clear of debris. Use a wire brush if necessary.
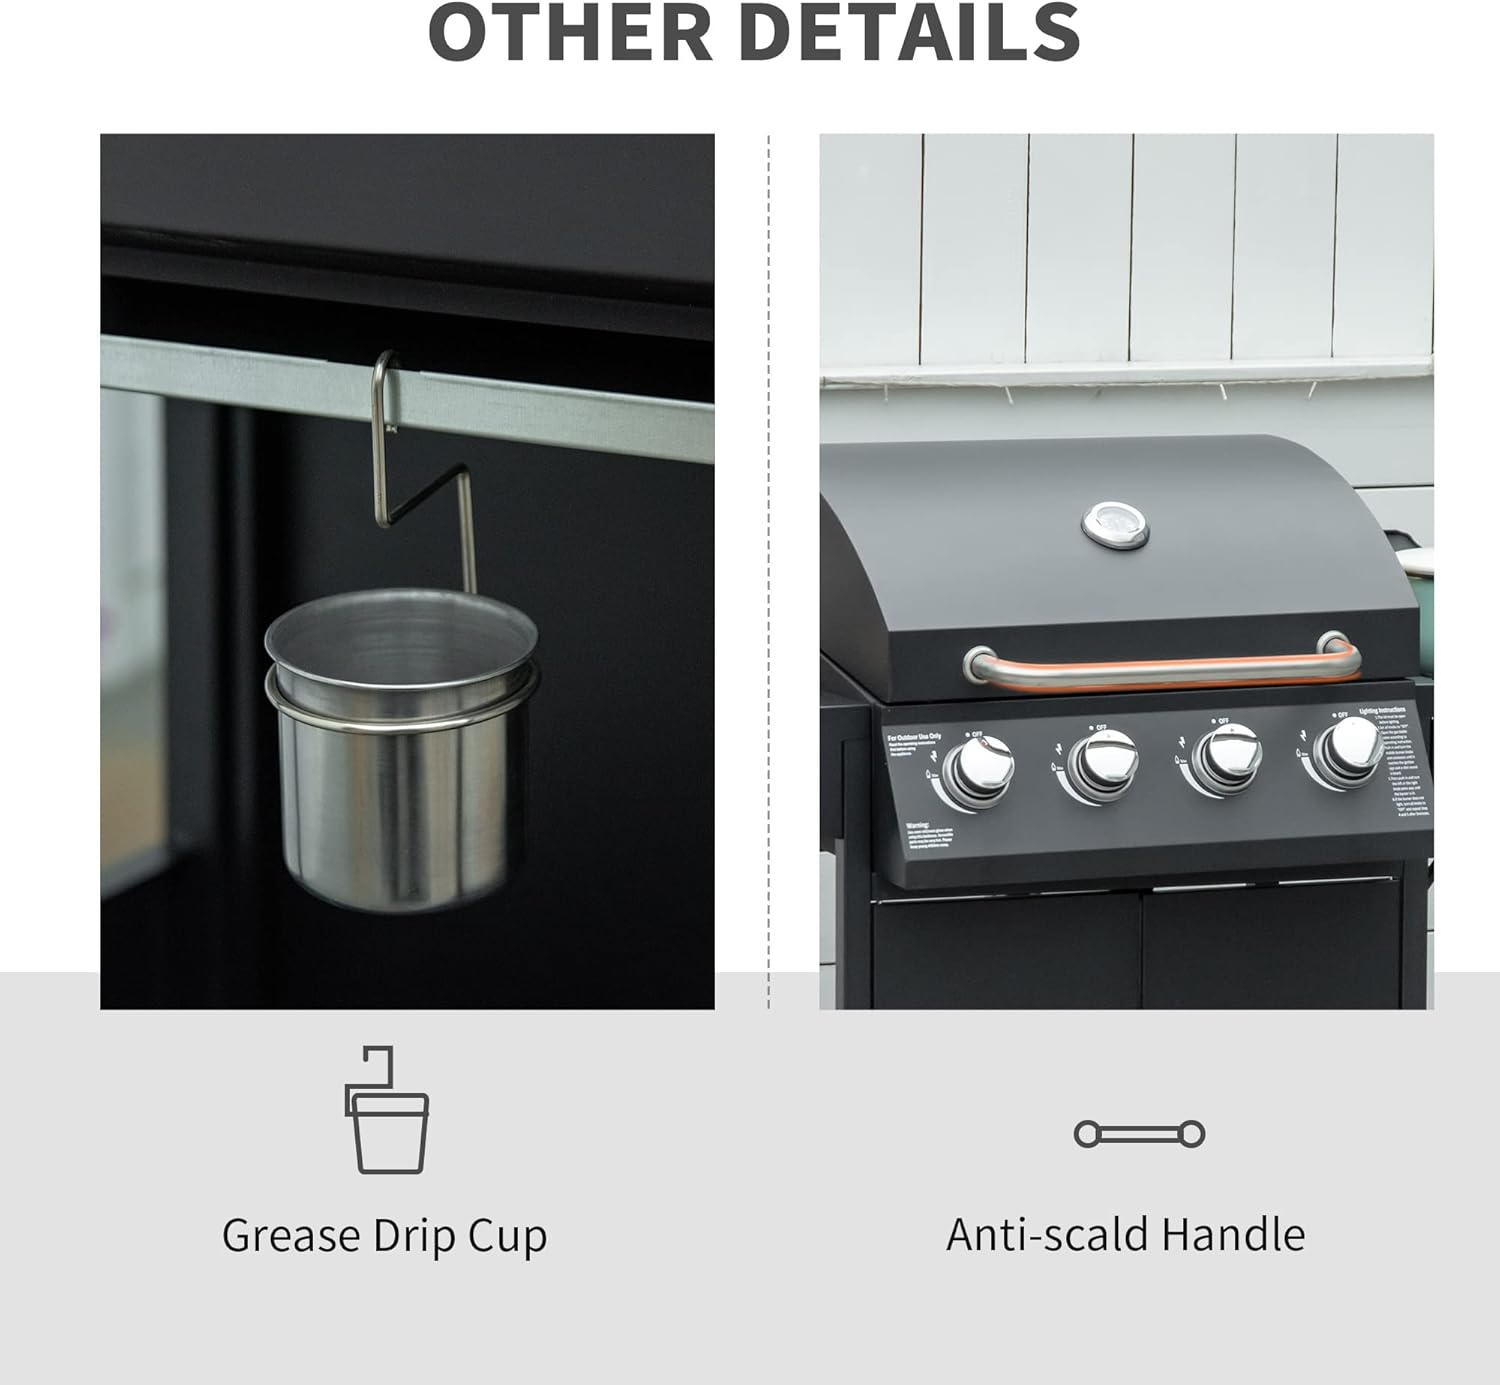
Image: Grease drip cup for easy cleaning.
Storage:
- Disconnect the LP cylinder when the grill is not in use.
- Store the grill in a dry, sheltered location.
- If storing outdoors, use a weather-resistant grill cover to protect it from elements.
Troubleshooting
| Problem | Possible Cause | Solution |
|---|---|---|
| Burner fails to light | No gas flow; clogged burner ports; faulty igniter. | Check LP cylinder and regulator connection; clean burner ports; check igniter electrode and wire. |
| Low flame or uneven heat | Low gas pressure; partially clogged burner ports; regulator issue. | Ensure LP cylinder is not empty; clean burner ports; reset regulator by disconnecting and reconnecting. |
| Flare-ups | Excessive grease buildup; high fat content food; too high temperature. | Clean grill regularly; trim fat from meat; reduce cooking temperature. |
| Gas leak smell | Loose connections; damaged hose/regulator. | Immediately turn off gas supply. Perform a leak test. Tighten connections or replace faulty parts. Do not operate if a leak is detected. |
Product Specifications
| Feature | Detail |
|---|---|
| Brand | Outsunny |
| Model Number | 846-102V80BK |
| Fuel Type | Liquid Propane (LP) Gas |
| Main Burner Count | 4 |
| Side Burner Count | 1 |
| Total Heating Power | 48,000 BTU (approx. 10,000 BTU per burner) |
| Material | Carbon Steel |
| Overall Dimensions (L x W x H) | 52.1" x 21.7" x 42.9" (132.4 cm x 55 cm x 109 cm) |
| Item Weight | 9.98 kg |
| Assembly Required | Yes |
| Features | Warming Rack, Side Shelf, Storage Cabinet, Thermometer, 4 Wheels (2 with brakes) |

Image: Detailed dimensions of the Outsunny 4+1 Burner Gas Grill.
Warranty and Support
Specific warranty details for the Outsunny 4+1 Burner Liquid Propane Gas Grill (Model 846-102V80BK) are not provided in the available product data. For warranty information, technical support, or to order replacement parts, please refer to the documentation included with your purchase or contact Outsunny customer service directly.
You may also visit the official Outsunny brand store for more information: Outsunny Brand Store


