1. Setup Guide
This section provides instructions for the initial setup of your KALEVOL Projection Alarm Clock with Weather Station.
1.1 Unpacking and Components
Carefully remove all components from the packaging. Ensure all items listed below are present:
- Main Projection Alarm Clock Unit
- Wireless Outdoor Sensor
- Power Adapter (DC 5V/1.2A)
- Instruction Manual (this document)

Image: Main Projection Alarm Clock Unit and Wireless Outdoor Sensor.
1.2 Powering the Main Unit
The main unit can be powered by the included AC adapter. For continuous display and projection, it is recommended to use the power adapter.
- Connect the power adapter to the DC 5V port on the back of the main unit.
- Plug the adapter into a standard electrical outlet.
Note: The main unit may also have a backup battery compartment (batteries not included) to retain settings during power outages. Refer to the back of the unit for battery installation details.

Image: Rear view of the main unit, highlighting the power input and battery compartment.
1.3 Installing Batteries in the Wireless Outdoor Sensor
The wireless outdoor sensor requires batteries (not included) for operation.
- Open the battery compartment on the back of the wireless sensor.
- Insert 2 x AAA batteries, ensuring correct polarity (+/-).
- Close the battery compartment securely.
Video: Demonstrates the unboxing and battery installation for the wireless outdoor sensor. The video shows the sensor being powered on and displaying temperature and humidity.
1.4 Placing the Wireless Outdoor Sensor
Place the wireless outdoor sensor in a shaded, dry location outdoors, protected from direct sunlight and rain, to ensure accurate temperature and humidity readings. Ensure it is within the 60M/200FT transmission range of the main unit.
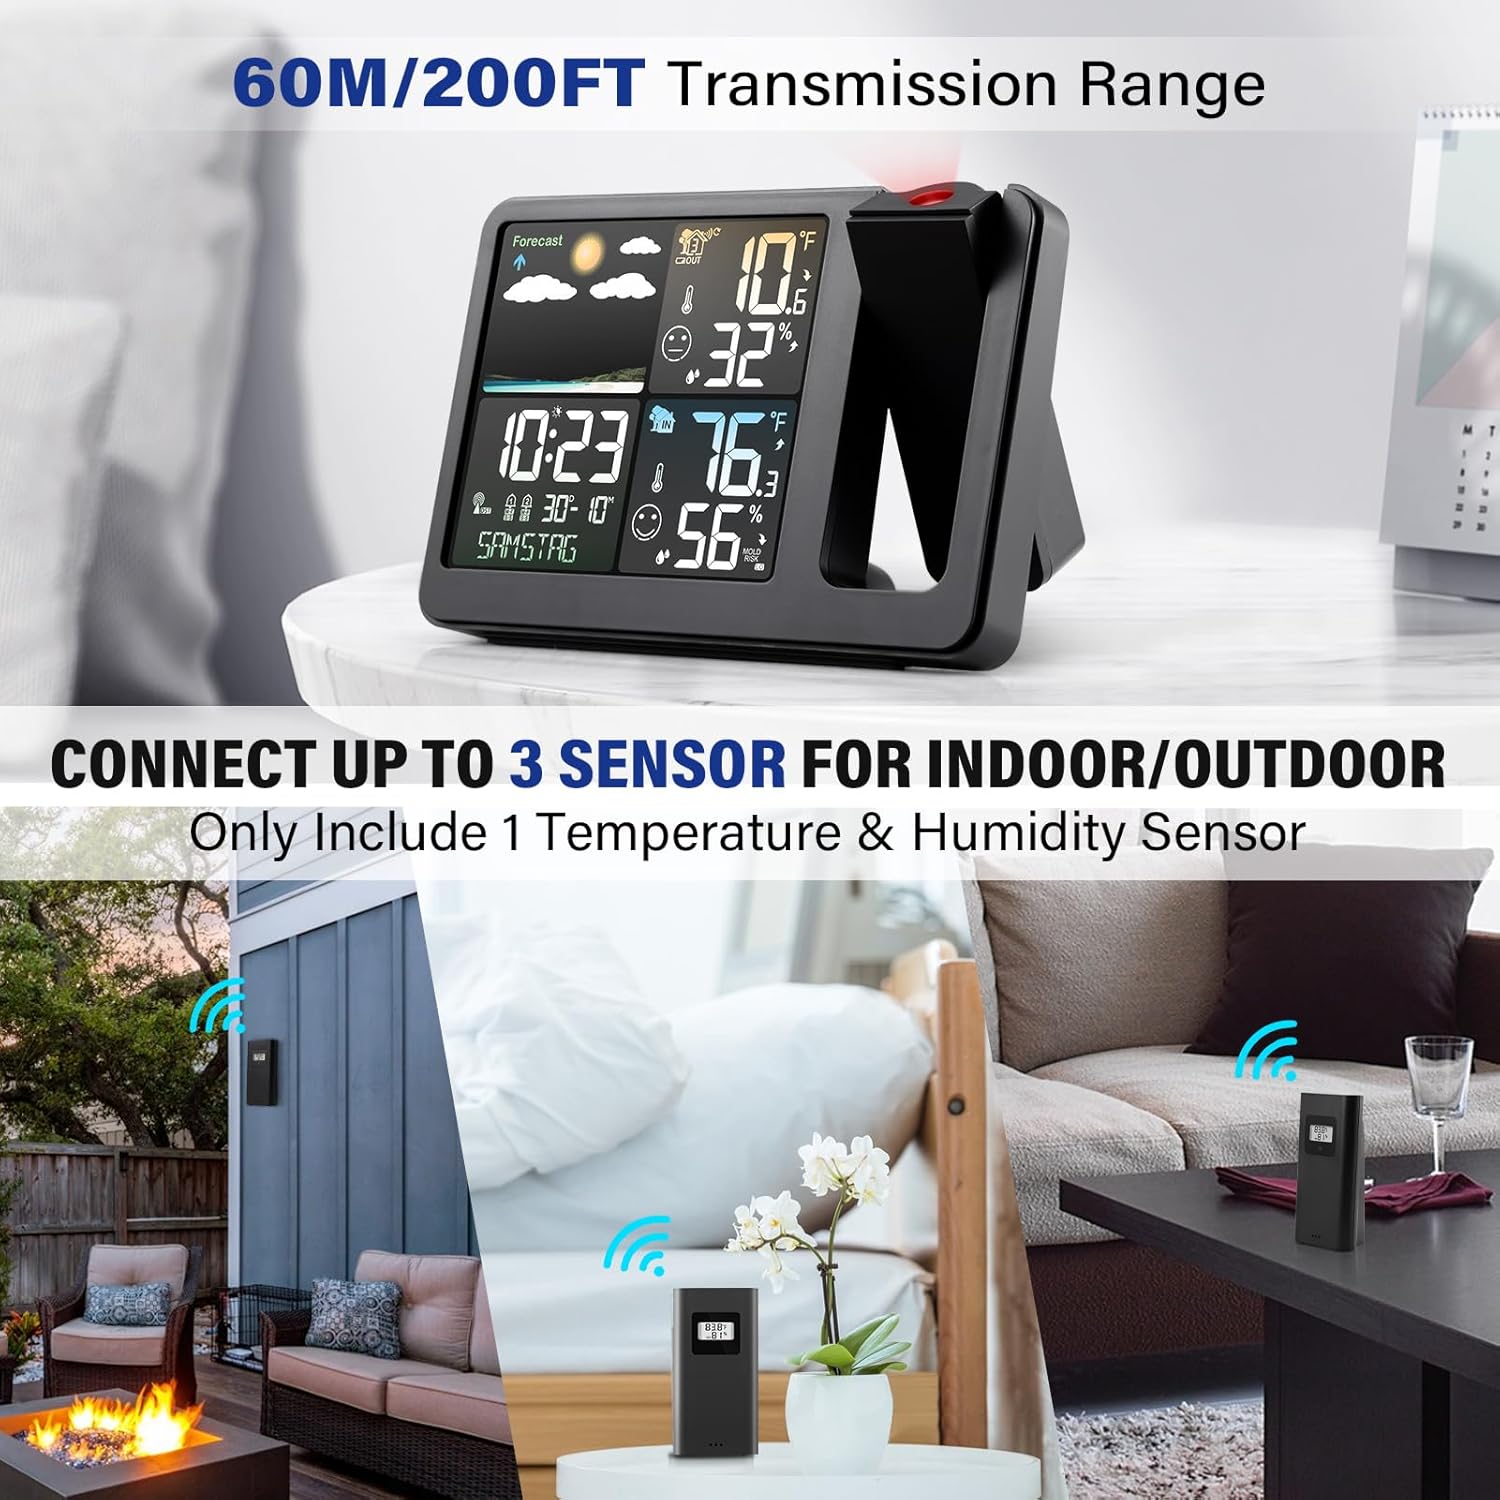
Image: Examples of suitable placement for the wireless outdoor sensor, including a patio, garden, and indoor areas like a bedroom or kitchen.
1.5 Automatic Time Synchronization (Atomic Clock)
The clock features WWVB radio control time function for automatic time synchronization. Upon initial power-up, the unit will attempt to receive the atomic clock signal. This process may take several minutes to a few hours depending on your location and signal strength.
2. Operating Instructions
2.1 Display Overview
The main unit displays time, indoor temperature, outdoor temperature, humidity, and weather forecast. The display is designed for clear readability.
Image: Front view of the main unit display, showing various weather and time information.
2.2 Time Projection
The clock can project the time and alternating indoor/outdoor temperature onto a wall or ceiling. The projection can be rotated 180 degrees for optimal viewing.
- Adjusting Projection Angle: Rotate the projector lens to adjust the angle of the projected image.
- Adjusting Projection Brightness: Press and hold the projection button to cycle through brightness levels or turn off the projection.
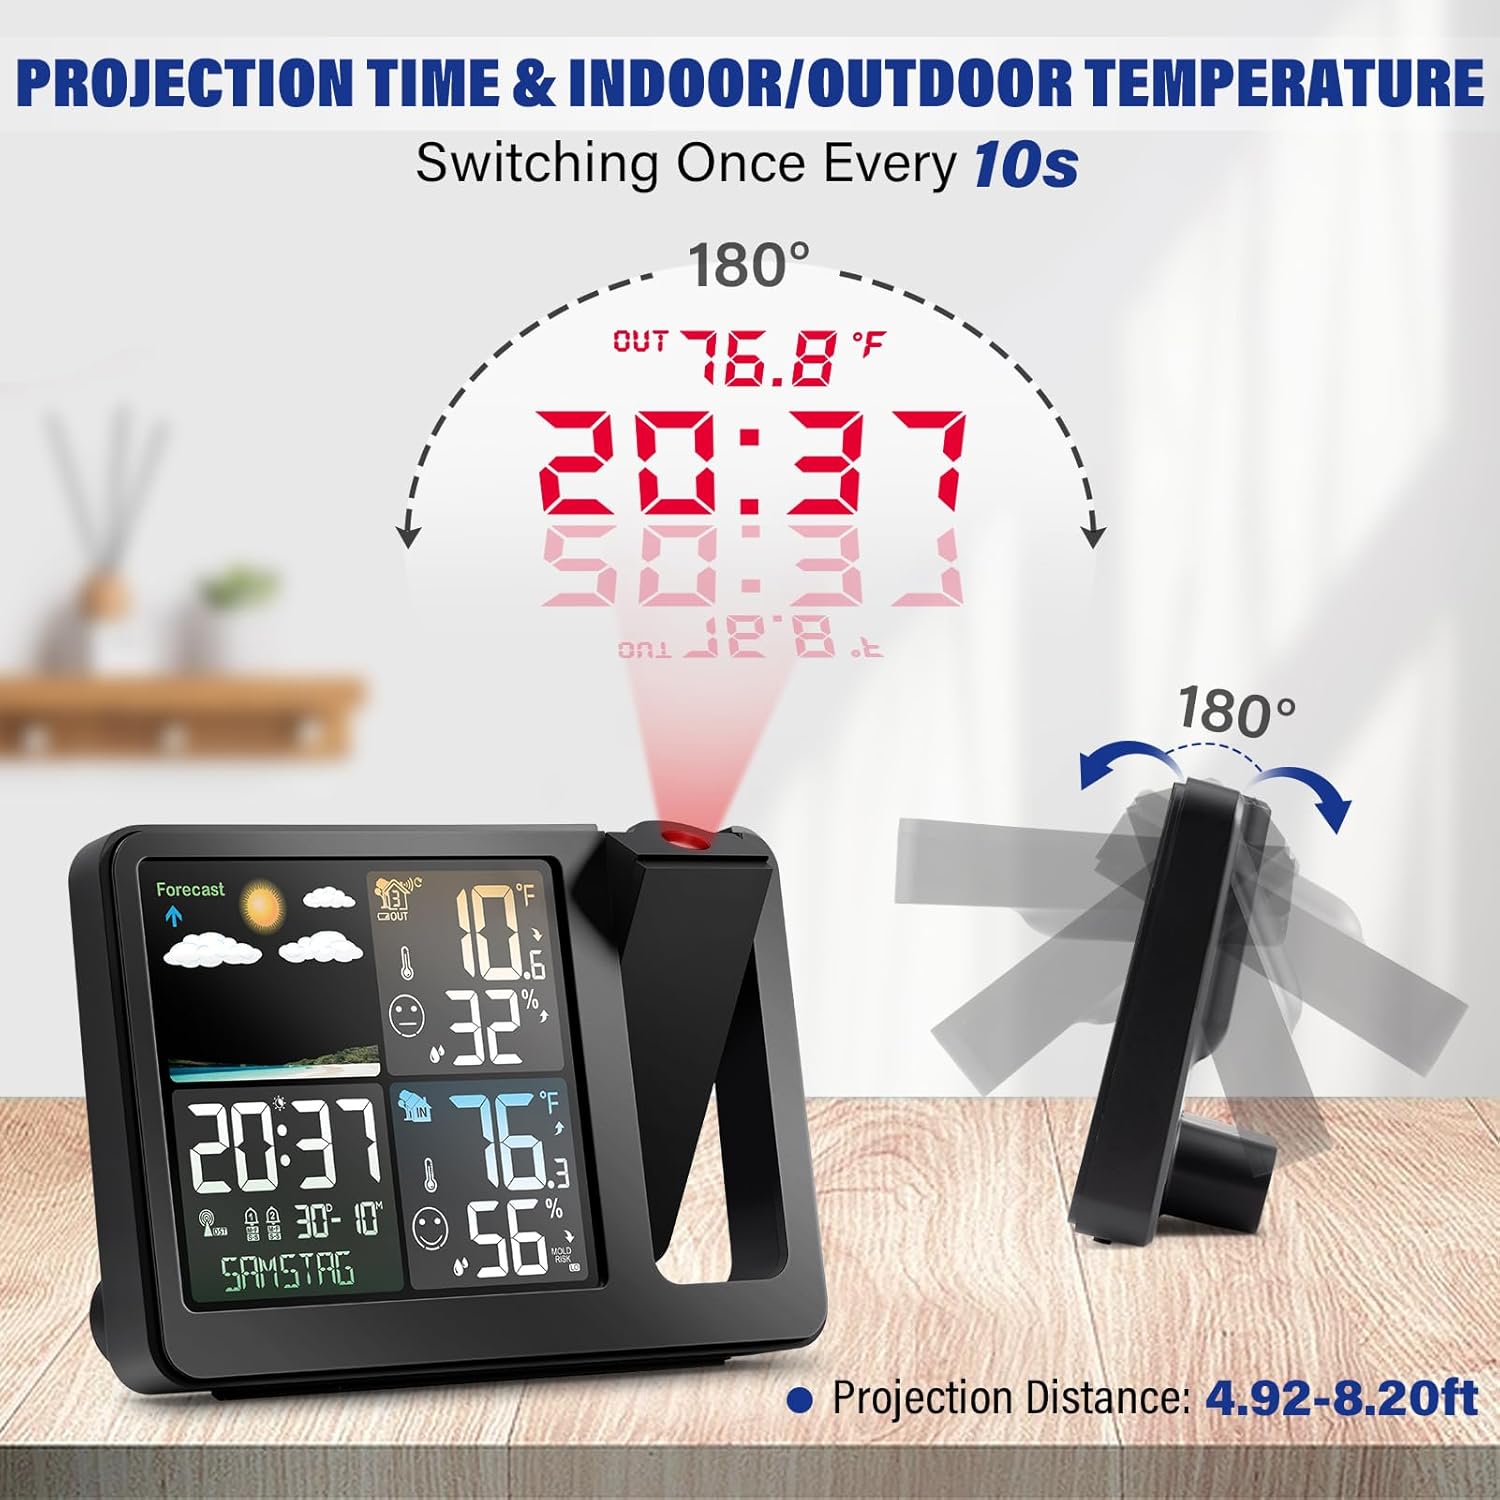
Image: Illustration of the time and temperature projection feature, showing 180-degree rotation capability.
Video: Demonstrates the projection feature in a bedroom setting, showing time and temperature projected onto a wall.
2.3 Dual Alarm Functionality
Set two independent alarms for different wake-up times. The clock also features a snooze function.
- Setting Alarms: Use the 'ALARM' button and +/- buttons to set Alarm 1 and Alarm 2.
- Snooze Function: Press the 'SNOOZE/LIGHT' button when an alarm sounds to activate snooze.

Image: Illustrates the dual alarm and snooze features, showing different alarm settings for weekdays and weekends.
2.4 Display Brightness Control
The main display has 4 adjustable brightness levels to suit your preference, day or night.
- Press the 'SNOOZE/LIGHT' button to cycle through the 4 brightness levels (0%, 25%, 50%, 100%).

Image: Shows the four adjustable brightness levels of the main display, from 0% to 100% illumination.
2.5 Weather Forecast
The unit provides a weather forecast for the next 12 hours, based on changes in atmospheric pressure. Icons indicate conditions such as sunny, partly cloudy, cloudy, rainy, heavy rainy, and snowy.
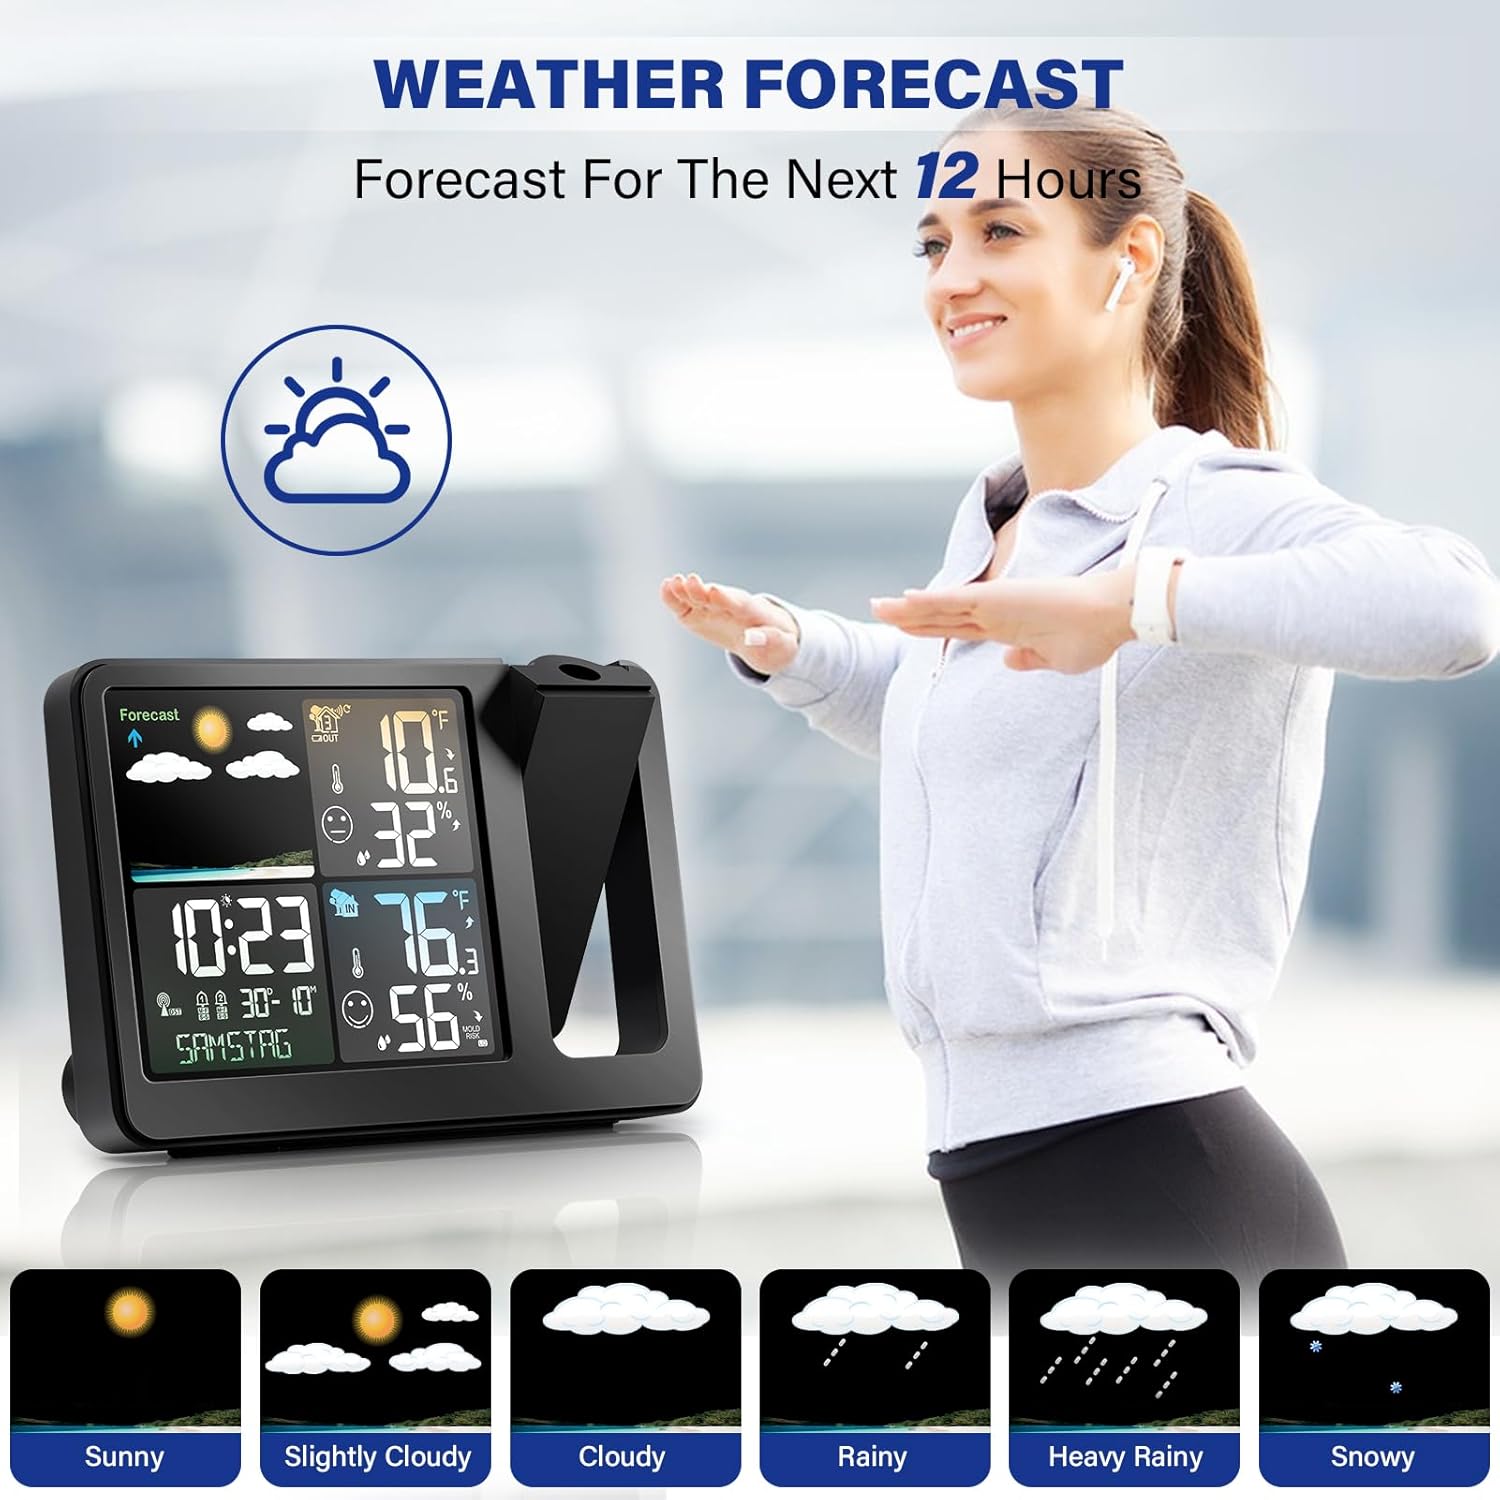
Image: Displays the weather forecast icons, representing different weather conditions like sunny, cloudy, and rainy.
2.6 USB Charging Port
A USB charging port is available on the main unit to charge your mobile devices.
- Connect your device's USB charging cable to the USB socket on the main unit.
Image: Rear view of the main unit, highlighting the USB charging port.
3. Maintenance
- Clean the unit and sensor with a soft, dry cloth. Do not use abrasive cleaners or solvents.
- Ensure the outdoor sensor is kept clear of debris and obstructions for accurate readings.
- Replace batteries in the outdoor sensor annually or when the low battery indicator appears on the main unit.
4. Troubleshooting
| Problem | Possible Cause | Solution |
|---|---|---|
| No display on main unit | Power adapter not connected or faulty. Backup batteries depleted. | Ensure power adapter is securely connected. Replace backup batteries if applicable. |
| Outdoor temperature/humidity not displayed | Outdoor sensor batteries depleted or not paired. Sensor out of range. | Replace sensor batteries. Re-pair the sensor with the main unit (refer to manual for pairing steps). Move sensor closer to the main unit. |
| Inaccurate weather forecast | Weather station needs time to calibrate. | Allow 24-48 hours for the weather station to calibrate to local atmospheric pressure. |
| Projection is blurry or dim | Projection focus needs adjustment. Projection brightness too low. | Adjust the focus ring on the projector lens. Increase projection brightness using the projection button. |
5. Product Specifications
- Brand: KALEVOL
- Model Number: EM3392
- Power Source: Battery Powered (for sensor), AC Adapter (for main unit)
- Special Feature: Clock, Projection, Weather Station, Dual Alarm, Snooze, USB Charge
- Material: Plastic
- Connectivity Technology: Wi-Fi, Bluetooth (for some models, check specific product)
- Temperature Accuracy: 1 °C
- Batteries Included: No
- Sensor Technology: Thermistor, Capacitive/Resistive, Anemometer (features may vary by sensor type)
- Item Weight: 14.1 ounces (main unit)
- Shape: Rectangular
- Display Type: Digital LCD
- UPC: 749350466004
- Package Dimensions: 6.93 x 4.96 x 2.99 inches
6. Warranty and Support
KALEVOL is committed to providing high-quality products and comprehensive after-sales service. For any questions, technical assistance, or warranty claims, please refer to the contact information provided on the product packaging or visit the official KALEVOL website.
We actively listen to customer feedback to continuously improve and upgrade our products.