1. Introduction
This manual provides instructions for the safe and effective operation of your YIHUA 939D+ III EVO 110W Digital Soldering Iron Station. Please read this manual thoroughly before use and retain it for future reference.

Figure 1: YIHUA 939D+ III EVO Soldering Station and included accessories.
2. Safety Information
Always observe the following safety precautions when operating the soldering station:
- Electrical Safety: Ensure the unit is connected to a properly grounded 110-127V AC power outlet. Do not operate with wet hands or in damp conditions.
- Heat Hazard: The soldering iron tip reaches high temperatures (up to 896°F / 480°C). Avoid direct contact with the tip or heated components. Allow the iron to cool completely before handling or storing.
- Fume Inhalation: Soldering produces fumes that can be harmful. Always work in a well-ventilated area or use a fume extractor.
- Eye Protection: Always wear safety glasses to protect against solder splashes or flying debris.
- Fire Prevention: Keep flammable materials away from the soldering area. Use a heat-resistant mat.
- Proper Handling: Always place the soldering iron in its designated holder when not in use.
- Children and Pets: Keep the soldering station and all accessories out of reach of children and pets.
3. Package Contents
Verify that all items are present in your package:
- YIHUA 939D+ III Soldering Station Body
- Soldering Iron
- Roll of Lead-Free Solder Wire (35g)
- 3 Assorted Soldering Tips
- X-2 Iron Holder System (with protective edge)
- User Manual (this document)
- Helping Hands with Magnifier and LED Light
4. Product Features
4.1. 110W EVO Heating Technology
The YIHUA 939D+ III EVO features a 110W heating element, providing rapid heat-up and excellent thermal recovery. The built-in PID temperature stabilization program maintains a steady temperature for consistent soldering results.

Figure 2: The 110W EVO heating technology ensures fast heating and stable temperatures.
4.2. LCD Display
The integrated LCD displays both the set temperature and the actual temperature simultaneously, along with the temperature unit (°C/°F) and operation indicators for easy monitoring.
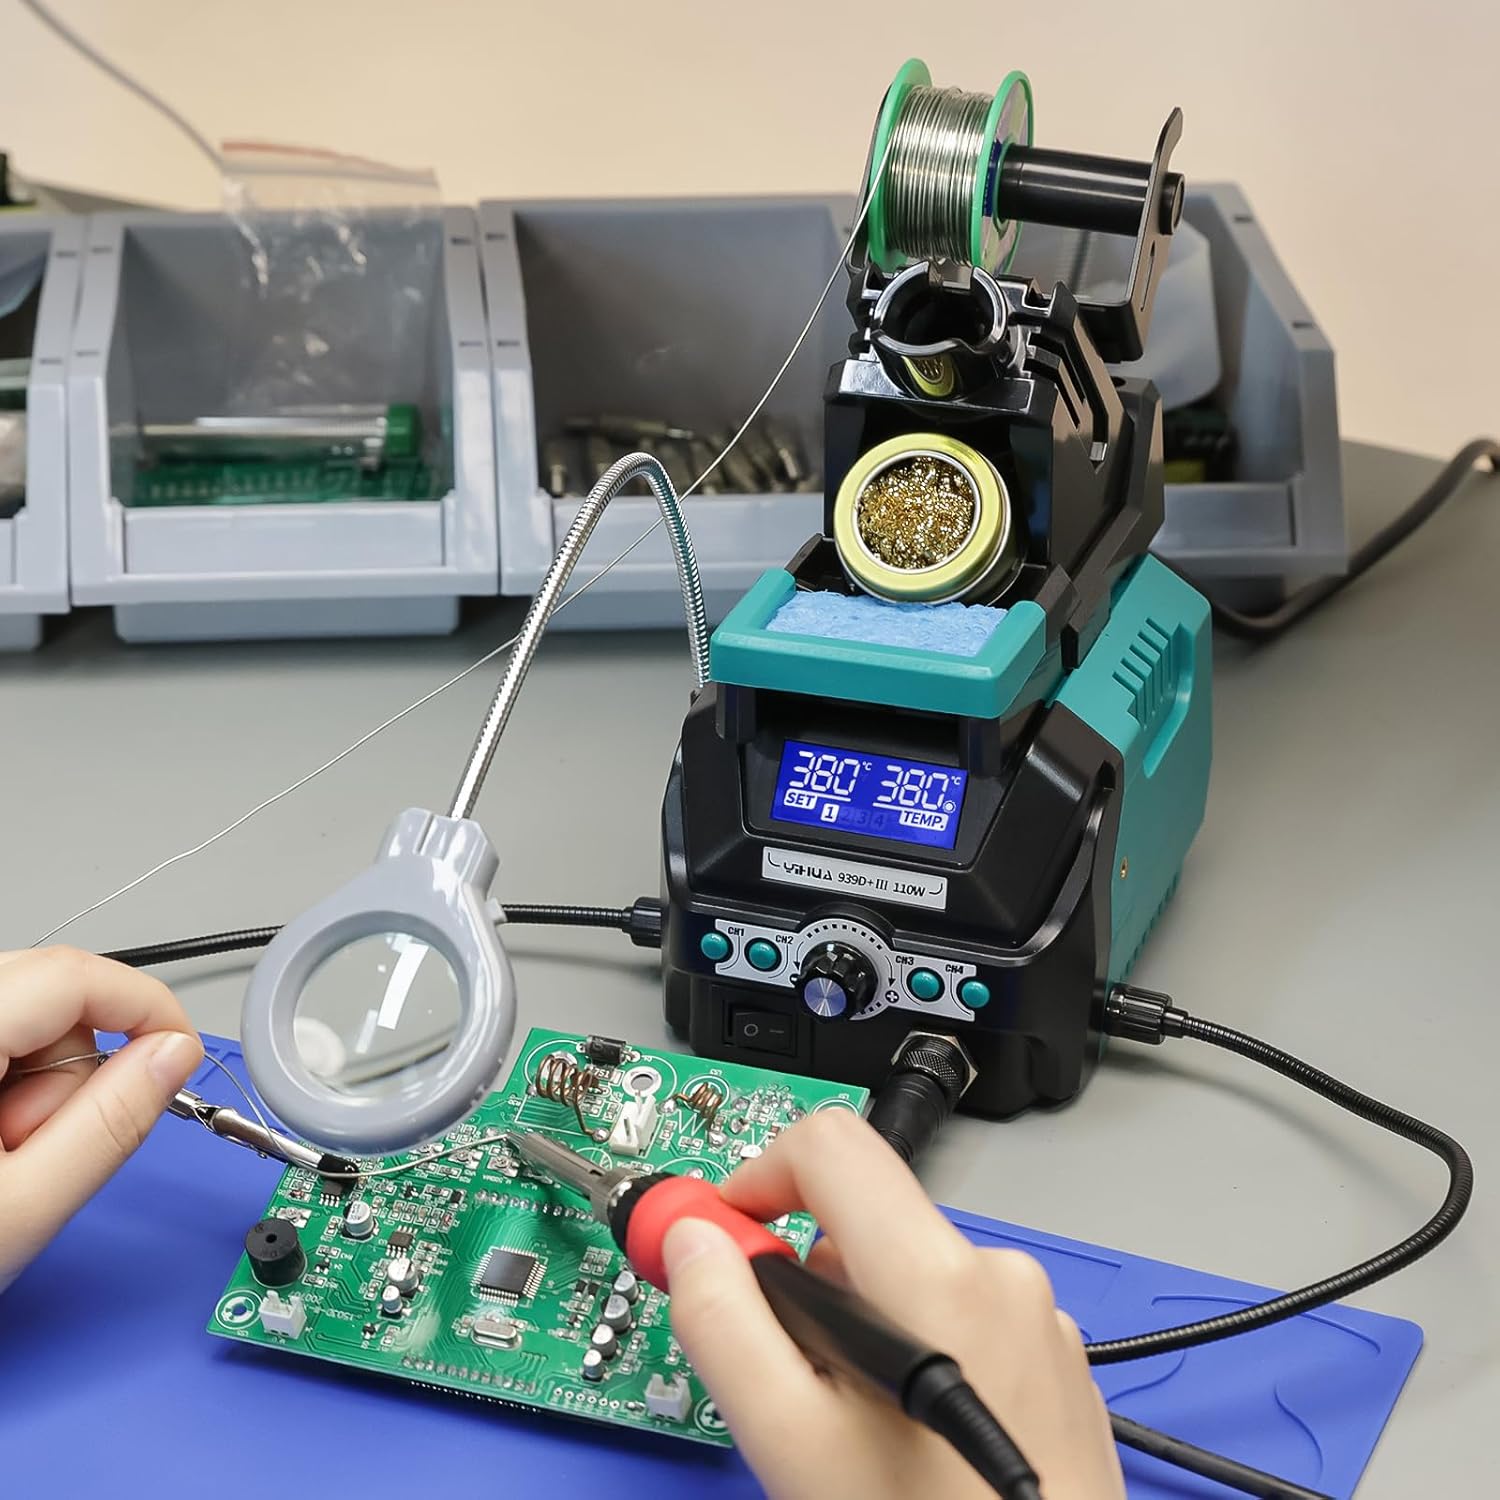
Figure 3: Detailed view of the LCD display showing temperature information and preset channels.
4.3. 4 Memory Channels
The station includes four customizable memory channels, allowing you to store and quickly recall frequently used temperature settings for different soldering tasks.

Figure 4: The four memory channels allow for quick temperature selection.
4.4. Sleep Mode
An automatic sleep mode activates after 10 minutes of inactivity, cooling the iron to 212°F (100°C). This feature reduces tip oxidation and extends the lifespan of the heating element and soldering tip.

Figure 5: Sleep mode conserves tip life and energy.
4.5. Digital Temperature Calibration
The station supports digital temperature calibration, allowing users to fine-tune the displayed temperature to match the actual tip temperature for precise work.
4.6. X2 Storage System
The integrated X2 holder system provides a stable holster for the soldering iron and consolidates essential cleaning tools. It includes the iron holder, cleaning kit, protective residual tray, temporary soldering tip storage slots, and a solder wire dispenser.

Figure 6: The X2 storage system provides an organized workspace.
4.7. Helping Hands and Magnifier with LED
The kit includes adjustable helping hands and a magnifier with an LED light, providing assistance for holding components and illuminating the work area for intricate tasks.

Figure 7: Helping hands and magnifier for detailed soldering work.
5. Setup Instructions
- Unpack: Carefully remove all components from the packaging.
- Assemble Iron Holder: Attach the X2 Iron Holder System to the main unit as per the diagram in Section 4.6. Ensure it is securely fastened.
- Install Solder Wire: Place the included solder wire roll onto the dispenser spindle on the X2 holder.
- Connect Soldering Iron: Plug the soldering iron cable into the designated port on the front of the soldering station. Ensure the connection is firm.
- Attach Helping Hands: Insert the flexible arms of the helping hands and magnifier into the ports on the side of the main unit. Position them as needed for your workspace.
- Power Connection: Connect the power cord to the soldering station and then to a grounded 110-127V AC power outlet.
6. Operating Instructions
6.1. Power On/Off
Flip the main power switch located on the front panel to the 'ON' position to power on the station. The LCD will illuminate. Flip the switch to 'OFF' to power down.
6.2. Temperature Adjustment
Rotate the main rotary knob on the front panel to adjust the desired temperature. The LCD will show the set temperature changing. The iron will then heat up or cool down to reach the new setting.
6.3. Using Memory Channels
To save a temperature setting:
- Adjust the temperature to your desired value using the rotary knob.
- Press and hold one of the 'CH1', 'CH2', 'CH3', or 'CH4' buttons until the display indicates the setting has been saved.
To recall a saved temperature setting:
- Press the corresponding 'CH1', 'CH2', 'CH3', or 'CH4' button briefly. The station will automatically adjust to the saved temperature.
6.4. Sleep Mode Activation
The sleep mode activates automatically after 10 minutes of inactivity. To wake the iron, simply pick it up from the holder or press any button. The iron will quickly return to its set operating temperature.
6.5. Digital Calibration
If the displayed temperature does not match the actual tip temperature (measured with a thermometer), you can calibrate the unit. Refer to the detailed calibration procedure in the full user manual (if provided separately) or contact support for guidance.
7. Maintenance
7.1. Soldering Tip Care
- Tinning: Always tin the tip with a small amount of solder before and after use to prevent oxidation.
- Cleaning: Use the brass wool tip cleaner or a damp sponge (ensure it's only damp, not soaking wet) to clean the tip regularly during use.
- Replacement: Replace tips when they become excessively worn or corroded to maintain optimal performance.
7.2. General Cleaning
- Ensure the unit is powered off and unplugged before cleaning.
- Wipe the station body with a soft, dry cloth. Do not use abrasive cleaners or solvents.
- Empty the residual tray in the iron holder periodically.
8. Troubleshooting
- Iron Not Heating:
- Check if the power switch is ON and the unit is plugged in.
- Ensure the soldering iron cable is securely connected to the station.
- Verify the set temperature is above the ambient temperature.
- Temperature Instability:
- Ensure the soldering tip is properly seated and tightened.
- Clean the soldering tip to remove any oxidation or debris.
- Consider performing a digital calibration if the discrepancy is significant.
- Error Codes:
- If an error code appears on the display, power off the unit, unplug it, and then restart. If the error persists, contact customer support.
9. Specifications
| Specification | Value |
|---|---|
| Model | 939D+ III EVO |
| Power Consumption | 110 Watts |
| Input Voltage | 110-127 Volts AC |
| Temperature Range | 392°F - 896°F (200°C - 480°C) |
| Temperature Stability | ±2°F (±1°C) (Static) |
| Display Type | LCD |
| Dimensions (L x W x H) | 6.61 x 5.04 x 7.28 inches |
| Item Weight | 4.27 pounds (1.94 kg) |
| Heating Element | Ceramic Heater |
10. Warranty and Support
The YIHUA 939D+ III EVO Digital Soldering Iron Station comes with a 12-month US-exclusive manufacturer technical coverage. For professional assistance, please contact YIHUA customer support through the Amazon platform or visit the official YIHUA website.
Please retain your proof of purchase for warranty claims.