BoxWave MyChron4 660
BoxWave ClearTouch Anti-Glare Screen Protector User Manual
For AiM MyChron4 660
Introduction
Thank you for choosing the BoxWave ClearTouch Anti-Glare Screen Protector. This product is designed to protect your AiM MyChron4 660 device screen from scratches, smudges, and glare, ensuring optimal visibility and longevity. This manual provides detailed instructions for installation, maintenance, and troubleshooting to help you get the most out of your screen protector.
Key Features
- Anti-Glare Technology: Disperses light to reduce reflections and improve screen visibility in various lighting conditions, including direct sunlight. Reduces 90% UV rays.
- Smooth Matte Surface: Provides a comfortable, paper-like feel for touch interactions and reduces fingerprint smudges.
- Clean Application: Features a special glueless adhesive that ensures a residue-free removal, protecting your device screen.
- Precision Cut: Specifically designed and precision-cut to perfectly fit the AiM MyChron4 660 screen, including all contours and cut-outs, ensuring full functionality.
- Two-Pack: Each package includes two ClearTouch Anti-Glare screen protectors, providing a spare or allowing for sharing.

Image: Comparison demonstrating the anti-smudge properties of the ClearTouch screen protector against a standard screen.

Image: Illustration of the screen protector's paper-like feel, enhancing writing and drawing on the device.
Package Contents
Your BoxWave ClearTouch Anti-Glare Screen Protector package includes the following items:
- Two (2) ClearTouch Anti-Glare Screen Protectors
- One (1) Applicator Card
- One (1) Microfiber Cleaning Cloth
- One (1) Dust Removing Sticker

Image: The essential tools included for a clean and precise screen protector installation.
Installation Instructions
Follow these steps carefully for a bubble-free and precise installation of your screen protector:
- Prepare Your Workspace: Choose a clean, dust-free environment. Wash your hands thoroughly to avoid transferring oils or dirt to the screen.
- Clean the Device Screen: Use the included microfiber cleaning cloth to gently wipe down the AiM MyChron4 660 screen. Ensure all dust, smudges, and fingerprints are removed. For stubborn marks, a small amount of screen cleaner (not included) can be used, applied to the cloth, not directly to the device.
- Remove Dust: Use the dust removing sticker to lift any remaining dust particles from the screen. Lightly dab the sticker across the entire screen surface.
- Peel Back Layer 1: Carefully peel back a small portion of the protective film labeled 'Layer 1' from one end of the screen protector. Avoid touching the adhesive side.
- Align the Protector: Align the exposed adhesive edge of the screen protector with one edge of your device screen. Take your time to ensure perfect alignment with the device's edges and any cut-outs (e.g., sensors, buttons).
- Apply and Smooth: Slowly and steadily lower the rest of the screen protector onto the device screen while simultaneously using the applicator card to smooth out any air bubbles. Work from the applied edge towards the opposite end, pushing bubbles outwards.
- Remove Layer 2: Once the screen protector is fully applied and all bubbles are smoothed out, carefully peel off the top protective film labeled 'Layer 2'.
- Final Wipe: Give the newly installed screen protector a final gentle wipe with the microfiber cloth to remove any remaining smudges.
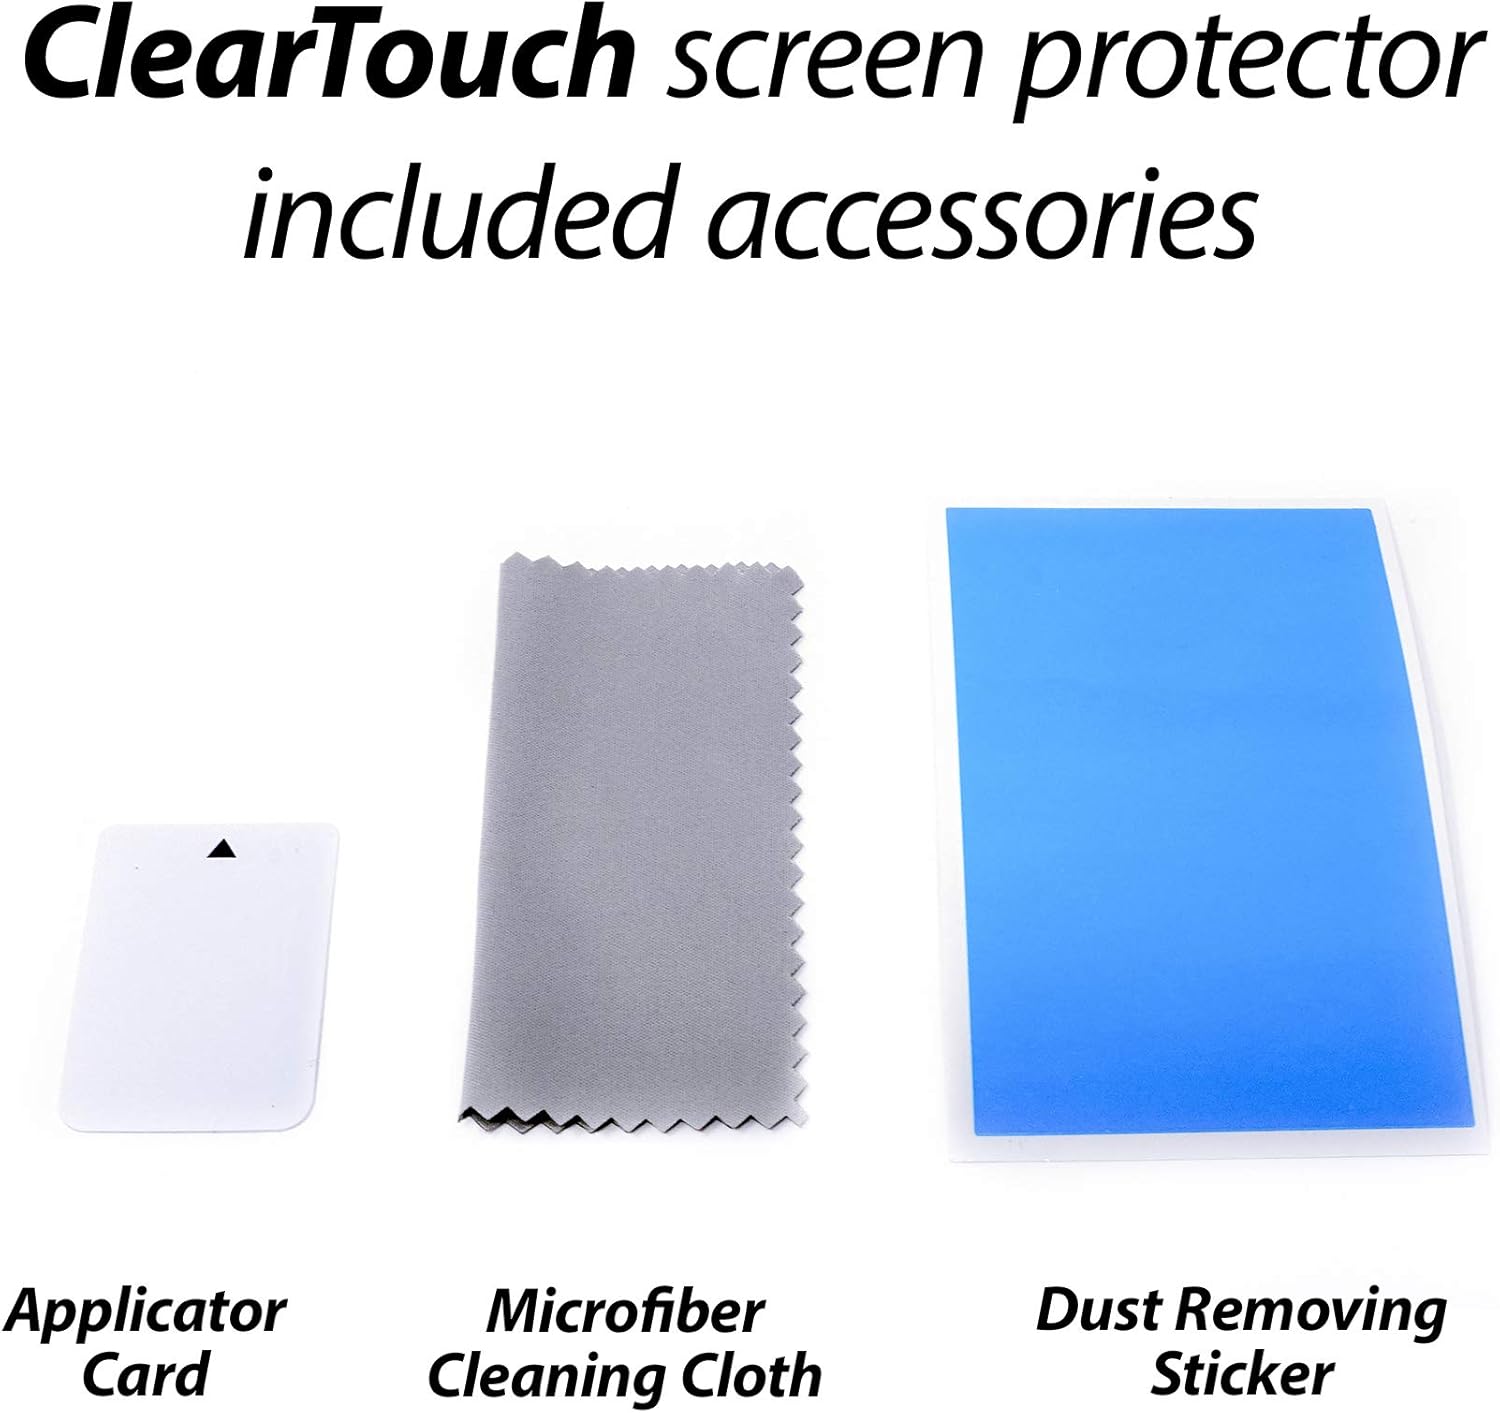
Image: The complete screen protector kit, ready for installation.
Usage and Benefits
Once installed, your BoxWave ClearTouch Anti-Glare Screen Protector will immediately begin providing protection and enhancing your viewing experience:
- Reduced Glare: The matte finish effectively diffuses light, significantly reducing reflections from bright light sources or direct sunlight, making your AiM MyChron4 660 screen easier to read.
- Fingerprint Resistance: The oleophobic layer repels oils and smudges, keeping your screen cleaner for longer and reducing the need for frequent cleaning.
- Scratch Protection: Provides a durable barrier against scratches from keys, coins, and other abrasive objects, preserving the original screen's condition.
- Enhanced Touch Sensitivity: Designed to maintain the original touch sensitivity of your device, ensuring smooth and accurate interactions.
Care and Maintenance
To ensure the longevity and effectiveness of your screen protector, follow these simple care guidelines:
- Cleaning: Use the included microfiber cleaning cloth to gently wipe the screen protector. For more stubborn smudges, slightly dampen the cloth with water or a mild, non-abrasive screen cleaner. Avoid harsh chemicals or abrasive materials.
- Avoid Sharp Objects: While the protector offers scratch resistance, extreme pressure or sharp objects can still damage it.
- Storage of Spare: Keep the unused screen protector in its original packaging in a cool, dry place to protect it from dust and damage until needed.
Troubleshooting
Here are solutions to common issues you might encounter during or after installation:
| Problem | Solution |
|---|---|
| Bubbles Under the Protector | Most small bubbles will disappear within 24-48 hours. For larger bubbles, gently lift the nearest edge of the protector and use the applicator card to push the bubble towards the lifted edge. Re-adhere the section. Ensure no dust is trapped. |
| Dust Particles Trapped | If dust is trapped, carefully lift the nearest edge of the protector. Use the dust removing sticker to dab the dust particle off the adhesive side of the protector or the device screen. Re-apply the protector. |
| Misalignment | If the protector is significantly misaligned, gently peel it off completely. Clean the screen again thoroughly and attempt re-installation, paying close attention to alignment from the start. The glueless adhesive allows for re-application. |
| Reduced Touch Sensitivity | Ensure the screen protector is fully adhered without any lifted edges or large air pockets. If the issue persists, verify that the protector is indeed designed for your specific device model. |
Product Specifications
| Attribute | Detail |
|---|---|
| Brand | BoxWave |
| Compatible Device | AiM MyChron4 660 |
| Material | Polyethylene Terephthalate (PET) |
| Finish Type | Matte |
| Special Feature | Anti-Glare, Anti-Fingerprint |
| Number of Items | 2 (Two-Pack) |
| Item Weight | 0.7 ounces |
| Manufacturer | BoxWave |
Warranty and Support
BoxWave stands behind the quality of its products. For any questions, concerns, or support needs regarding your ClearTouch Anti-Glare Screen Protector, please contact BoxWave customer service. Refer to your product packaging or the BoxWave official website for the most current contact information and warranty details.
Return Policy: This product is subject to a 30-day refund/replacement return policy from the date of purchase, as per standard retail terms.
Ask a question about this manual
Ask about setup, troubleshooting, compatibility, parts, safety, or missing instructions. Manuals+ will review the question and use this page’s manual context to help answer it.