1. Introduction
This manual provides detailed instructions for the safe and effective operation of your RIUKOE PL-W126 Fanless LED Par Light. This versatile lighting fixture is designed for various applications, including DJ setups, parties, weddings, and stage productions, offering powerful and quiet illumination.
Key Features:
- Small Body, Big Power: Equipped with 12x12W RGBWAUV 6-in-1 LEDs, delivering a high lumen output of 8550 lux at 1 meter.
- 100% Quiet & Durable: Features a fanless design with a robust aluminum cast housing and efficient heat sink for silent operation and enhanced durability.
- Dimmable & Color Mixing: Utilizes imported LED beads and a 40-degree lens for smooth dimming and excellent, even color mixing.
- Multiple Smart Control Modes: Supports DMX512, Master-slave, Auto, IR remote, and Sound activated control for flexible operation.
- Versatile Application: Ideal for DJ events, discos, parties, weddings, churches, clubs, and any venue requiring a portable LED wash light.

Image 1.1: Overview of the RIUKOE PL-W126 LED Par Light highlighting its control modes.
2. Safety Information
Please read and understand all safety instructions before installing or operating this product. Failure to do so may result in injury or damage to the product.
- This product is for indoor use only. Do not expose to rain or moisture.
- Ensure the power supply matches the voltage requirements (AC 100-240V, 50/60Hz).
- Always disconnect from power before cleaning or servicing.
- Do not operate the fixture if the power cord is damaged.
- Ensure adequate ventilation around the fixture. Do not block cooling fins.
- Avoid direct eye exposure to the light source.
- Keep out of reach of children.
3. Package Contents
Verify that all items listed below are included in your package:
- 1 x RIUKOE PL-W126 LED Par Light
- 1 x IR Remote Control (1 CR2 battery included)
- 1 x Power Cable
- 1 x DMX Cable
- 1 x Mounting Bracket
- 1 x User Manual
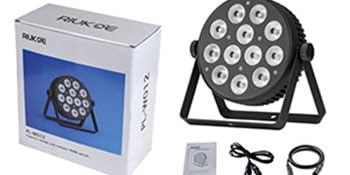
Image 3.1: Contents typically found in the RIUKOE PL-W126 product package.
4. Product Overview
Components and Controls:
Familiarize yourself with the main components and control interface of your LED Par Light.

Image 4.1: Front view of the LED Par Light and its IR remote control.

Image 4.2: Detailed view of the rear panel, highlighting power input/output, DMX connections, digital display, menu buttons, and fixed knob.
- LED Array: 12x12W RGBWAUV 6-in-1 LEDs for diverse color mixing.
- Mounting Bracket: Adjustable bracket for floor standing or truss mounting.
- Power IN/OUT: Standard power connections for daisy-chaining multiple units.
- DMX IN/OUT: 3-pin XLR connectors for DMX control and daisy-chaining.
- Digital Display: LED screen for menu navigation and setting display.
- Menu Buttons: Menu, Up, Down, Enter buttons for navigating settings.
- Fixed Knob: Secures the light's tilt angle.
5. Setup
5.1 Mounting
The fixture comes with a bracket suitable for various mounting options:
- Floor Standing: Position the light on a stable, flat surface using the bracket as a stand.
- Truss Mounting: Attach the bracket to a compatible clamp (not included) and secure it to a lighting truss. Ensure the clamp and truss can support the weight of the fixture.
Adjust the angle of the light using the fixed knobs on the sides of the bracket. Tighten securely once the desired angle is achieved.
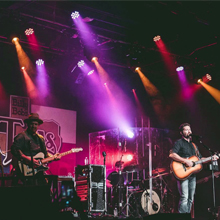
Image 5.1: Detail of the DMX ports and the fixed knob for angle adjustment.
5.2 Power Connection
Connect the provided power cable to the 'POWER IN' socket on the rear panel of the fixture and then to a suitable AC power outlet (100-240V, 50/60Hz). Multiple units can be daisy-chained by connecting the 'POWER OUT' of one fixture to the 'POWER IN' of the next, up to the maximum recommended load.
5.3 DMX Connection
For DMX control, connect a DMX controller to the 'DMX IN' socket of the first fixture using a 3-pin XLR DMX cable. To daisy-chain multiple fixtures, connect the 'DMX OUT' of the first fixture to the 'DMX IN' of the next, and so on. Ensure the last fixture in the chain has a DMX terminator (not included) for stable signal transmission.
6. Operation
6.1 Control Panel Navigation
Use the four buttons on the rear panel to navigate the menu and adjust settings:
- MENU: Cycles through the main menu options.
- UP/DOWN: Adjusts values or cycles through sub-menu options.
- ENTER: Confirms a selection or saves a setting. Always press "Enter" to save any changes you make.
6.2 IR Remote Control
The included IR remote control provides convenient wireless operation for basic functions.
- Initial Use: Pull out the insulation sheet from the battery compartment before first use.
- Range: The effective range is approximately 6 meters (20 ft). For white light, the range may be reduced to about 3 meters.
- Compatibility: Ensure the light is set to an address mode like "d00X" or "E00X" (where X is a number) for the remote to function.
- Conflict: DMX console control and IR remote control cannot be used simultaneously to avoid signal conflicts. Disconnect or turn off one control method before using the other.
- Master-Slave with IR: If using Master-slave mode with the IR remote, daisy-chain the lights with DMX cables. Set one unit as the master (e.g., "d00X" or "E00X") and others as slaves (e.g., "d001" or "E001"). The remote will then only control the master unit.
6.3 Operating Modes
The PL-W126 offers several operating modes:
- DMX512 Mode: For professional control, connect to a DMX controller. Set the DMX address via the menu to integrate with your lighting system.
- Master-Slave Mode: Link multiple fixtures via DMX cables. Set one unit as the master (e.g., "d00X") and the others as slaves (e.g., "d001"). The master unit will control all linked slave units.
- Auto Mode: The fixture runs through pre-programmed light shows and color sequences automatically. Select desired auto programs via the menu.
- Sound Activated Mode: The light reacts to ambient sound or music, changing patterns and colors in sync with the beat. Adjust sensitivity via the menu.
7. Maintenance
7.1 Cleaning
To maintain optimal performance and appearance, clean the fixture regularly:
- Disconnect power before cleaning.
- Use a soft, dry cloth to wipe the exterior.
- For lenses, use a soft cloth and a mild glass cleaner. Avoid abrasive materials.
7.2 Cooling System
The RIUKOE PL-W126 features a fanless design, relying on its aluminum housing and heat sink for cooling. It is normal for the unit to become warm or hot to the touch after extended use. The light includes built-in temperature protection to prevent overheating.

Image 7.1: The fanless design ensures quiet operation.
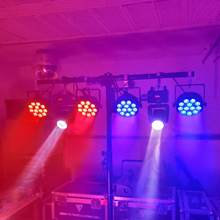
Image 7.2: Internal view showing the robust construction and heat dissipation components.
8. Troubleshooting
If you encounter issues with your RIUKOE PL-W126, refer to the following common problems and solutions:
- Light gets very hot: This is normal for the fanless design. The aluminum housing acts as a heat sink, and the unit has built-in temperature protection. Ensure adequate airflow around the fixture.
- IR Remote not working:
- Check if the insulation sheet has been removed from the remote's battery compartment.
- Ensure the CR2 battery is correctly inserted and has sufficient charge.
- Verify the light is set to an appropriate address mode (e.g., "d00X" or "E00X").
- Confirm that DMX control is not active, as it can conflict with the IR remote.
- DMX Control Issues (e.g., dimming not smooth, strobe erratic):
- Double-check all DMX cable connections for proper seating and integrity.
- Verify the DMX address settings on the fixture match your controller.
- Ensure a DMX terminator is used on the last fixture in a daisy-chain.
- Note: Some users have reported that DMX programming for dimming and strobe functions may not be as smooth as expected. This is a characteristic of the unit's internal programming.
- Mounting Knobs breaking: The plastic knobs for adjusting the mounting bracket may be susceptible to damage. If they break, contact customer support for assistance or consider replacing them with more durable alternatives if available.
9. Specifications
Detailed technical specifications for the RIUKOE PL-W126 LED Par Light:

Image 9.1: Product dimensions of the RIUKOE PL-W126 LED Par Light.
| Feature | Specification |
|---|---|
| Model Number | PL-W126 |
| Light Source Type | Light Emitting Diode (LED) |
| LEDs | 12 x 12W RGBWAUV 6-in-1 LEDs |
| Brightness | 8550 lumen (at 1M) |
| Beam Angle | 40 Degrees |
| Color | RGBWAUV |
| Material | Aluminum |
| Finish Type | Aluminum |
| Power Source | Corded Electric |
| Input Voltage | AC 100-240V, 50/60Hz |
| Wattage | 70 Watts (Light Source: 12 Watts) |
| Control Modes | DMX512, Master-slave, Auto, IR remote, Sound activated |
| Product Dimensions | 8.3"L x 2.4"W x 9"H (21.1cm L x 6.1cm W x 22.9cm H) |
| Item Weight | 4.8 pounds (2.18 kg) |
| Batteries | 1 CR2 battery required (included for IR remote) |
| Manufacturer | Guangzhou Rico Stage Lighting Co.,Ltd |
10. Warranty and Support
For warranty information, technical support, or service inquiries, please contact your retailer or the manufacturer directly. Keep your purchase receipt as proof of purchase.