
1. Important Safety Information
Read all instructions carefully before beginning installation. Consult a qualified electrician if you are unsure about wiring. Ensure power is disconnected at the circuit breaker before installation or maintenance.
- Do not connect the fan to a dimmer switch.
- Ensure the installation site can support the fan's weight (approximately 21.2 lbs).
- Maintain a minimum clearance of 7 feet from the floor to the fan blades.
- Use only the parts supplied by the manufacturer.
2. Package Contents
Verify that all components are present before beginning assembly.
- Motor Housing Assembly
- Downrod and Canopy
- Fan Blades (5)
- Blade Arms (5)
- Light Kit Assembly with Crystal Diffuser
- Remote Control and Receiver
- Hardware Pack (screws, washers, wire nuts)
- Instruction Manual

Image 2.1: Overview of the Warehouse of Tiffany Jacira 52-Inch Antique Copper Crystal Ceiling Fan. This image displays the complete fan assembly, including the motor housing, five wooden blades, the crystal light kit, and the downrod with canopy, all in an antique copper finish.
3. Tools Required for Installation
- Phillips Screwdriver
- Flathead Screwdriver
- Adjustable Wrench
- Wire Strippers
- Electrical Tape
- Ladder
4. Setup and Installation
4.1 Mounting the Fan
- Turn off power at the circuit breaker.
- Secure the mounting bracket to the ceiling junction box. Ensure the junction box is rated for ceiling fan support.
- Attach the downrod to the motor housing, securing it with the provided pin and screw.
- Carefully lift the fan assembly and hang it from the mounting bracket using the hook on the downrod.

Image 4.1: Close-up view of the antique copper canopy, which covers the ceiling junction box and mounting hardware. The "WAREHOUSE" logo is subtly embossed on the canopy.
4.2 Wiring the Fan
- Install the remote receiver into the mounting bracket.
- Connect the fan's wires to the receiver wires, and then connect the receiver wires to the household wiring (Live, Neutral, Ground) using wire nuts. Match colors carefully (e.g., Black to Black, White to White, Green/Bare Copper to Green/Bare Copper).
- Ensure all connections are secure and insulated with electrical tape.
4.3 Attaching Fan Blades
- Attach each blade to a blade arm using the provided screws.
- Secure each blade arm to the motor housing.
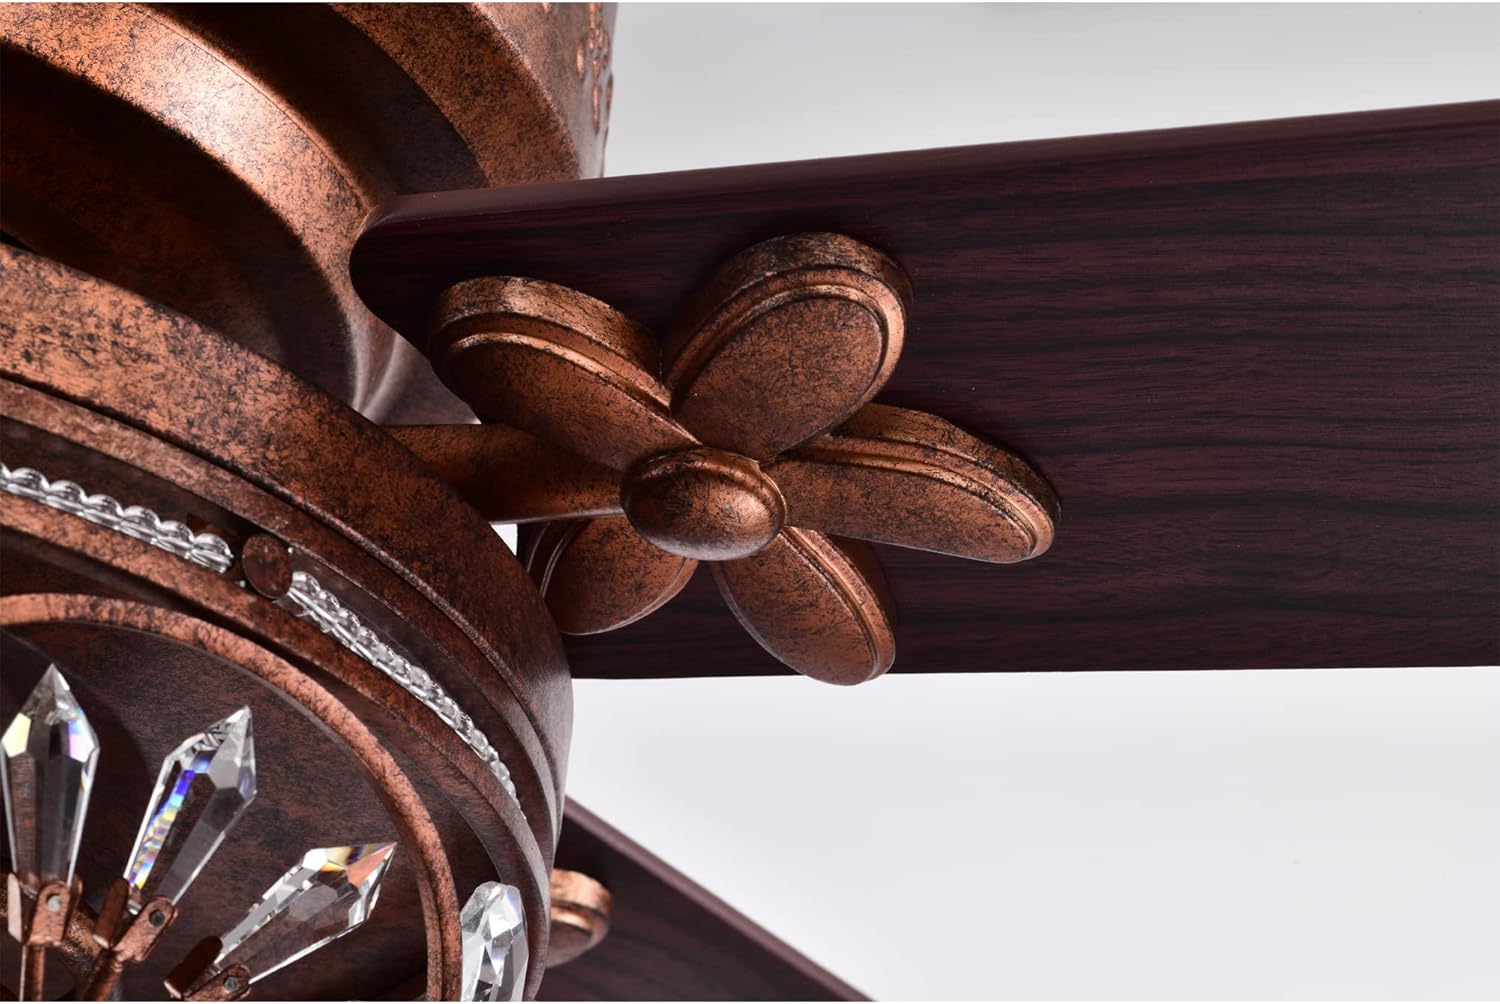
Image 4.2: Detailed view of a fan blade arm, showcasing the antique copper finish and the attachment point for the wooden blade.
4.4 Installing the Light Kit
- Connect the light kit wires to the corresponding wires from the fan motor.
- Secure the light kit assembly to the bottom of the motor housing.
- Install two E26 medium base LED bulbs (not included).
- Attach the crystal bowl diffuser to the light kit.

Image 4.3: Close-up of the crystal light kit, featuring intricate metalwork and multiple faceted crystals that diffuse the light.
5. Operating Instructions
5.1 Remote Control Operation
The fan is operated via the included remote control. Ensure batteries are installed in the remote.
- Fan ON/OFF: Press the fan button to turn the fan on or off.
- Fan Speed: Use the speed buttons (e.g., 1, 2, 3) to adjust fan speed.
- Light ON/OFF: Press the light button to turn the light on or off.
- Light Dimming: Hold the light button to dim or brighten the light (if dimmable bulbs are used).
- Reverse Function: (If available) Press the reverse button to change blade direction for summer (downward airflow) or winter (upward airflow).
6. Maintenance
6.1 Cleaning
To maintain the appearance and performance of your fan:
- Turn off power before cleaning.
- Use a soft, damp cloth to clean the motor housing and blades. Avoid abrasive cleaners.
- For the crystal diffuser, gently wipe with a soft, lint-free cloth.
6.2 Bulb Replacement
- Turn off power at the circuit breaker.
- Carefully remove the crystal bowl diffuser.
- Unscrew the old bulbs and replace with new E26 medium base LED bulbs (max 25 watts total).
- Reattach the crystal bowl diffuser.
7. Troubleshooting
| Problem | Possible Cause | Solution |
|---|---|---|
| Fan does not start | No power to the fan; Loose wire connections; Remote control battery low. | Check circuit breaker; Verify all wire connections; Replace remote control batteries. |
| Fan wobbles | Loose blade screws; Unbalanced blades; Loose mounting bracket. | Tighten all blade screws; Use a balancing kit (not included); Ensure mounting bracket is secure. |
| Light does not work | Loose wire connection; Faulty bulb; Remote control issue. | Check light kit wiring; Replace bulb; Check remote battery. |
8. Specifications
| Feature | Detail |
|---|---|
| Model Number | AW01W01AC |
| Brand | Warehouse of Tiffany |
| Size | 52 inches |
| Finish | Antique Copper |
| Material | Copper, Wood, Crystal |
| Control Method | Remote Control |
| Light Source Type | LED (E26 Medium Base) |
| Number of Lights | 2 |
| Wattage (Fan) | 55 watts (excluding lights) |
| Brightness (Light) | 1800 lumens |
| Voltage | 120 Volts (AC) |
| Item Weight | 21.2 pounds |
| Product Dimensions | 52 x 52 x 26 inches |
| Indoor/Outdoor Usage | Indoor |
| Room Type | Medium Rooms up to 175 sq. ft. |
| UPC | 653341659088 |

Image 8.1: Energy Information chart displaying airflow (4,964 CFM), electricity use (55 Watts excluding lights), and airflow efficiency (90 CFM/Watt) at high speed.
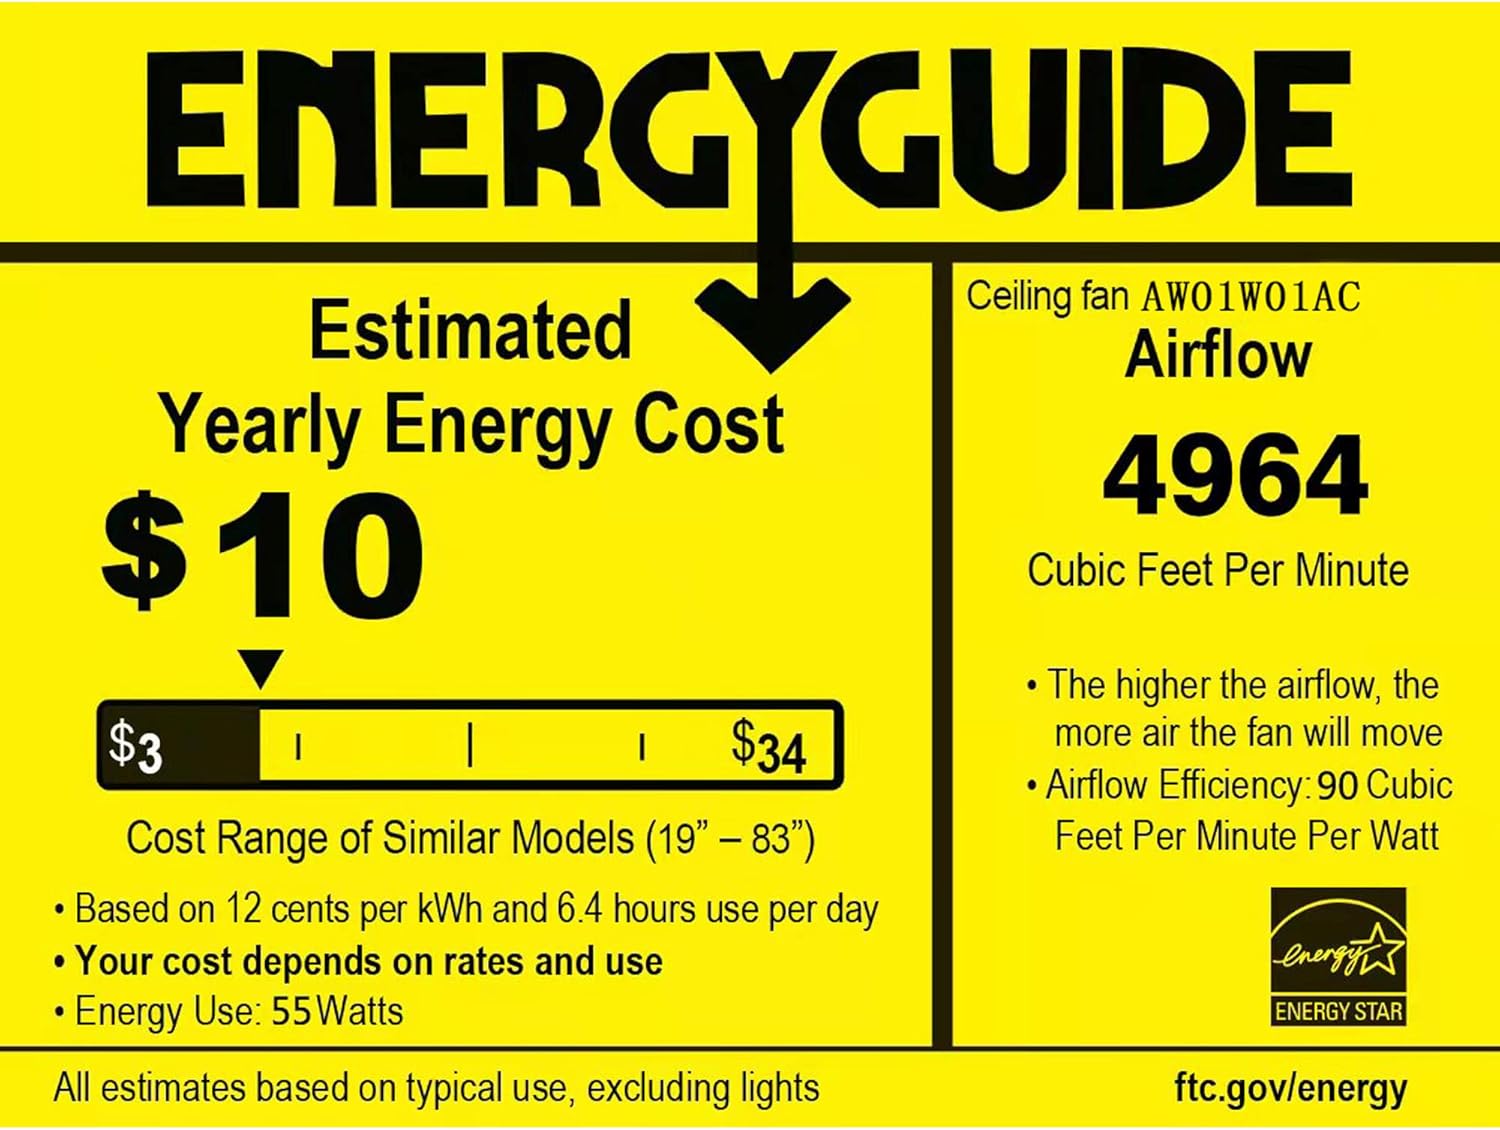
Image 8.2: Energy Guide label for the ceiling fan (Model AW01W01AC), showing an estimated yearly energy cost of $10, based on 55 Watts energy use.
9. Warranty and Support
For warranty information or technical support, please contact Warehouse of Tiffany customer service. Refer to your purchase documentation for specific warranty terms.
You can visit the official Warehouse of Tiffany store for more information: Warehouse of Tiffany Store