RETRUE RAS2582
RETRUE Rear Air Bags Suspension Kit Installation and Operation Manual
Model: RAS2582 for 2015-2025 Ford F150 Trucks
1. Introduction
This manual provides detailed instructions for the installation, operation, and maintenance of your RETRUE Rear Air Bags Suspension Kit, Model RAS2582. This kit is designed to enhance the load-carrying capacity and stability of your vehicle, providing a more comfortable and safer ride, especially when towing or hauling heavy loads.
Please read these instructions thoroughly before beginning installation to ensure proper function and safety.
2. Vehicle Compatibility
The RETRUE RAS2582 Air Bags Suspension Kit is compatible with:
- 2015-2025 Ford F150 2WD and 4WD models.
Important Note: This kit is NOT compatible with the following Ford F-150 models:
- Raptor models
- Models with Continuously Controlled Damping (CCD)
- Models with an in-bed hitch (including Gooseneck Hitch and Fifth Wheel Hitch)
- Models with leveling arms outside the rear frame
- Models with self-leveling headlights
Due to variations in vehicle configurations, some models (e.g., XLT, FX4, Lariat trims) may require minor manual adjustment to the mounting holes during installation.
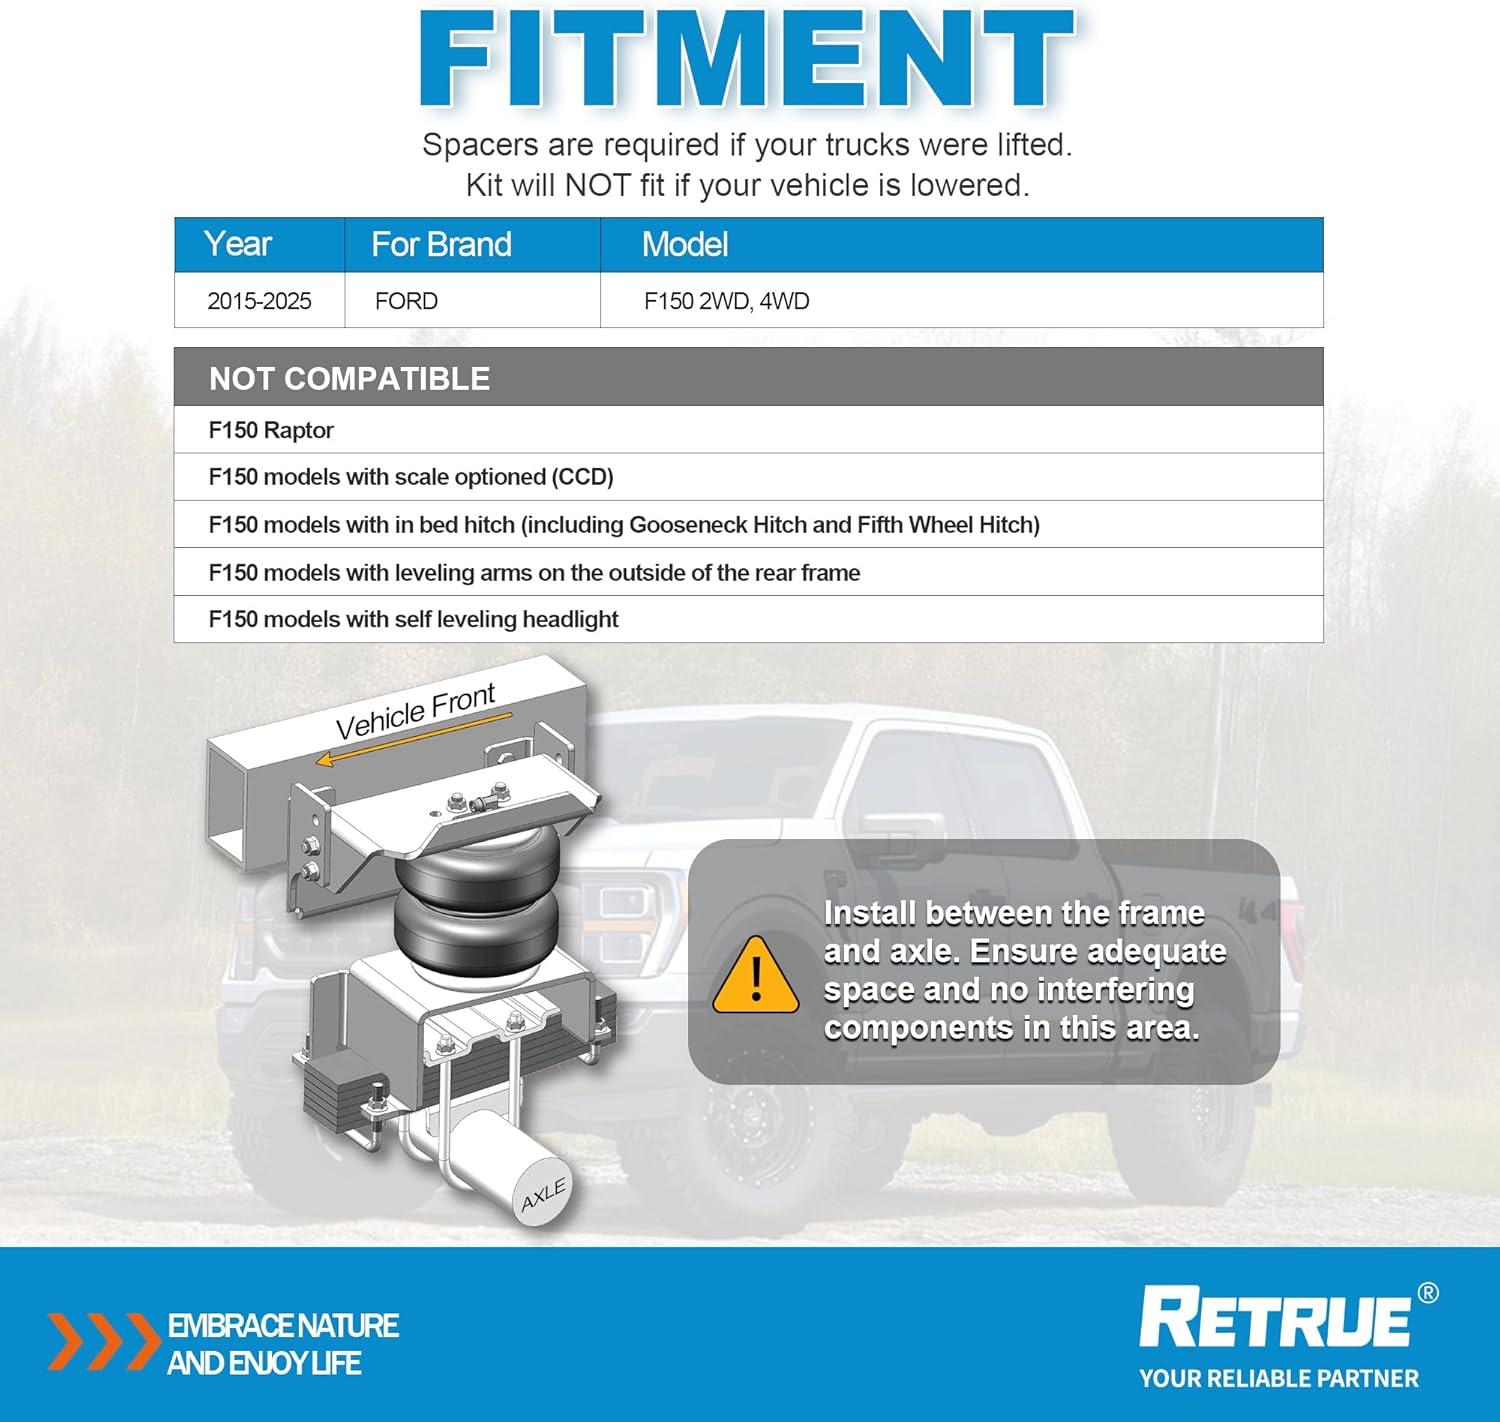
Image 2.1: Vehicle compatibility chart and a diagram illustrating the installation position between the frame and axle. It highlights the need for adequate space.
3. Kit Components
Before beginning installation, verify that all components listed below are present in your kit:
- Air Bags (2)
- Brackets (Upper and Lower)
- Hardware Pack (bolts, nuts, washers, U-bolts, zip ties)
- Air Tubing
- Air Fittings
- Installation Guide (this document)

Image 3.1: Overview of all included components: air bags, various brackets, hardware, air tubing, and fittings.

Image 3.2: A visual breakdown of the kit's main components, including air bags, various brackets, the hardware pack, and the air line.
4. Setup and Installation
Installation of this air suspension kit is designed to be straightforward, with pre-drilled holes and no drilling required for most applications. Automated tools can expedite the process.
4.1 Safety Precautions
- Always wear appropriate personal protective equipment (PPE), including safety glasses and gloves.
- Ensure the vehicle is parked on a level surface and properly secured with wheel chocks.
- Safely raise and support the rear of the vehicle using jack stands before working underneath.
- Disconnect the vehicle's battery before starting any electrical work (if applicable for optional air compressor systems).
4.2 General Installation Steps (Refer to detailed guide for specific vehicle steps)
- Prepare Vehicle: Safely lift the rear of the truck and support it with jack stands. Removing the rear wheels is highly recommended for better access to the frame and axle area.
- Remove Existing Components: Remove any existing jounce bumpers or other components that occupy the space where the air bags will be installed.
- Assemble Brackets and Air Bags: Attach the air bags to the upper and lower brackets according to the provided diagrams. Ensure air fittings are securely installed.
- Mount Air Bag Assembly: Position the assembled air bag and bracket system between the vehicle's frame and axle. Secure the upper bracket to the frame and the lower bracket to the axle using the provided hardware.
Note: Some F150 models (XLT, FX4, Lariat) may require minor slotting of mounting holes for proper alignment. - Route Air Lines: Connect the air tubing to the air fittings on the air bags. Route the air lines away from hot exhaust components, sharp edges, and moving parts. Secure the lines with zip ties.
- Install Air Valves: Install the air inflation valves in a convenient and protected location, such as the bumper or fender well.
- Check for Leaks: Inflate the air bags to approximately 50 PSI and spray all connections with a soapy water solution to check for air leaks. Tighten connections as necessary.
- Lower Vehicle: Carefully lower the vehicle and remove jack stands.
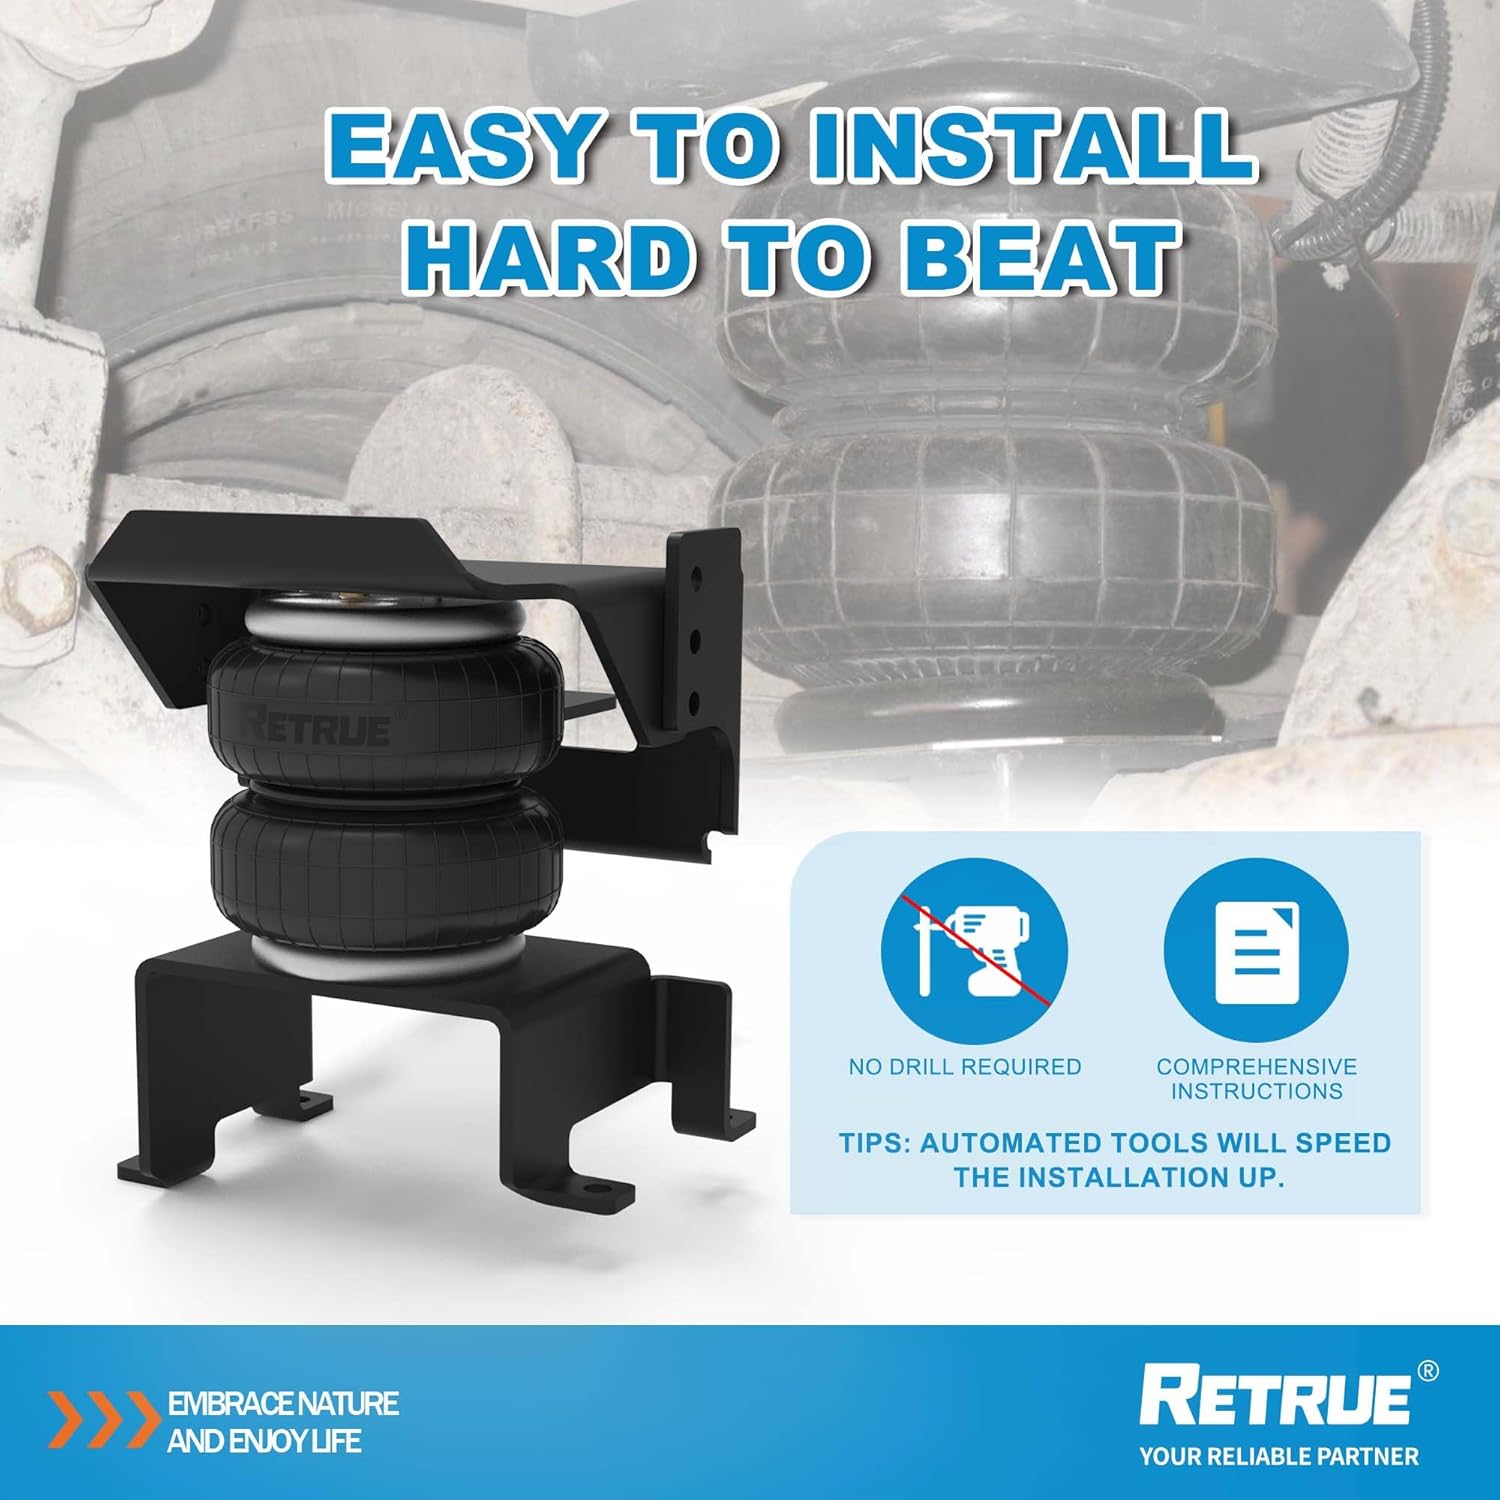
Image 4.1: Illustration emphasizing the ease of installation, highlighting no drilling required and the availability of comprehensive instructions.

Image 4.2: A close-up view of the RETRUE air bags installed on a truck, showing their placement between the frame and axle.
5. Operating Instructions
The RETRUE air bags allow for customized air pressure adjustment to achieve optimal balance and ride comfort for various load conditions.
5.1 Air Pressure Adjustment
- Pressure Range: The air bags can be adjusted from 5 PSI (minimum) to 100 PSI (maximum).
- Load Leveling: Inflate the air bags to level the vehicle front-to-rear and side-to-side when carrying a load or towing a trailer.
- Ride Comfort: Adjust pressure to achieve desired ride comfort. Higher pressure provides more support for heavy loads, while lower pressure can improve unladen ride quality.
- Equal Pressure: For optimal performance and even load distribution, ensure both air bags are inflated to the same pressure. Consider using a T-fitting for simultaneous inflation.
- Check Pressure Regularly: Periodically check air pressure, especially before and during long trips, as temperature changes can affect pressure.

Image 5.1: Illustration demonstrating the adjustable air pressure range (5 to 100 PSI) and the 5,000 lbs load leveling capacity.
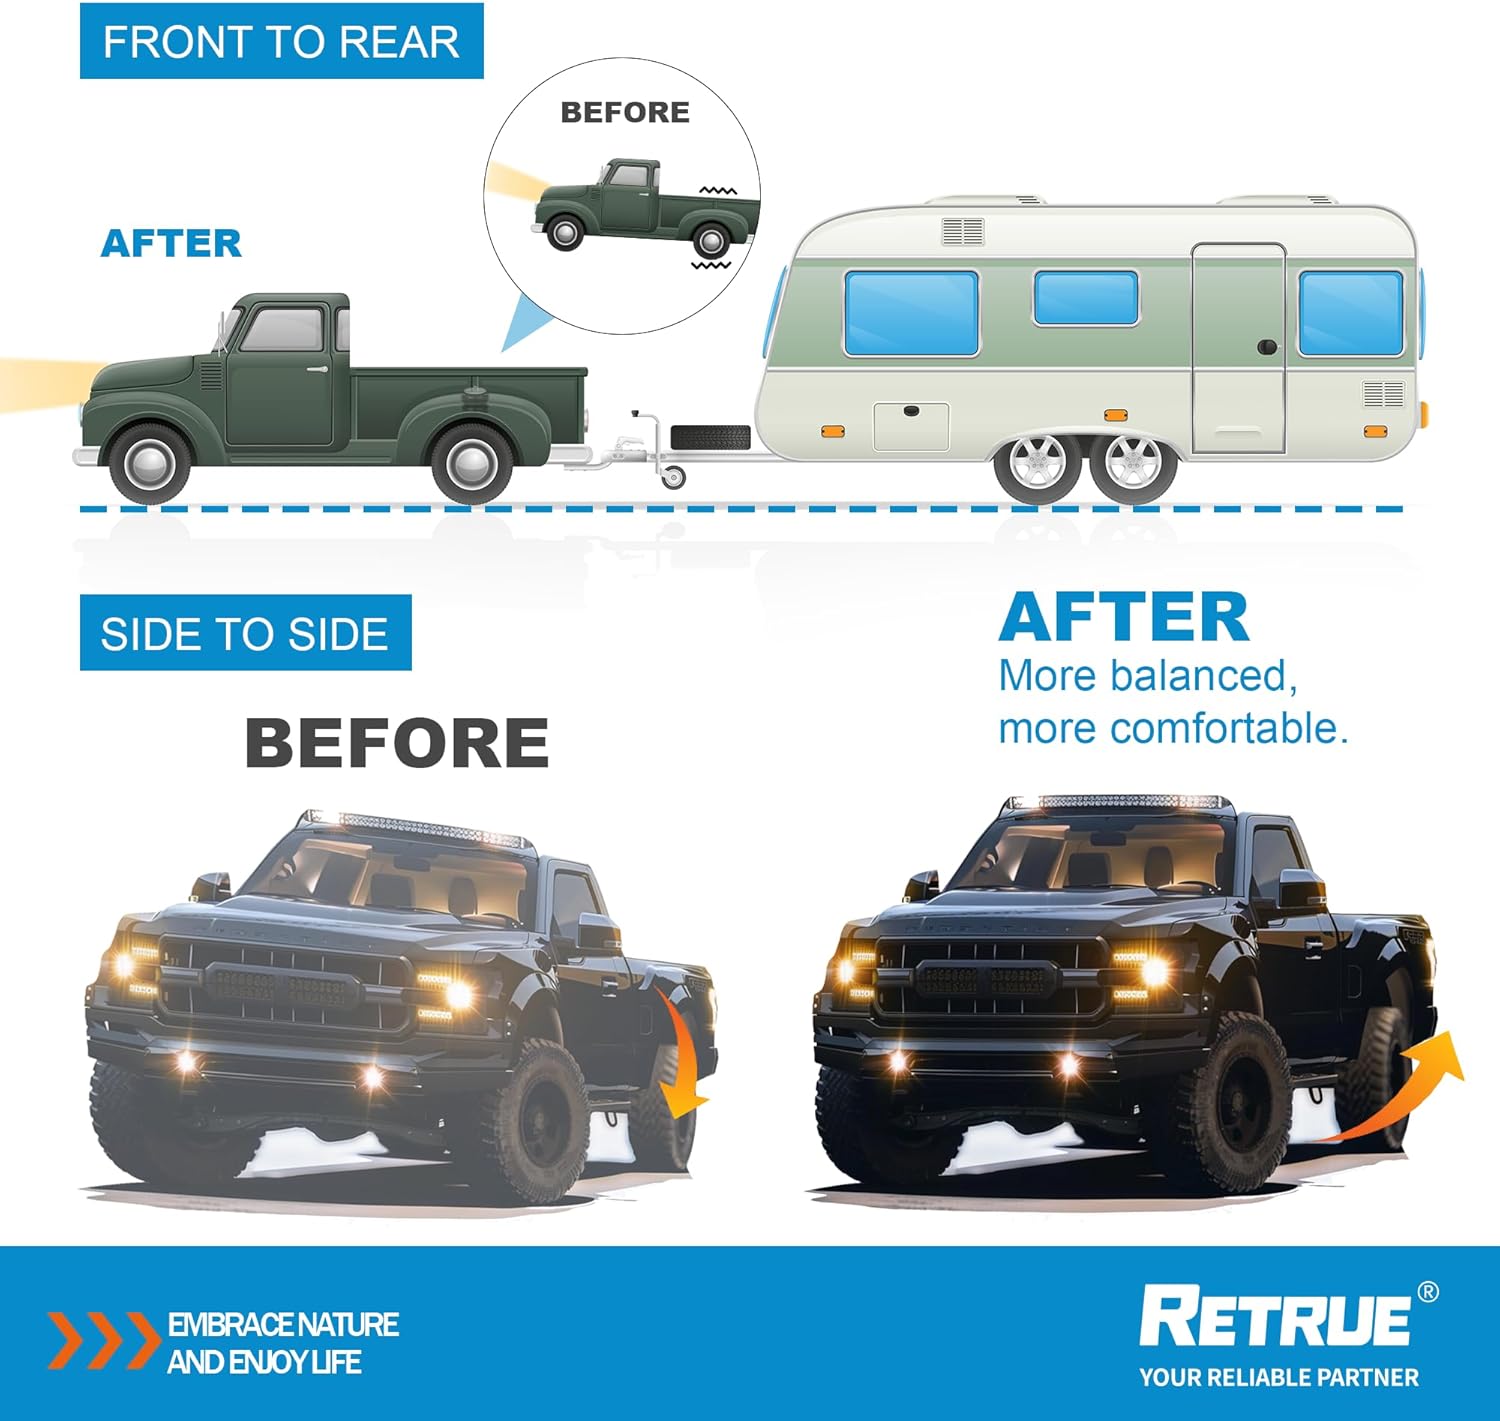
Image 5.2: Visual comparison of a truck before and after air bag installation, demonstrating improved front-to-rear and side-to-side leveling when towing.
6. Maintenance
Regular maintenance ensures the longevity and optimal performance of your air suspension system.
- Inspect Air Lines and Fittings: Periodically check all air lines and fittings for signs of wear, cracks, or leaks. Repair or replace damaged components immediately.
- Clean Air Bags: Keep the air bags clean from dirt, debris, and road salt. A mild soap and water solution can be used.
- Check Air Pressure: Maintain minimum air pressure (5 PSI) in the air bags at all times, even when unloaded, to prevent damage.
- Torque Check: Periodically check the torque of all mounting hardware to ensure they remain secure.
7. Troubleshooting
This section addresses common issues you might encounter with your air suspension kit.
| Problem | Possible Cause | Solution |
|---|---|---|
| Air bags lose pressure | Air leak in lines, fittings, or air bag itself. | Spray all connections and air bag surfaces with soapy water to locate leaks. Tighten fittings or replace damaged components. |
| Uneven vehicle leveling | Unequal air pressure in air bags. | Check and adjust air pressure in each air bag to be equal. |
| Difficulty inflating air bags | Clogged air valve or kinked air line. | Inspect air valve for obstructions. Check air lines for kinks or damage. |
| Kit does not fit properly | Vehicle model incompatibility or minor alignment issue. | Verify vehicle compatibility (Section 2). For XLT, FX4, Lariat trims, minor modification to mounting holes may be required (Section 4.2). Contact customer support if issues persist. |
If you encounter issues not listed here or require further assistance, please contact RETRUE customer support.
8. Specifications
| Feature | Detail |
|---|---|
| Brand | RETRUE |
| Model Number | RAS2582 |
| Vehicle Compatibility | 2015-2025 Ford F150 (2WD/4WD, excluding Raptor, CCD, in-bed hitch, external leveling arms, self-leveling headlights) |
| Load Leveling Capacity | Up to 5,000 lbs |
| Adjustable Air Pressure | 5 to 100 PSI |
| Auto Part Position | Rear |
| Material | Reinforced Rubber, Alloy Steel |
| Maximum Lifting Height | 8 Inches |
| Item Weight | 40.7 pounds |
| Package Dimensions | 13.78 x 11.61 x 10.24 inches |
9. Customer Support and Warranty
RETRUE is committed to customer satisfaction. If you have any questions, concerns, or require assistance with your product, please contact our dedicated support team.
For warranty information and to reach customer support, please refer to the contact details provided on the product packaging or the official RETRUE website.
Warranty: The product comes with a standard refund/replacement return policy for 30 days. Specific warranty duration beyond this period should be confirmed with RETRUE customer service.
Ask a question about this manual
Ask about setup, troubleshooting, compatibility, parts, safety, or missing instructions. Manuals+ will review the question and use this page’s manual context to help answer it.