1. Introduction
Thank you for purchasing the UKing 4PCS LED Par Light set. This product is designed to provide versatile and dynamic lighting effects for various events and venues, including DJ shows, discos, weddings, Christmas parties, and stage lighting. Each unit features 36 RGB LEDs, offering a wide spectrum of colors and lighting modes. This manual provides essential information for the safe and effective operation of your LED Par Lights.

Image 1.1: Overview of the four UKing LED Par Lights and their remote controls.
2. Safety Information
Please read and understand all safety instructions before operating this product. Failure to follow these instructions may result in electric shock, fire, or serious injury.
- CAUTION: DO NOT OPEN THE HOUSING. SHOCK HAZARD. There are no user-serviceable parts inside. Refer all servicing to qualified service personnel.
- Ensure the operating voltage (AC 110-240V, 50/60Hz) matches your local power supply.
- Do not expose the device to rain or moisture to prevent fire or shock hazards.
- Keep the device away from flammable materials and ensure adequate ventilation.
- Always disconnect from the power supply before cleaning or performing any maintenance.
- Avoid direct eye exposure to the light source, as it can be harmful.

Image 2.1: Important safety warning regarding the product housing and electrical shock.
3. Package Contents
Verify that all items listed below are included in your package:
- 4 x LED Par Light units
- 8 x Remote Controls (each light comes with two remotes for convenience)
- 4 x EU Plugs (power cables)
- 8 x Screws
- 8 x Brackets (for mounting)
- 4 x User Manuals (this document)
4. Setup and Installation
Follow these steps to set up your LED Par Lights:
- Attach Brackets: Use the provided screws to securely attach the mounting brackets to each LED Par Light unit. The brackets allow for flexible positioning and angle adjustment.
- Positioning: Place the lights on a stable surface or mount them to a truss system using appropriate clamps (not included). Ensure the lights are positioned to achieve the desired lighting effect without obstruction.
- Power Connection: Connect the EU plug power cable to the power input on the back of each light. Plug the other end into a suitable AC 110-240V, 50/60Hz power outlet.
- DMX Connection (Optional): For DMX control, connect a 3-pin XLR DMX cable from your DMX controller to the DMX IN port of the first light. Then, daisy-chain subsequent lights by connecting a DMX cable from the DMX OUT of the previous light to the DMX IN of the next.

Image 4.1: The LED Par Light with its adjustable bracket, illustrating its physical dimensions and flexibility.

Image 4.2: Illustration of how to connect the LED Par Light to a DMX512 controller for advanced lighting control.
5. Operating Instructions
The UKing LED Par Lights offer multiple operating modes and can be controlled via the included remote control or a DMX controller.
5.1 Remote Control Operation
Each light comes with a remote control for convenient operation within 5 meters. Ensure the remote has a clear line of sight to the light's sensor.

Image 5.1: Detailed diagram of the remote control functions and the LED Par Light's rear panel controls.
| No. | Function | Description |
|---|---|---|
| 1 | ON/OFF | Turns the light unit on or off. |
| 2 | Strobe mode | Activates the strobe effect. |
| 3 | Jump mode | Switches between colors with a sudden transition. |
| 4 | Brightness level adjustment | Adjusts the intensity of the light. |
| 5 | Color adjustment | Selects specific colors (Red, Green, Blue, mixed colors). |
| 6 | Sound activated mode | Light changes patterns and colors according to the rhythm of music or sound. |
| 7 | Fade mode | Transitions smoothly between colors. |
| 8 | Change the speed levels under any mode | Adjusts the speed of effects (strobe, jump, fade). |
| 9 | DMX adjustment | Used to set DMX addresses or switch to DMX mode. |
5.2 Operating Modes
- Automatic Control Mode: The lights cycle through pre-programmed patterns and color combinations automatically. This mode is ideal for quick setup without external control.
- Sound Activation Mode: The built-in microphone detects sound and music, causing the lights to change patterns and colors in sync with the beat. Adjust the sensitivity if needed.
- DMX Control Mode: For professional lighting setups, connect the lights to a DMX512 controller. The lights utilize 7 DMX channels, allowing for precise control over color mixing (RGB), dimming, strobe, and various effects. Refer to your DMX controller's manual for specific programming instructions.
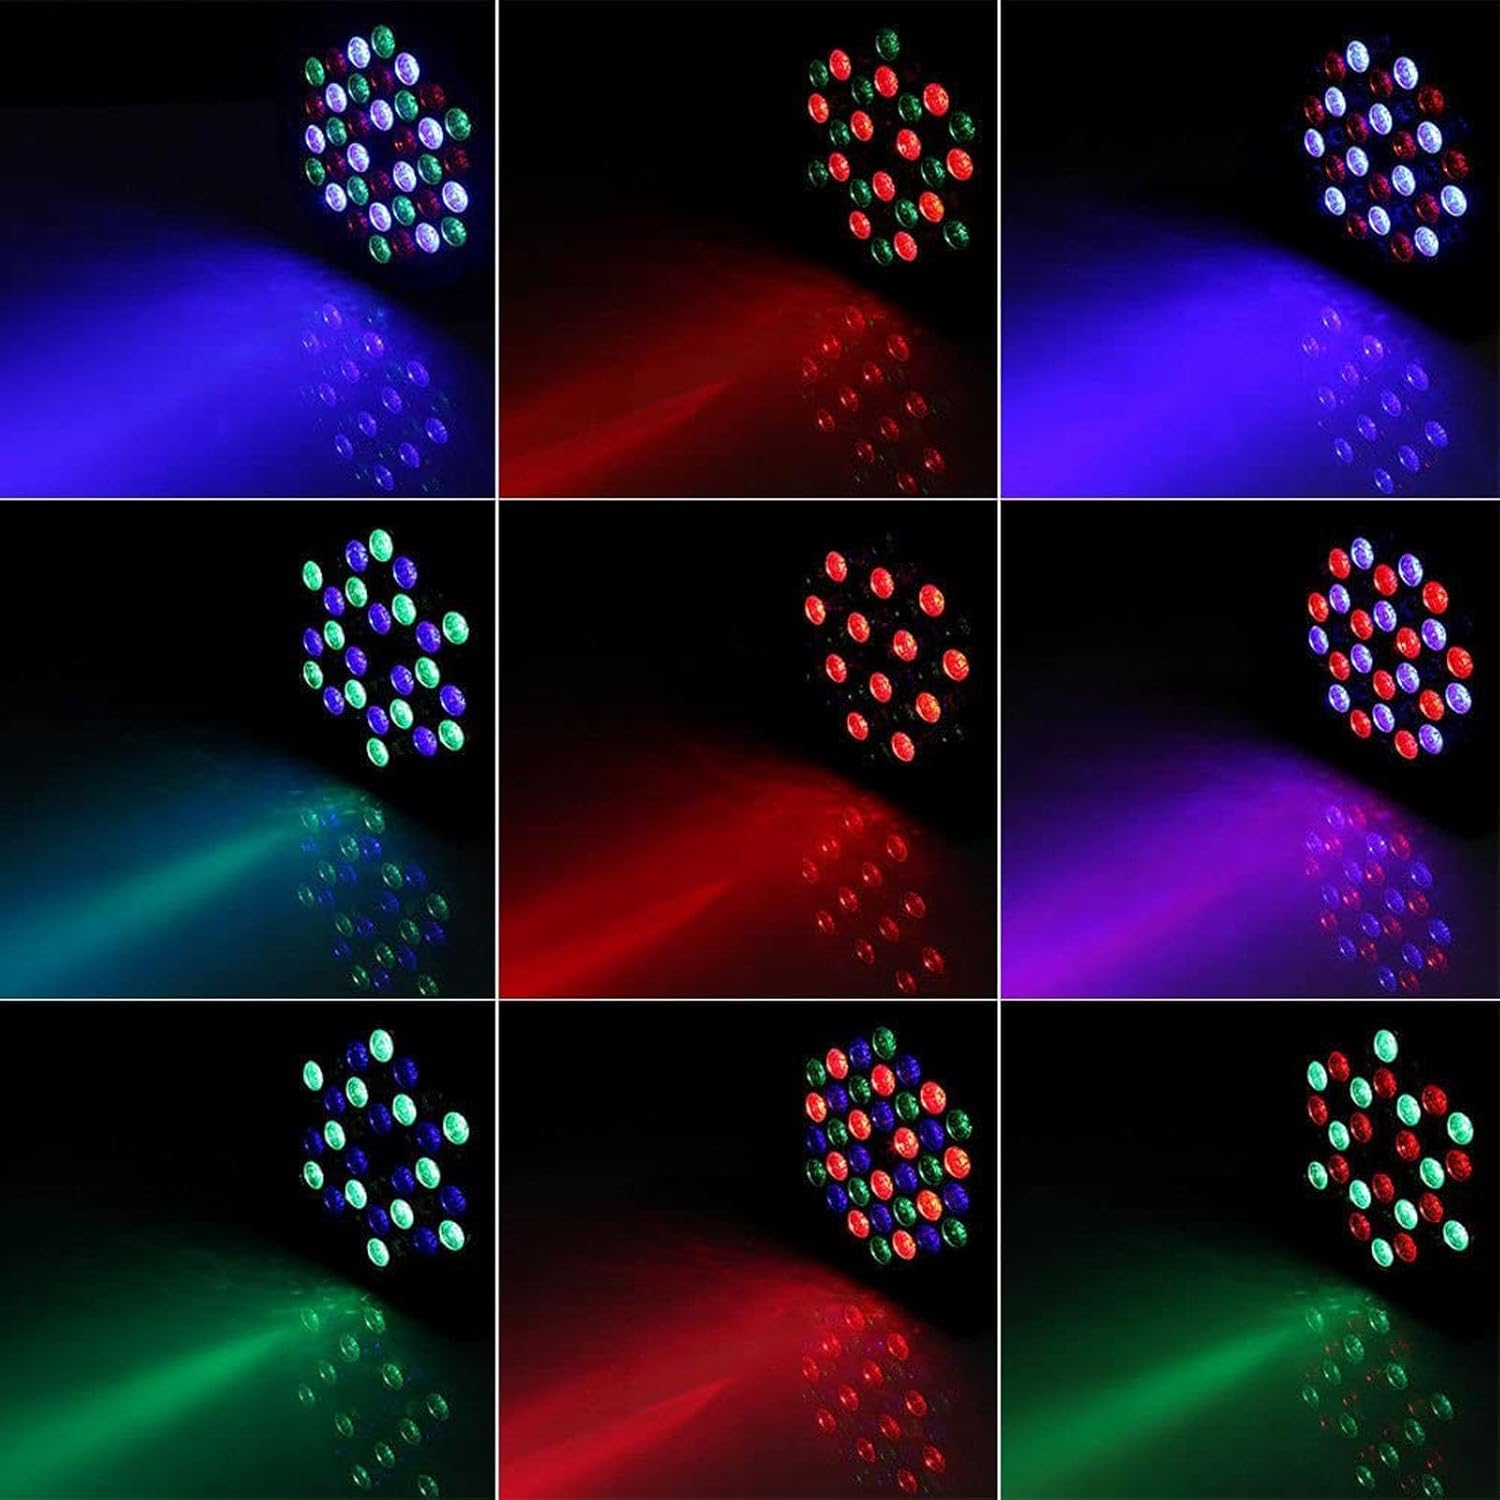
Image 5.2: Examples of various single and mixed color outputs achievable with the LED Par Light.

Image 5.3: Demonstrations of the LED Par Light's ability to project various color combinations onto a surface, creating dynamic visual effects.

Image 5.4: Examples of the LED Par Lights in various application settings, including event halls, churches, and home parties.
6. Maintenance
Proper maintenance ensures the longevity and optimal performance of your LED Par Lights.
- Cleaning: Regularly clean the transparent lid and housing with a soft, dry cloth. For stubborn dirt, use a slightly damp cloth and then dry thoroughly. Do not use abrasive cleaners or solvents.
- Ventilation: Ensure the fan and ventilation openings on the back of the unit (labeled 'C' in Image 5.1) are free from dust and debris to prevent overheating.
- Storage: When not in use, store the lights in a cool, dry place, away from direct sunlight and extreme temperatures.
- Cable Inspection: Periodically check power and DMX cables for any signs of damage. Replace damaged cables immediately.
7. Troubleshooting
If you encounter issues with your LED Par Lights, refer to the following common problems and solutions:
| Problem | Possible Cause | Solution |
|---|---|---|
| Light does not turn on. | No power supply; faulty cable; unit malfunction. | Check power connection and outlet. Test with a different cable. If problem persists, contact support. |
| Remote control not working. | Battery depleted; obstructed signal; remote out of range. | Replace remote battery (Lithium Metal battery included). Ensure clear line of sight to the light. Operate within 5 meters. |
| Sound activation mode is unresponsive or too sensitive. | Microphone sensitivity setting; ambient noise level. | Adjust the sensitivity using the remote control (if available) or through the unit's menu. Ensure sufficient music volume for activation. |
| Lights are not synchronized in DMX mode. | Incorrect DMX addressing; faulty DMX cable; DMX termination issues. | Verify DMX addresses for each unit. Check DMX cable connections. Ensure proper DMX termination if using a long chain. |
| Light flickers or behaves erratically. | Unstable power supply; DMX signal interference; internal issue. | Connect to a stable power source. Check DMX connections. If problem persists, discontinue use and contact support. |
8. Specifications
| Feature | Detail |
|---|---|
| Model Number | 1082X4 |
| Operating Voltage | AC 110-240V, 50/60Hz |
| Lighting Color | RGB (Red / Green / Blue / Red-Green / Red-Blue / Green-Blue / RGB) |
| LED Quantity | 36 LEDs * 2W each |
| DMX Channels | 7 channels |
| Interface | 3-pin XLR connector for DMX or Master/Slave connections |
| Net Weight (total for 4 units) | 3.12 kg (approx. 0.78 kg per unit) |
| Product Dimensions (per unit) | 19.5 x 18.5 x 11.8 cm |
| Package Dimensions (for 4 units) | 37 x 23 x 19 cm |
| Material | Metal housing, Acrylic shade |
| Finish Type | Painted |
| Light Source Type | Light Emitting Diode (LED) |
| Power Source | Corded Electric |
| Batteries | 1 Lithium Metal battery required (included for remote control) |

Image 8.1: Energy efficiency label for the product, indicating its energy class and consumption.
For more details, visit the EPREL database.
9. Warranty and Support
For information regarding product warranty, returns, or technical support, please refer to the purchase documentation or contact your retailer directly. U`King strives to provide high-quality products and customer satisfaction.