1. Introduction
Thank you for choosing the Toshiba AW-J900DUPEG 9 kg Top Load Washing Machine. This manual provides essential information for the safe and efficient use of your appliance. Please read it thoroughly before installation and operation, and keep it for future reference.

Figure 1: Toshiba AW-J900DUPEG Washing Machine (Side View)
2. Safety Information
To prevent injury to yourself and others, and to avoid property damage, please observe the following safety precautions:
- Read all instructions before using the appliance.
- Do not allow children to play on or in the appliance. Close supervision is necessary when the appliance is used near children.
- Do not install or store this appliance where it will be exposed to the weather or freezing temperatures.
- Do not tamper with controls.
- Do not repair or replace any part of the appliance or attempt any servicing unless specifically recommended in this manual.
- Always disconnect the appliance from the power supply before cleaning or performing any maintenance.
- Ensure the power cord is not damaged. If it is, it must be replaced by the manufacturer, its service agent, or similarly qualified persons to avoid a hazard.
3. Product Overview
The Toshiba AW-J900DUPEG is a 9 kg top-load washing machine designed for efficient and gentle laundry care. It features advanced technologies to optimize washing performance.
3.1 Main Components

Figure 2: Front View with Lid Open
- Lid: Provides access to the washing drum. Features a soft-close mechanism for safety and convenience.
- Control Panel: Located at the top rear, it houses all buttons and indicators for program selection and operation.
- Detergent Dispenser: Compartments for detergent and fabric softener.
- Washing Drum: Stainless steel drum where laundry is washed.
- Water Shield Filter: Integrated filter to prevent impurities from entering the drum.
3.2 Key Features
- Great Waves Technology: This technology enhances washing efficiency by creating dynamic water flow variations. It optimizes washing movements and water circulation, reducing wash time while delivering effective cleaning and gentle fabric care.
- Water Shield Filter: Designed to prevent dirt and small particles from entering the washing machine. This feature helps extend the appliance's lifespan and protects it from potential damage caused by water impurities.
- Memory Function: This function allows the washing machine to optimize wash cycles based on your previous usage patterns. It is particularly useful for small loads or when a quick clean is needed, providing convenient and tailored results.
- 15-Minute Quick Wash Program: A dedicated program for quickly washing small loads, saving both energy and water while still achieving effective cleaning results.
- Fuzzy Function: The Fuzzy Function automatically measures the weight of the clothes loaded into the drum and determines the appropriate water level and wash cycle settings for optimal performance.

Figure 3: Great Waves Technology in action

Figure 4: Water Shield Filter

Figure 5: Fuzzy Function for automatic load sensing
4. Setup and Installation
4.1 Unpacking
- Carefully remove all packaging materials, including the base packaging.
- Inspect the washing machine for any damage. If damaged, do not install or operate it, and contact customer service.
- Ensure all accessories are present.
4.2 Location
Choose a suitable location for your washing machine:
- Place the machine on a firm, level surface to minimize vibration and noise during operation.
- Ensure adequate ventilation around the appliance.
- Avoid direct sunlight or extreme temperatures.
- Do not place the machine on carpets or other soft surfaces that could block the ventilation openings.
4.3 Water Connection
Connect the water inlet hose to a cold water tap with a 3/4-inch thread. Ensure connections are tight to prevent leaks.
4.4 Drainage
Position the drain hose correctly to allow for proper water discharge. Ensure it is not kinked or blocked. The drain hose should be placed at a height between 60 cm and 90 cm from the floor.
4.5 Power Connection
Plug the washing machine into a grounded electrical outlet. Ensure the voltage and frequency match the specifications of your appliance.
5. Operating Instructions
Follow these steps for effective use of your washing machine:

Figure 6: Control Panel
5.1 Loading Laundry
- Sort laundry by fabric type, color, and degree of soiling.
- Open the lid and place clothes loosely into the drum. Do not overload the machine.
- Close the lid securely.
5.2 Adding Detergent and Softener

Figure 7: Detergent Dispenser
- Pull out the detergent dispenser drawer.
- Add the appropriate amount of detergent to the main wash compartment. For powder detergent, ensure the 'Remove for powder detergent' insert is in place.
- Add fabric softener to the designated compartment (marked with a flower symbol). Do not exceed the MAX line.
- Gently push the dispenser drawer back in.
5.3 Selecting a Program
- Press the Power (On/Off) button to turn on the machine.
- Use the Course button to select the desired wash program (e.g., Regular, Jeans, Blanket, Heavy Wash, Quick Wash).
- Adjust settings like Water Level, Rinse, and Spin using the respective buttons if needed. The Fuzzy Function will automatically detect the load and suggest optimal settings.
- To use the Memory Function, select your preferred settings, then press and hold the Memory button (if available on your model) to save them for future use.
5.4 Starting a Wash Cycle
Press the Start/Hold button to begin the selected wash cycle.
5.5 Ending a Wash Cycle
The machine will signal when the cycle is complete. Open the lid and remove your laundry promptly to prevent wrinkles.
6. Maintenance
Regular maintenance ensures the longevity and optimal performance of your washing machine.
6.1 Cleaning the Drum
The stainless steel drum should be cleaned periodically to prevent residue buildup. Use the 'Tub Clean' program (if available) or a specialized washing machine cleaner according to its instructions.

Figure 8: Clean Drum Interior
6.2 Cleaning the Water Shield Filter
The Water Shield Filter should be cleaned regularly to maintain its effectiveness. Refer to your machine's specific instructions for removing and cleaning the filter. Typically, it involves rinsing under running water to remove trapped particles.
6.3 Cleaning the Detergent Dispenser
Remove the detergent dispenser drawer and rinse it under warm water to remove any detergent or softener residue. Use a small brush if necessary to clean stubborn buildup. Dry thoroughly before reinserting.
6.4 Exterior Cleaning
Wipe the exterior surfaces of the washing machine with a soft, damp cloth. Do not use abrasive cleaners or solvents.
7. Troubleshooting
Before contacting service, try the following solutions for common issues:
| Problem | Possible Cause | Solution |
|---|---|---|
| Machine does not start | No power supply; Lid not closed; Start/Hold button not pressed. | Check power connection; Close lid securely; Press Start/Hold button. |
| Water not filling | Water tap closed; Water inlet hose kinked/blocked; Water supply pressure too low. | Open water tap; Straighten hose; Check water supply. |
| Water not draining | Drain hose kinked/blocked; Drain pump filter blocked. | Straighten drain hose; Clean drain pump filter (refer to full manual). |
| Excessive vibration/noise | Machine not level; Load unbalanced; Transit bolts not removed. | Adjust leveling feet; Redistribute laundry; Ensure transit bolts are removed (during installation). |
8. Specifications
Technical details for the Toshiba AW-J900DUPEG 9 kg Top Load Washing Machine:
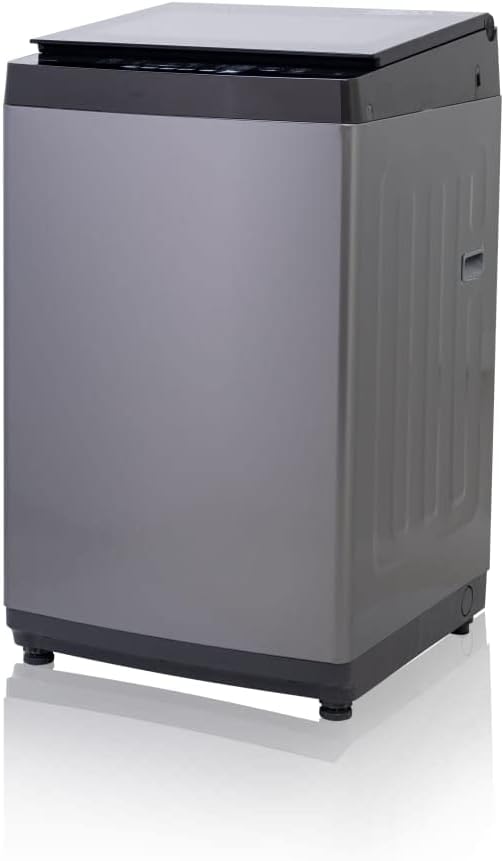
Figure 9: Product Dimensions
| Feature | Detail |
|---|---|
| Brand | Toshiba |
| Model | AW-J900DUPEG |
| Capacity | 9 kg |
| Product Dimensions (D x W x H) | 56.5 cm x 55 cm x 93 cm |
| Item Weight | 42 kg (92.59 pounds) |
| Color | Silver |
| Installation Type | Freestanding |
| Access Location | Top Load |
| Control Unit | Push Button |
| Material Type | Stainless Steel (Drum) |
| Noise Level | 62 dB |
| Special Features | Great Waves Technology, Water Shield Filter, Memory Function, Fuzzy Function, 15-Minute Quick Wash |
9. Warranty and Support
9.1 Warranty Information
This Toshiba washing machine comes with a 6-year full warranty and a 10-year warranty for the drum. Please retain your proof of purchase for warranty claims. The warranty covers manufacturing defects under normal household use.
9.2 Customer Support
For technical assistance, service requests, or further information, please contact Toshiba customer support. Refer to the contact details provided with your purchase documentation or visit the official Toshiba website for your region.