Important Safety Information
- WARNING: Supervise children during use of the sprinkler.
- CAUTION: Avoid direct eye contact with the water jet.
- IMPORTANT: Do not leave the product unattended during operation.
Product Overview
The Relaxdays Sprinkler on Telescopic Tripod Stand is designed for efficient and adjustable lawn and garden irrigation. This impact sprinkler features a robust head mounted on a stable, extendable tripod, allowing for precise watering of specific areas or full circular sectors. Its design ensures even water distribution without creating puddles, contributing to a healthy lawn.

Image: The Relaxdays Sprinkler on its telescopic tripod stand, actively watering a green lawn in a garden setting.
Package Contents
Please check that all parts are present and in good condition upon unpacking:
- 1 x Circular Sprinkler Head
- 1 x Telescopic Tripod Stand
Note: Decorative items shown in product images are not included in delivery.
Setup Instructions
- Unfold the Tripod: Carefully unfold the legs of the telescopic tripod stand until they are fully extended and stable. Ensure all locking mechanisms are engaged to secure the legs in position.
- Adjust Tripod Height: Loosen the black locking clips on the tripod legs to adjust the height as desired. The tripod can extend up to approximately 121 cm. Ensure the tripod is stable on a flat surface before firmly tightening the locks.
- Connect Water Hose: Attach a standard 3/4'' garden hose to the brass connector located at the base of the sprinkler head assembly on the tripod. Ensure a tight connection to prevent leaks.
- Position the Sprinkler: Place the assembled sprinkler in the desired area for irrigation, ensuring it is on a stable and level surface.

Image: A sequence of four images illustrating the tripod stand from its folded state to fully extended, demonstrating its adjustable nature.

Image: A close-up view of the black locking clips on the green tripod legs, used for adjusting and securing the height.

Image: A detailed view of the brass 3/4-inch hose connector at the bottom of the sprinkler's central pole, ready for hose attachment.
Operating Instructions
- Turn on Water Supply: Slowly turn on the water supply to the connected hose.
- Adjust Spray Radius: The spray radius can be adjusted from approximately 6 to 9 meters. This is typically controlled by the water pressure and a diffuser screw on the sprinkler head. Adjust the screw to achieve the desired distance.
- Adjust Spray Angle (0-360 degrees): The sprinkler head allows for adjustment of the watering sector from 0 to 360 degrees. Locate the adjustment collars or clips on the sprinkler head to set the desired arc. For continuous 360-degree rotation, ensure the stops are disengaged or set to their widest position.
- Monitor Watering: Observe the sprinkler's operation to ensure even coverage and make any necessary fine adjustments to the spray pattern or position.
- Turn off Water Supply: When watering is complete, turn off the water supply and disconnect the hose.
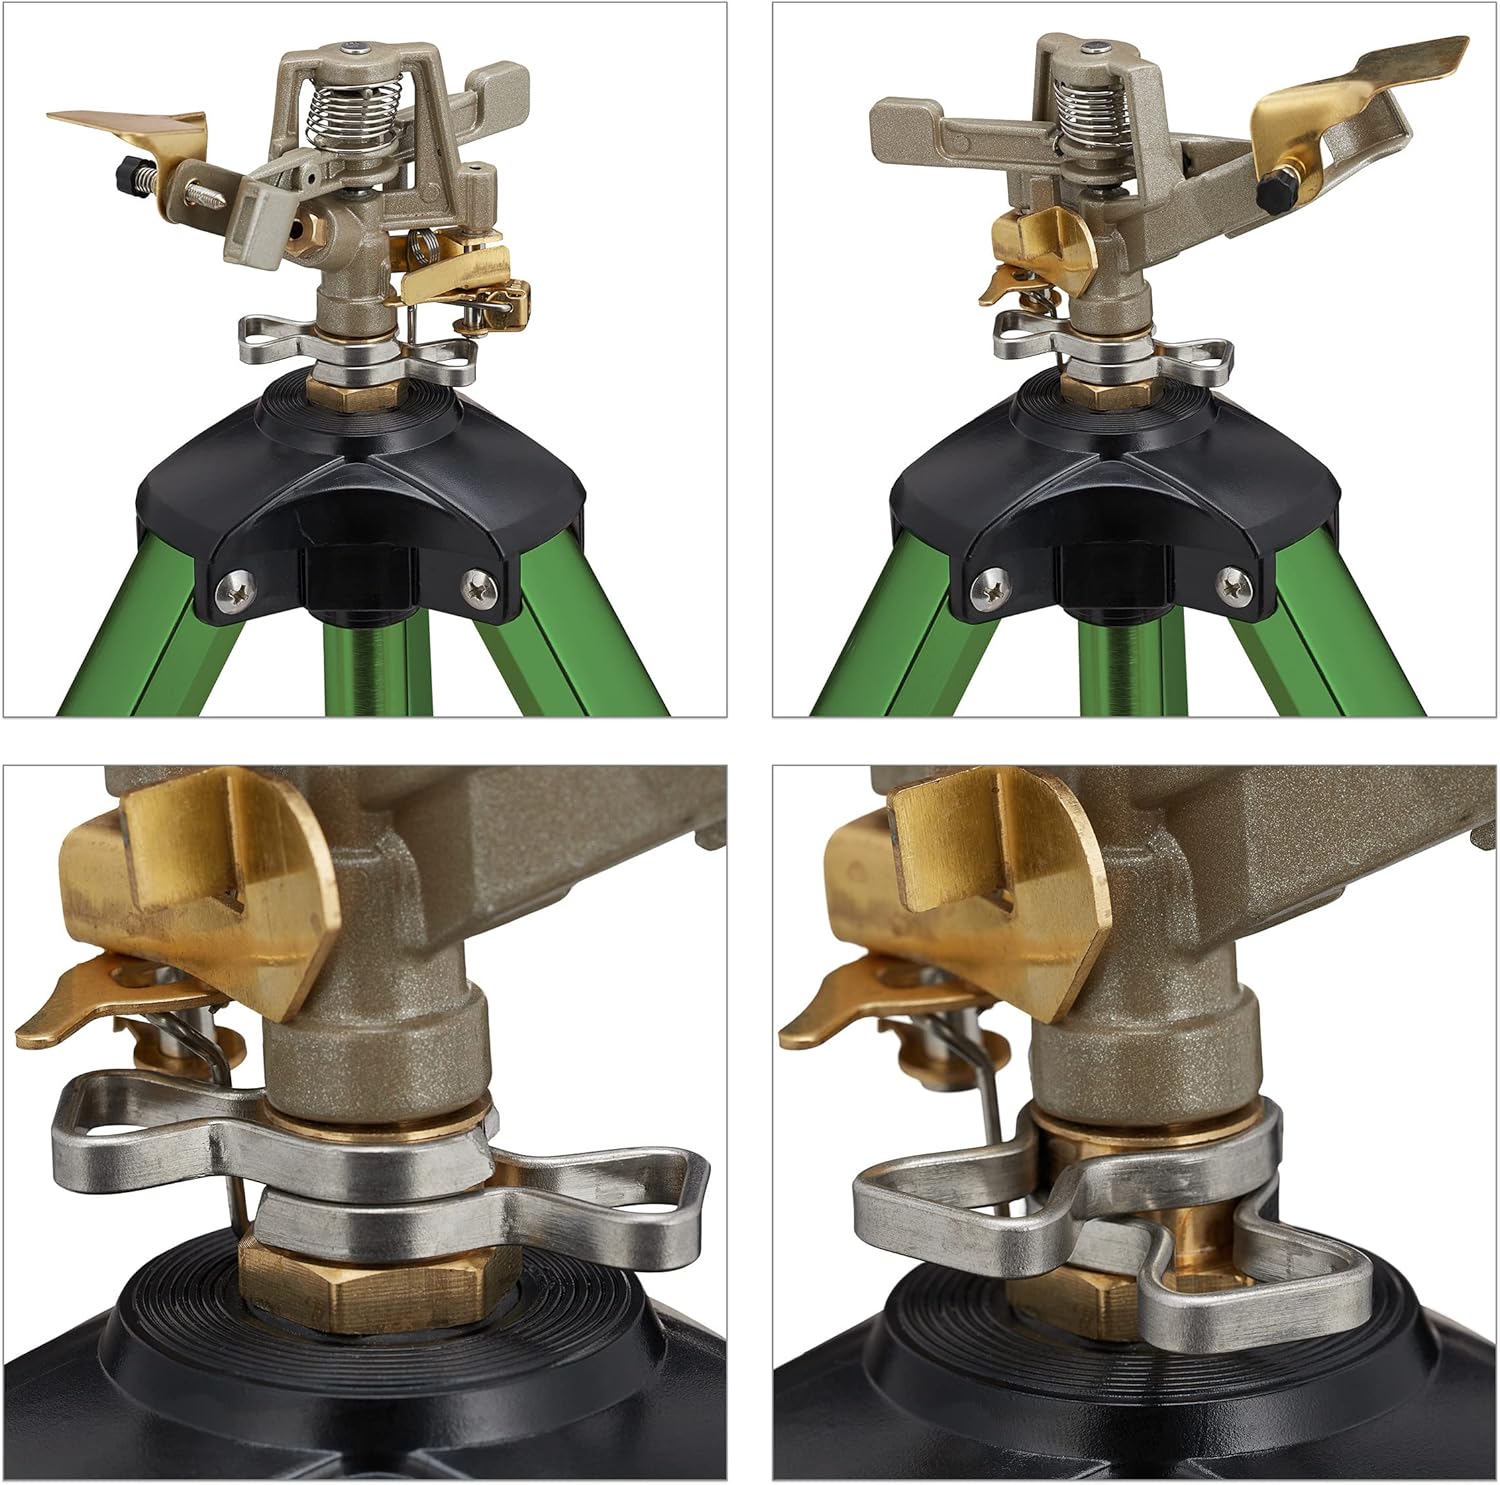
Image: A detailed view of the impact sprinkler head, highlighting the metal components used for adjusting spray distance and the arc of rotation.
Maintenance
- Cleaning: Periodically check the sprinkler head nozzle for debris or mineral buildup. Clean with a soft brush and water if necessary to maintain optimal spray performance.
- Storage: When not in use, especially during colder months to prevent freezing damage, drain any remaining water from the sprinkler. Store it in a dry, protected area. The tripod can be folded for compact storage.
- Inspection: Regularly inspect the hose connection, tripod legs, and all moving parts for signs of wear, corrosion, or damage. Replace any damaged components immediately to ensure safe and effective operation.
Troubleshooting
If you encounter issues with your sprinkler, please refer to the following common solutions:
- Uneven Spray Pattern: Check for debris obstructing the sprinkler nozzle. Ensure that the water pressure from your hose is adequate for the sprinkler's operation.
- No Rotation or Partial Rotation: Verify that the water pressure is sufficient. Inspect the rotating mechanism on the sprinkler head for any obstructions or damage that might impede movement.
- Leaks at Connection: Ensure the hose connection is tight and that the hose washer is properly seated and not damaged. Replace the washer if necessary.
- Sprinkler Not Stable: Ensure the tripod legs are fully extended and locked into place. Confirm that the sprinkler is positioned on a level and firm surface.
If problems persist after attempting these solutions, please contact customer support for further assistance.
Specifications
| Feature | Detail |
|---|---|
| Model Number | 10035950 |
| Material | Aluminium, Zinc |
| Color | Green/Black |
| Max. Dimensions (Set up HxWxD) | Approx. 121 x 122 x 108 cm |
| Folded Dimensions (HxWxD) | Approx. 65 x 12 x 14 cm |
| Spray Radius | Approx. 6 - 9 m |
| Adjustable Angle | 0 - 360 degrees |
| Connector Type | 3/4'' |
| Weight | Approx. 2.1 kg |
| Maximum Flow Rate | 10 Liters Per Minute |
| Inlet Connection Size | 0.75 Inches |

Image: A diagram illustrating the maximum height (121 cm) and width (122 cm) of the sprinkler when fully set up.
Warranty and Support
For warranty information or technical support regarding your Relaxdays Sprinkler, please refer to the contact details provided with your original purchase documentation or visit the official Relaxdays website. Please retain your proof of purchase for any warranty claims.