1. Introduction
Thank you for choosing the AEG BSS18C12ZC-0 Cordless Impact Wrench. This powerful 18V tool is designed for professional use, offering high performance, precision, and durability. It features a robust quadripolar motor delivering up to 410 Nm of torque, three tightening modes for versatile applications, and an integrated LED light for optimal visibility. This manual provides essential information for safe operation, setup, maintenance, and troubleshooting to ensure the longevity and optimal performance of your impact wrench.

Image 1.1: The AEG BSS18C12ZC-0 Cordless Impact Wrench, showcasing its compact design and ergonomic grip.
2. Safety Instructions
Always observe basic safety precautions when using electric tools to reduce the risk of fire, electric shock, and personal injury. Keep this instruction manual for future reference.
General Power Tool Safety Warnings
- Work Area Safety: Keep your work area clean and well-lit. Cluttered or dark areas invite accidents. Do not operate power tools in explosive atmospheres, such as in the presence of flammable liquids, gases, or dust.
- Electrical Safety: Power tool plugs must match the outlet. Never modify the plug in any way. Do not use any adapter plugs with earthed (grounded) power tools. Avoid body contact with earthed or grounded surfaces such as pipes, radiators, ranges, and refrigerators.
- Personal Safety: Always wear eye protection. Use personal protective equipment such as dust masks, non-skid safety shoes, hard hats, or hearing protection when appropriate. Stay alert, watch what you are doing, and use common sense when operating a power tool.
- Power Tool Use and Care: Do not force the power tool. Use the correct power tool for your application. Do not use the power tool if the switch does not turn it on and off. Disconnect the plug from the power source and/or remove the battery pack from the power tool before making any adjustments, changing accessories, or storing power tools.
- Battery Tool Use and Care: Recharge only with the charger specified by the manufacturer. Use power tools only with specifically designated battery packs.
- Service: Have your power tool serviced by a qualified repair person using only identical replacement parts. This will ensure that the safety of the power tool is maintained.
3. Product Overview
Key Features
- Powerful Motor: Quadripolar motor delivers up to 410 Nm of torque for demanding applications.
- Precision Control: Three tightening modes allow for precise power adjustment based on the task.
- Integrated LED Light: Enhances visibility in dark or confined work areas.
- Durable Construction: Magnesium housing and gears ensure optimal durability and protection against wear and impact.
- PRO18V Compatibility: Compatible with all AEG PRO18V batteries, offering flexibility and cost efficiency (battery and charger sold separately).
- Ergonomic Design: Softgrip coating and a belt hook provide comfort and convenience during use.
Components
The AEG BSS18C12ZC-0 Cordless Impact Wrench package includes:
- 1 x AEG BSS18C12ZC-0 Cordless Impact Wrench
- Note: Battery and charger are not included and must be purchased separately.

Image 3.1: Back view of the impact wrench, highlighting the softgrip and belt hook.
4. Setup
4.1 Battery Installation
The AEG BSS18C12ZC-0 operates with AEG PRO18V Lithium-ion batteries. Ensure the battery is fully charged before use.
- Align the battery pack with the battery port on the tool handle.
- Slide the battery pack into the tool until it clicks securely into place.
- To remove, press the battery release button and slide the battery pack out.

Image 4.1: Visual reminder that the battery is not included with the tool.
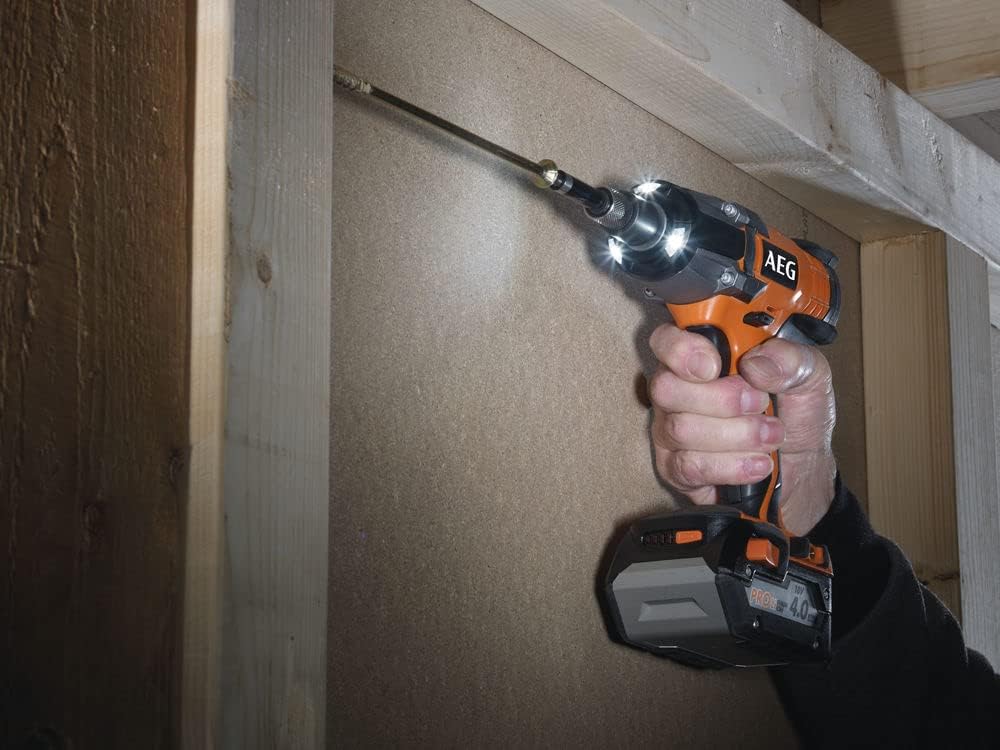
Image 4.2: The impact wrench with a PRO18V battery attached, demonstrating the correct assembly.
4.2 Attaching Accessories (Sockets)
The impact wrench uses standard square drive sockets.
- Ensure the tool is switched off and the battery is removed before attaching or removing accessories.
- Push the desired socket onto the square drive anvil until it locks securely.
- To remove, pull the socket firmly off the anvil.
5. Operating Instructions
5.1 Powering On/Off
The tool is activated by pressing the trigger switch. The speed is variable depending on how far the trigger is pressed. Release the trigger to turn the tool off.
5.2 Selecting Tightening Modes
The AEG BSS18C12ZC-0 features three tightening modes to match the application requirements. Refer to the tool's control panel for mode selection. Each mode provides a different level of torque and speed, allowing for precise control.
- Mode 1: Lower torque for delicate applications or initial fastening.
- Mode 2: Medium torque for general fastening tasks.
- Mode 3: Full torque (410 Nm) for heavy-duty fastening and loosening of stubborn bolts.
5.3 Using the Integrated LED Light
The LED light automatically illuminates when the trigger is pressed, providing improved visibility of the work surface. It remains on for a short period after the trigger is released.

Image 5.1: The impact wrench being used to drive a screw into a wooden beam, demonstrating its application.

Image 5.2: The impact wrench in use for automotive tasks, such as loosening lug nuts on a wheel.
6. Maintenance
Regular maintenance ensures the long life and efficient operation of your tool.
6.1 Cleaning
- Always remove the battery pack before cleaning.
- Keep the tool's ventilation openings clean to prevent overheating.
- Use a soft, damp cloth to clean the exterior of the tool. Do not use harsh chemicals or abrasive cleaners.
- Periodically clean the square drive anvil and ensure it is free from debris.
6.2 Storage
- Store the tool in a dry, secure place out of reach of children.
- Avoid storing the tool in direct sunlight or in areas with extreme temperatures.
- Remove the battery pack from the tool before long-term storage.
6.3 Battery Care
- Charge batteries in a well-ventilated area.
- Do not expose batteries to water or extreme temperatures.
- For optimal battery life, store partially charged batteries (around 50%) if not used for extended periods.
7. Troubleshooting
This section addresses common issues you might encounter with your impact wrench.
| Problem | Possible Cause | Solution |
|---|---|---|
| Tool does not start | Battery not inserted correctly Battery discharged Tool malfunction | Ensure battery is fully seated Charge the battery Contact customer support |
| Reduced power/torque | Battery low on charge Incorrect tightening mode selected Worn accessories | Recharge battery Select a higher torque mode Replace worn sockets |
| Tool overheating | Blocked ventilation openings Continuous heavy use | Clean ventilation openings Allow tool to cool down; reduce load |
If you encounter issues not listed here or if the suggested solutions do not resolve the problem, please contact AEG customer support or an authorized service center.
8. Specifications
| Feature | Specification |
|---|---|
| Model Number | BSS18C12ZC-0 (4935481078) |
| Voltage | 18 Volts |
| Max. Torque | 410 Nm (Newton-meters) |
| Operating Mode | Battery |
| Dimensions (L x W x H) | 23.2 x 8 x 20 cm |
| Weight | 1.52 kg |
| Material | Alloy Steel |
| Color | Black |
| Battery Type Required | 1 Lithium-ion (not included) |
| Spare Parts Availability | 5 Years |
9. Warranty and Support
AEG Power Tools are manufactured to high-quality standards. For information regarding warranty terms and conditions, please refer to the warranty card included with your product or visit the official AEG Power Tools website.
For technical support, spare parts, or service inquiries, please contact your local AEG authorized service center. Ensure you have your model number (BSS18C12ZC-0) and serial number available when contacting support.
Spare parts for this model are available for a period of 5 years from the date of purchase.

Image 9.1: The AEG brand logo.